Vintage Layered Card featuring our May 2026 Card Kit!

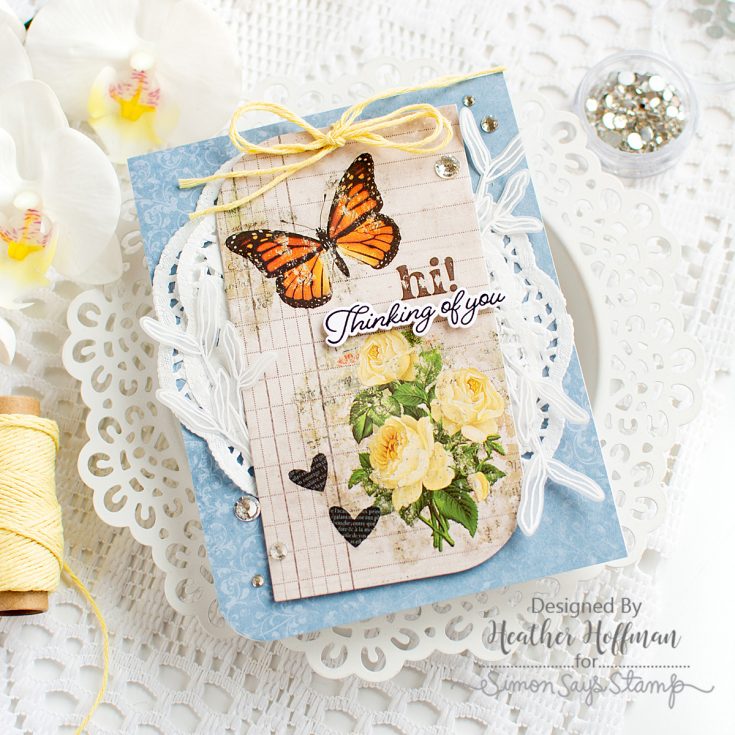
Hello everyone! Heather Hoffman here today, and I am loving the May 2026 Card Kit: Long Stem Florals! I had fun with lots of layers and textures to create a card that has a vintage feel, but with a bright, spring vibe as well!

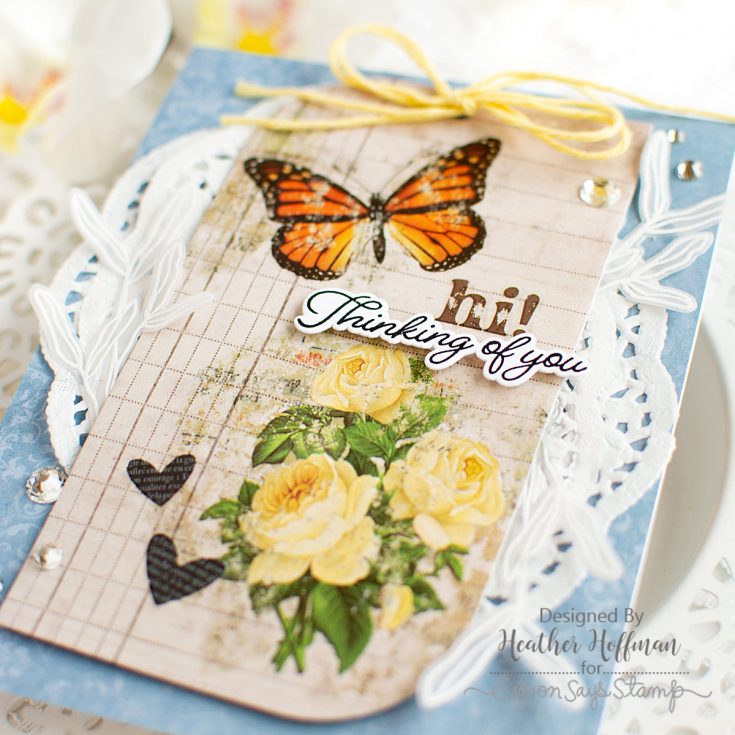
I’m always a fan of pretty pattern papers, and this kit has some lovely ones, that pair so beautifully with the included rub ons! I die cut a piece of the more neutral pattern paper with one of the Squoval Tags dies, then used a few of the rub ons directly on it. Have you ever overlapped some of the rub ons? It works great, and adds some more fun layers and texture! I trimmed off the excess of the lower bottom floral rub on, and used it in the upper left corner. Then I layered the butterfly over it, and the hearts over the bottom portion.

Next, I chose some more pattern paper that coordinated well, and adhered that to my cardbase. Before adding the tag, I cut a couple 4″ Doilies in half, layered each half together and slightly offset, then adhered them to my cardbase. I also heat embossed the greenery image from the Long Stem Florals stamp set in white on vellum 3 times, die cut with the (separately available) dies, and tucked those around the tag as well, adhering it with foam adhesive.
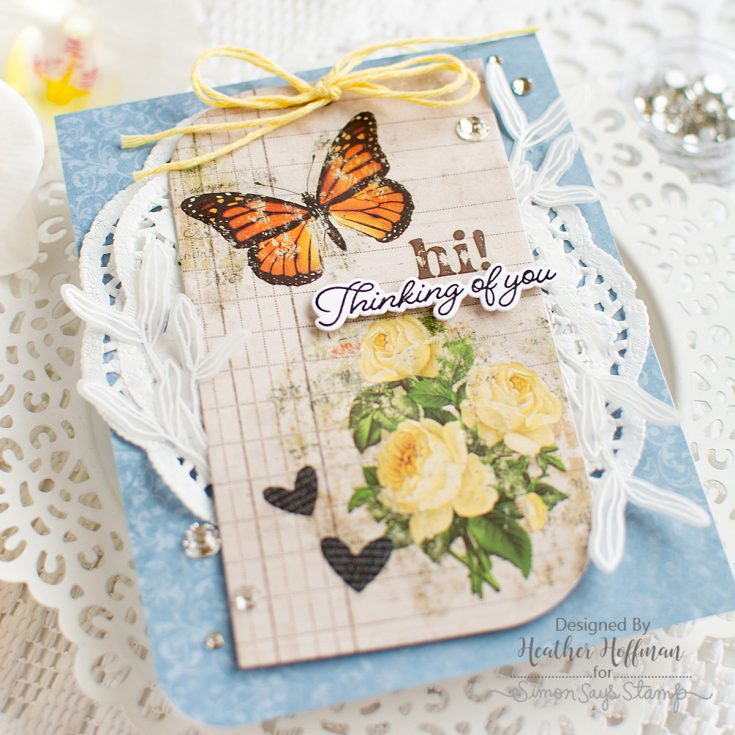

Once the tag was adhered, I pulled out some pretty Prima Marketing Yarn in a pretty pale yellow tone, used two pieces together, looped through the top of the tag, and tied in a pretty bow. I also rounded off one corner of the cardbase – just for fun! I stamped and added an additional sentiment from the Long Stem Florals stamp set as well. Finally, I sprinkled around a few Clear Dazzling Gems for an extra touch of sparkle.
I hope this inspires you to mix and match pattern paper, stamping, rub ons, and add texture like doilies and twine!
SUPPLIES:
|


Thanks so much for stopping by, I hope you have a wonderful day!
Did you know?! We’ve made our card kit subscription BETTER THAN EVER!

Here’s what makes our new service a crafting paradise:
Exclusive Access: As a subscriber, you get first dibs! Each month, you’ll get an exclusive sneak peek at our new kit, with the option to add more coordinating items to your cart, including handy replenishable supplies, all shipped together for your convenience.
Hassle-Free Payments: Say goodbye to monthly billings! Our automated system smoothly charges your preferred card, ensuring an uninterrupted flow of crafty goodness – unless you decide to pause, of course!
$5 Off Magic: Enjoy a special $5 discount off our kit’s retail price, exclusive to our beloved subscribers – no codes needed, just automatic savings!
Crafting Inspirations: Dive into a sea of creative ideas monthly, all tailored around your kit, to keep your inspiration flowing endlessly.
Flexibility First: Fear of commitment? Not here! Our subscription is as flexible as it gets – pause or cancel anytime, no strings attached.
Why wait? Step into the realm of our NEW Simon Says Stamp Monthly Card Kit service. Welcome a box full of crafting marvels, right to your doorstep. Craft with ease and let creativity come to you!
Ready to elevate your craft? Subscribe Now and open the doors to boundless creativity!
We’re thrilled to have you in our crafting community and can’t wait to embark on this renewed creative adventure together!
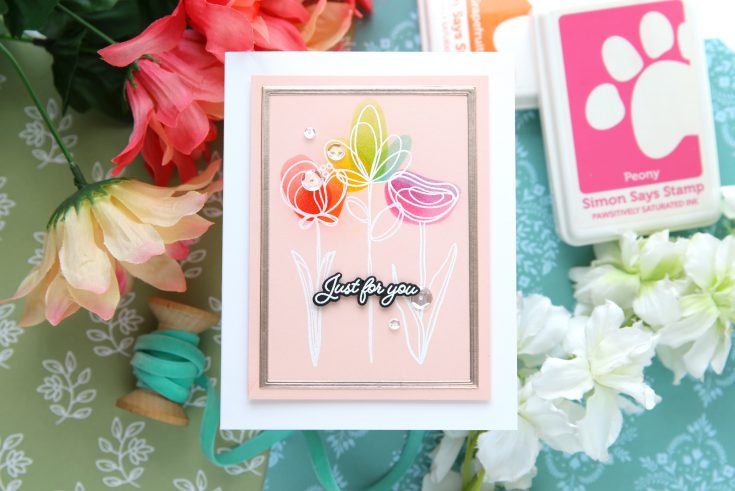
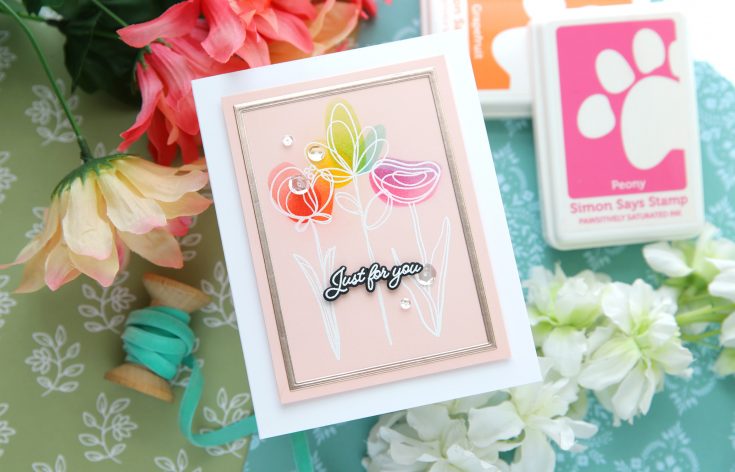
Rainbow Emboss Resist on Colored Cardstock | Easy WOW Technique

Hi friend! Happy Tuesday! We’re delighted to welcome back special guest Laura Bassen with this pretty inspiration showcasing our brand new May 2026 Card kit! Be sure to watch the video for all the details, and enjoy!
WATCH THE VIDEO:

SUPPLIES:
|


A big thank you to YOU, our reader — and to Laura Bassen for being our guest!
Did you know?! We’ve made our card kit subscription BETTER THAN EVER!
Here’s what makes our new service a crafting paradise:
Exclusive Access: As a subscriber, you get first dibs! Each month, you’ll get an exclusive sneak peek at our new kit, with the option to add more coordinating items to your cart, including handy replenishable supplies, all shipped together for your convenience.
Hassle-Free Payments: Say goodbye to monthly billings! Our automated system smoothly charges your preferred card, ensuring an uninterrupted flow of crafty goodness – unless you decide to pause, of course!
$5 Off Magic: Enjoy a special $5 discount off our kit’s retail price, exclusive to our beloved subscribers – no codes needed, just automatic savings!
Crafting Inspirations: Dive into a sea of creative ideas monthly, all tailored around your kit, to keep your inspiration flowing endlessly.
Flexibility First: Fear of commitment? Not here! Our subscription is as flexible as it gets – pause or cancel anytime, no strings attached.
Why wait? Step into the realm of our NEW Simon Says Stamp Monthly Card Kit service. Welcome a box full of crafting marvels, right to your doorstep. Craft with ease and let creativity come to you!
Ready to elevate your craft? Subscribe Now and open the doors to boundless creativity!
We’re thrilled to have you in our crafting community and can’t wait to embark on this renewed creative adventure together!
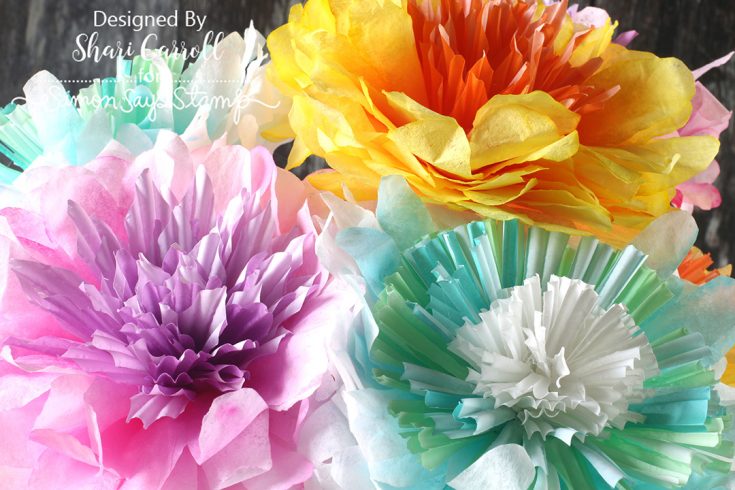
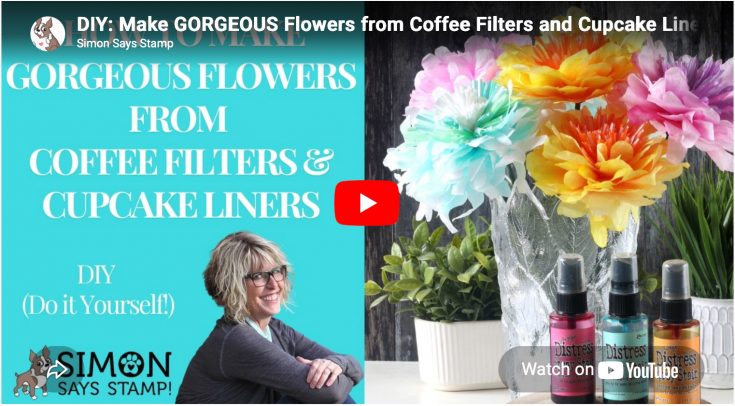
Do It Yourself: Make Gorgeous Flowers from Coffee Filters and Cupcake Liners

Are you ready to get your crafting on? I’ve got a very fun and rewarding “Do It Yourself” idea to create some gorgeous flowers. I’ve been seeing these online and just had to give them a try.
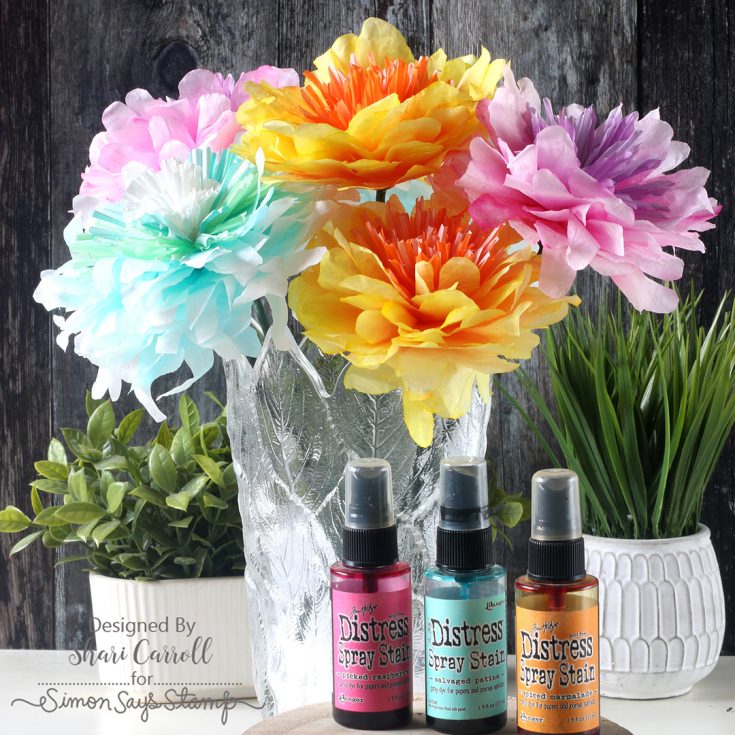
These were made from some basic supplies you might have on hand! Plain white coffee filters are used for the flower petals and were colored using Tim Holtz Distress Sprays.
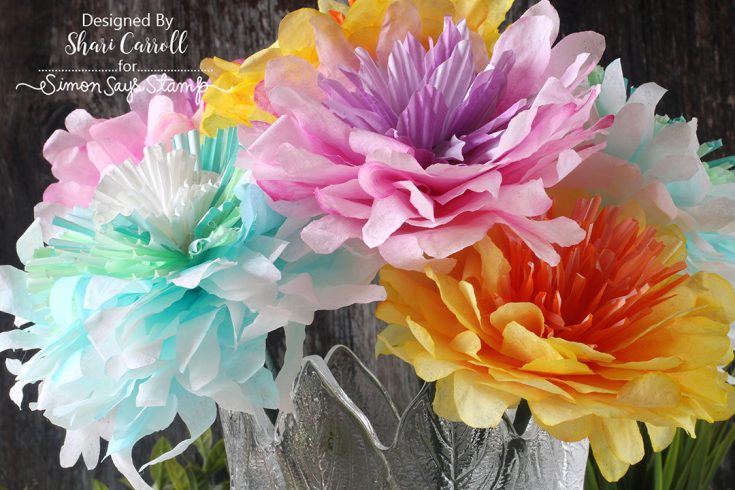
The flower centers are made from colored cupcake liners. These were cut on the sides and added to a bamboo skewer to get the flowers started. The hardest part about making these is choosing what color to use!
I have created a video that you can view below. Enjoy!
|


