Create Stunning Blackout Art with Patterned Paper!


Hi friends! Happy Wednesday! Please join me in welcoming back special guest Nichol Spohr as we continue to celebrate our March 2025 Simon Says Stamp exclusive card kit, Tweet Friend! Today, Nichol is sharing the super popular blackout technique incorporated into using tons of components of our March 2025 kit to make these two darling featured cards! Be sure to watch the video for all the details, and enjoy!


WATCH THE VIDEO:

SUPPLIES:
|


Thanks so much for stopping by, and thanks to Nichol for being our guest!
These Handmade Zipper Pouches are Approachable AND Make a GREAT GIFT!
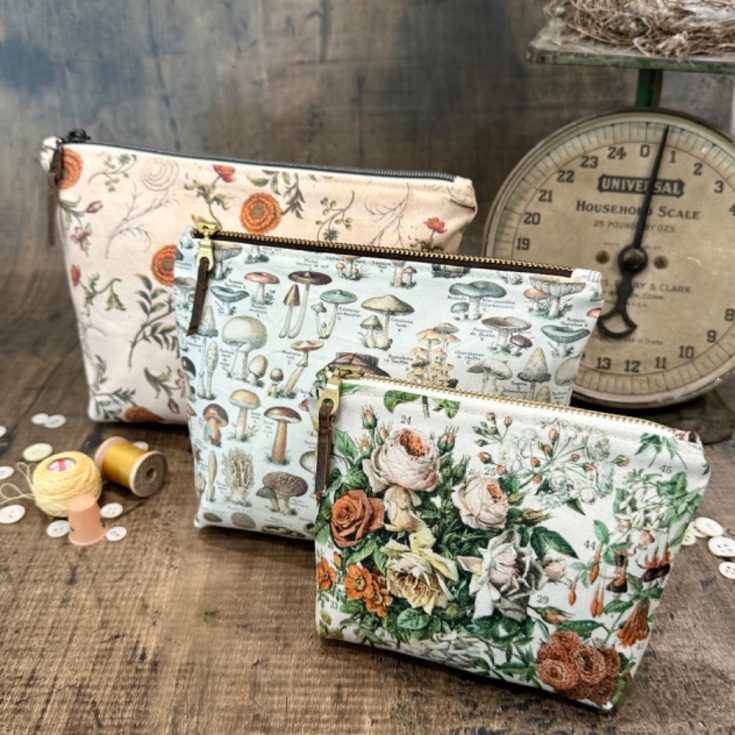
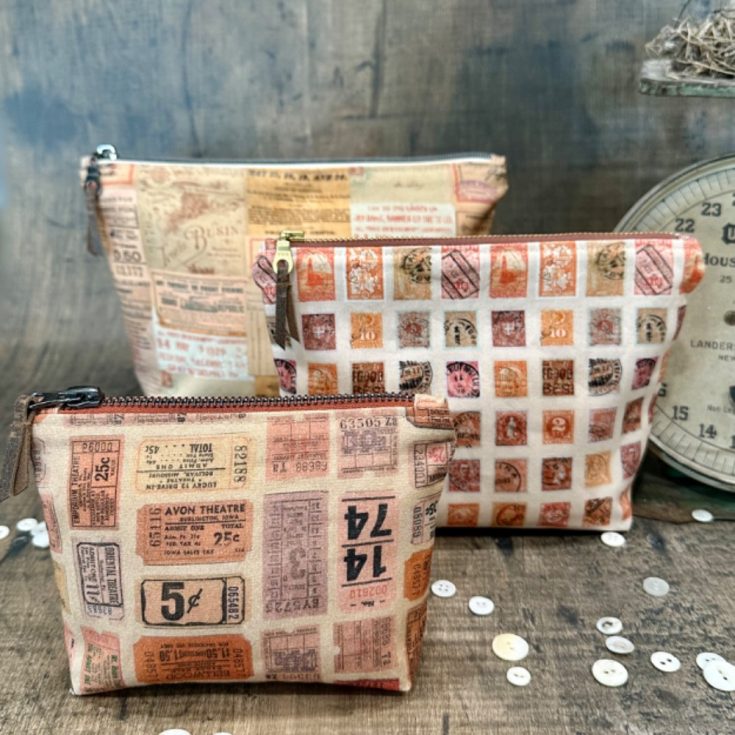
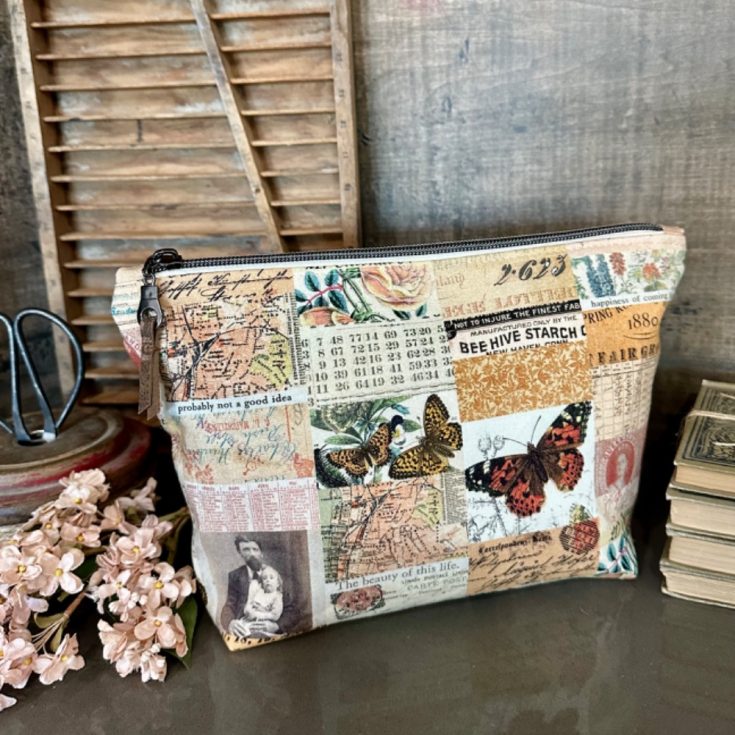
Hello friends its Richele here today with another sewing project using the Tim Holtz Palette Fabric in ORANGE. I’m loving the Orange Palette there is so many wonderful designs. The florals alway get me but I sure love the tickets, ephemera, tiny print and the mushrooms are all so fun.
Have you ever heard of a Fat Quarter? If you’re a quilter or sewer you know exactly what this is. A Fat Quarter is a pieces of fabric that is a quarter of a yard but it’s cut a little differently so you have more usable fabric from a print. To create the Fat Quarter you would first cut a half yard piece of fabric and then cut in half on the fold line so your piece will be 18” x 22” instead of 9” x 44”. There are lots of patterns out there that are Fat Quarter friendly like our project today. Simon Says Stamp has Fat Quarter Bundles of each color in the Palette line. It’s a great way to play and/or make smaller projects.
Let’s get started. The pattern we are using today is the “Verity Zipper Pouch” by Molko. It’s a great pattern with very good step out instructions so if you’re a beginners this would be a great pattern to try. These pouches go together pretty fast too.
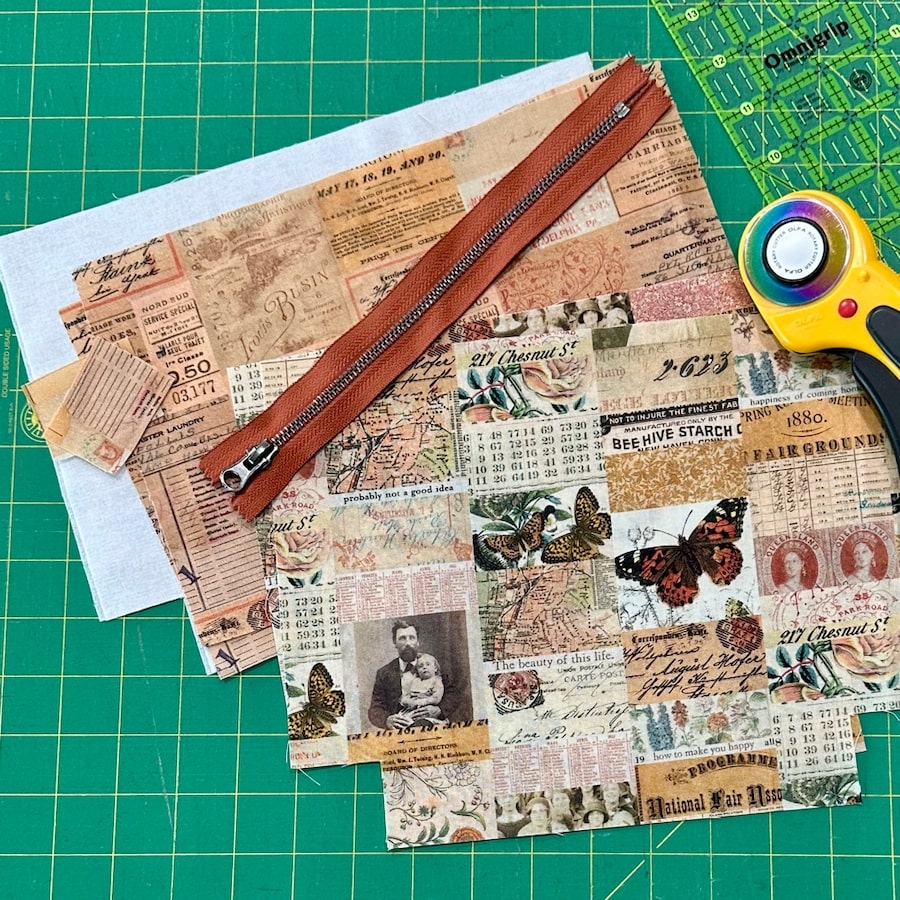

- Cut all you pieces out per the instructions. 2 exterior, 2 lining 2 fusible interfacing and 2 zipper tabs.
- Iron interfacing to the wrong side of the exterior pieces of fabric.
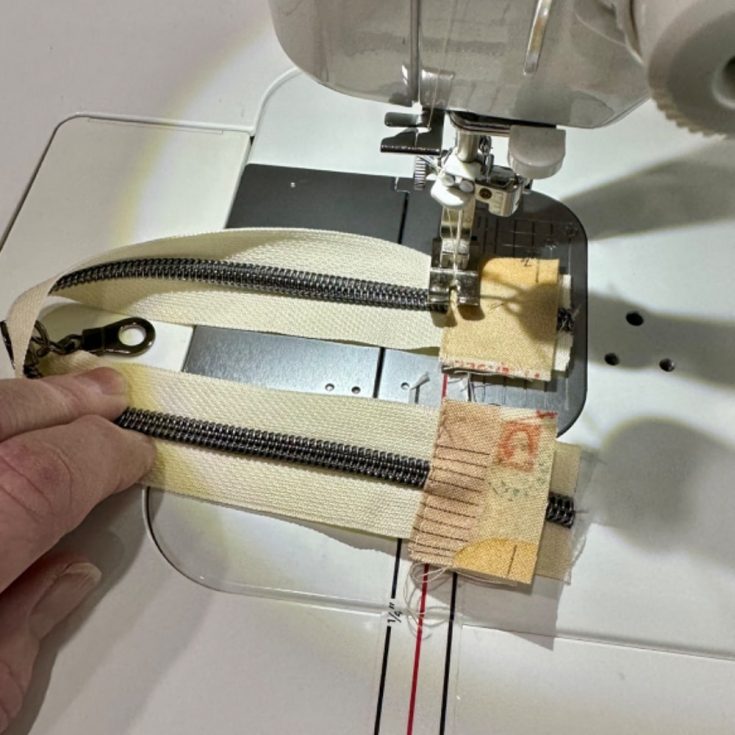
- Mark zipper and then sew zipper tabs to both ends of the zipper.
- Add a line of glue stick to the edge of the zipper and adhere the right side of the exterior fabric to the right side of the zipper. I like using a glue stick as it really helps hold fabric in place so it won’t move around.
- Adhere the lining to the wrong side of the zipper to right side of the fabric towards the zipper.
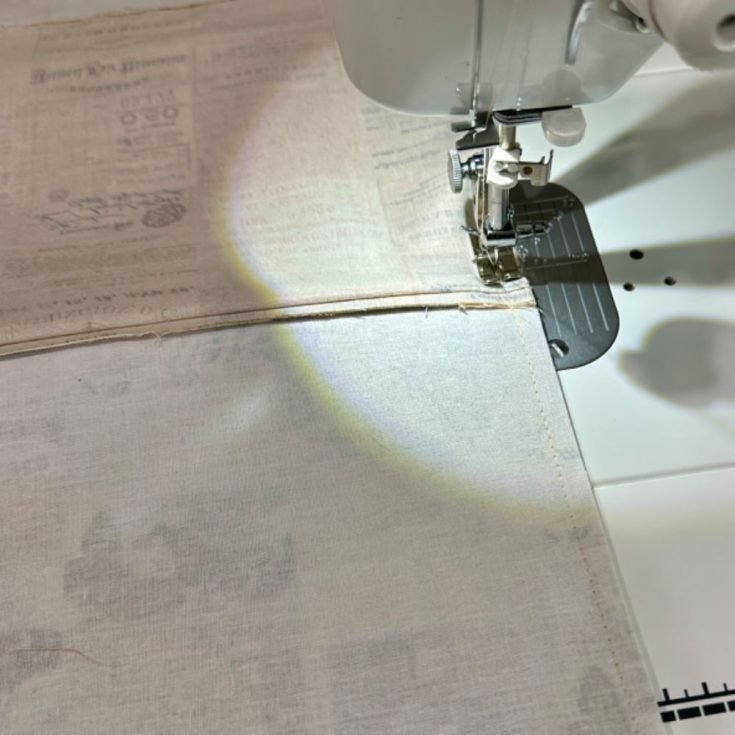
- Using a zipper foot stitch the zipper in place. Repeat steps 4-6 for the other side. Fold fabric wrong sides together and press fabric away from zipper. Top stitch along zipper 1/8” for edge.
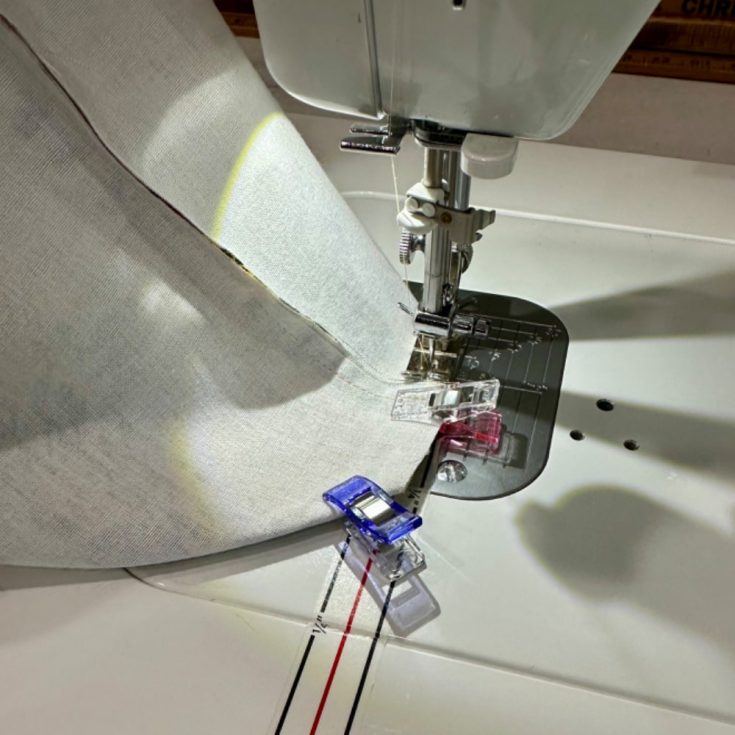
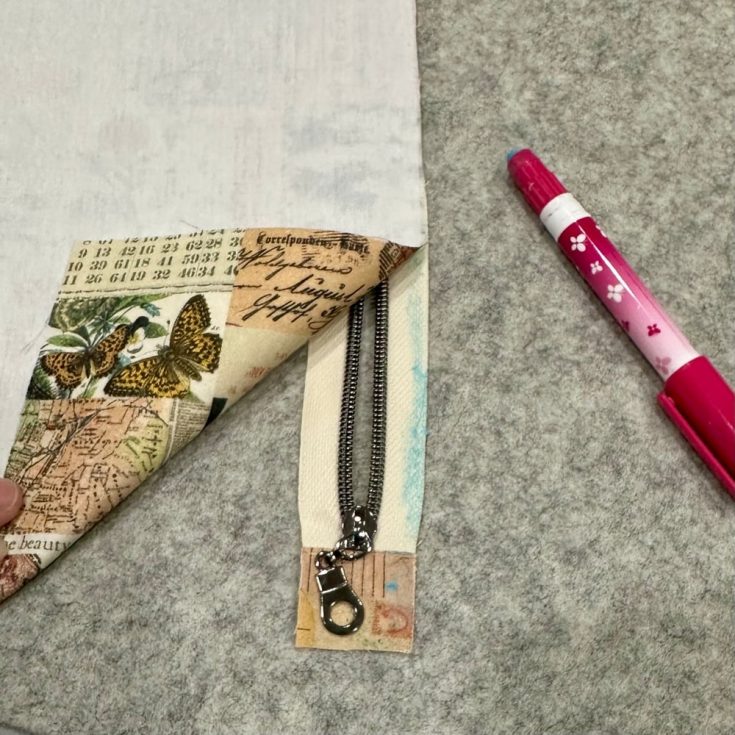
- Position exterior fabrics right sides together and lining fabrics right sides together and stitch with a 1/4” seam allowance leaving an opening for turning.
- Line up the corners matching the seams in the middle and stitch with a 1/4” seam allowance. Do this to all 4 corners.
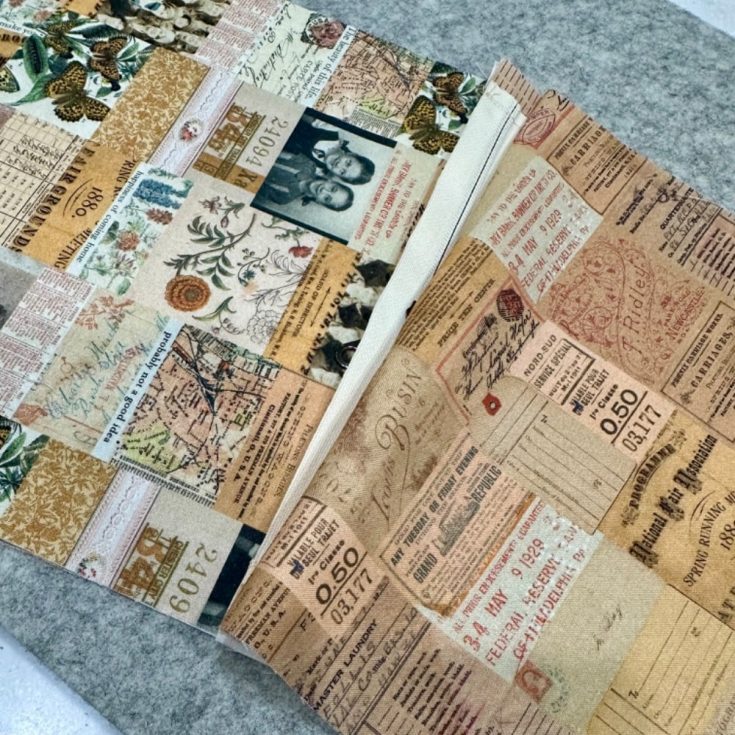
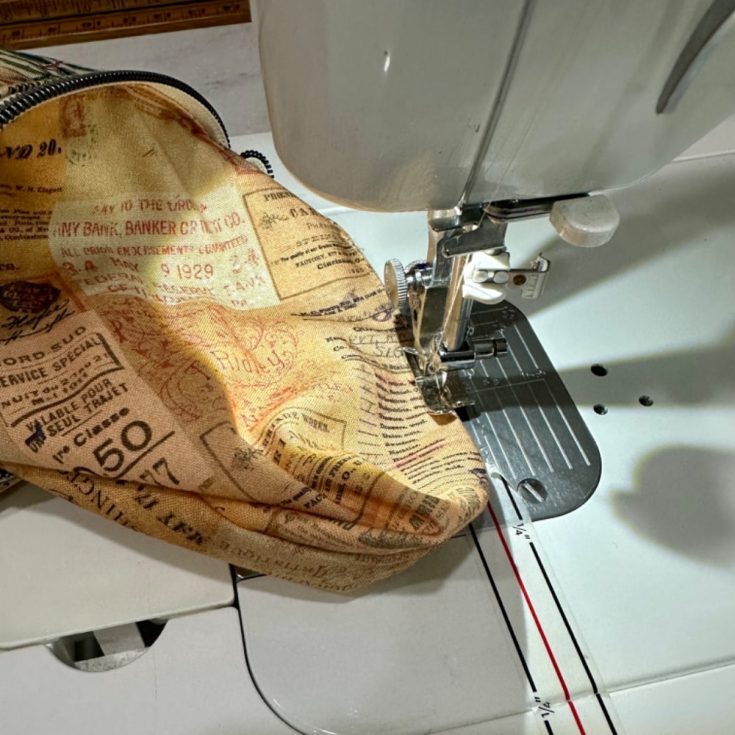
- Turn pouch right sides out through the hole left for turning. Sew opening shut.
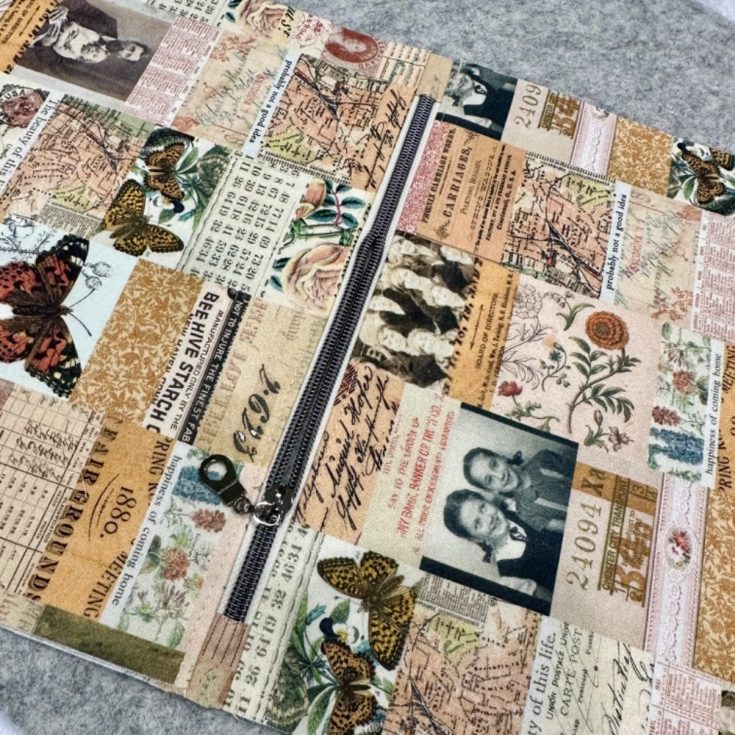
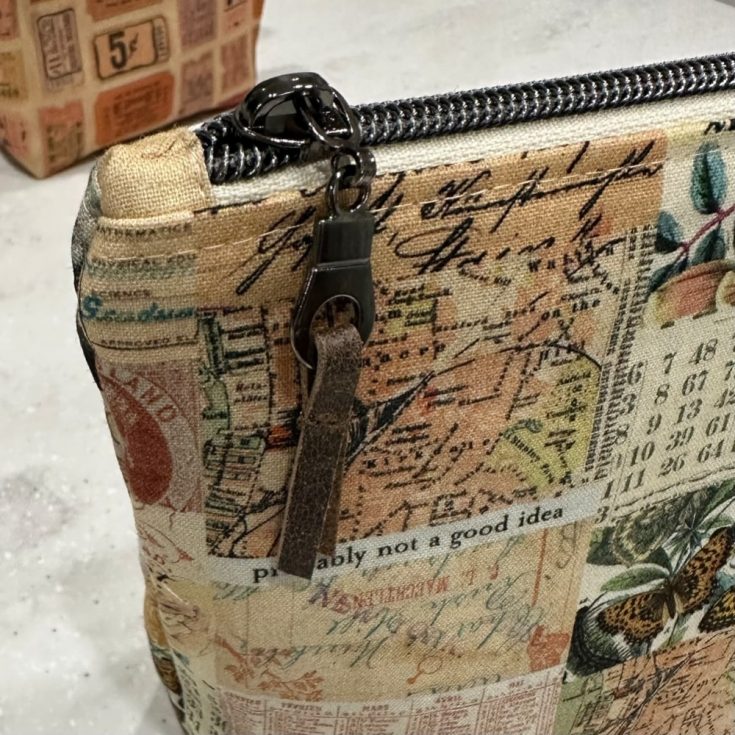
- Add a pieces of leather to zipper pull and stitch to secure.
Thanks so much for joining me today I hope you will try making a zipper pouch with some of Tim’s Palette fabric! Do you have a favorite color yet? Happy sewing! –Richele
SUPPLIES:
|


Thanks so much for stopping by, and thanks to Richele for being our guest!
Stencils, Scallops, + SPRINKLES: Amore Laurafadora

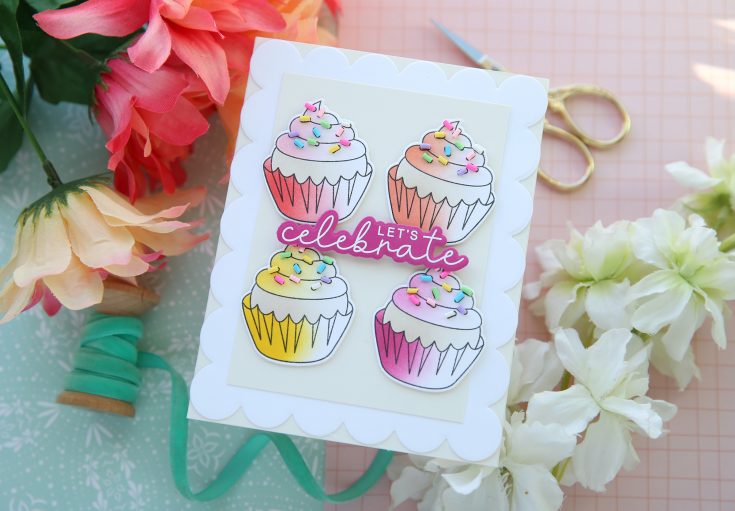
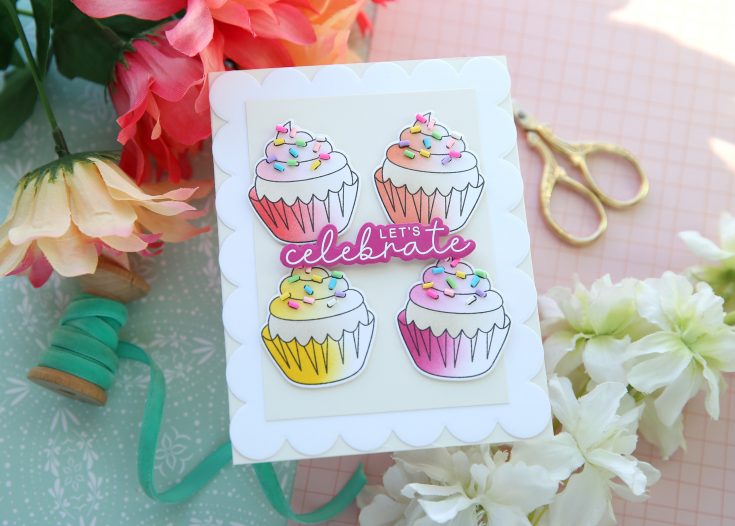
Hi friends! Happy Thursday! Please join me in welcoming back special guest Laura Bassen with this bright and happy Birthday card idea featuring our Sweet Treats cupcakes and showcasing the beauty of a “suite” of coordinating products that features stamps, dies, and layering stencils! Laura paired the perfect sentiment from our CZ Design Birthday Basics set, added the perfect border using our Chunky A2 Scalloped Rectangles set, and topped it off with Birthday Cake Sprinkles for the perfect embellishment! Be sure to watch the video for all the details and enjoy!
WATCH THE VIDEO:

SUPPLIES:
|


Thanks so much for stopping by, and thanks to Laura for being our guest!


