Mixed Media Made Easy: A 5-Step Formula Anyone Can Follow by Tina Smith

Hi friend! I’m delighted to welcome back special guest Tina Smith to our blog today with fresh and gorgeous inspiration showcasing our brand new May 2026 Card kit! Be sure to watch the video for all the details, and enjoy!
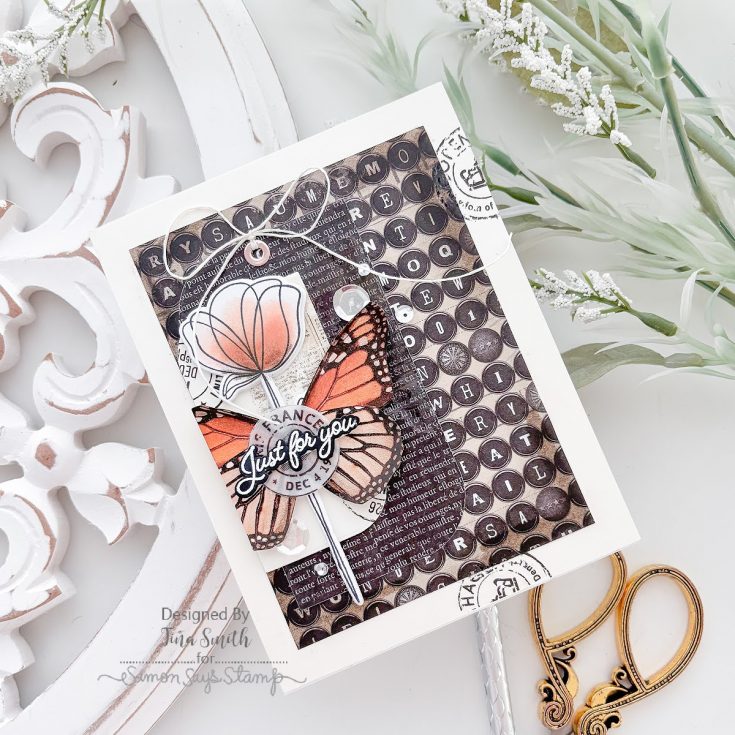
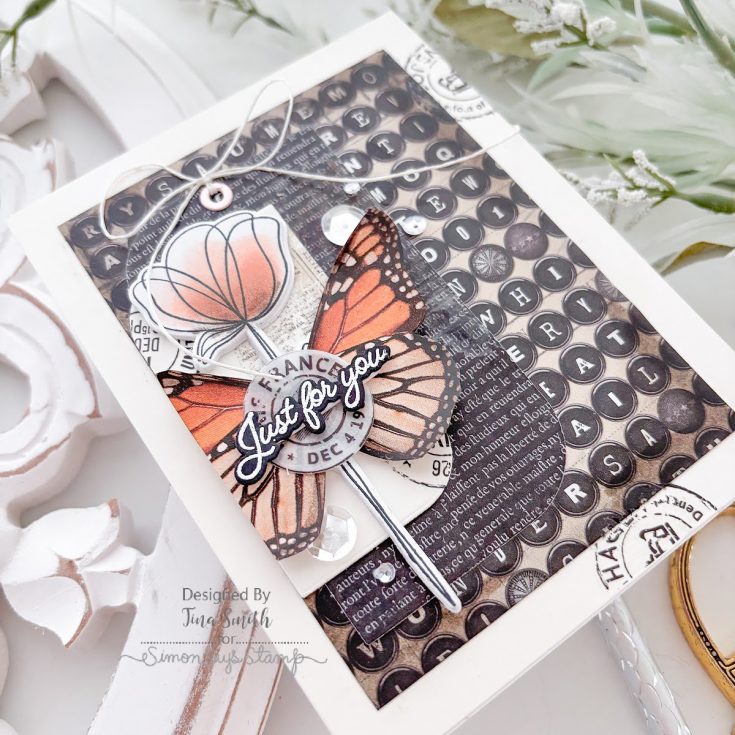
Hello there, wonderful cardmakers! I’m beyond excited to show off a new mixed media card I created with the May 2026 Card Kit – Long Stem Florals.
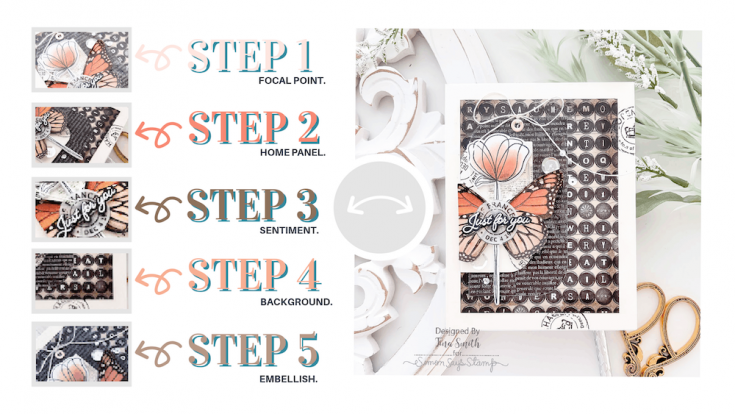
I’ll be the first to admit: sometimes mixed media feels like a giant puzzle with no picture on the box! To keep my brain from short-circuiting, I’ve started using a 5-step formula that makes building mix media feel like a total breeze. I actually use this 5 Step process for most of my card projects. Here’s how the magic happens:
- Step 1: I start with the star of the show—the focal point.
- Step 2: I build a landing spot for that focal point so it doesn’t just look like it’s floating in space.
- Step 3: I lock in the sentiment.
- Step 4: I craft a background that ties those first three elements together.
- Step 5: The best part—I embellish with all the bells & whistles!
There is something so satisfying about piling up elements and seeing what sticks. I really hope this “Just for you” design with my 5 step formula sparks some fresh ideas for your next craft room session! Thanks for visiting and have a lovely day!
WATCH THE VIDEO:

SUPPLIES:
|


A big thank you to YOU, our reader — and to Tina Smith for being our guest!
WEEKEND DEAL ALERT!!

Did you know?! We’ve made our card kit subscription BETTER THAN EVER!

Here’s what makes our new service a crafting paradise:
Exclusive Access: As a subscriber, you get first dibs! Each month, you’ll get an exclusive sneak peek at our new kit, with the option to add more coordinating items to your cart, including handy replenishable supplies, all shipped together for your convenience.
Hassle-Free Payments: Say goodbye to monthly billings! Our automated system smoothly charges your preferred card, ensuring an uninterrupted flow of crafty goodness – unless you decide to pause, of course!
$5 Off Magic: Enjoy a special $5 discount off our kit’s retail price, exclusive to our beloved subscribers – no codes needed, just automatic savings!
Crafting Inspirations: Dive into a sea of creative ideas monthly, all tailored around your kit, to keep your inspiration flowing endlessly.
Flexibility First: Fear of commitment? Not here! Our subscription is as flexible as it gets – pause or cancel anytime, no strings attached.
Why wait? Step into the realm of our NEW Simon Says Stamp Monthly Card Kit service. Welcome a box full of crafting marvels, right to your doorstep. Craft with ease and let creativity come to you!
Ready to elevate your craft? Subscribe Now and open the doors to boundless creativity!
We’re thrilled to have you in our crafting community and can’t wait to embark on this renewed creative adventure together!
Time to Stock Up! 25% Off Ranger (Including Tim Holtz!)
Hi friends! Happy Friday!
We’ve got an extra-special treat for you this weekend! It’s the perfect time to stock up on your favorite Ranger crafty staples—or finally try something NEW you’ve had your eye on.
Shop early for the best selection, and don’t miss out on these amazing deals—happy crafting!
HOPE Panel Tutorial by Paula Cheney

I was listening to a podcast recently where the speaker shared a small, beautiful observation: she loved seeing tiny flowers growing in the cracks of a sidewalk. To her, those stubborn little blooms were a visual definition of hope.
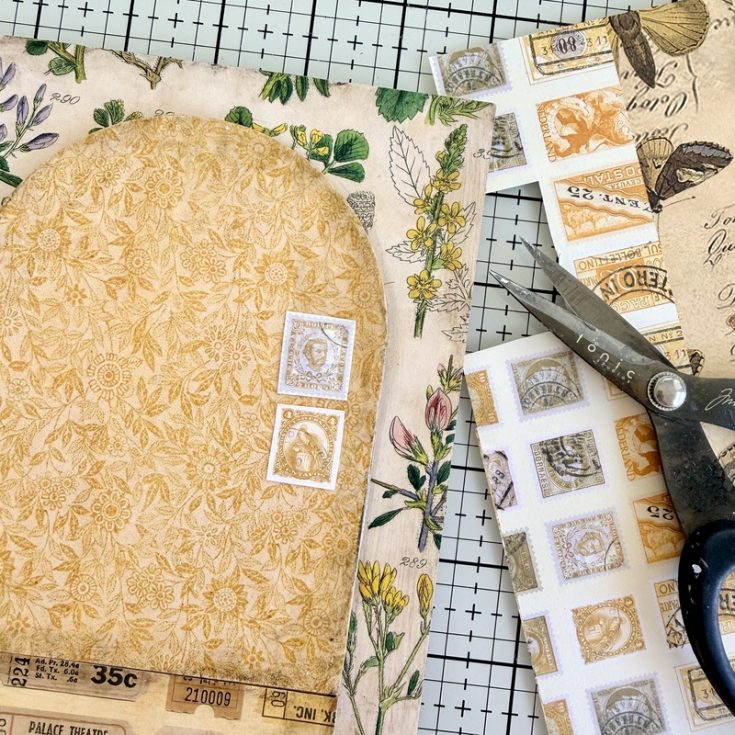
When I sat down to create this project, I found myself staring at a sheet of cracked-pattern paper from the Palette Yellow collection. Immediately, her words flashed back to me. I wanted to create a piece that mirrored that exact feeling—the idea that even in the fractured, “broken” places, there is space for something bright to grow. This project is my version of that sidewalk flower: a reminder that hope always finds a way through.
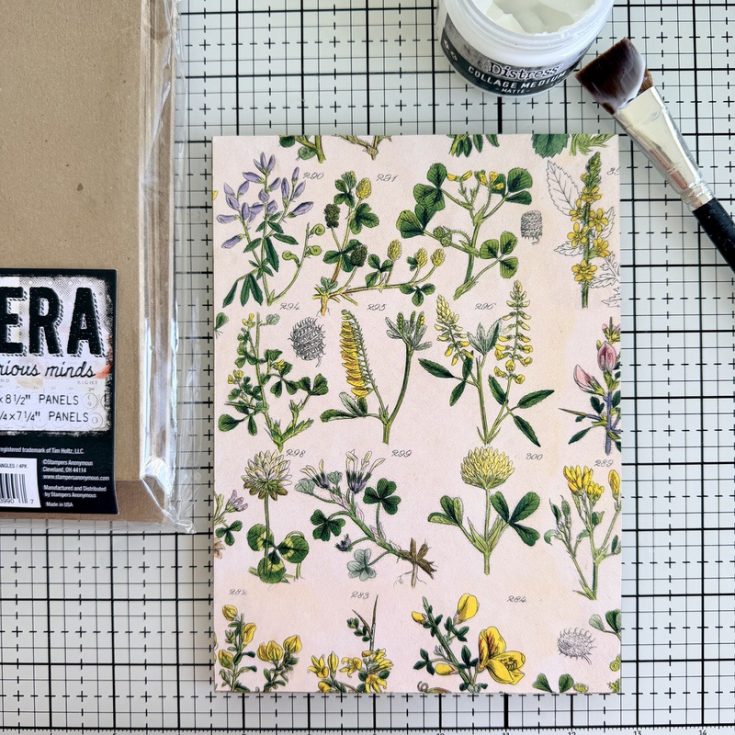
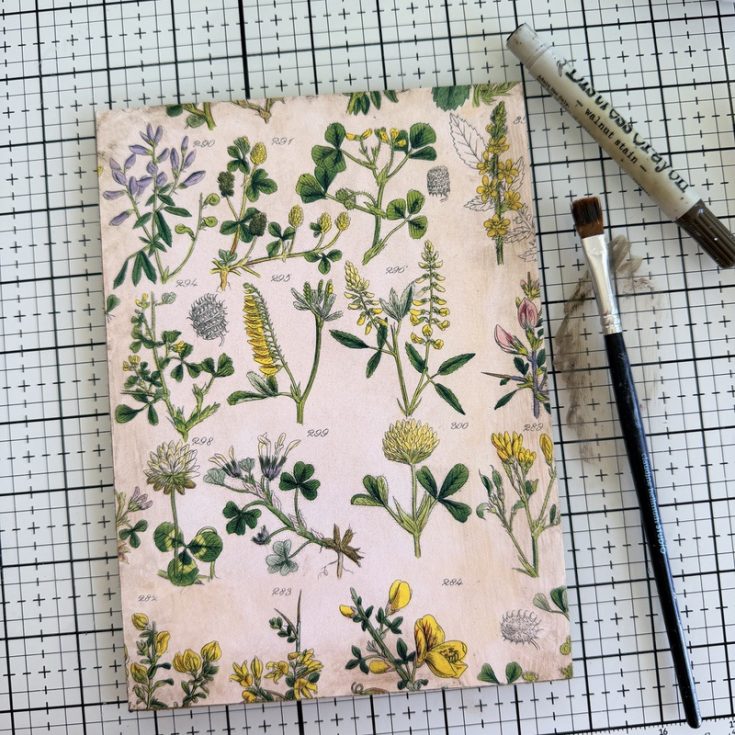
- Begin with an Etcetera Panel (6 x 8.5”) as the substrate. Use Collage Medium to adhere paper from the 12 x 12” Palette Yellow paper pack. I chose a bold botanical to counterbalance the ditsy print I will be using next. Be sure to add a layer of Collage Medium over the top of the paper to seal.
- Once the Collage Medium is dry to the touch, scribble Walnut Stain Distress Crayon on the edge of the Etcetera Panel. Use a damp brush to move the crayon around to age the edges.
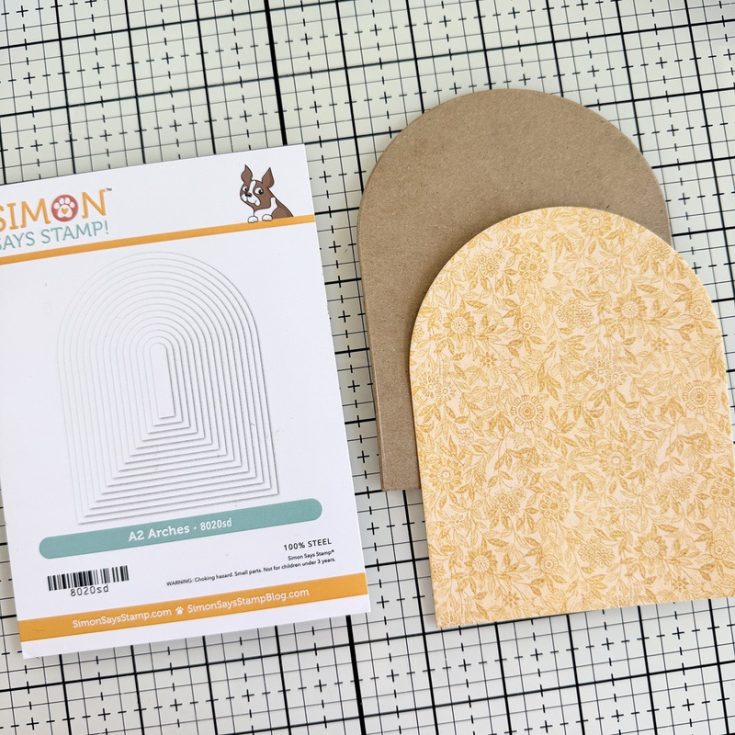
- Using the largest arch of the Simon Says Stamp A2 Arches Wafer Die, cut a piece of Palette Yellow paper and two pieces of thin chipboard. Glue all the pieces together with Collage Medium.
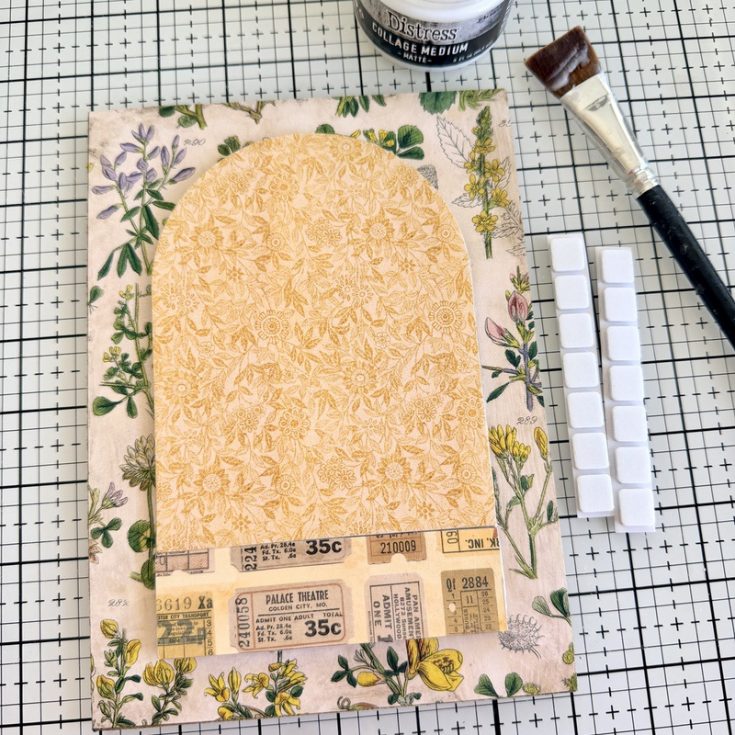
- Use 3D Foam Squares to add the arch shape to the Etcetera Panel. I added a second piece of chipboard to extend the length of the arch (1 1/4 x 4 1/4”). I covered the small chipboard rectangle with another Palette Yellow pattern for added interest. Add 3D Foam Squares to adhere it to the panel below the arch. Once the two pieces were in place, I added a layer of Collage Medium over the top and let it dry.
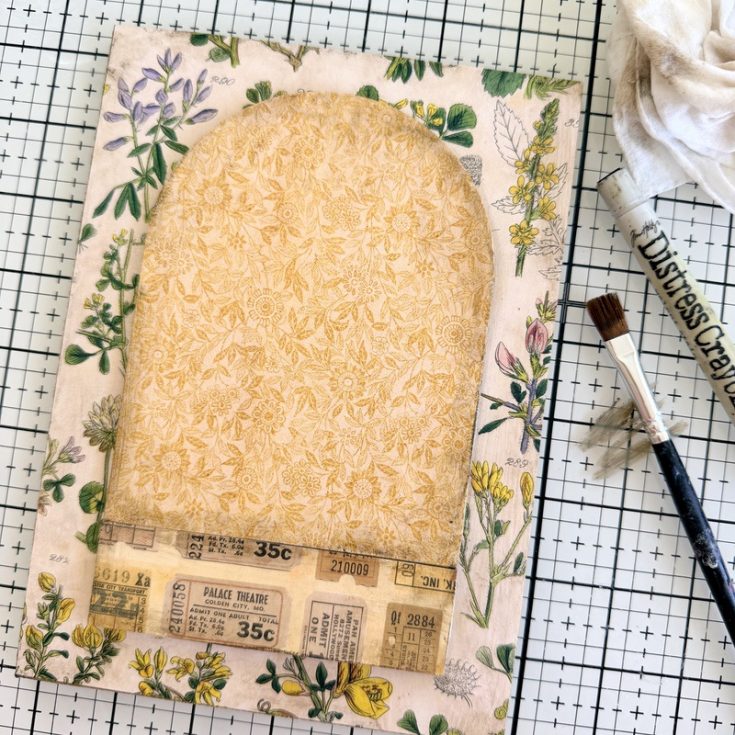

- Once the Collage Medium was dry, I repeated the crayon technique to give definition to the edges of the added chipboard pieces.
- Cut a couple stamp from the Stamps Palette Yellow paper and adhere them to the right side of the arch. Cover with Collage Medium to seal and let dry.
- Once dry, use the Walnut Stain Crayon to build up a dark edge around the stamps. Make a puddle of Picket Fence Distress Paint and a small amount of water. Use a paint brush to flick the white paint over the arch (I covered the background panel with a paper towel to protect the surface from the splatter).
STAMPING
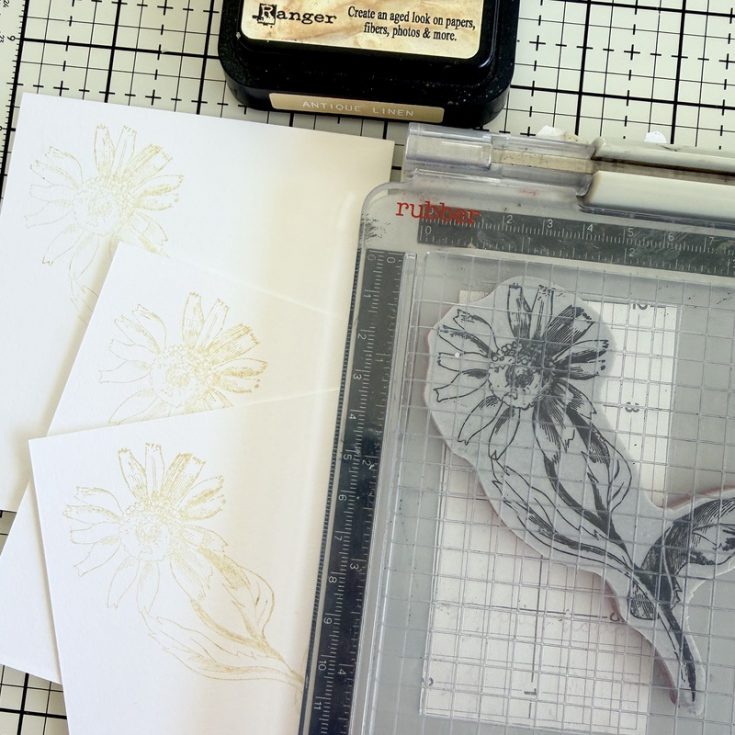
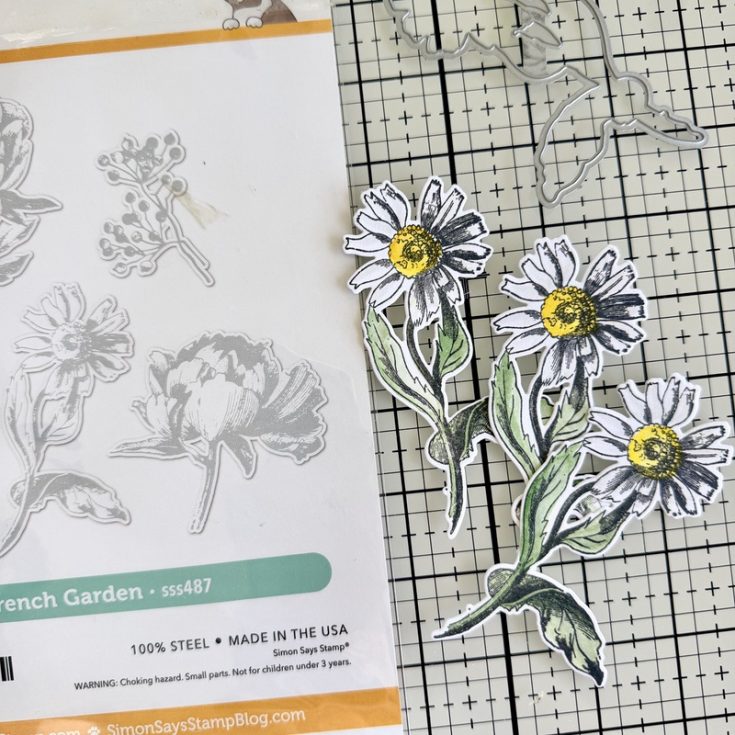
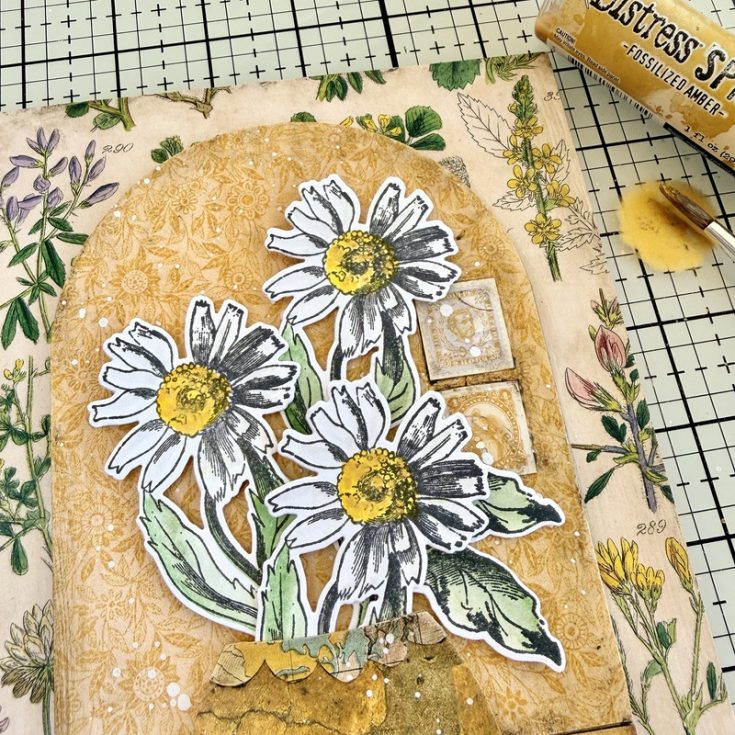
- Use a stamp positioner and Antique Linen Distress Ink to stamp three pieces of Distress Watercolor Cardstock with the daisy image from the Stampers Anonymous French Garden stamp set. DO NOT remove the stamp from the positioner after stamping – you will use again after coloring the images.
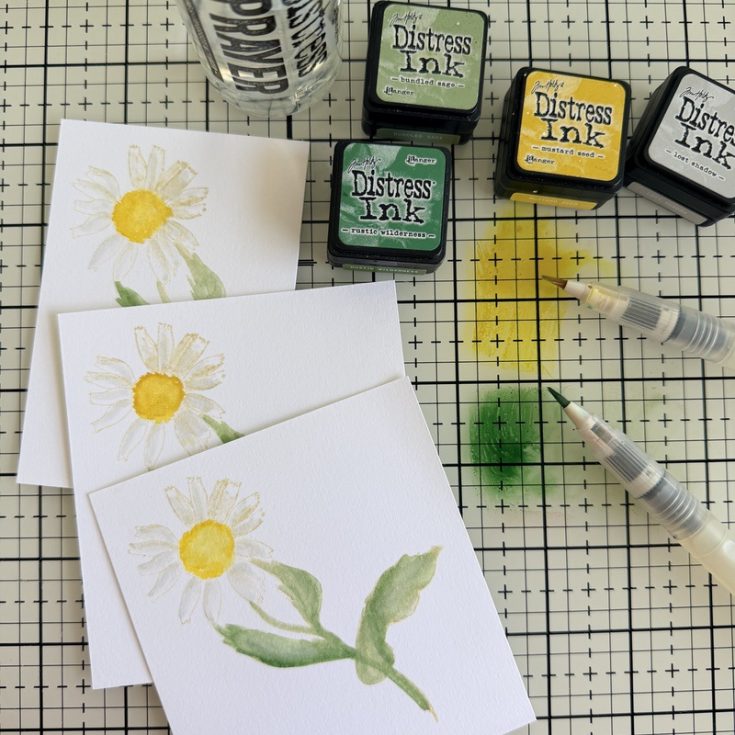
- Use a variety of Distress Inks and a Detailer Water Brush to watercolor the images. I used a combination of colors – for the leaves, Rustic Wilderness and Bundled Sage. Lost Shadow for the petals and Mustard Seed for the center.
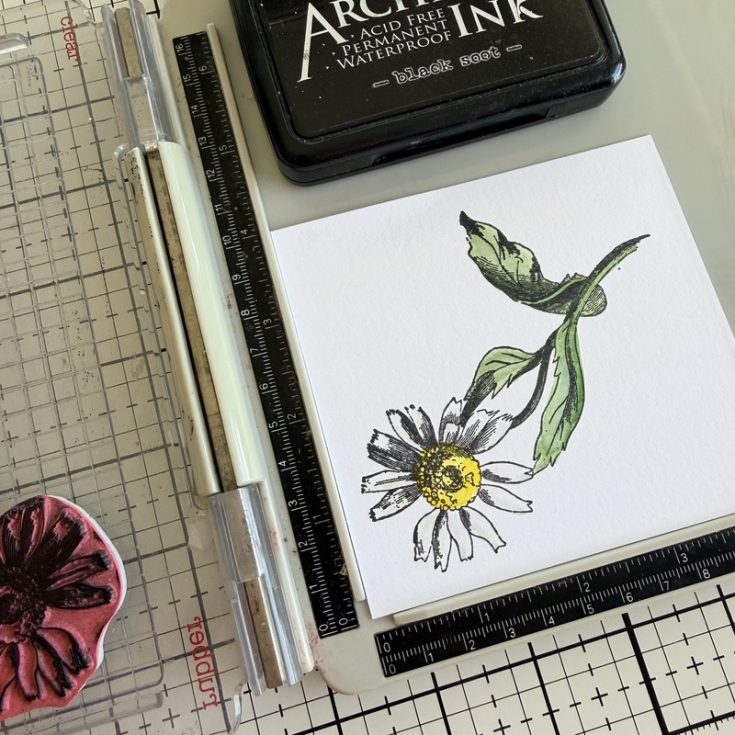
- Once the stamped images are colored and dry, place each image back into position on the stamp positioner. This time, stamp the image with a dark Archival Ink, like Black Soot or Ground Espresso. The dark color brings back the lost details of the image.
- Once stamped, use the Simon Says Stamp French Garden Wafer Die to cut out the three images. Now that was EASY!
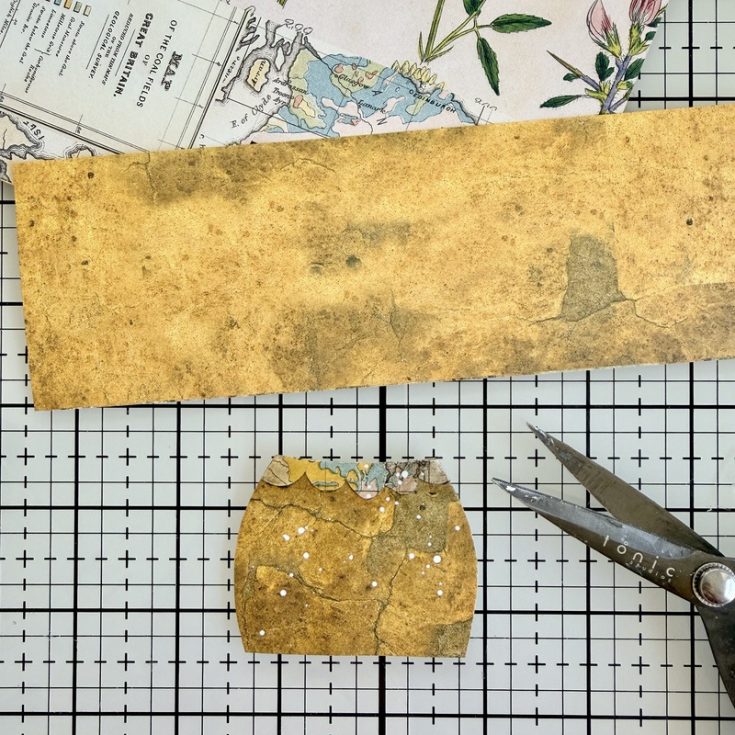
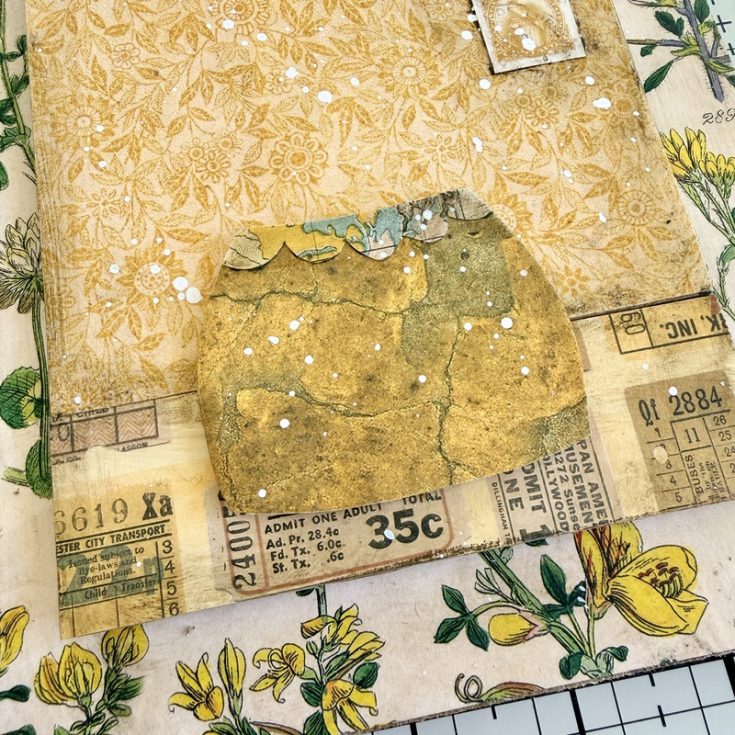
- Next we need a vase of sorts. I cut drew a shape on chipboard then cut it out. I chose the cover the chipboard with the Palette Yellow paper with all the cracks in it to go with my theme. I freehand cut a small piece of the Palette Yellow Map paper into a small scallop to run along the top edge – but you can decorate the vase anyway you choose.
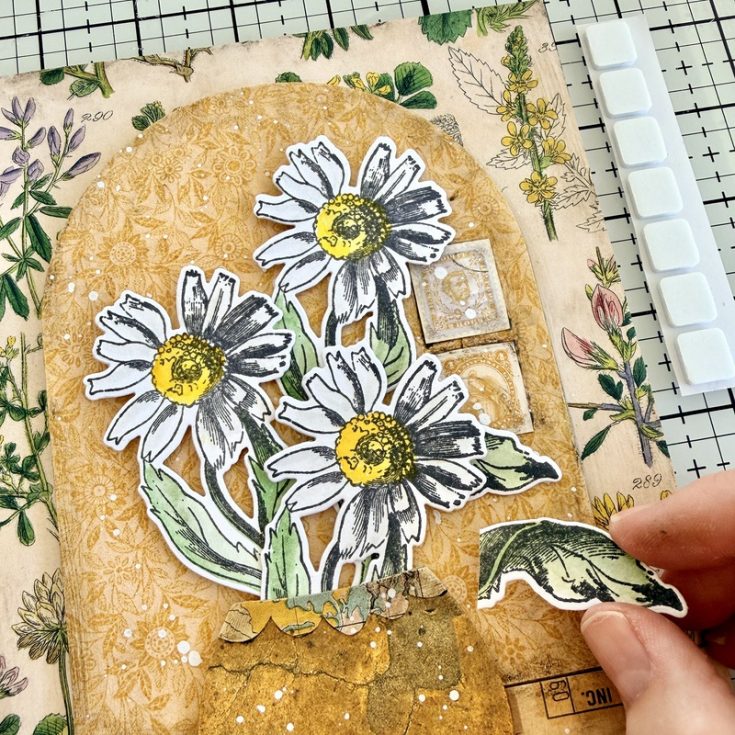
- I added the vase to the panel with 3D Foam Squares. I cut each Foam Square in half and lined the edge of the vase so I can slip the flower stems inside, just like a real vase.
- Add one 3D Foam Squares to the back of each flower and add to the vase. I cut the leaf from the daisy on the left and repurposed it behind the daisy in the front.
- This step is not easy to see in a photo, but I used a paint brush to add dots of Fossilized Amber Distress Spritz to the center of each flower for a bit of shine. Again, hard to see in a still photo but in person it is beautiful when the light catches it.
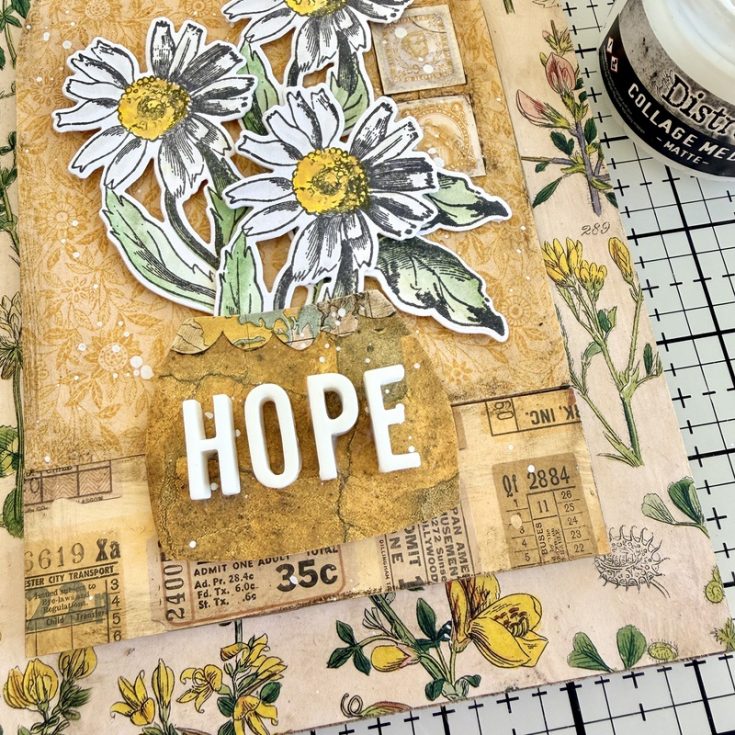
- Just a few more steps, the first being the addition of the word HOPE to the vase. Typography is one of my favorite idea-ology products. The 3D letters always give a pop of something unexpected when added to a piece and they are so easy to use – just glue them down with Collage Medium. I do like to have a tiny brush on hand to wipe away any glue that might squish out from underneath.
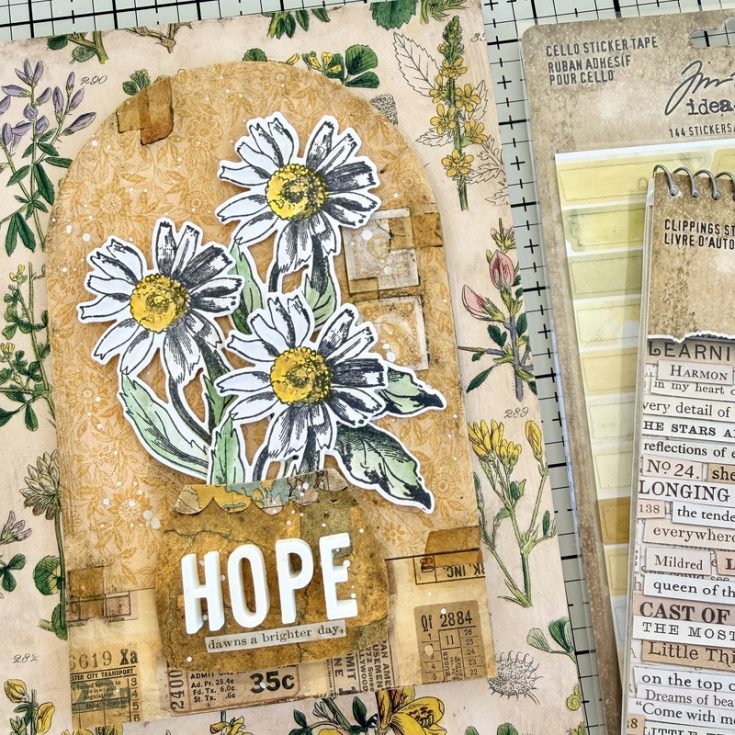
- And in one final move, I added Cello Sticker Tape to various areas of the arch and a Clipping Sticker below the word HOPE. I used the Walnut Stain Distress Crayon to create the added buildup around the Cello Tape Stickers. Love the dimension it creates so the tape stands out from the golden background.
SUPPLIES:
|


Thanks so much to Paula for this gorgeous inspiration and to YOU our reader, for stopping by today!


