Playful Animals
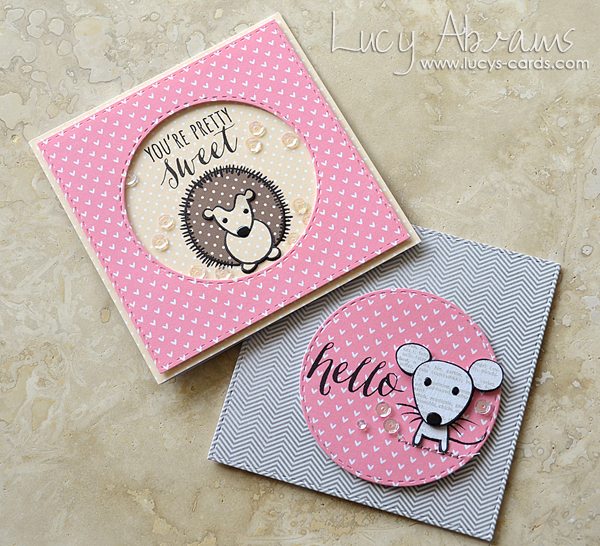
Hello. It’s Lucy Abrams here today, and I have a pair of 4 x 4″ cards to share with you, made with a mixture of Hero Arts and Simon Says Stamp products.
Hero Arts’ new Playful Animals set is perfect for creating cute little notecards like these, and the critters in this set match really well with the sentiments in the new Stamp Your Own Fruit set.
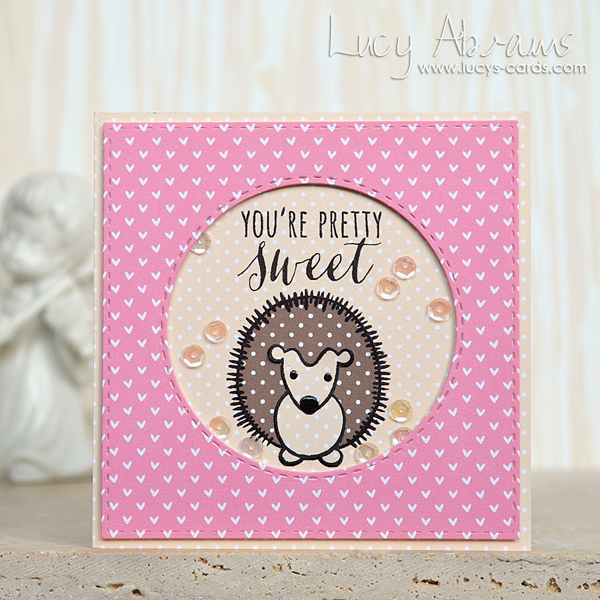
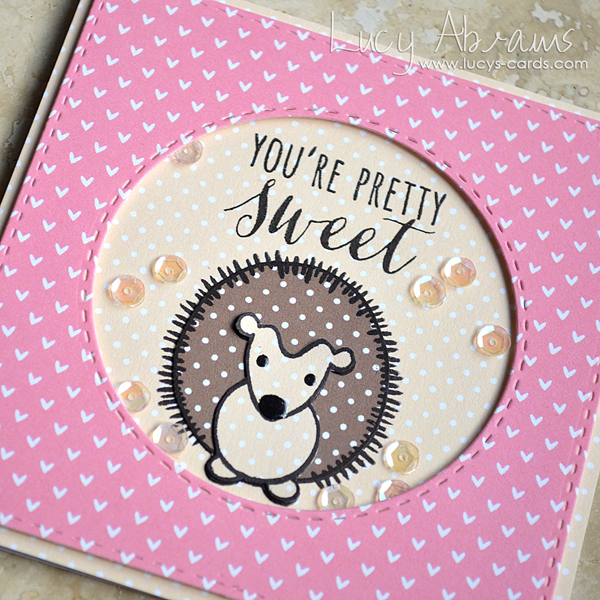
I started off by creating my hedgehog card, using patterned papers from Lawn Fawn’s new Let’s Polka Mon Amie 6 x 6 pad, and both the Stitched Circles and Stitched Squares dies from Simon Says Stamp.
I added some Glossy Accents to my hedgehog’s eyes and nose, and embellished the card with some Pale Pink Sequins.
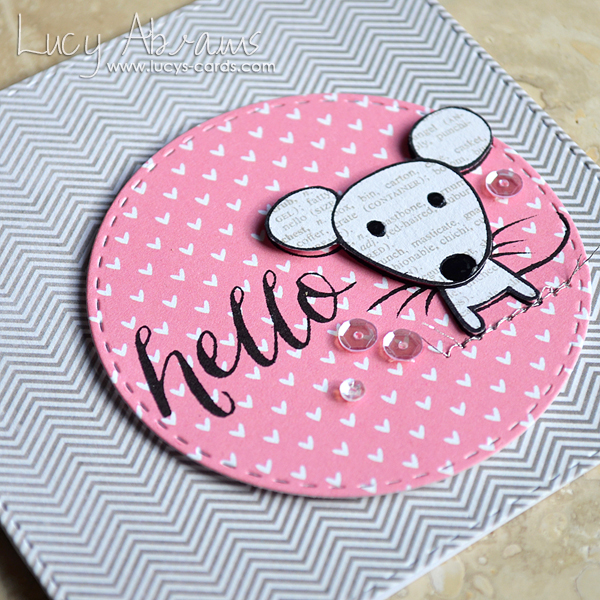
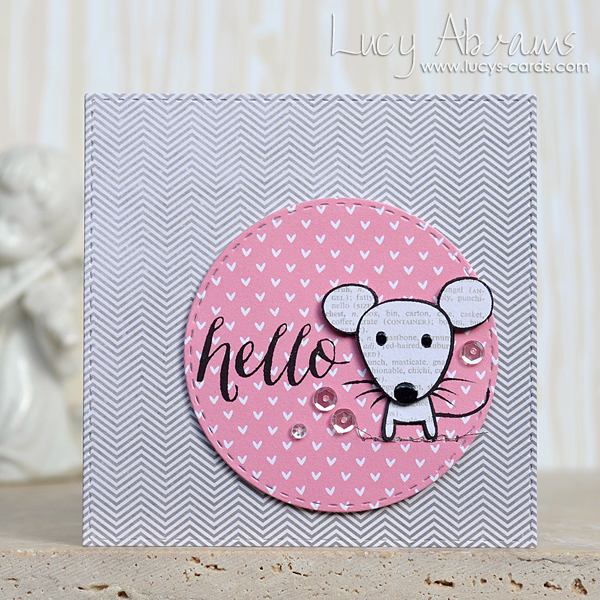
One of my favorite things about the Stitched dies is that the leftovers are just as pretty and you HAVE to use them up… So, once I’d finished my hedgehog, I used the scrap circle to make my mouse card.
I chose papers from Pebbles’ Special Delivery Girl pad to complement the pink, and added some Moonshine sequins and a bit of silver stitching for some sparkle.
Thanks so much for joining me today!
SUPPLIES:
 |
 |
 |
 |
 |
 |
 |
 |
 |
 |
 |
 |
Thanks for reading today and thanks to the awesome Lucy for being our guest!

Blog Candy Alert!! Follow our blog via email and comment on this post for a chance to win a special blog candy!
April Card Kit of the Month REVEAL: Celebrate!
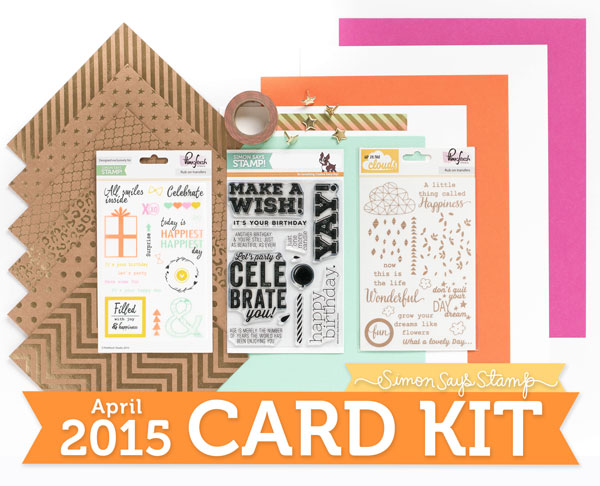
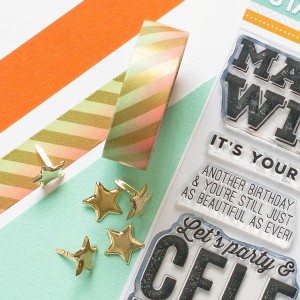
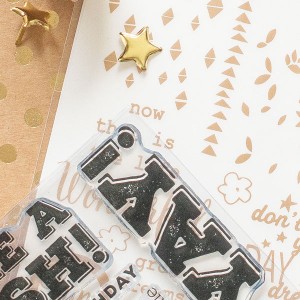
Color Pops! Bursts of fun! Our April 2015 Card kit of the month is appropriately named CELEBRATE! This kit is perfect for all your birthday celebrations. Pair up the Big Birthday Wishes stamps with the Bazzill 6×6 Kraft Gold Foil papers for an elegant look, or mix and match with the bright card stocks in the kit for really festive cards. Top them all off with the striking gold star brads. You can subscribe to our kit of the month program for just $24.95 plus S&H per month!
We’ve included several rub on sets: one is a full sheet of color rub ons with a birthday and celebration theme and the other is a sheet of gold toned rub ons with great sentiments and trending images. Also, check out the super cool Pink and Mint ombre washi tape from Pink Fresh Studio!
*Due to the dock issue on the West Coast, there has been a slight delay in receipt of kit products for assembly of our April kit. Instead of shipping the kits immediately, they will begin shipping March 23rd. We apologize for any inconvenience to you.
Shari has put together a quick card using the stamp set from the kit. She stamped several greetings using Mint and Coral Reef inks to form a panel using the Misti stamping tool. Once the stamping was done, she die cut a balloon from the panel and raised it up with foam squares.
Shari has put together a quick kit walkthrough and shows how her card came together. You can see the video below, or watch on our YouTube Channel.
The stamp set for this kit is called Big Birthday Wishes an ideal set for creating gender neutral cards for all ages!
Blog Candy Alert!! Follow our blog via email and comment on this post for a chance to win a special blog candy!

Thanks for stopping by and enjoy your weekend!
Mixed Media Burlap Panels Featuring Tim Holtz Products
Hi readers!! TGIF! I’m so pleased to welcome very recent mother of two Anna-Karin Evaldsson back to our blog as a guest designer! Congrats to her and her family! Anna-Karin has created these very fun Mixed Media Burlap Panels featuring Tim Holtz products for a very special Friday feature! Read on and enjoy!
Hello everyone!
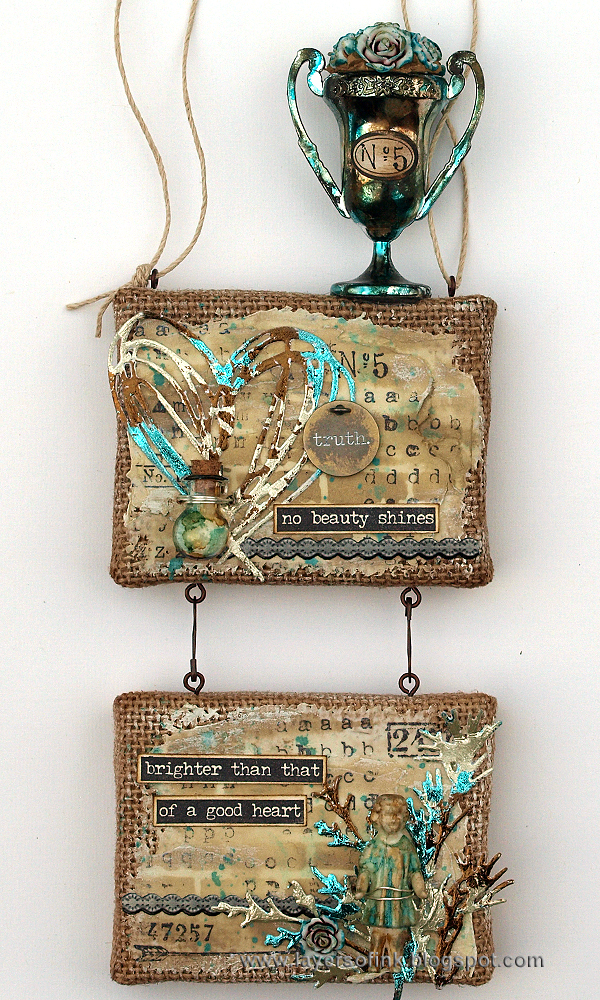
I am happy so happy to be here at the Simon Says Stamp blog today, with a mixed media burlap panel. The project was made mainly with products by Tim Holtz and Ranger. You can easily use the same techniques for cardmaking, art journaling, scrapbooking and more.
-
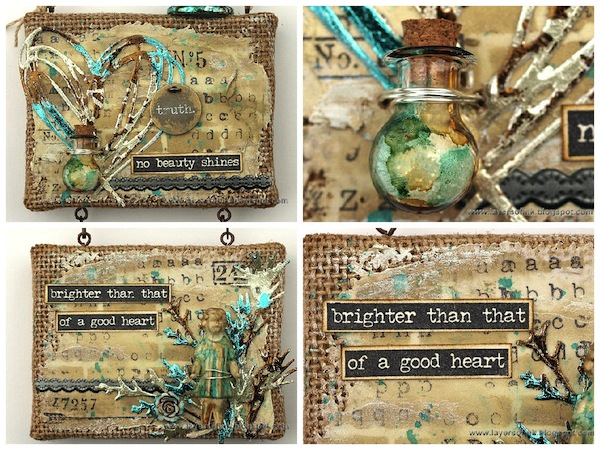
The Mini Burlap Panels are so cute and I thought it would be a fun idea to attach two of them together for a wall-hanging – and to give me more space to decorate. Since the panels are made of wood, they are sturdy and you can screw things into them, and the top forms a great shelf for more embellishments. I took some step photos along the way.
-
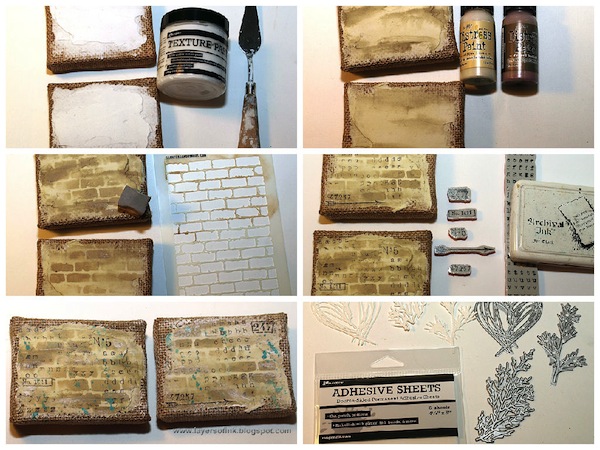
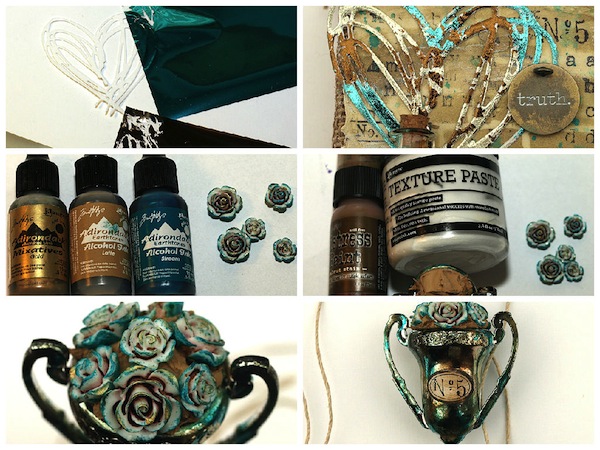
Start by smearing Ranger’s Texture Paste on the burlap panels with a palette knife. Try to give them a medium thick smooth layer, but don’t cover them all the way to the edge. Let some of the burlap show. Leave to dry.
-
Paint with Antique Linen and Frayed Burlap Distress Paint, adding a little bit of water to the paint.
-
Sponge Frayed Burlap through the Bricked stencil. I used a small piece of Cut-n-Dry foam for this.
-
To add more detail and texture, stamp the panels with various stamps from the Correspondence set and with the alphabet background from Documented. I love this alphabet stamp, it is certainly going to be well-used.
-
Splatter a little bit of Peacock Feathers Distress Paint on the panels, by picking the paint up with a paint brush and tapping the handle. You might need to add a little water to the paint.
-
I wanted shiny metallic pieces and decided to use Ranger’s Foil Sheets. First, apply an Adhesive Sheet to cardstock and die cut a heart and foliage using the Scribbles and Splat and Holiday Greens dies. These dies work great together with the Sizzix Magnetic Platform. Use this sandwich: Magnetic Platform, Cutting Pad, paper, die facing down, second Cutting Pad. You might need to run the dies through the machine twice, since they are detailed.
-
Remove the back liner of the adhesive sheet and press the grey side of the foil sheets onto the adhesive. Vary the colours for a fun look.
-
The effect is really cool and I love the multi-coloured metallic shine.
-
Colour Heirloom Roses, a Trophy Cup and a Salvaged Doll with alcohol inks, using an ink-blending tool and felt applicator.
-
Fill the Trophy Cup with crumbled up pieces of paper. Mix a little Walnut Stain paint into Texture Paste and apply at the top of the cup.
-
Press the roses into the paste, which acts both as soil and as an adhesive.
-
Sand a Vial Label slightly and stamp it with a stamp from the Correspondence set. Glue the trophy on top of the top panel using a strong adhesive.
-
The panels were embellished with a Typed Token, Gallery Industrious Stickers, and a stamped sentiment.
-
I love the shapes of the new Tiny Vials. This one was altered with alcohol ink and I filled it with Rock Candy Distress Glitter, before drilling two holes in the panel and attaching it with a piece of wire.
-
To attach the two panels to each other I screwed in Screw Eyes and simply attached them with two Loop Pins. Very easy. The Salvaged Doll was attached the same way as the vial bottle, by drilling two holes and threading a wire through them. The paste is a great surface to stencil and stamp on, while still keeping the rough texture of the burlap around the edges.
I hope you enjoyed this tutorial. Thank you so much for looking!
Happy crafting!
Anna-Karin
SUPPLIES:
 |
 |
 |
 |
 |
 |
 |
 |
 |
 |
 |
 |
 |
 |
 |
 |
 |
 |
 |
 |
 |
 |
 |
 |
 |
 |
 |
 |
 |
 |
 |
 |
 |
 |
 |
Blog Candy Alert!! Follow our blog via email and comment on this post for a chance to win a special blog candy!


