Blending Night Skies
Hi readers! Isn’t this gorgeous night sky blending by guest designer Chari Moss of Lawn Fawn so totally gorgeous? I love it! Want to know more about the process to recreate it for yourself? Read on!
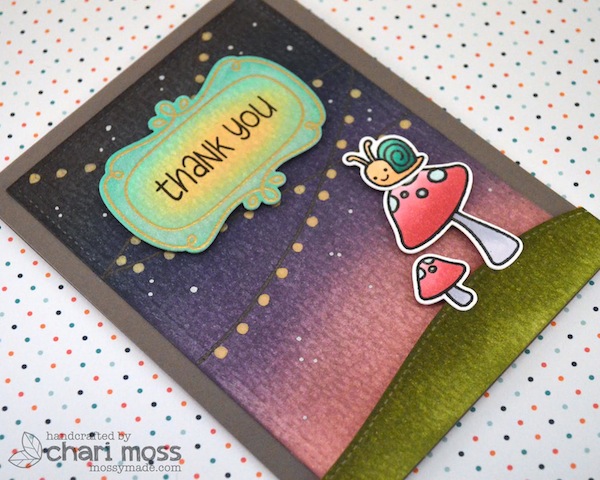
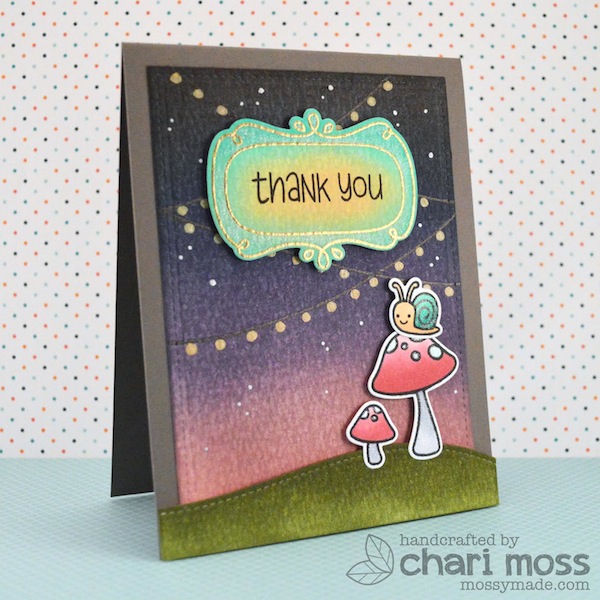
Things are blooming and gardens are popping with color so I was inspired to break out my Gleeful Gardens set for today’s card. I thought it would be fun to create a night time garden party for something a little different. I used distress watercolor paper to blend my night time sky starting with victorian velvet at the very bottom, dusty concord, chipped sapphire and black soot at the top. I picked colors for my images that were a little more toned down, maybe how a bright red mushroom might look at night in the star light.
For the snail I tried to make him glow a bit like a glow worm, does anyone remember those toys? Of course no garden party would be complete without strings of garden lights strung above. For these I used Kirarina Wink pens in black and dandelion to hand draw the lights strung across the card. I also added tiny dots of silver with the Silver metallic Kirarina Wink pen for stars.
To keep the same look and texture I used distress inks to color the frame for my sentiment as well. I embossed the frame in gold on distress watercolor paper and blended it with scattered straw in the center then worked my way toward the outer edge with cracked pistachio and peacock feathers. I love how it looks like it is glowing as well. I finished off by adding some wink of stella glitter to the frame and the images, like stardust falling on the little snail and mushrooms below.
SUPPLIES:
 |
 |
 |
 |
 |
 |
 |
 |
 |
 |
 |
 |
 |
 |
 |
 |
 |
 |
 |
|
 |
 |
 |
 |
 |
 |
 |
 |
Thanks for reading today, and thanks to the fabulous Chari for being our guest today!

Blog Candy Alert!! Follow our blog via email and comment on this post for a chance to win a special blog candy!
Spring Tim Holtz Thank You Card!
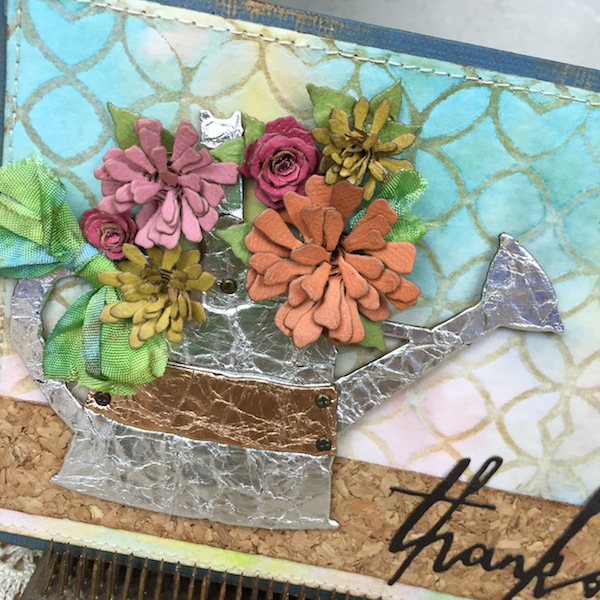
Hi readers! Happy Friday to you! I hope your weekend is starting off wonderfully and the sun is shining wherever you are! We’re beyond pleased to welcome back the magnificent Richele Christensen as a guest on our blog today with this watering can thank you card that is just the perfect combination of clever and beautiful! Check out all the details on how to make this neat card below!
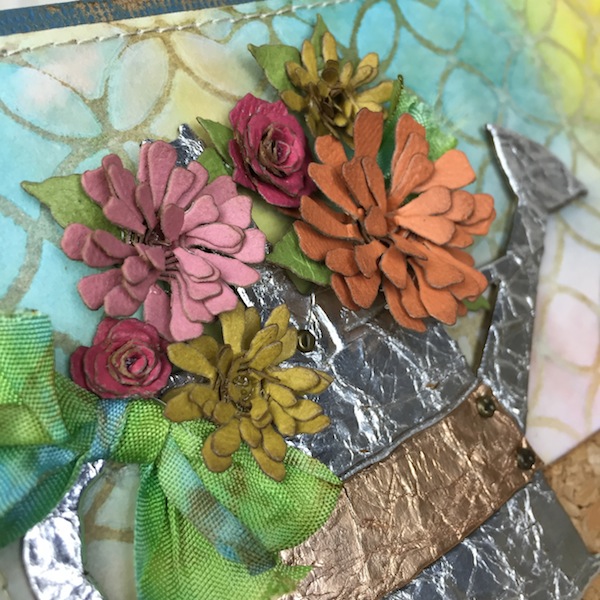
Hello friends! It’s Richele here and I have lots of new products to share with you today! “Kraft-core” cardstocks are a favorite of mine they’re perfect for cards and to distress of course. The new Classic collection is so bright and the Metallics are to die for. Another favorite is the Tiny Tattered Florals die it’s a great set with 15 dies (8 flowers and 7 leaves) and the quilling tool is included with the die set. There are so many beautiful details to love about this card!
Instructions:
-
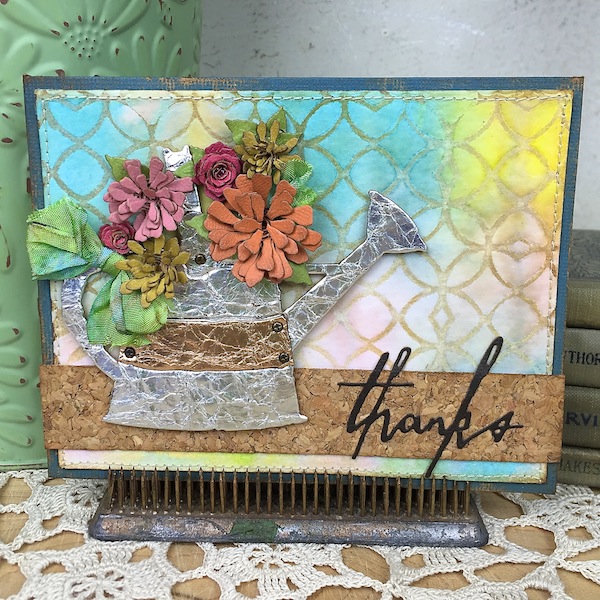
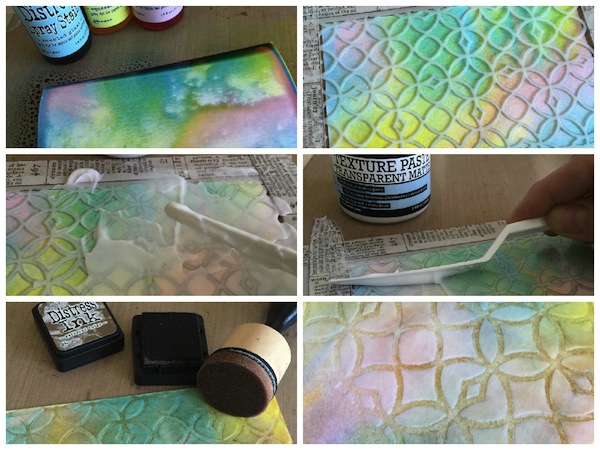
Color a piece of Watercolor Cardstock with Distress Spray Stains and dry with a heat tool.
-
Tape Latticework Layering Stencil over cardstock lining up at the top.
-
Apply a layer of Texture Paste in Transparent Matte with a Palette knife.
-
Holding the Palette knife at an angle scrape off excess paste. Set aside to dry. Once the paste is dry it will dry clear and have a matte finish which is perfect for our project today.
-
Ink over the areas with Distress Ink on a Mini Ink Blending Tool, the paste will act as a resist.
-
Wipe off inked area with a damp cloth to remove the ink over the paste.
-
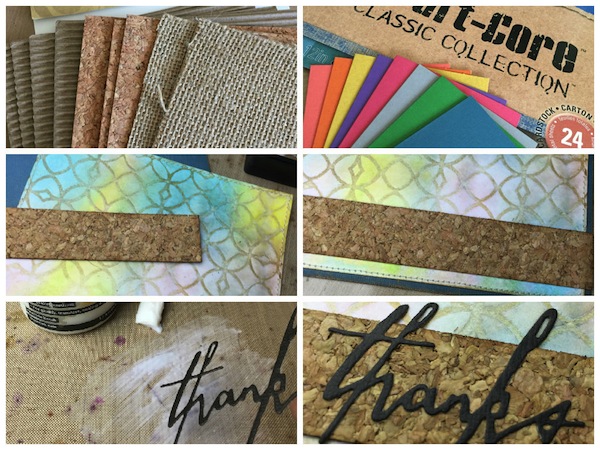
Cut a 1” strip from the Textured Surfaces pack by the width of your card. The Textured Surfaces pack comes with Cork, Burlap and Corrugate. They are sticky backed with a very strong adhesive for easy use.
-
Cut base card from Kraft-Core Cardstock. Score and fold in half. Love the new Classic colors!
-
Ink the edges of with Distress Ink on a Mini Ink Blending Tool. Add stitching if desired.
-
Adhere pieces to the base card.
-
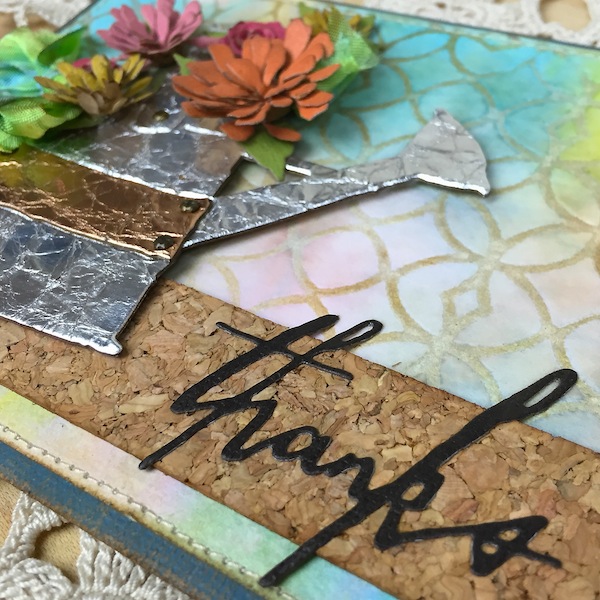
Die cut “thanks” from black cardstock using the Handwritten Celebrate Thinlits Dies. These dies have become a staple for me. They are great for cards, mixed media projects, layouts and more. To adhere apply a thick layer of liquid adhesive to your craft sheet and pounce the word over the adhesive.
-
Position the “thanks” on the cork strip.
-
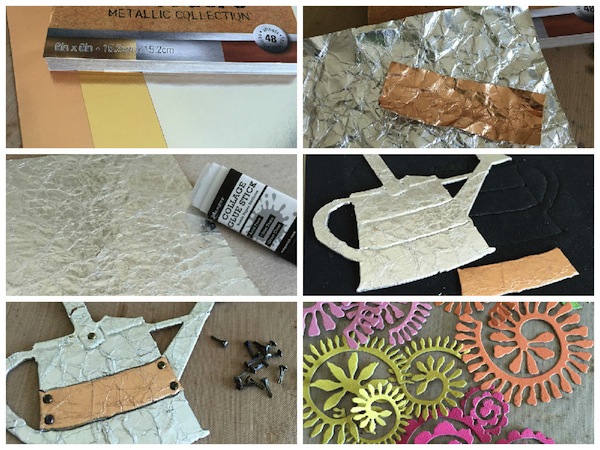
The new Kraft-Core Metallic Collection comes in 3 colors silver, gold and copper.
-
Crumple up a piece of silver and copper cardstock for the watering can. Tip: Mist the back of the cardstock with water and it will make it easier to crumple up.
-
Adhere the metallic pieces to chip board with glue stick.
-
Die cut the pieces using the Watering Can Bigz die.
-
Add Mini Fasteners at the handle and contrasting center strip.
-
Die cut the flowers form several colors of Classic Kraft-Core using the Tiny Tattered Florals Thinlits die. The set comes with 8 flowers, 7 leaves and the quilling tool is also included. Tip: Use the Precision Base plate with the Magnetic Platform when die cutting intricate dies and it will help cut them every time.
-
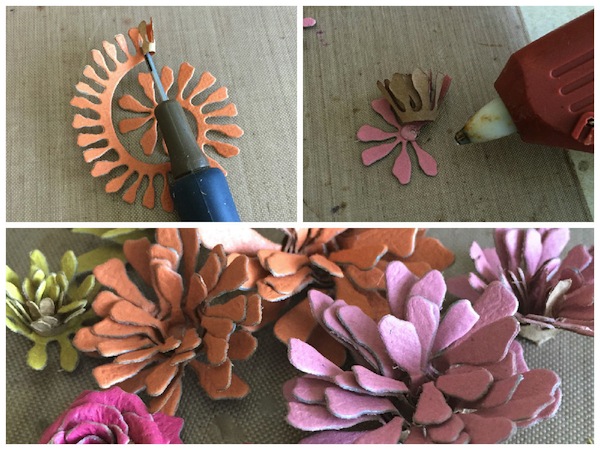
Insert the Quilling tool at the small end of the die cut flower. Roll towards the colored side of the cardstock and continue to roll up the flowers to the end. Remove from quilling tool.
-
Apply a little dollop of hot glue at the end and push the rolled petals onto the glue. Spread out the petals to create a beautiful flower.
-
Create several flowers and ink the edges with Distress Ink on a Mini Ink Blending Tool. Don’t forget the leaves.
-
Adhere the Watering Can with foam tape. Arrange flowers and adhere to card with hot glue.
I hope you will try some of the new products and techniques i’ve shared today. I know you will love them as much as I do!!
Thanks so much for stopping in and sharing your time today!
Richele
SUPPLIES:
 |
 |
 |
 |
 |
 |
 |
 |
 |
 |
 |
 |
 |
 |
 |
 |
 |
 |
 |
 |
 |
Thanks for reading today, and thanks to Richele for being our fabulous guest!

Blog Candy Alert!! Follow our blog via email and comment on this post for a chance to win a special blog candy!
June Card Kit Reveal!!!

The June card kit Be Happy is screaming with colors of summer and happy days ahead! We’ve included Sunkissed 6×6 papers and Summer Sprinkle Shapes from Doodlebug along with some super cheerful rainbow washi tape from Little B.
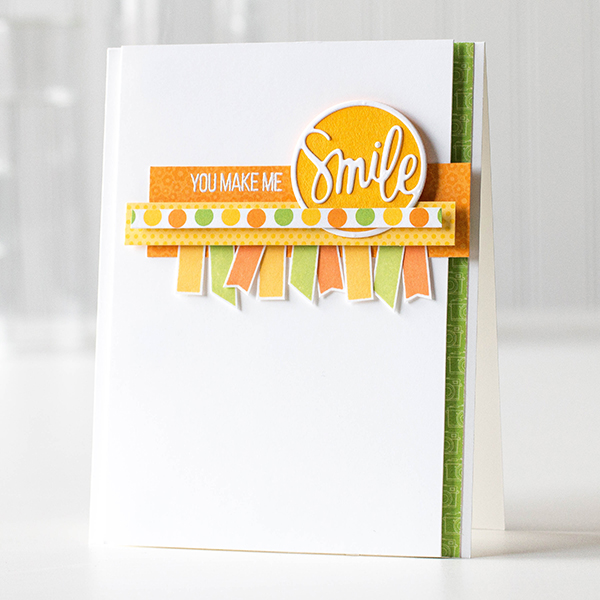
I’ve shot a video of the walk through and a look at how my card came together. You can watch the video below or on our YouTube channel.
The Happy and Smile stamp set and Smile Circle die are also available for individual purchase in our store.


Remember, you can SUBSCRIBE to our kits and receive them monthly for $ 24.95 or purchase them each month for $ 29.95, while supplies last. I have a feeling this one will go fast.
Thanks for stopping by today.


