Mixed Media Artist: Cathy Nichols
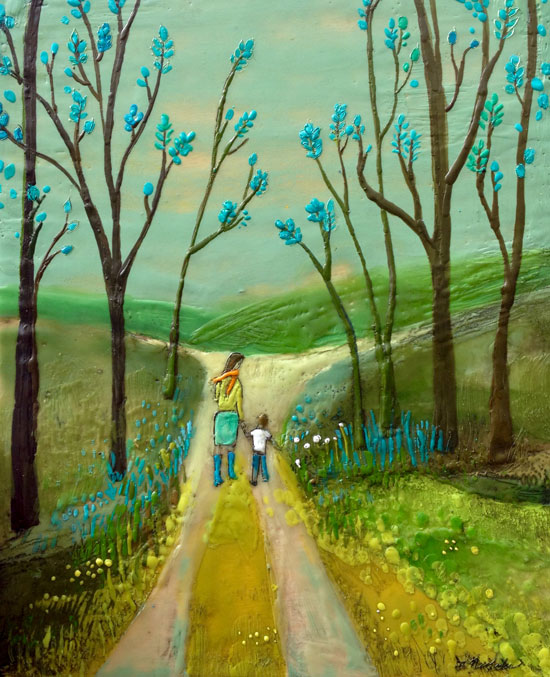
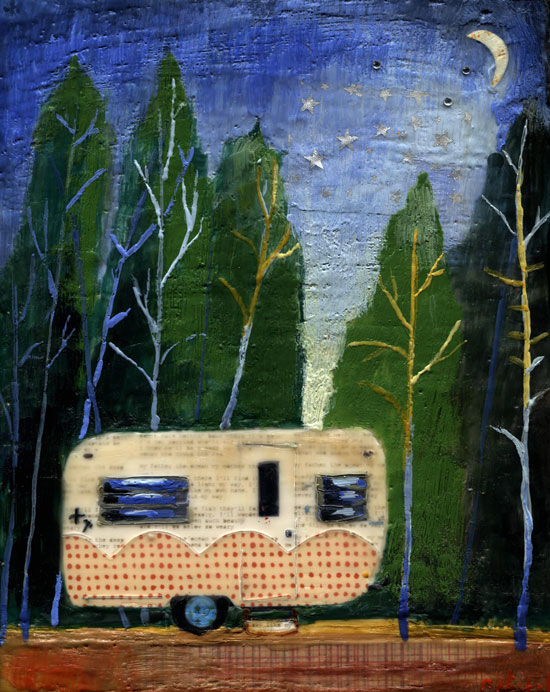
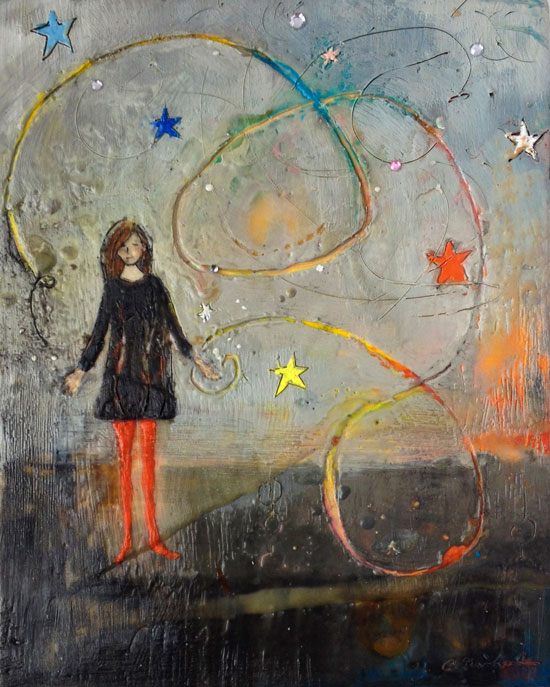
Hi readers! Happy Tuesday to you! I recently discovered the art of the very talented Cathy Nichols, when perusing Pinterest and thought you might enjoy seeing some of her work too! You may or may not know she also designs stencils for StencilGirl, and actually used the Camping Stories stencil to create her “Night Under the Stars” art work. Peruse even more of her lovely artwork on her site.
Enjoy!
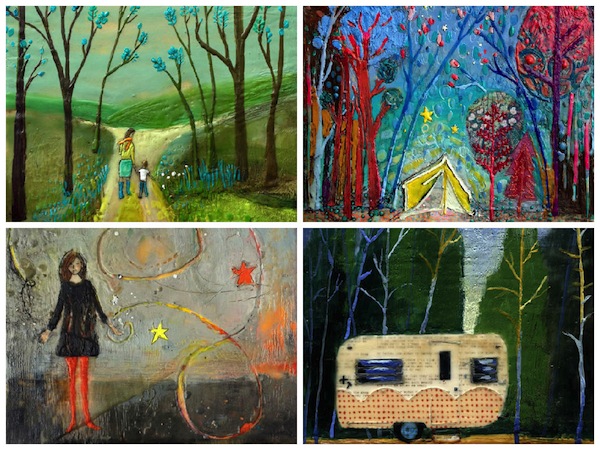
Cathy began her career as a young artist in Venice, CA where her encaustic work showed on trendy Abbot Kinney Blvd. and charmed collectors such as Julia Roberts and Owen Wilson. After moving to New York in 2005, Cathy continued to exhibit her work in the prestigious Enormous Tiny Art Show at the Nahcotta Gallery in Portsmouth, NH and in galleries in New York, Virginia Beach and Asheville, NC. In 2011, she co-founded The Firefly Gallery in Northport Village to feature the work of local Long Island Artists, and in 2012 The Lamantia Gallery unveiled her larger encaustic pieces at New York Art Expo. For the past three years, Cathy has also been the featured artist for the “Modern Vintage” Elements line of handbags produced by Boulder, Colorado company, Sherpani. She also designs cards and stationary for companies such as Graphique de France and American Greetings.
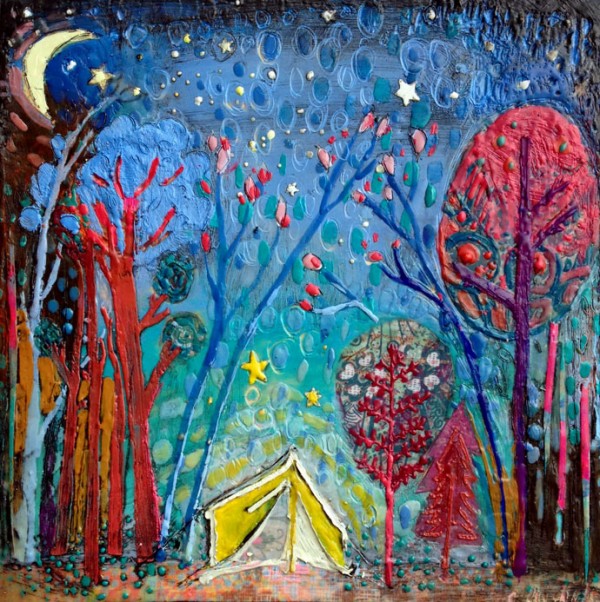
Night Under the Stars: Created using Camping Stories stencil from StencilGirl
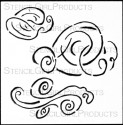
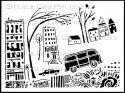
Shop StencilGirl Stencils by Cathy Nichols:
 |
 |
 |

Blog Candy Alert!! Follow our blog via email and comment on this post for a chance to win a special blog candy!
Congrats! Blog Candy Winner!
From: Aloha! Scrapbooking Layout: Natalie Godfrey!
Please email Samantha ([email protected]) with your mailing address and the name of the blog you won from to claim your prize!
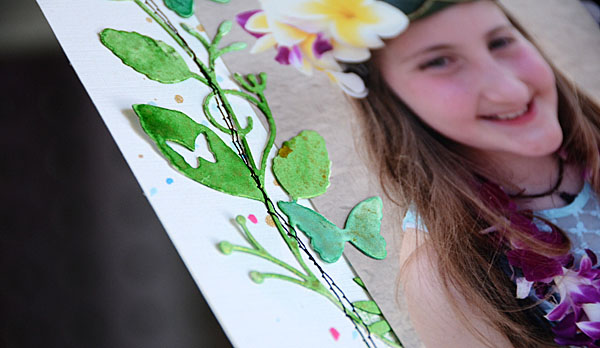
Aloha! Scrapbooking Layout
What supplies go well with which kind of project? When it comes to Simon Says Stamp exclusives, I believe they’re good for all kinds of paper crafting! Hello everyone – May Flaum here to share a scrapbook layout that I created with several favorite Simon Says Stamp exclusive products. One of my favorite kind of layouts to make is to take plain white cardstock and let my color mediums, stencils, and die cuts take over.
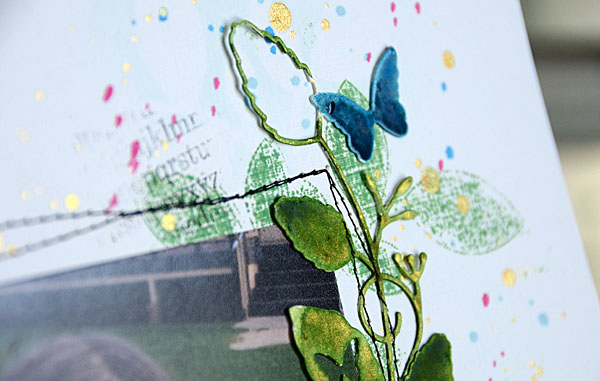
The first thing I did was to die cut the butterfly tendrils die and color it with watercolors. I set this aside to dry while I built the background for my layout featuring two 4×6 photos.
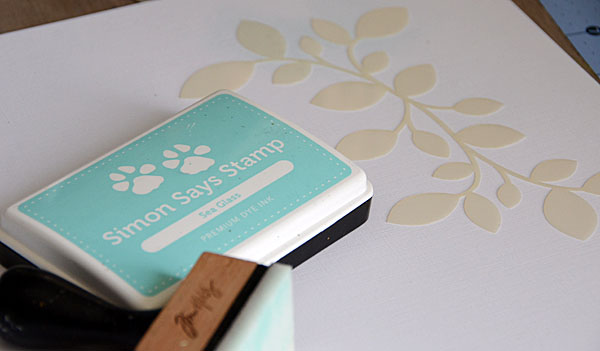
I very carefully and gently colored this leaf stencil with sea glass ink. This is so subtle it will barely show up, but it makes a great base layer. Then I took that same stencil and “stamped” it with fern ink.
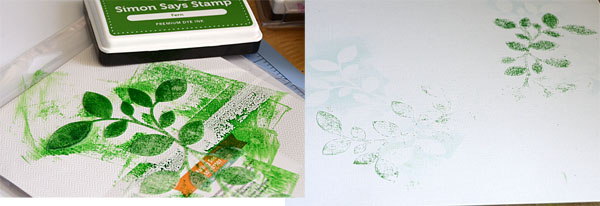
The next step – you guessed it – I “stamped” that inked up stencil right onto my page! I love this look and how it adds a fun sketchy leaf look to my layout.
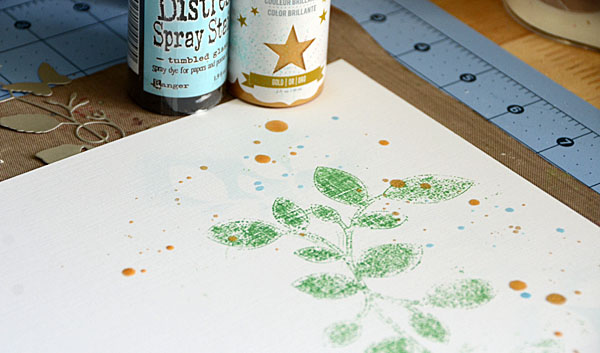
Next up, time to add a few droplets of mist. I like to remove the top and just flick wherever I want nice big droplets. This lets me get more of a splatter and less of a misted look.
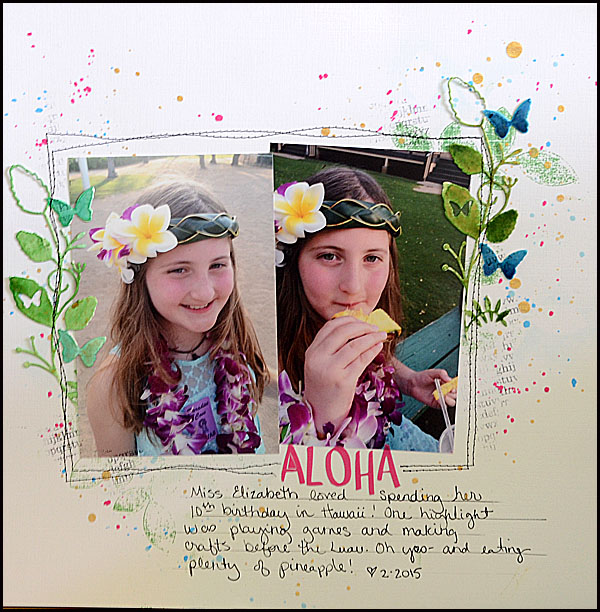
Here is my finished layout. To pull this all together I attached the previously watercolored dies, added some stitching, title, journaling, and I also stamped the new Simon alpha background stamp in a few places for added contrast. I just love how this turned out – and how quickly too!
Supplies Used:
 |
 |
 |
 |
 |
 |
 |
 |
 |
 |
 |
 |
Blog Candy Alert!! Follow our blog via email and comment on this post for a chance to win a special blog candy!
Congrats! Blog Candy Winners!
From: DIY Decor featuring Prima: Mary Holshouser!
From: Blending Night Skies: Helen LeBrett!
From: Spring Tim Holtz Thank You Card!: Joanna Ladesma!
From: And So The Adventure Begins: Laurie Black!
Please email Samantha ([email protected]) with your mailing address and the name of the blog you won from to claim your prize!
DIY Decor featuring Prima
Hi readers! Thanks for popping by today! We’re pleased to welcome back Prima queen and super designer Sharon Laakkonen as a guest on our store blog! She has another kiddo with wedding bells in his future and was inspired by the happy occasion to create this piece of art! Read on and enjoy!

My family is crazy big…which means we always have a lot going on! This year is no exception. My oldest son, Billy, is getting married in June to his sweetheart, Bethany! Our whole family has been busy crafting away for it.
Today’s DIY wedding project is by far one of my favorites yet…because it is FAST and EASY to create! And you can customize it to fit any color scheme or theme. (I might just make another one for my home!) Let’s jump right in!
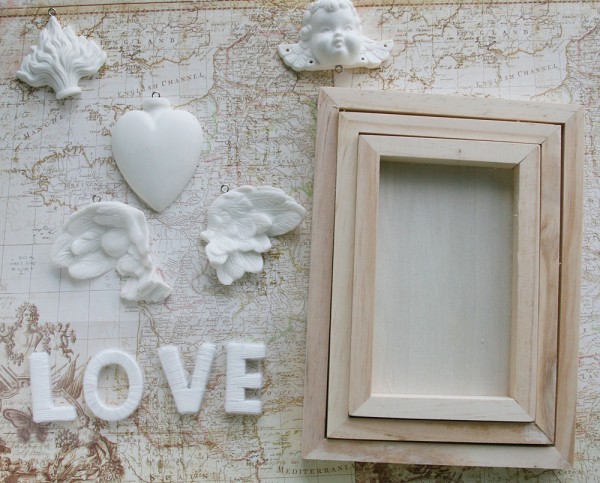
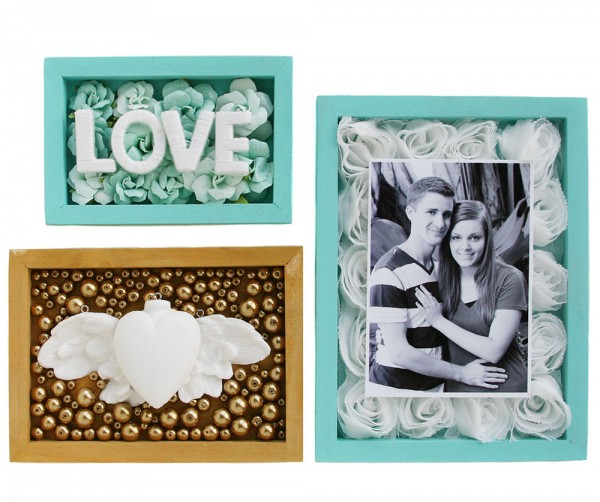
1. Start with Prima’s new line: Relics & Artifacts. These gorgeous cast pieces are ready for anything you want to throw at them, but you know what? They are absolutely beautiful unaltered too! I chose a few I thought would fit a “love” theme and grabbed the new wood frames to go with them. Then I started to play!
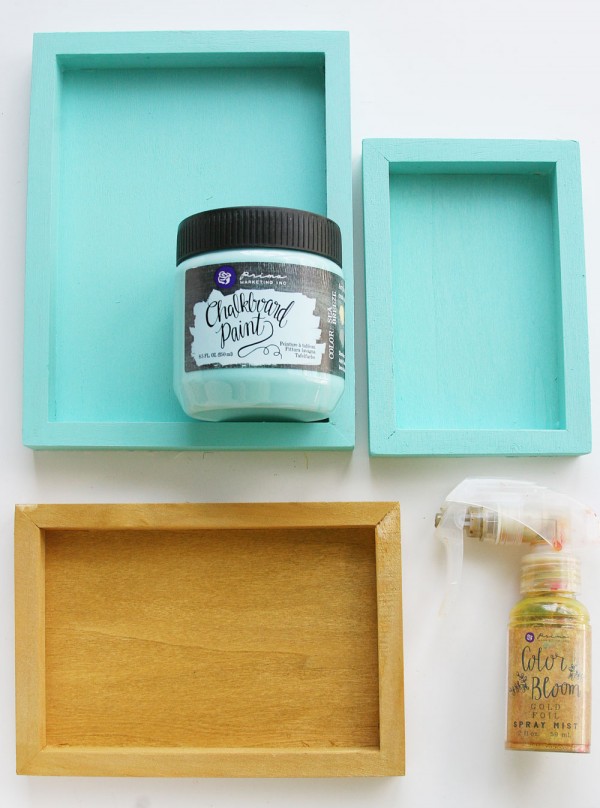
2. Once I narrowed down my Relics & Artifacts choices I grabbed Chalkboard Paint that matched their wedding colors…along with a Color Bloom spray in Gold Foil. I painted two frames with Sea Breeze paint, then sprayed the middle frame sparkling, brilliant GOLD! (I’m obviously smitten with Gold Foil as you can see by the heavily used bottle!) Dry all frames. (I only used one coat of paint on the frames as the chalkboard paint is quite thick.)
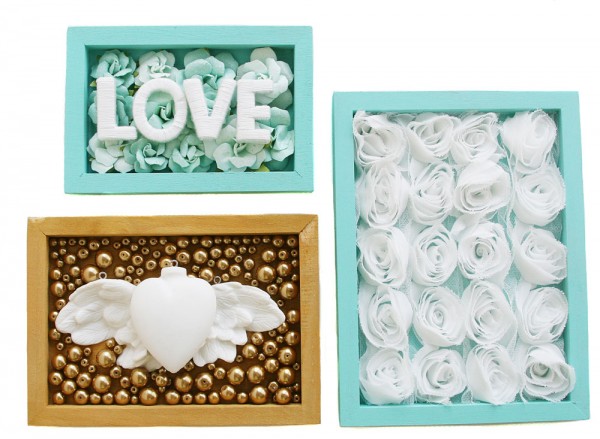
3. Now comes the FUN part! I chose a few Prima embellies that matched everything beautifully:
-
one pack of Isabella Roses (Nicia-581688)
-
Memory Hardware Glass Pearls (just pick out the gold ones! 990398)
-
a Bloom Girl Thread Word (LOVE-980474)
-
and the luxurious Memory Hardware Grande Rosette Trim (990466)
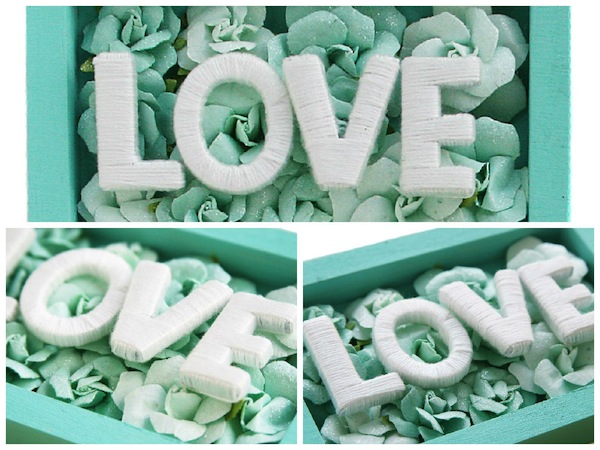
4. Add roses to smallest tray. Set letters on top. If letters do not rest evenly move flowers around. Adhere everything with hot glue.
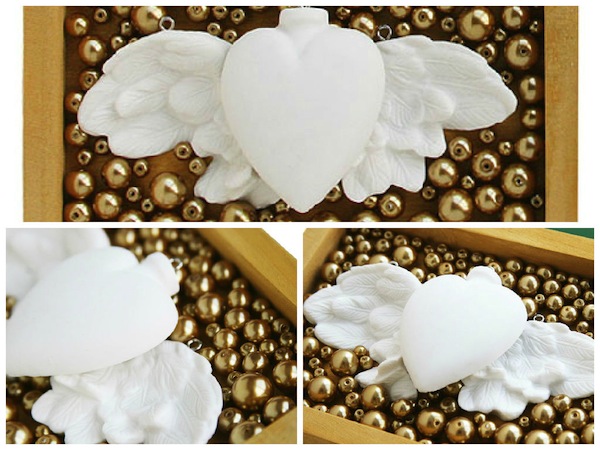
5. Add a thick layer of gel medium to the inside bottom of the tray. Set the wings on the gel. Brush gel medium on back of heart and set on top of the wings. Pour gold glass pearls in! (Save a handful of to fill in any spots left open.)
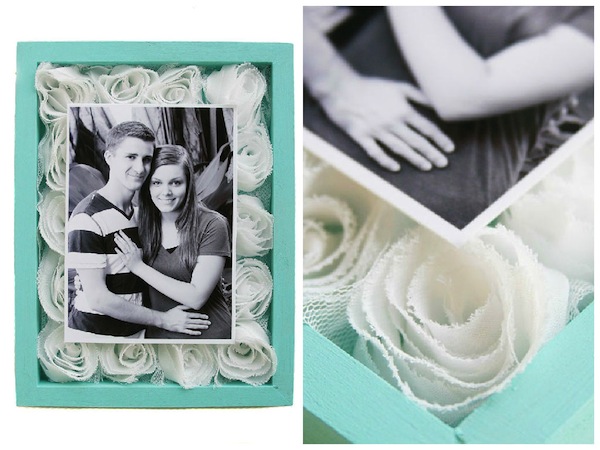
6. Cut four pieces of Rosette trim. (Each one will be 5 rosettes long.) Adhere to large tray. Print out a photo (3.5 x 5″) and adhere gently to top of trim.
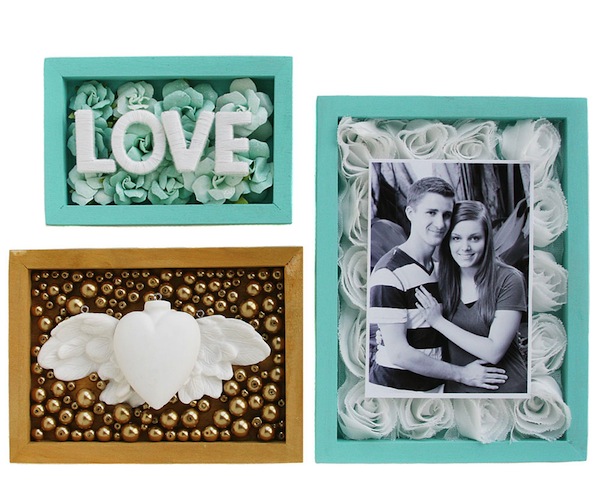
That’s it! It really is fast once you get going! And you can customize the frames with your favorite Prima embellies making this a really fun project! Just think of the possibilities: hang them to make a mini gallery wall, set on easels for a cute entry display, or give as a adorable wedding favors!

Thank you, SSS, for inviting me to create for you! It is always a huge pleasure!!! ~Sharon Laakkonen
SUPPLIES:
 |
 |
 |
 |
 |
 |
 |
 |
 |
 |
Blog Candy Alert!! Follow our blog via email and comment on this post for a chance to win a special blog candy!


