August’s Color of the Month Is…
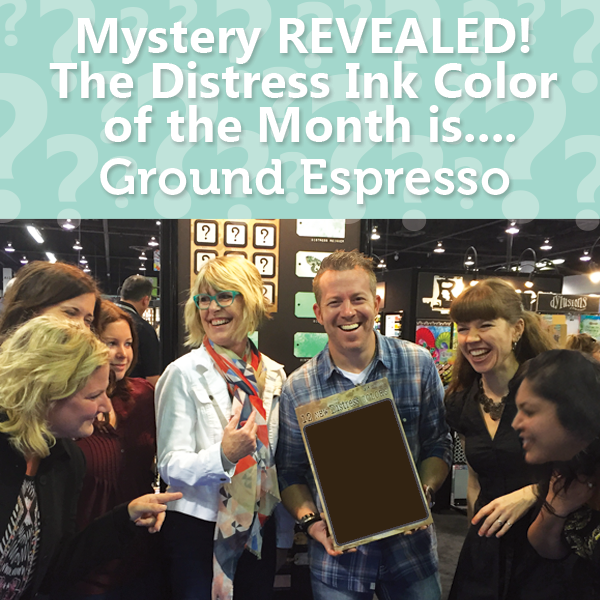
Hi readers! We’re happy to kick your August off RIGHT with a fresh new color from Tim Holtz & Ranger!
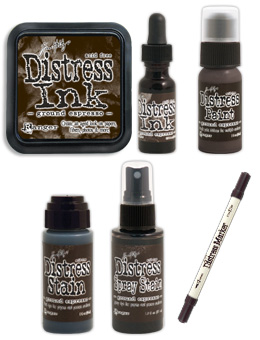
We hope you’re as excited as we are about this lovely color: GROUND ESPRESSO! You can reserve this color now, and it will ship at the end of the month!!
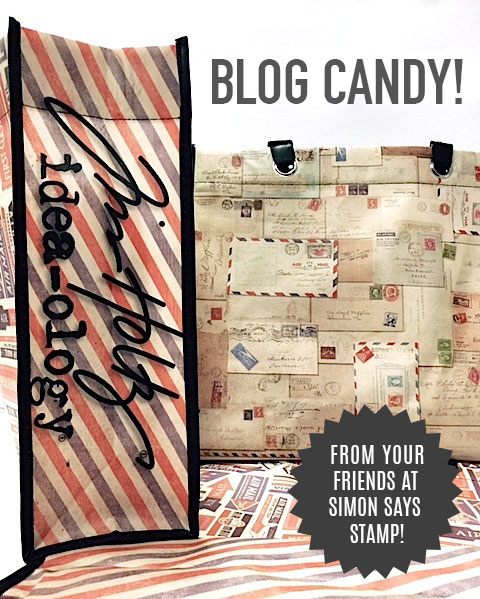
Blog Candy Alert! Is this color a must have for you? Comment your thoughts on this post for a chance to WIN a reusable Tim Holtz Idea-olgy tote bag! Good luck!
Beat the Heat with Cold Treats
Hi readers! Welcome back to our monthly feature with the fantastic Debby Hughes who shows us new and creative ways to stretch our crafting supplies! This month she’s tempting us with a sweet treat! This yummy looking treat reminded me of Neapolitan Ice Cream! Who’s hungry?!
Grab a snack, come back, and read on!
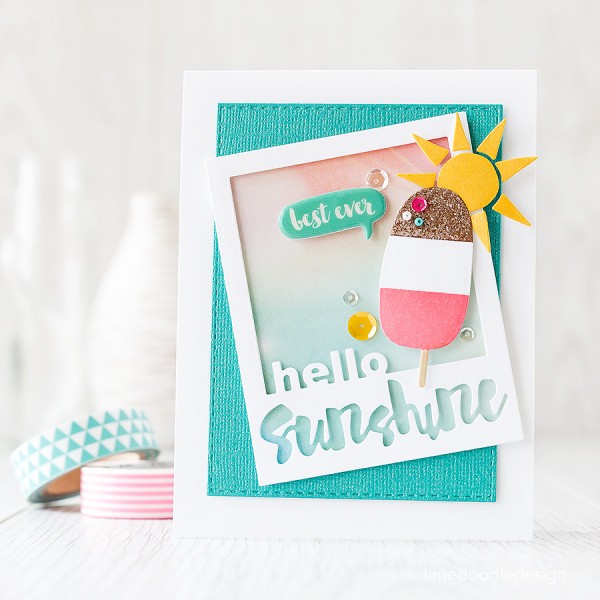
Hi Debby here, with a look at stretching those supplies. Last month I used the ice cream cone from Cone Building to create trees, well this month I’m turning the leaf/tree from the Nature die set in to an ice cream!
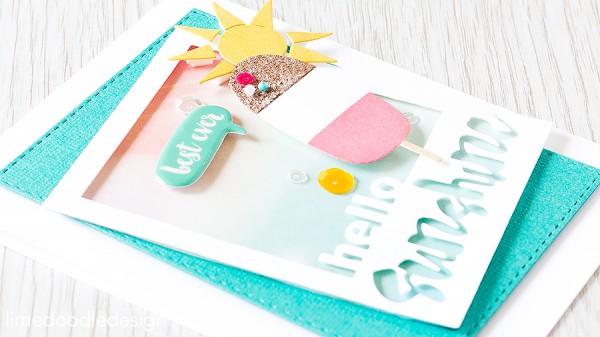
This is a really simple change to make – cut the die from white card, place a strip of washi across the middle, blend Dark Chocolate ink into the top, Hot Lips along the bottom with a touch of Khaki for the stick then remove the washi to reveal your lolly. Here in the UK we call this type of lolly a Fab and it has sprinkles on the top. Is that what you call them too? To represent the sprinkles I coated the Dark Chocolate area in Ranger Multi Medium Matte and dunked into Distress Glitter before adding a sequin and a couple of beads.
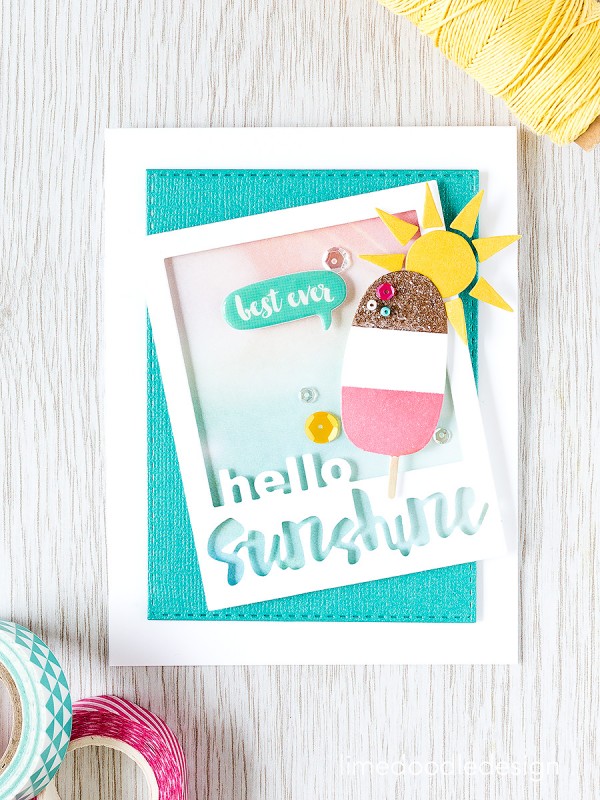
The lolly is mounted on a Hello Sunshine Frame cut from white card and mounted over a piece of Simple Stories paper from the August Card Kit. Also from that kit is an October Afternoon puffy sticker as well as the delicious Tropical Bay shimmer card cut with a Stitched Rectangle. I tucked in the sun from the Hello Sunshine Frame die set blended with Sunshine ink and finished off with a few sequins :D
Try letting your eyes wander over your supplies to see what else jumps out at you other than their intended use and really stretch your stash. Hope you are enjoying your summer and that the sun will still be with us when I’m back next month!
Supplies:
 |
 |
 |
 |
 |
 |
 |
 |
 |
 |
 |
 |
 |
 |
 |
 |
 |
 |

Blog Candy Alert!! Follow our blog via email and comment on this post for a chance to win a special blog candy!
Congrats! Blog Candy Winners!
From: Adorable Little Prima Book: Donna Rinckel!
From: Celebrate!: Carol Watson!
Please email Samantha ([email protected]) with your mailing address (if applicable) and the name of the blog you won from to claim your prize!
Adorable Little Prima Book
Hi readers! Happy Wednesday, and please join me in wishing our returning guest designer Sharon Laakkonen a very HAPPY BIRTHDAY! I hope it’s full of fun, laughter, and of course a delicious treat of your choice! Sharon has started playing with a mixture of brand new, coming soon, and existing Prima products to make this very fun Prima book that I’m sure she’ll fill with great memories!
Would you like to make your own?
First off I just have to say THANK YOU to SSS for inviting me again! It is always a huge honor, but this time it’s extra special because TODAY is my birthday! Woohoo! Okay, on to the project! I sure hope you like it!
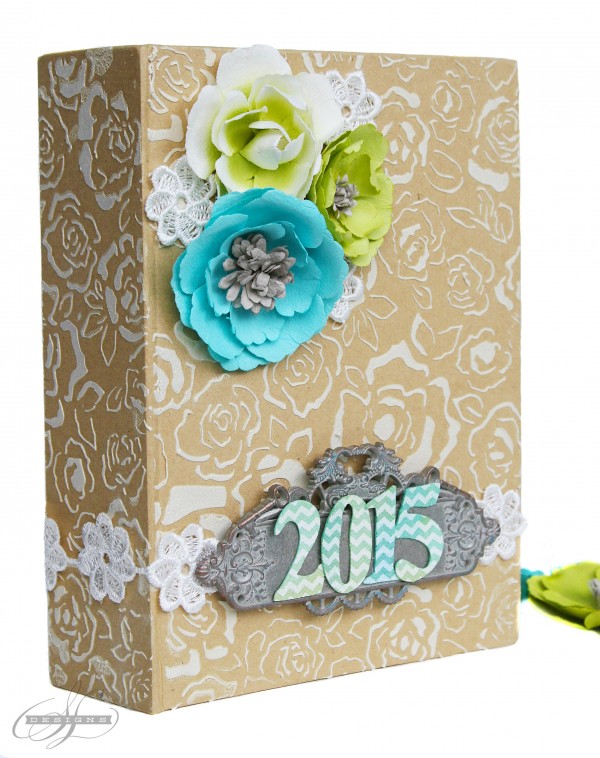
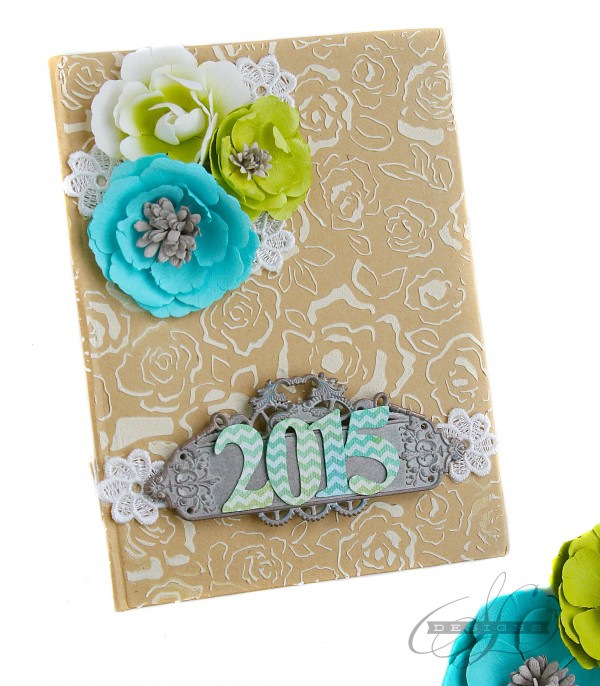
Planners and journals are all the rage right now and while I LOVE those out on the market I always like to make something unique for myself! When I received a sampling of Prima’s new summer releases I instantly fell in love with the Memory Hardware Tall Journal Book (Coming SOON to Simon Says Stamp!). It is the PERFECT size (about 5″x7″) for a journal or planner…and for slipping into my purse!
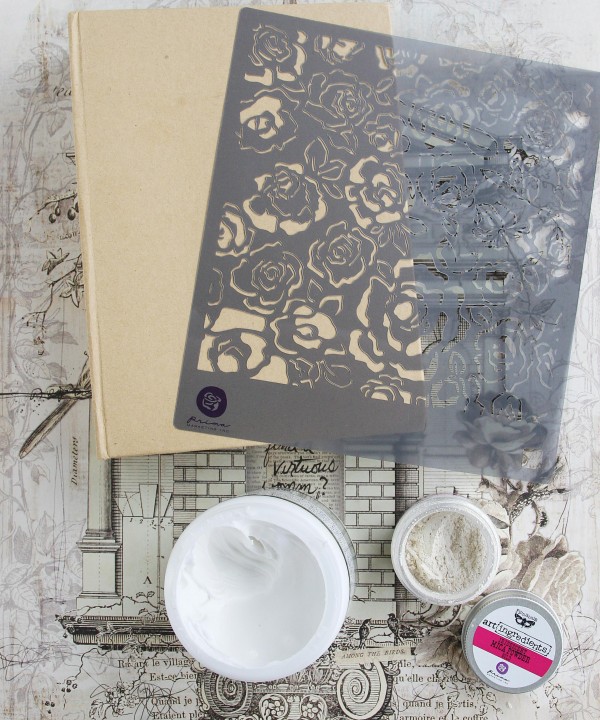
My vision for this project included a touch of mixed-media, but it also had to be fast and easy to do. (Hey, according to my schedule I just didn’t have ALL day to play like I wanted to!) So, I pulled out my favorite Art Basics product, Light Paste, and mixed in a touch of brand-new Art Ingredients Iridescent Mica Powder in GOLD! Who doesn’t love gold right now? Just mix it up until you love the color, then spread over the stencil with a palette knife.
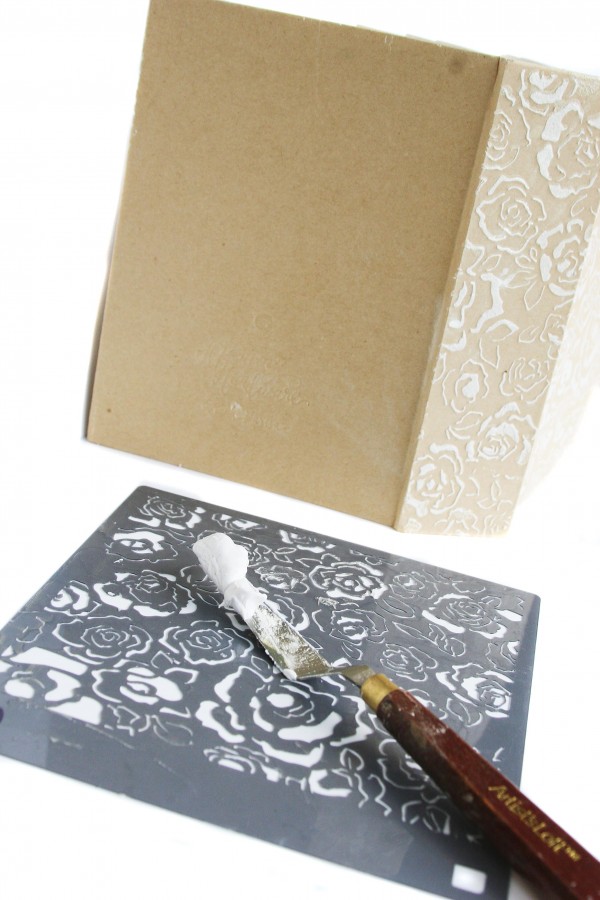
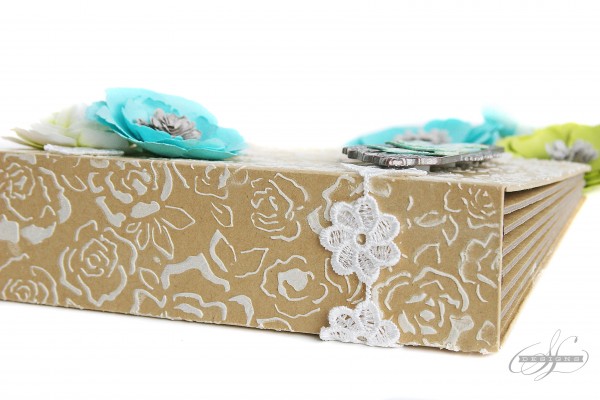
Loving this stencil? So am I! It’s a brand-new one filled with gorgeous roses. It is only 6×6 so I completed one layer on the book. Let it dry a bit. Then spread more colored paste over the stencil to completely cover the book. Now, if you mess up it’s okay! I have a pretty noticeable smudge line on the front. So the lesson of the day is…start on the BACK until you perfect your technique..then move to the front. Yours will be so much better than mine!
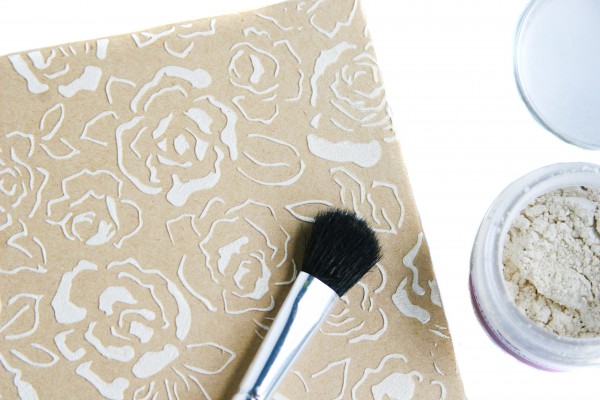
Once everything was ALMOST dry I dry-dusted a touch of Mica Powder all over the book. I love that the mica clings to the paste and makes it extra sparkly! (You could wait until it is totally dry to do this step so you don’t smudge the paste. Just seal with a matte spray sealer or hairspray afterwards. Yes, hairspray works as a sealer, and we ALL have some Aqua Net lying around, right?)
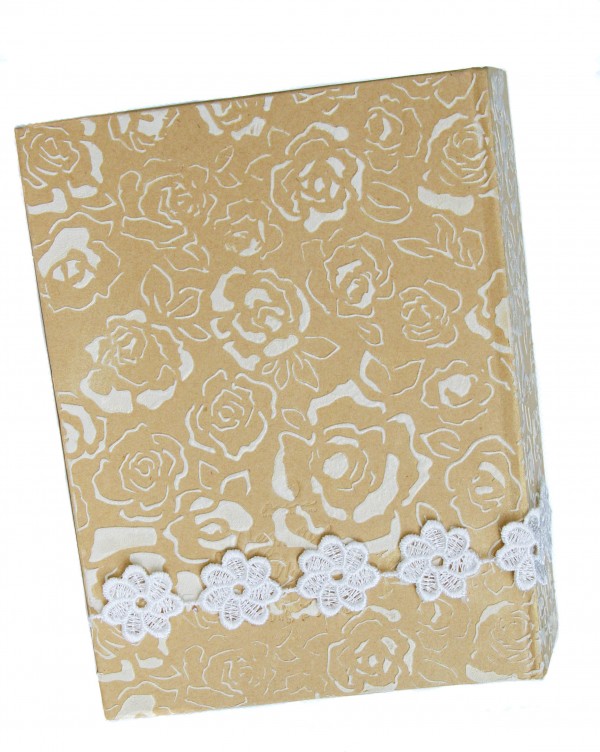
Next step: add a gorgeous new Prima trim along the paste seam. It will cover up all imperfections and add a gorgeous, shabby-chic touch to your project! (Back shown here.)
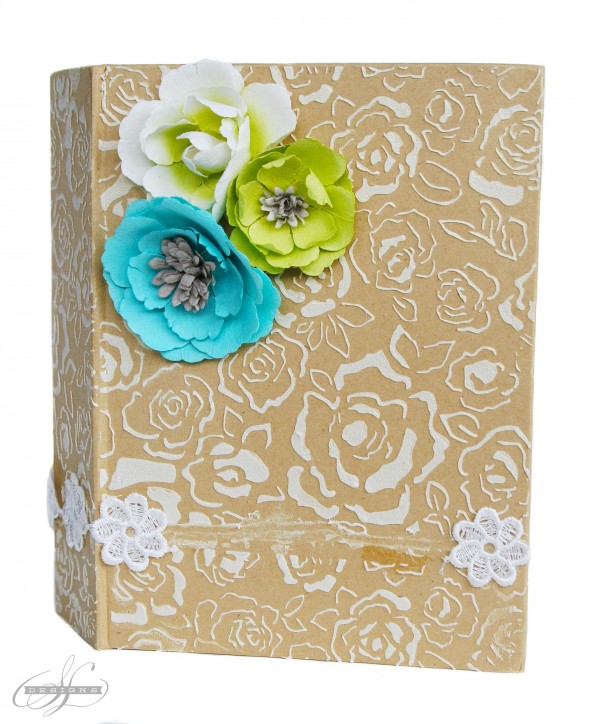
On the front I only added a few lace flowers as I knew I wanted a metal label as well! And find some gorgeous Prima flowers in your favorite colors and glue a cluster of them in the top left corner.
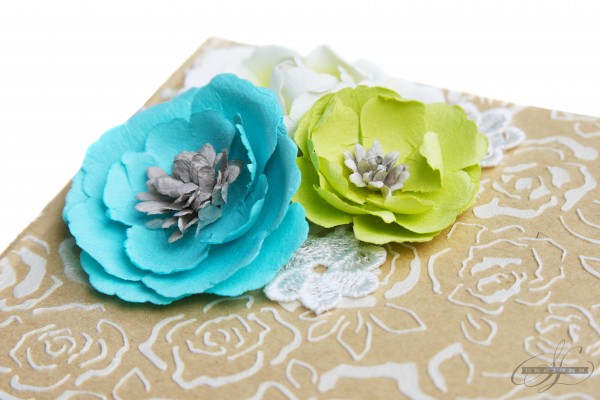
Cut three lace flowers off and add to the flower cluster for extra texture. I love how it adds cohesiveness by carrying the lace trim through-out the project as well.
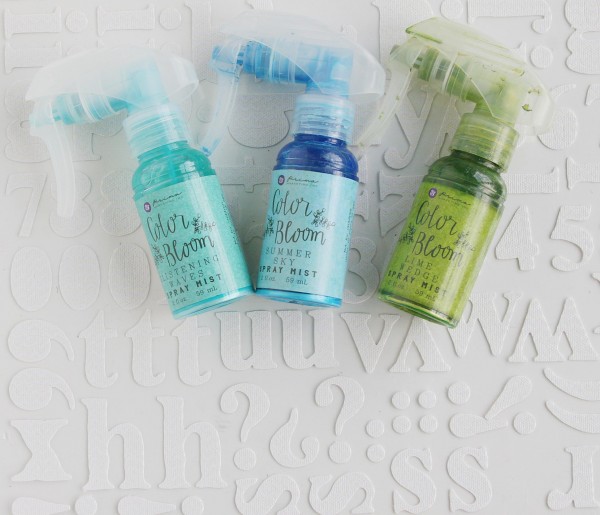
I struggled a bit with my title, but decided to go with “2015”…it’s perfect for a planner title…or I may just turn this little book into a highlight of my extra busy and crazy year! Prima’s resist canvas alphas added the perfect touch once I colored them to match my flowers. How? I pulled off the numbers I wanted to use; sprayed Lime Wedge, Glistening Waves, and Summer Sky here and there to cover the letters; wiped them gently with a wet wipe so the pattern showed through; then let them dry.
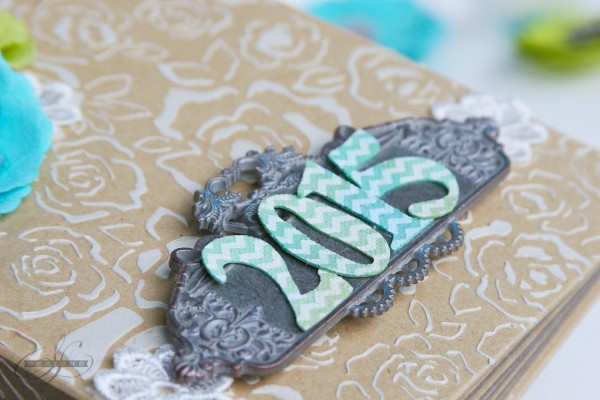
Pop on the new metal plate with foam squares and glue your numbers on top!
In about one hour I customized my own little book! Now all I need to do is add some photos and memories inside for a really fun year-in-review! Or should I make it a planner after all? I REALLY need one! Decisions. Decisions! What do you think I should do?
Thank you, SSS, for inviting me once again to join you! Your readers are the BEST! I just adore reading all the comments they leave! ~Sharon Laakkonen
SUPPLIES:
 |
 |
 |
 |
 |
 |
 |
 |
 |
 |
 |
 |
 |
 |
 |
Thanks for reading today and thanks to the always awesome Sharon for being our guest!
Blog Candy Alert!! Follow our blog via email and comment on this post for a chance to win a special blog candy!


