Emboss for Christmas like a BOSS.
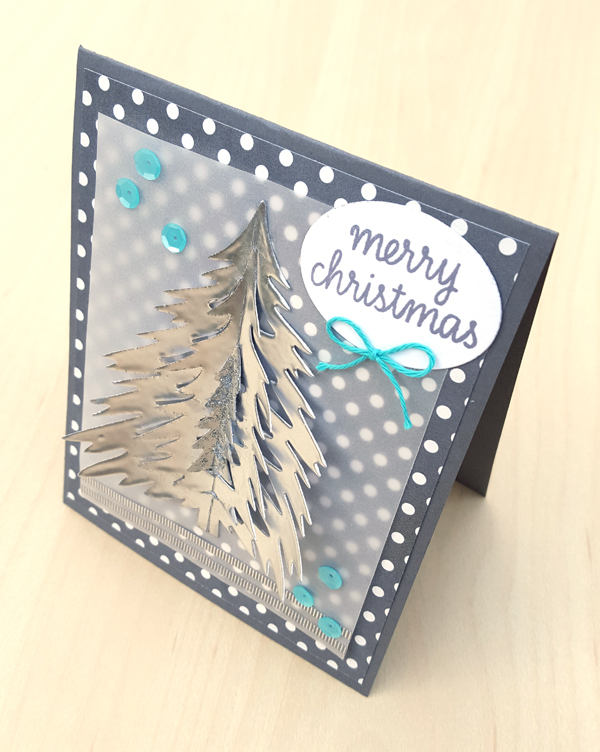
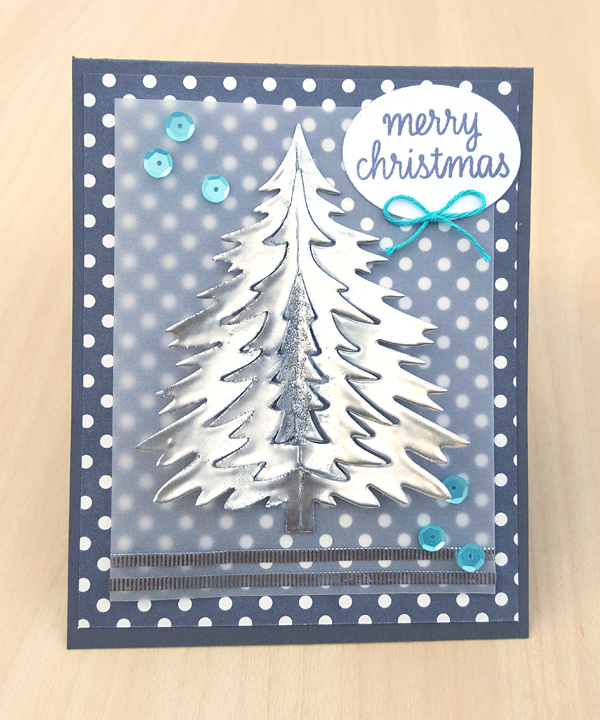
Hi! I’m really thrilled to be a guest here for the first time today! And I wanted to share one of my favorite things from the Hero Arts holiday collection – this Paper Layering Christmas Tree die! The die looks like a half tree – you can cut it twice, once on the front of your paper, then again on the back, to create a full tree. I love the dimension it brings to my card! I embossed the entire tree with Hero Arts silver embossing powder. A little bit of Bo Bunny Silver Glitter Paste was added to the center tree for extra sparkle.
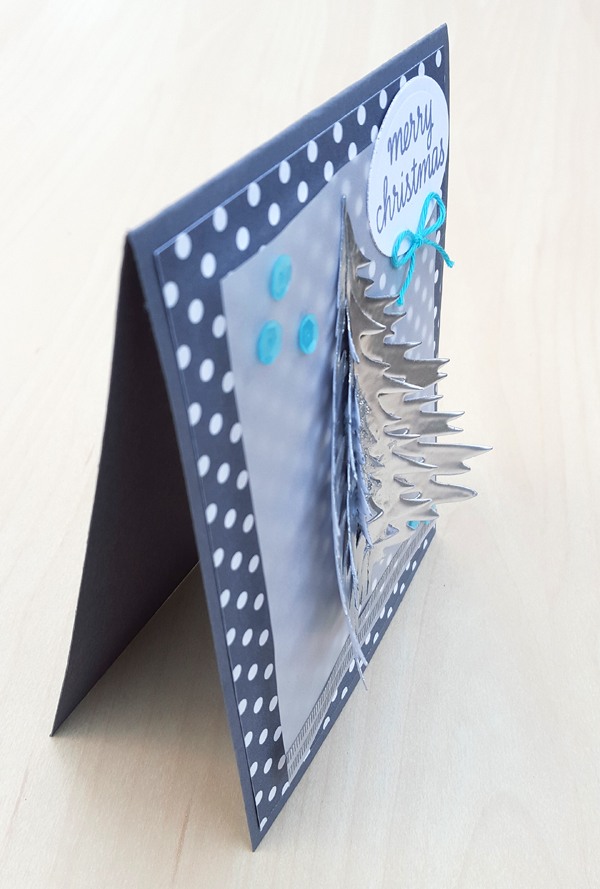
The tree is mounted on vellum, which is on top of Echo Park Dots & Stripes paper. I love the font of the “Merry Christmas” greeting from the Hero Arts Color Layering Wreath set. I inked it up in gray using Kelly’s Urban Inks. A few sequins finish off the card.
SUPPLIES:
 |
 |
 |
 |
 |
 |
 |
 |
 |
 |
 |
 |
 |
 |
 |

Blog Candy Alert!! Follow our blog via email and comment on this post for a chance to win a special blog candy!
Congrats! Blog Candy Winners!
From: Winter Gratitude: Joanna Ladesma
From: Happy Thanksgiving! We’re Giving Thanks for YOU!: Angie Hall, Laura Capote, and Charity Chamerlain!
From: Misti Marbling Technique: Anne Sturgeon!
From: Tim Holtz Christmas Flip Frame!: Rebecca Yahrling!
Please email [email protected] with your mailing address (if applicable), the name of the blog you won from, and the prize you won to claim your prize!
Don’t forget! Special Sale Going on NOW!

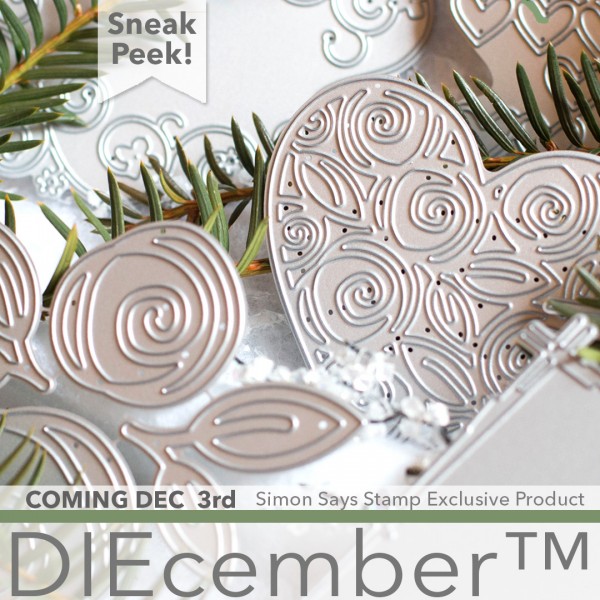
Stay tuned for our EXCLUSIVE DieCember release that will go LIVE on Thursday, December 3rd!
Want a sneak peek?
Tim Holtz Christmas Flip Frame!
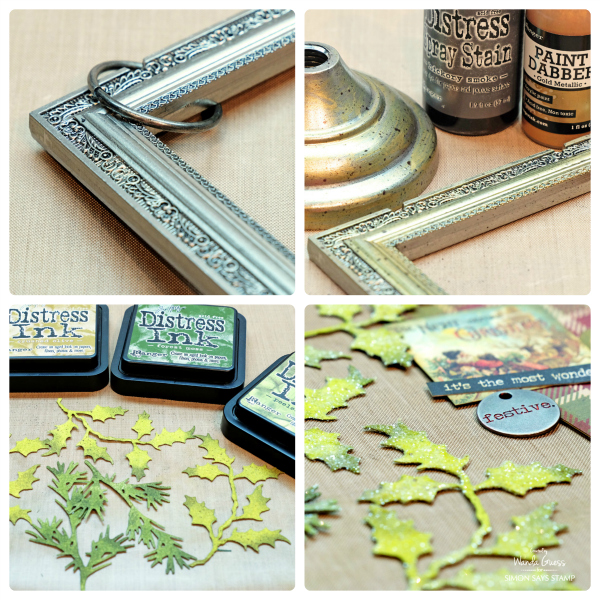
Happy Christmas-time! Nice to have you joining us on the Simon Says Stamp blog today! I’m sharing a super fun home decor project today, made with Tim Holtz supplies. It’s a project I’ve been wanting to make for a long time, and I’m really excited to share it with you. I used the fabulous Tim Holtz Flip Frame to make a Christmas decoration piece for our fireplace mantle. For this project I had ink and paint and stamps and ribbon flying everywhere! I hope that I will inspire you to make a project like this too.
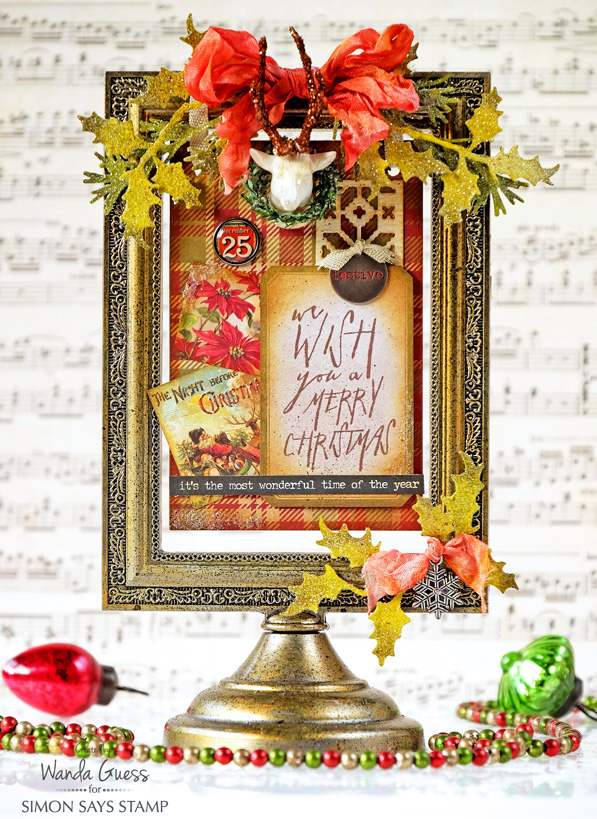
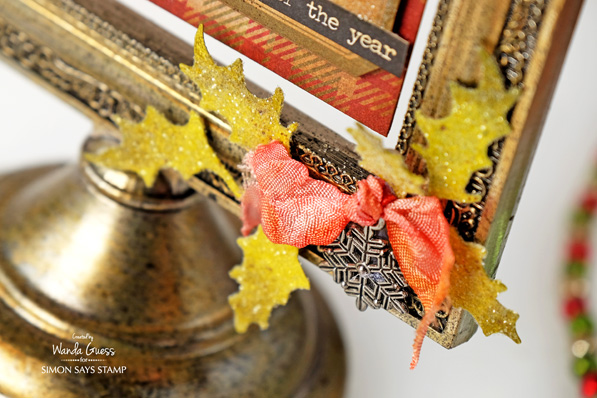
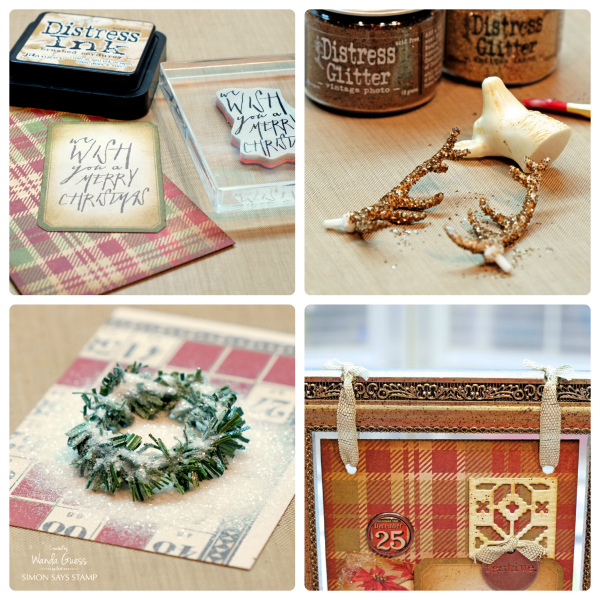
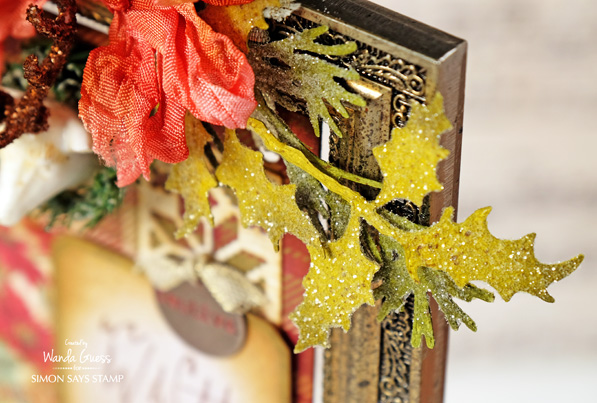
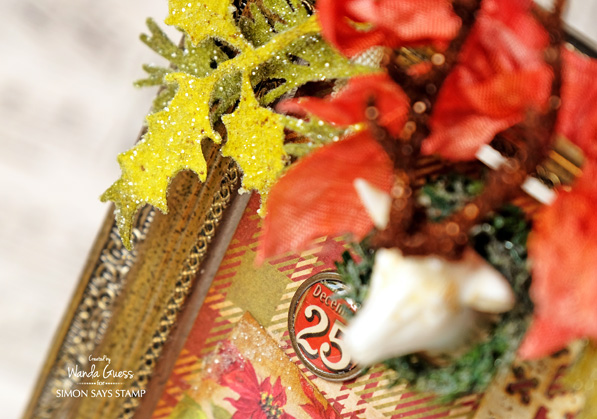
Almost every piece of this project has yummy Rock Candy Distress Glitter on it! I used the Holiday Greens Dies to cut out bunches of holly and pine boughs for decorating my piece. Here you can see I dyed my own Crinkle Ribbon and added a Snowflake charm for a little accent in the corner. This photo also shows a close up of how the frame and stand came out.
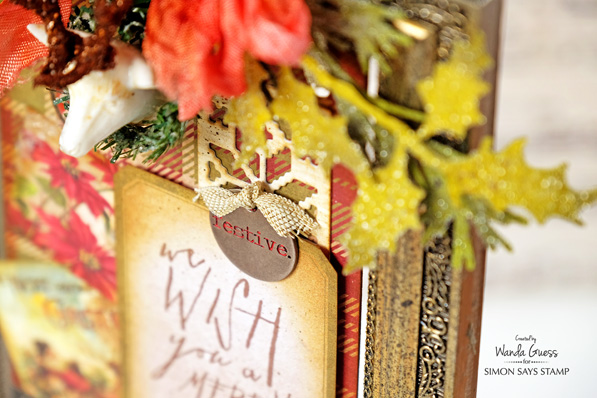
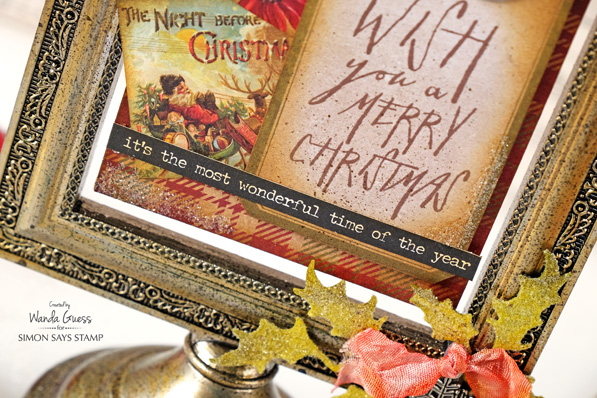
These Trophy Antlers are awesome! I glittered the antlers with Distress Glitter. Here is a close up of the ‘festive’ charm and the Holiday Knits Die cut. This project can be whatever you want it to be! Clean and Simple, or lots of layers. Just have fun with it and experiment. The frame holds a piece of paper that is 3.25 x 5 inches so it’s really like making a card! I crammed a lot of good stuff in that small space. I stamped my sentiment with the Mini Handwritten Holidays stamp set and edged the label with Distress Ink and a sponge.
I used the Small Talk – Occasions stickers pack for the black and white strip at the bottom. The rest is bits and pieces of papers cut from the Yuletide Paper Pad.
The frame comes out of the box silver – and it’s very pretty. For my frame, I felt like I wanted warm gold tones. So, I took some Ranger Gold Paint and randomly put the paint over the silver frame just using my fingers. I dried the paint with my heat tool and then rubbed some off. The end result is a frame that is silver and gold. I also took some Spray Stain and ‘speckled’ the frame and the stand. I die cut my Holiday Greens dies from watercolor paper and inked them with beautiful shades of green Distress Inks. Then I added loads of Rock Candy Distress Glitter. Glitter makes everything better!
In this photo collage you can see my stamping and the bottom piece of paper – which is plaid. I adhered the paper to a piece of chipboard to give it some more weight. I glittered the antlers and inked both pieces of them. I added glitter to the Pine Bough that went around the trophy. The flip Frame comes with rings to place your piece together. I chose to use some metallic ribbon because I liked the extra touch of shimmer. There is no end to the possibilities with this project!
The rest of the photos show some close ups of the different elements.
I love anything that looks vintage for Christmas! No one does that better than our friend Tim Holtz. I love that he gives us so many products to mix and match together and release our own creativity. Have a wonderful day!
SUPPLIES:
 |
 |
 |
 |
 |
 |
 |
 |
 |
 |
 |
 |
 |
 |
 |
 |
 |
 |
 |
|
|
 |
 |
 |
 |
 |
 |
 |
 |
|
 |
 |
 |
 |
 |
 |
 |
Blog Candy Alert!! Follow our blog via email and comment on this post for a chance to win a special blog candy! Remember to tag your Christmas projects with #simonsaysstamp on social media so we can see what you are creating this holiday season!

Happy Cyber Monday!
Happy Cyber Monday! We have a very special collection of exclusive dies that will be revealed in full on Thursday, December DieCember® 3rd! We can’t wait to show you the whole reveal, but, in the meantime, we have a nice variety of fabulous dies that you will get at least 50% off of when you use code DIES at checkout!
Be sure to check out the Die Sale Category to view this fabulous selection of dies on sale now!


