Are You Ready for the Holidays?
Christmas is just days away and this week on the Monday Challenge we’re having a Holly Jolly Stamping Time and creating cards, gifts and decorations in preparation for the big day! Have fun stamping!
Once you have made your creation just go ahead and upload it into the linky on the Simon Says Stamp Monday Challenge blog! We can’t wait to see what you make!
As always, we’re offering a chance to win a $50 Gift Voucher to Simon Says Stamp! 
Below are three projects created by the design team, that showcase this weeks theme! You can visit the challenge blog to get all the details and see the amazing cards and projects that the design team has created this week. If you click on each designers name, you’ll be taken directly to their blog where you’ll get more details about their project! Be sure to give these talented ladies some comments!
Andrea Ockey Parr created a lovely holiday tag featuring many of Simon’s own products.
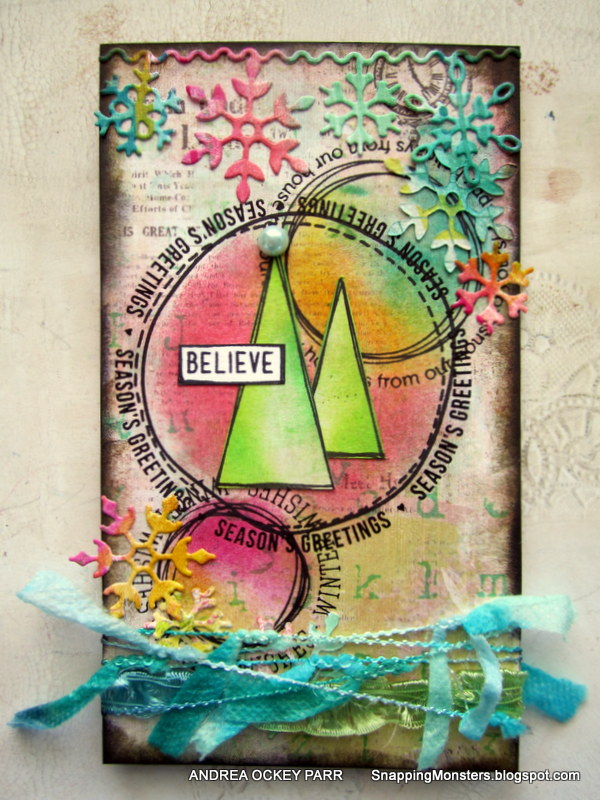
Andrea used:
 |
 |
 |
 |
 |
 |
 |
 |
 |
 |
 |
 |
 |
 |
Emma Williams is excited that Santa is on his way!
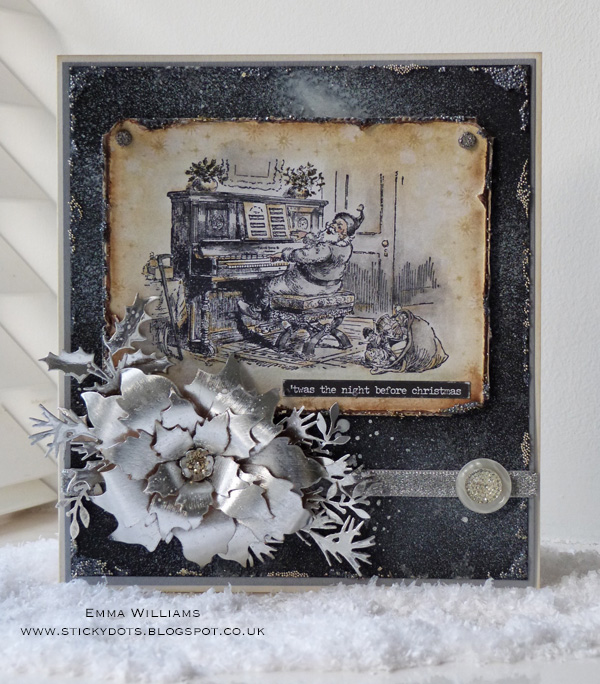
Emma used:
 |
 |
 |
 |
 |
 |
 |
 |
 |
 |
 |
 |
 |
 |
Maura Hibbits is thinking of sweet slumber on a winter night.
Maura used:
 |
 |
 |
|
 |
 |
Follow Simon Says Stamp on Instagram

Do you use Instagram? If so please add #sssmchallenge to your challenge entry uploads so we can see them on there too!
Blog Candy Alert!! Follow our blog via email and comment on this post for a chance to win a special blog candy!

Congrats! Blog Candy Winners!
From: Meowy Christmas: Kristina Pavlovic!
From: Debby Hughes’ Creative Uses: Sherisse A!
From: Weekender with Wanda – Memory Box Spotlight!: Rebecca Yahrling!
From: December’s Color of the Month Is…: Debbie Siddle!
From: NEW RELEASE: DieCember 2015 – Not Your Typical Blog Hop: Jennifer Cassista!
From: Limited Edition Holly Jolly Christmas Kit Is Available Now!: Brenda Lubrant!
From: Thank You Card Idea: Denise Bryant!
From: We’re Dreaming of a White Christmas on the Wednesday Challenge: Carey Nusbaum!
From: Emboss for Christmas like a BOSS.: Celeste Goff!
Please email [email protected] with your mailing address (if applicable), the name of the blog you won from, and the prize you won to claim your prize!
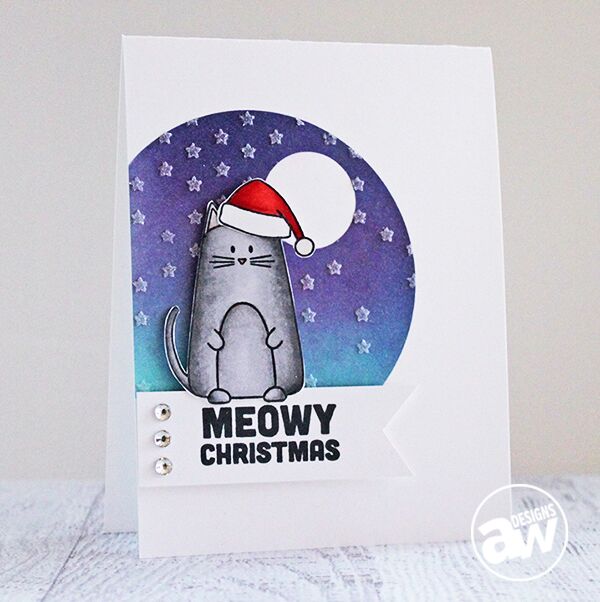
Meowy Christmas
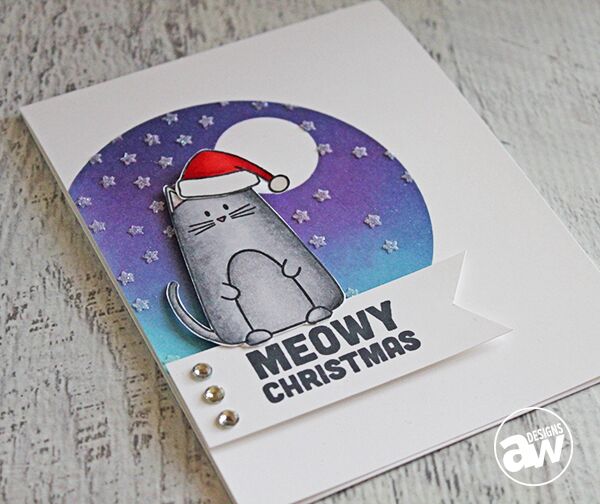
Hi readers! Happy Monday! We’re delighted to welcome back Andrea Walford of Paper Crafter’s Library as a guest on our blog today! She’s made an adorable Falling Stars starry scene with our super cute exclusive Christmas Cats stamp front and center! Love the textured stars? Just add translucent embossing paste and clear glitter!
Watch the video:
Supplies:
 |
 |
 |
 |
 |
 |
 |
 |
 |
 |
 |
 |
 |
 |
 |
 |

Blog Candy Alert!! Follow our blog via email and comment on this post for a chance to win a special blog candy!
Debby Hughes’ Creative Uses
Hi readers! Happy Sunday! I think you’ll be surprised at the supplies list for this card. I sure was! Debby Hughes is back with her very fun and popular Creative Uses post! I think you’ll find today’s inspiration to be out of this world!
Read on…. enjoy!
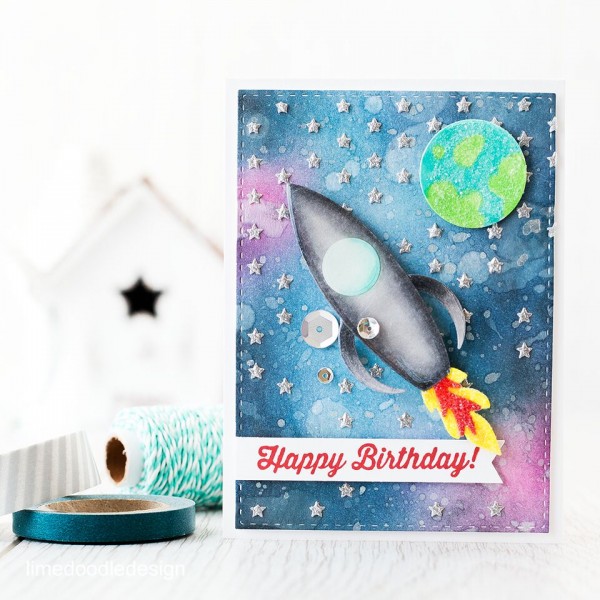
Hello, Debby here with my monthly look at stretching your supplies. I think more than any time of year, getting the most out of your holiday supplies is key. We buy sets for a certain occasion or season and shouldn’t put them away afterwards but look how they can be used all year round.
I took the surf board from the Warm Christmas Wishes die set and turned it in to a rocket. Firstly I gathered all the shapes I needed – the surf board as the main body of the rocket, parts of the Circle Loops dies as rocket wings, Tattered Poppy leaves as flames, a window from the sports balls set and I also used another circle from this set for the Earth. Having cut all the pieces from Neenah Solar White card I then colored them with Copics. I accented the die cuts with Rock Candy Distress Glitter on the Earth and flames and covered the rest of the rocket in Glossy Accents then put them to dry while I worked on the background panel
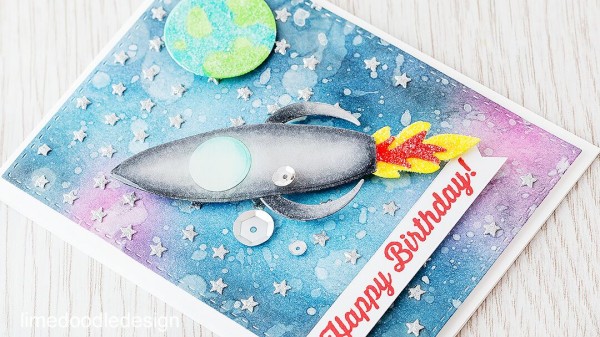
Taking a piece of Neenah Solar White I blended in Distress Inks (Spun Sugar, Seedless Preserves, Broken China, Stormy Sky & Black Soot) then sprinkled the panel with water and dabbed off with a tissue to remove some of the color. I also splattered the background with a solution of Perfect Pearls. With the galactic sky starting to take shape I turned to a technique I’ve not used for a while but love – swiping embossing paste through the Falling Stars stencil and then, while still wet, sprinkling on silver embossing powder before heat setting. This gives fabulous texture and dimension to the stars :D
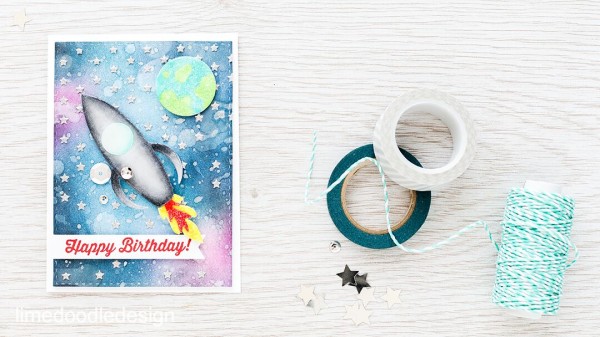
To finish off the card I mounted the die cuts on the panel with foam adhesive and in turn the panel on a top folding card base. The sentiment from More Sketchy Banner Greetings is stamped in Lipstick Red, trimmed in to a banner and again foam mounted. The last touch were a few sequins. I always love to add sequins, but they are also great to cover up a mark in glossy accents if you failed to leave it dry long enough and touched your finger to it ;)
I hope you take a look at your autumn and holiday supplies to see uses for them other than those intended :D
Supplies:
 |
 |
 |
 |
 |
 |
 |
 |
 |
 |
 |
 |
 |
 |
 |
 |
 |
 |
|
 |
 |
 |
 |
 |
 |
 |
 |
Thanks for reading today, and thanks to the amazing Debby for being our guest today!
Blog Candy Alert!! Follow our blog via email and comment on this post for a chance to win a special blog candy!


