Creative Uses with Debby Hughes: Carrot Top Tulips!
Happy Wednesday all! I’m always pleased to welcome back the fabulous Debby Hughes to our blog as a monthly guest where she uses her Simon Says Stamp exclusives in an always fun and creative way! Let’s jump in and enjoy!

Hello, Debby here and today I’m searching out flower shapes from among my supplies to create this soft and subtle tulip card from carrot tops! I think particularly with dies it can be surprising to look and see so many shapes intended for other purposes but which can represent a flower. I used two different carrot tops for these tulips. The flower is the carrot top from Springtime Shapes whereas the stem is from Plush Little Carrot and I added in leaves from the Plush Springtime Chicken die set.
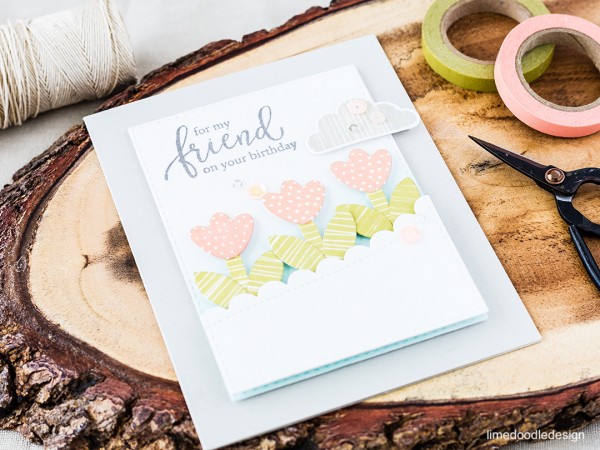
I cut the dies from Pattern Swatches stamped in Apricot and Catkin inks and then mounted them on a Stitched Rectangle with a little Sea Glass ink blended in. I also cut another Stitched Rectangle partially die cut with a Wavy Scallop Stitches die to act as a hill to ground the tulips.
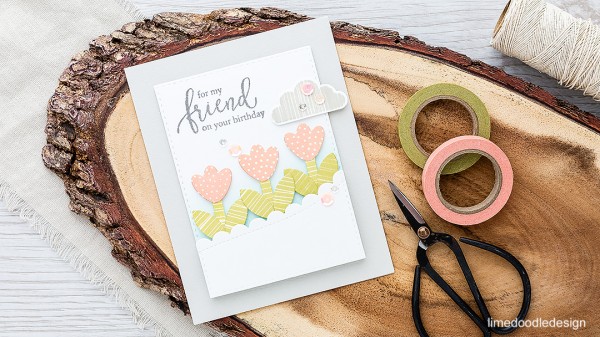
The sentiment is from Friendship Blooms and then finally I added a cloud from the Cloudy Skies set stamped in Fossil which I think tones in really nicely with the Fog card base.
Thanks for joining me today and I’ll see you next time with another look at how to make the most of our supplies :D
WATCH THE VIDEO:
SUPPLIES:
 |
 |
 |
 |
 |
 |
 |
 |
 |
 |
 |
 |
 |
 |
 |
 |
 |
 |
 |
 |
 |
Thanks for reading today, and thanks to Debby for being our guest!

Blog Candy Alert!! Follow our blog via email and comment on this post for a chance to win a special blog candy!
Birthday Shaker Card
Hi readers! Thanks for stopping by today. We’ve got a great card sample from the fabulous Lucy Abrams! Aren’t her sequin packs just over the top GORGEOUS? She even incorporated some fun paper piecing to make this adorable Birthday shaker card. Care to give it a try? Read on!
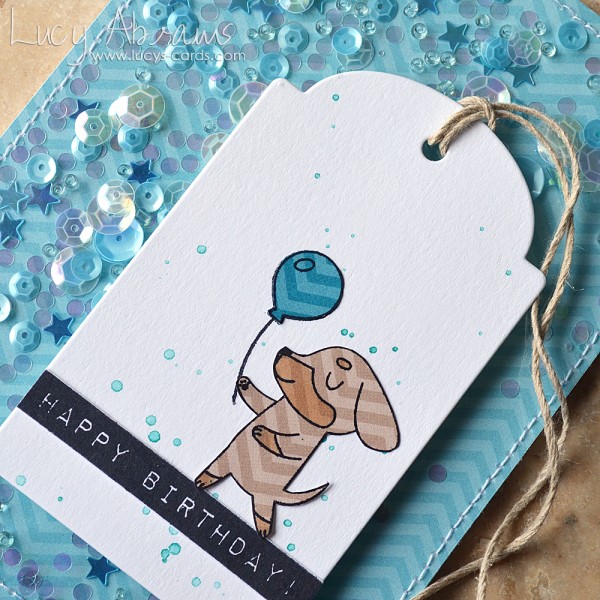
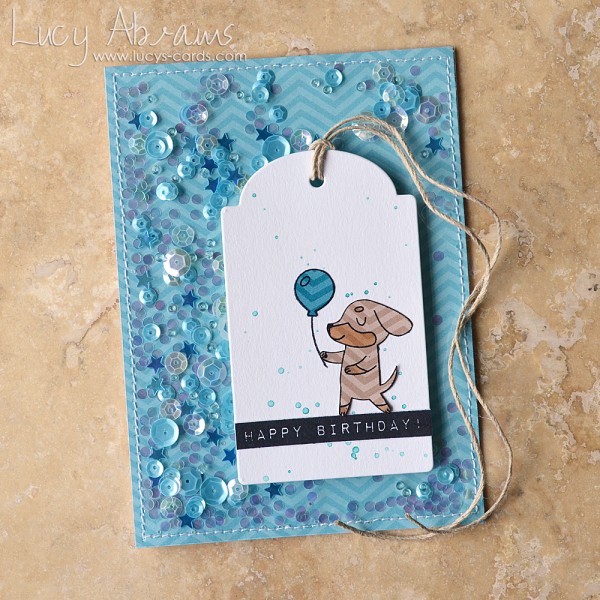
Hi. Today I have a fun birthday shaker card to share with you. To make my card, I first stitched a sheet of acetate to some MFT chevron patterned paper, leaving an opening at the top. I filled the pocket with Lucy’s Cards Lagoon Sparkly Shaker Selection, then stitched up the gap and adhered the shaker pocket to a folded card. Next, I die cut a Large Tag from some Hero Arts Letterpress paper, then splattered with some Peacock Feathers Distress Ink mixed with water.
I stamped the dog and balloon from Hero Arts Party Time by Lia set on more chevron papers, and fussy cut them out. I stamped the balloon again on the tag, then paper pieced the chevron balloon on top and added the dog. Finally, I stamped the sentiment from Simon Says Stamp’s Birthday Flowers set on white card, cut it out and added to the tag. After threading the tag with some Lawn Fawn cord, I adhered it to the card with foam tape. Thanks so much for visiting – I hope you enjoy your day.
SUPPLIES:
 |
 |
 |
 |
 |
 |
 |
|
|
 |
 |
 |
 |
 |
 |
Thanks for reading today, and thanks to Lucy for this fun idea!
Blog Candy Alert!! Follow our blog via email and comment on this post for a chance to win a special blog candy!
Congrats! Blog Candy Winners!
From: Studio Monday with Nina-Marie: Watercolor Stenciling: Kate Dykstra!
From: Combining Lawn Fawn Stamp Sets in Cardmaking: Berina Febin!
From: Weekender with Wanda – Avery Elle Spotlight!: Jeanie Gregory!
From: One Stamp Set… multiple design ideas!: Helen Gullett!
From: WPlus9 Watercolor Bleaching: Terry York!
From: Tim Holtz April 12 tags with a Bright Twist: Kathy Schewinfurth!
From: Ready to Try Something Magical?: Lagene Sands!
Please email [email protected] with your mailing address (if applicable), the name of the blog you won from, and the prize you won to claim your prize!
Studio Monday with Nina-Marie: Watercolor Stenciling
Hi friends! Happy Monday! Welcome back to our weekly Studio Monday with Nina-Marie feature! I hope you are enjoying our subject matter so far! If you have anything you’d like to see from us, please feel free to leave it in the comments below and we will definitely put it into consideration! For now, please enjoy the beauty of this post, and be sure to check out the video!
Enjoy!
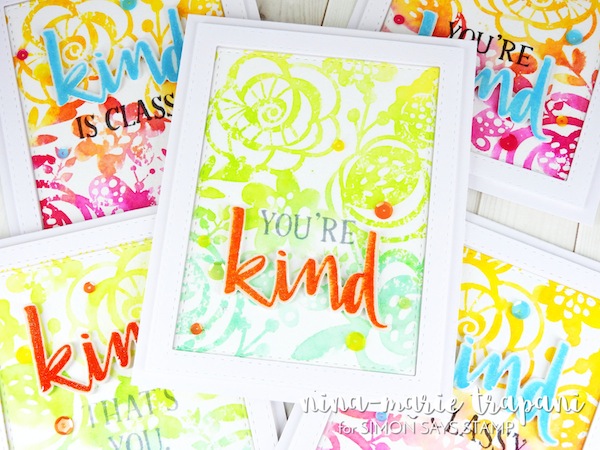
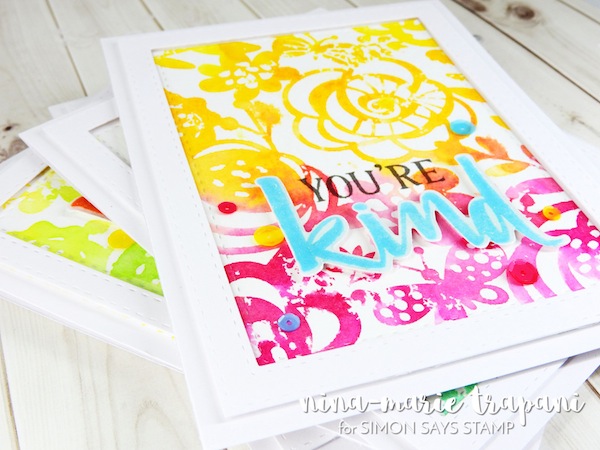
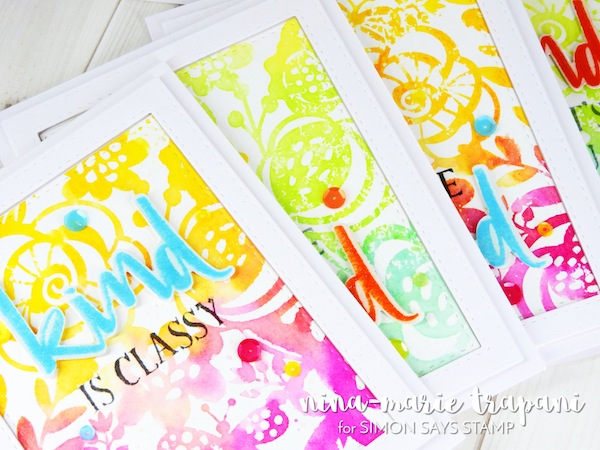
Hi there, it’s Nina-Marie here today with another Studio Monday video for you! I love creating watercolor effects with my distress inks, and I’m sure most of you here do too! But sometimes we need a card (or multiple cards) in short notice, and we often think we cannot do more involved techniques like watercoloring because of the amount of time it takes.
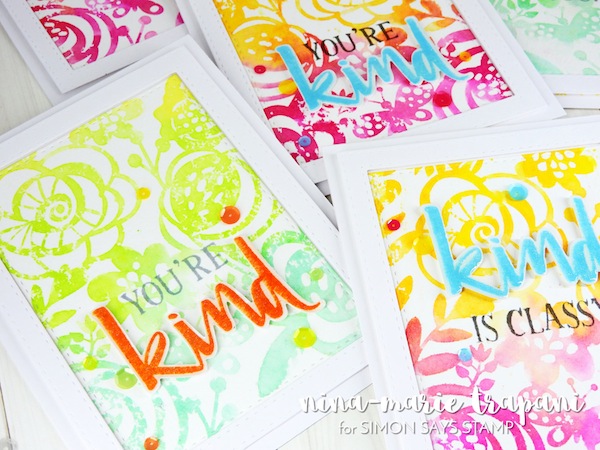
In today’s video I am going to share with you a watercolor background technique that was created with just a few distress ink colors and a stencil! I ended up making a total of five cards using this technique in just a couple hours… making this a perfect design for quick and easy cards!

I used the new Hero Arts Bold Floral stencil for the watercolored backgrounds on each of these cards… the artistic design of this stencil made it a perfect fit for the cards I wanted to create. However, you can easily swap out this stencil for just about any other stencils you have in your stash!
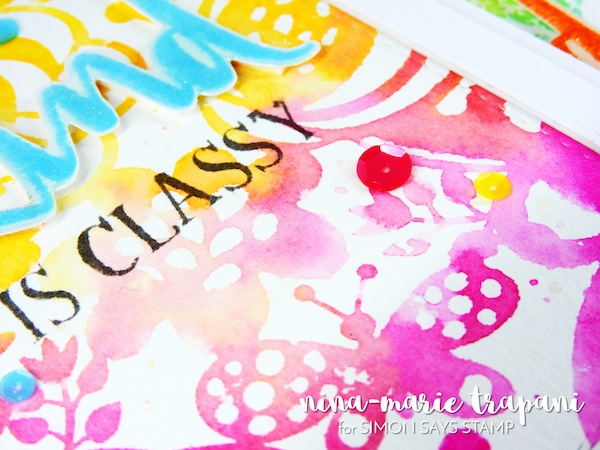
I also used the Concord and 9th Being Classy stamp and die set; these stamps and dies came out last year but it is one of my favorites still and I love the large type in the set. I stamped my sentiments in Hero Arts Tangerine bold ink and Soft Pool shadow ink.
So to see how I created these cards from start to finish, be sure to check out the video below! If you enjoy, please give it a thumbs up and subscribe to our YouTube channel for more inspiration and techniques!
Thanks so much for stopping by and spending part of your Monday with me… I’ll see you again soon!
xoxo, Nina-Marie
Watch the video:
SUPPLIES:
 |
 |
 |
|
 |
 |
 |
 |
 |
 |
 |
 |
 |
 |
 |
 |
 |
 |
 |
 |
 |
 |
 |
 |
 |
 |
|
Blog Candy Alert!! Follow our blog via email and comment on this post for a chance to win a special blog candy!


