Weekender with Wanda – Mama Elephant Stamps!

Hey everyone! Happy Weekend! Welcome back to the latest edition of Weekender with Wanda! So glad to see you here today! I love having a set time to share with all of you each week. It’s my pleasure! Last week’s Weekender post was very personal and I thank you for all the super nice comments. Last week we talked Tim Holtz and Distress…. And this week we are going in a totally different direction! I used my Copics and some happy striped paper to feature stamps from one of my favorite stamp companies – Mama Elephant. Their stamps are so cheerful and cute and just plain fun. I combined two stamp sets together to create a little scene that looks just like the desk in my studio.
I used the Blogging Buddies stamp set and the Little Edibles stamp set together for my card. I thought the scale was really nice together…and who can resist those tiny food and coffee stamps! (Not me!) So, here’s the card photo, and then we can talk a little more about how I made it. This is a great clean and simple card layout that you can use with any images or theme.

I started with a pre-cut Simon Says Stamp A2 Card Base and then covered the front with a fab stripe from the new Echo Park paper collection called Happy Summer. I used the Mama Elephant Landscape die to cut a gentle curve from some crisp white paper. I used the tiny envelope that comes in the Blogging Buddies stamp set, and randomly stamped all over the white layer. Then I added my sentiment in crisp black ink. Then,I layered that piece onto the stripes with foam tape.
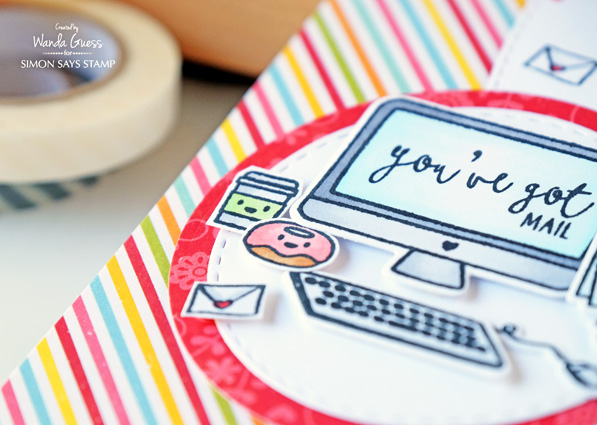
Next I stamped all my images with SSS Intense Black Ink and die cut them out with the matching dies. The Little Edibles stamps had to be hand cut, but it was easy! I used my Copic Markers to color everything in hues to match the stripes in the paper.
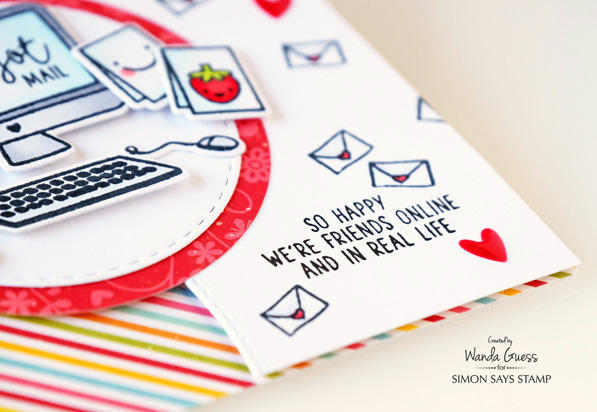
How cute are those tiny cards?? LOVE. I used a sheet of red floral paper from the same Echo Park Happy Summer paper to frame my white circle – and made that my focal point. I attached all the images with foam squares onto the circle.
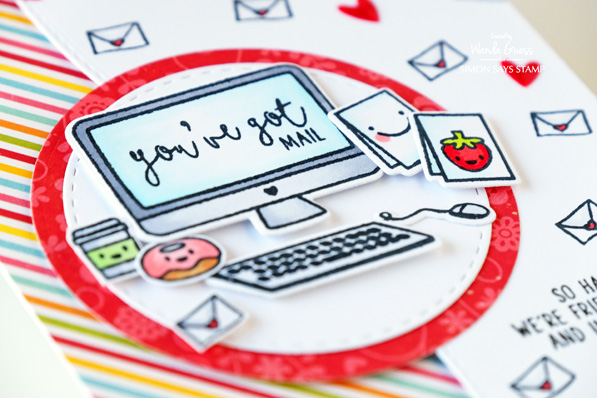
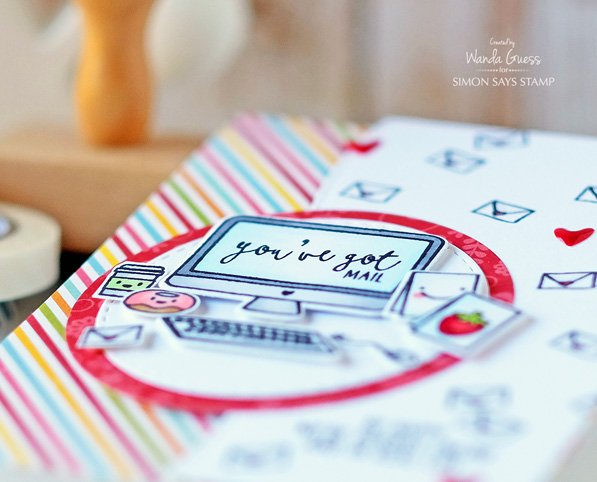
At the last minute I thought about adding glitter or Stickles…. But I decided to use some little red hearts instead. It just added that little extra bit of color to the card.
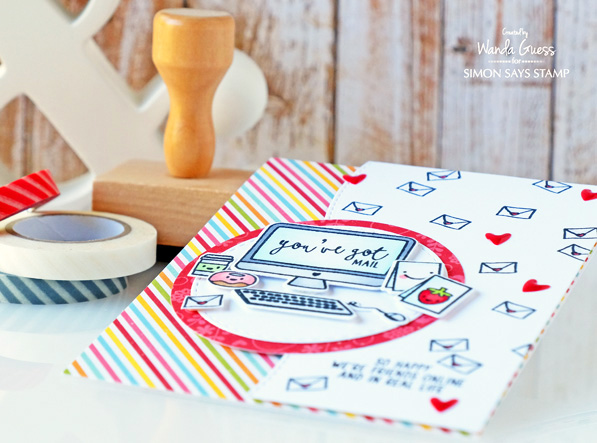
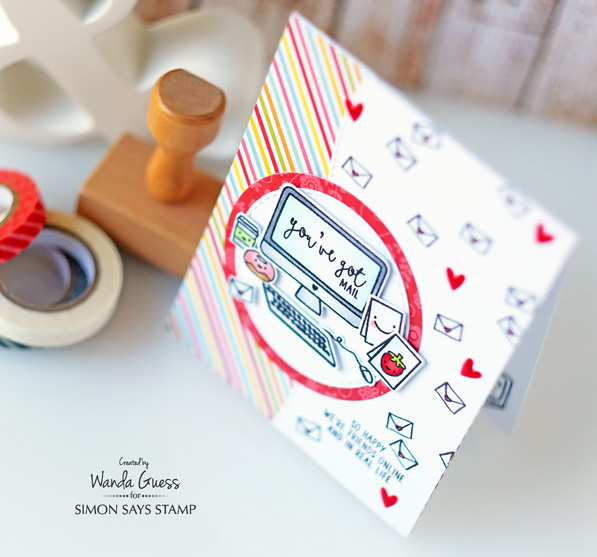
“You’ve Got Mail!” Who doesn’t like to get happy mail? No one I know! I hope that this little piece of mail has put a smile on your face today. Happy crafting – until we meet again next weekend!
SUPPLIES:
 |
 |
 |
 |
 |
 |
 |
 |
 |
 |
 |
 |
 |
 |
 |
 |
 |
 |
 |
 |
 |
 |
 |
 |
 |

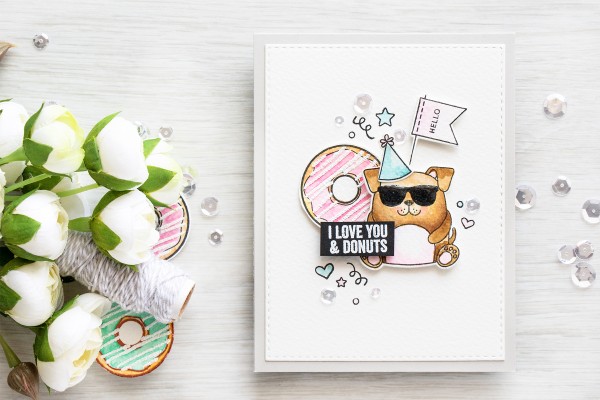
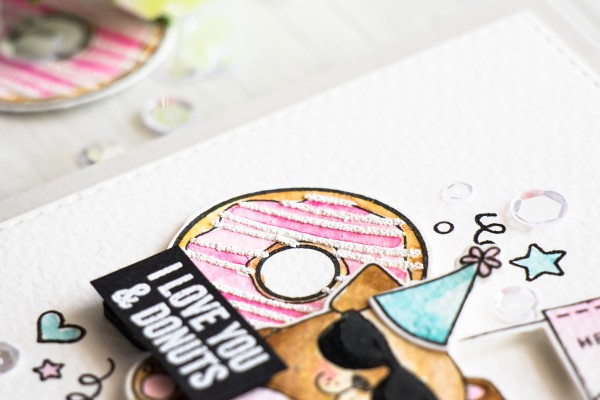
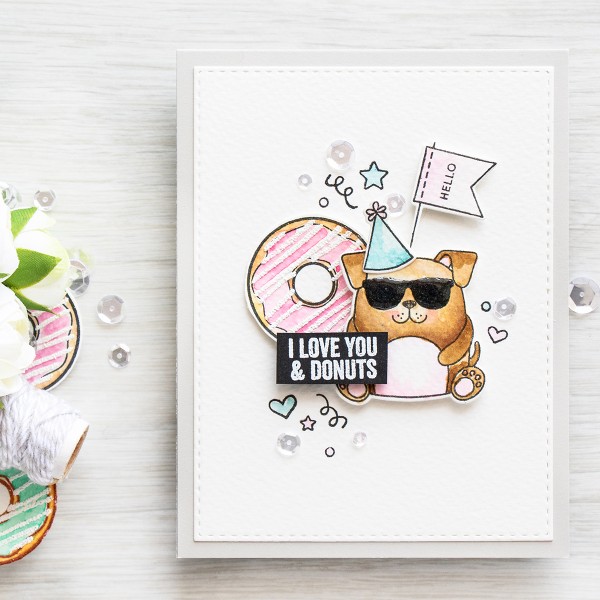
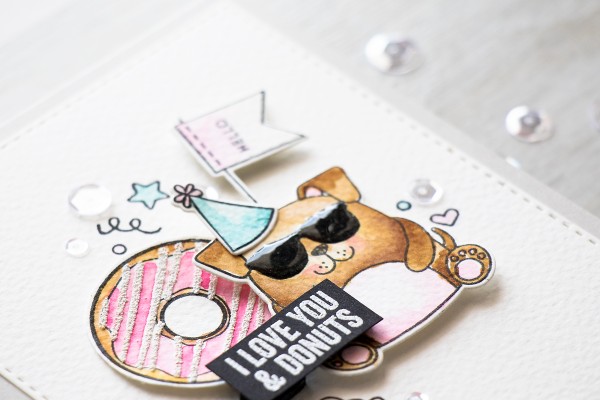
I Love You and Donuts Watercoloring with Puff Embossing Powder
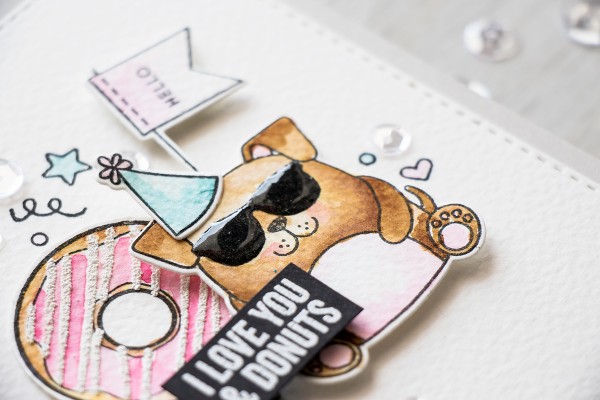
Hi readers! Happy Saturday! I just adore this card special guest Yana Smakula made from the too cool for school Cuddly Critters dog complemented with a party hat from the Cuddly Critters Accessories, and the Donut? Well it looks good enough to eat, especially with the cool bonus “drizzle” of puff embossing powder! Be sure to watch the video too, and enjoy! *Ahem* Pass the donuts, won’t you? ;)
Watch the video:
Supplies:
 |
 |
 |
 |
 |
 |
 |
 |
 |
 |
 |
 |
 |
 |
 |
 |
 |
 |
 |
 |
 |
 |
 |
 |
 |
 |
 |
 |
 |
 |

Blog Candy Alert!! Follow our blog via email and comment on this post for a chance to win a special blog candy!
Prima Frameworks Birdcage: Shabby Chic Photo Display
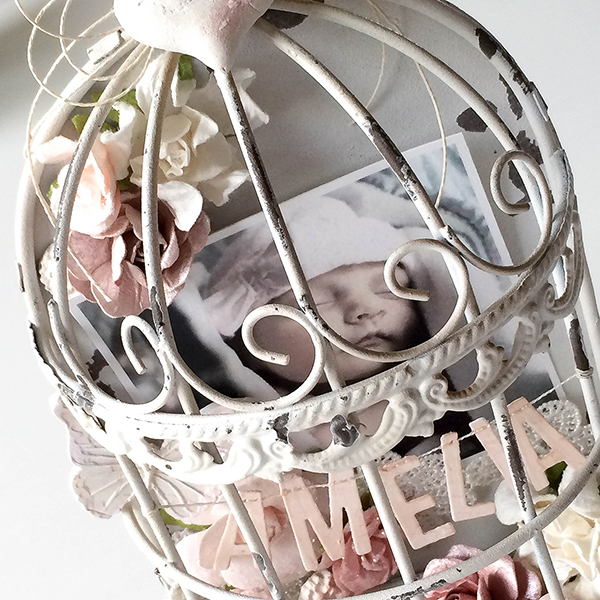
Do you have a special photo you want to display in your home? A special event you’d like to showcase? I have a new grandniece who has made my sister a grandmother for the first time. I thought this would be a nice gift for her.
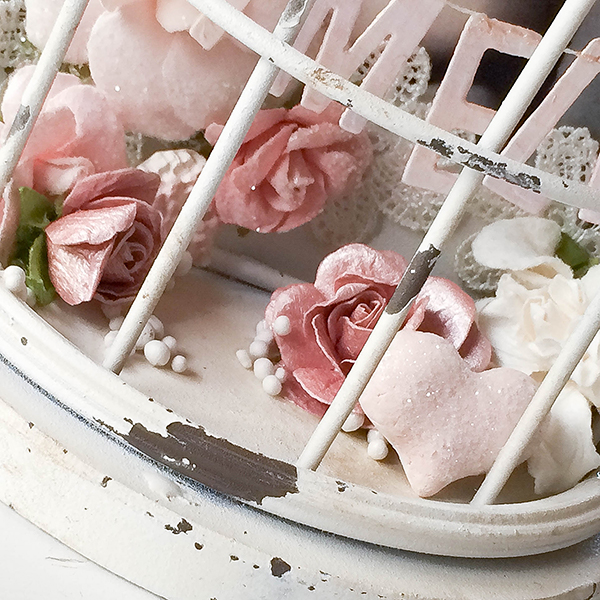
The Frameworks Birdhouse from Prima can be decorated so many ways, I chose to go Shabby Chic with pink and white roses to that coordinate with my photo. This is one of those projects that just flowed, everything came together so nicely.
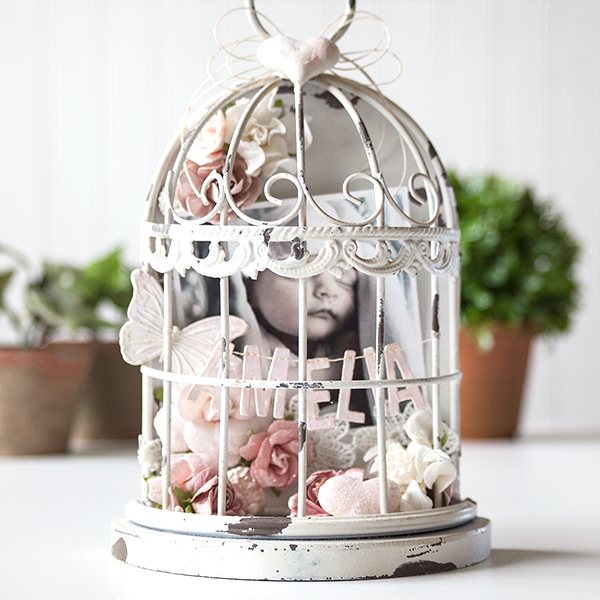
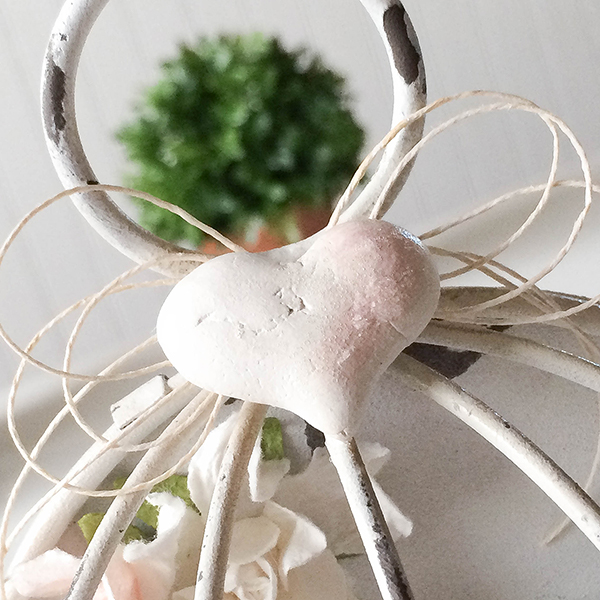
I tried out the paperclay from Prima, I really liked how it looks like stone. The heart mold from WOW was a great choice and fit perfectly on the top of the birdcage along with some twine.
I knew I wanted to suspend some sort of banner on the inside, and the Tim Holtz Alphanumeric Thinlits fit the name and were chunky enough to run through my sewing machine.
A new product that I tried out was the Prima’s Art Stones. They are unique paperclay balls in various sizes that add a nice texture and can be painted or left as is. They were the perfect touch for the bottom of the cage. I think it gives this a garden look.
I have shot a full process video of this project. You can view it below or on our YouTube channel.
Blog Candy Alert!! Follow our blog via email and comment on this post for a chance to win a special blog candy!

Thanks for stopping by today. I hope you’ve found some inspiration in my project to create one of your own. Have a great weekend!
 |
 |
 |
 |
 |
 |
 |
 |
 |
 |
 |
 |
 |
 |
 |
 |
 |
 |
 |
 |
|
 |


