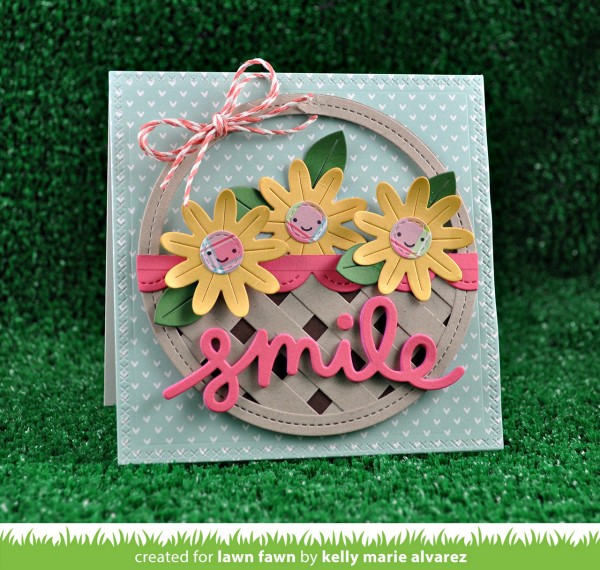
A Smiley Flower Basket Card
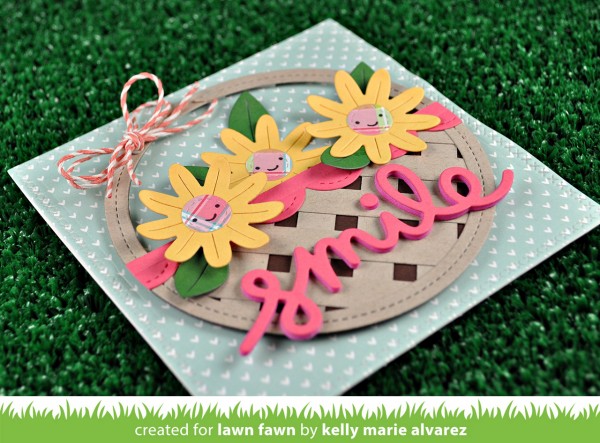
Hi friends! Happy Thursday! It’s such a treat to welcome back our sweet talented friend Kelly Marie Alvarez as a guest to our store blog today! She’s using some fantastic Lawn Fawn products in very creative ways to make this adorable card! The main components are the Stripey Background to make the basket, and the Flower Power for the flowers! Love the smiles in the middle? They’re from the So Smooth stamp set! Be sure to watch her video to get the step by step how to’s!
Enjoy!
Watch the video:
SUPPLIES:
 |
 |
 |
 |
 |
 |
 |
 |
 |
 |
 |
 |
 |
 |
 |
 |
 |
 |
 |
 |
 |
 |
 |
 |
 |
 |
 |
 |

Blog Candy Alert!! Follow our blog via email and comment on this post for a chance to win a special blog candy!
Patterned Papers: Do YOU have a favorite?
Have you tuned in? There’s still time to join! This week on the Monday Challenge, we’re using patterned papers. This is something that seems to have taken a little bit of a back seat in the mixed media world as we are more likely to use stencils, stamps and ink. There are so many fabulous patterned papers out there that we thought it was about time we put them up front and center!
Once you have made your creation just go ahead and upload it into the linky on the Simon Says Stamp Monday Challenge blog! We can’t wait to see what you make!
As always, we’re offering a chance to win a $50 Gift Voucher to Simon Says Stamp! All YOU need to do is join in with the challenge!
Below are three projects created by the design team, that showcase this weeks theme! You can visit the challenge blog to get all the details and see the amazing cards and projects that the design team has created this week. If you click on each designers name, you’ll be taken directly to their blog where you’ll get more details about their project! Be sure to give these talented ladies some comments!
Created by Andrea Ockey Parr:
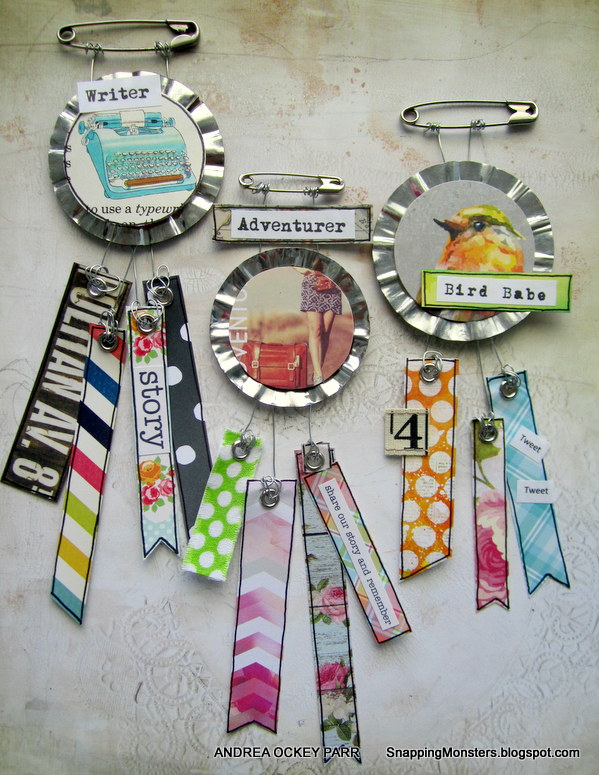
Andrea used:
 |
 |
 |
 |
 |
 |
 |
 |
 |
 |
 |
 |
 |
Created by Macarena Ziuziakowska:
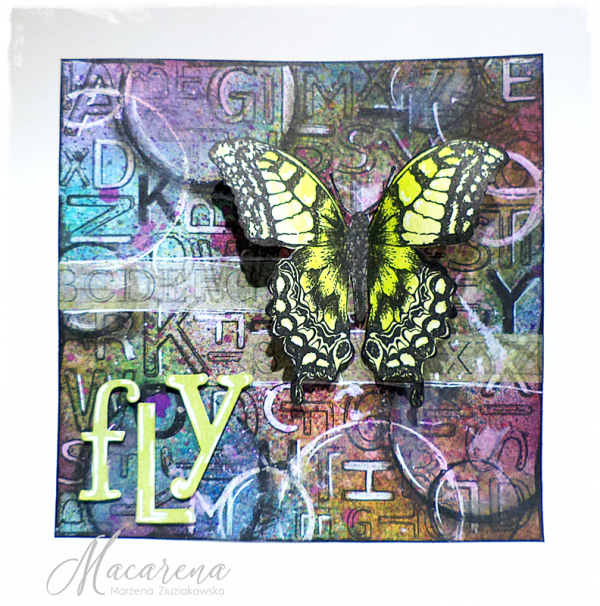
Macarena used:
 |
 |
|
 |
 |
 |
 |
|
|
 |
 |
 |
 |
|
 |
Created by Sandra Mouwen:
Sandra used:
 |
 |
 |
 |
 |
 |
 |
 |
 |
 |
 |
|
So now it’s your turn to cut into your patterned papers and get crafting!

Do you use Instagram? If so please add #sssmchallenge to your challenge entry uploads so we can see them on there too!
Blog Candy Alert!! Follow our blog via email and comment on this post for a chance to win a special blog candy!

Watercolor with the look of Calligraphy
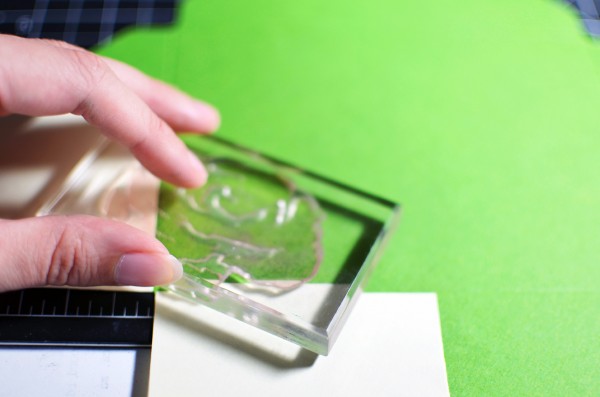
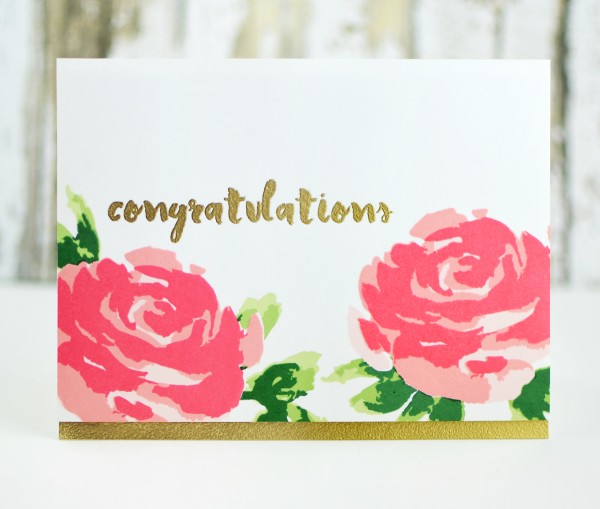
Good morning! This is Jennifer Rzasa and I am so excited to share a project featuring some of the newest products from Altenew! This card and envelope set has trendy artistic flair, and it was SO easy to create. I started with a sheet of Neenah Solar White 80lb cardstock, and stamped two roses from Painted Rose using Blush, Rouge, and Crimson inks. I find it’s easiest to layer when I stamp the lightest base image first, but I also know people who like to start with the darkest color.
It’s up to you! The flowers were then masked so I could stamp the leaves in Frayed Leaf, Forest Glades, and Evergreen. I used a MISTI stamp positioner for perfect alignment, but honestly, the painted brush strokes of this set look great even when slightly misaligned!
Did you know that this set is based on an actual watercolor painting I did? If you are uncomfortable with watercolor or if you don’t have the time to paint yourself, this is a great shortcut for a gorgeous effect every time.
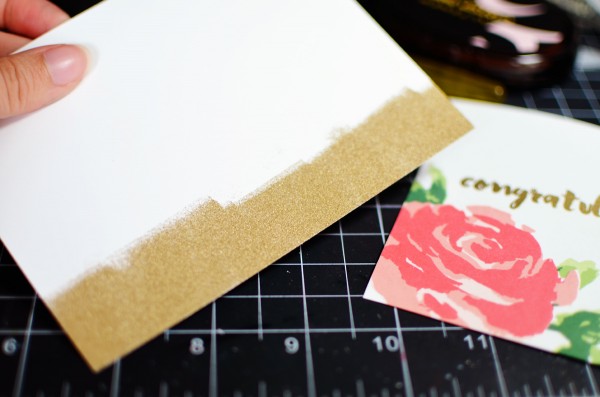
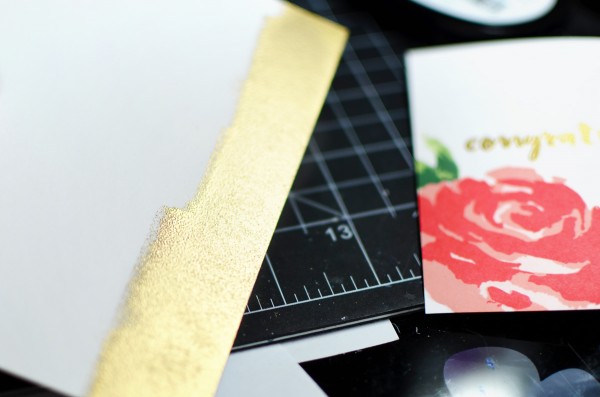
The sentiment, from Painted Greetings, was stamped in VersaMark ink and then heat embossed with gold embossing powder. I wanted to bring a little of that gold color to the rest of the card, so I also embossed along the bottom edge of my card base, which was made from 110 lb Neenah Solar White. Then, I used some foam adhesive to adhere the flower panel to the card base, allowing the gold edge to peek out the bottom.
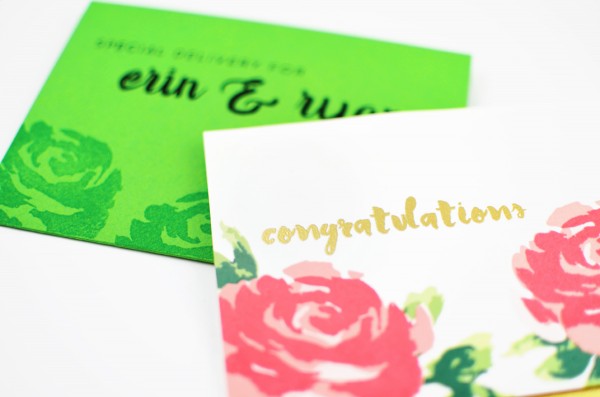
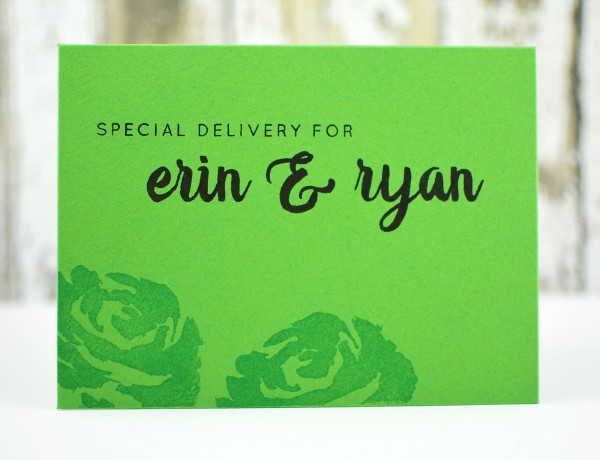
My cousin just recently got engaged, and I’ll be going to their engagement party in a few weeks. I wanted to make this card special for them, so I decided to include a custom envelope! I used the We R Memory Keepers Envelope Punch Board and SSS Green Leaf Cardstock to create my envelope. Before folding it, I masked off the edge with a Post-It and stamped the top layer of the rose with VersaMark ink.
I find it’s easiest to stamp while the cardstock is flat. I then stamped “special delivery for” (from our From the Desk Of stamp set) with VersaFine Onyx Black ink. To create the look of hand-written calligraphy, I used our Calligraphy Alpha set, stamped one letter at a time with black ink. For an extra little surprise, I included a small heart and “xoxo” (from Painted Greetings) on the flap.

You don’t have to be an artist to create a watercolor card with the look of calligraphy – you just need the right supplies! :) I want to thank you for stopping by today to check out my project, and a HUGE thank you to Simon Says Stamp for inviting me here!
Supplies:
 |
 |
 |
 |
 |
 |
 |
 |
 |
 |
 |
 |
 |
 |
 |
 |
 |
Blog Candy Alert!! Follow our blog via email and comment on this post for a chance to win a special blog candy!


