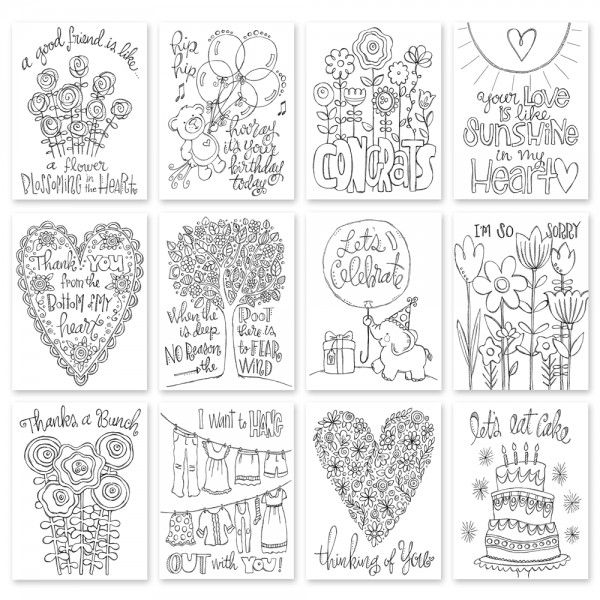
Stock Up For Class!
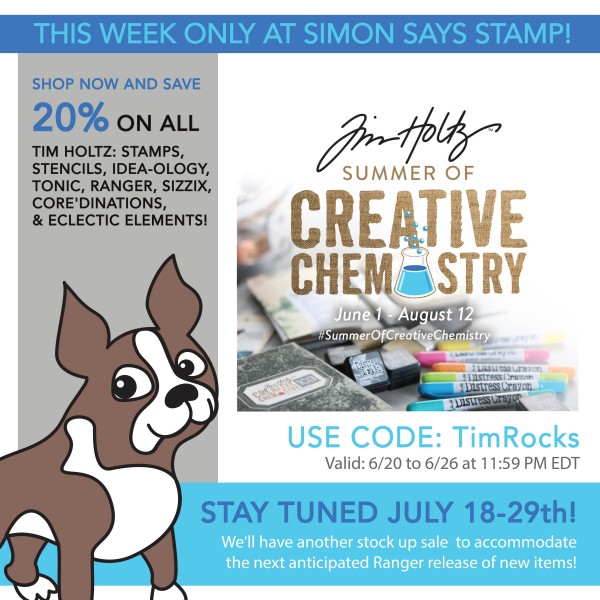
Hi friends! I hope your week is starting off wonderfully! Just popping in quickly to let you all know we’re running a special Tim Holtz Stock Up Sale to get you all set for the newest Online Card Classes for a Summer of Creative Chemistry! This sale is valid on Tim Holtz Stamps, Stencils, Idea-Ology, Tonic, Sizzix, Core’dinations, Eclectic Elements, AND Ranger branded products!! Don’t forget to sign up for class! We hope you enjoy!

Studio Monday with Nina-Marie: Copic Colored Superheroes
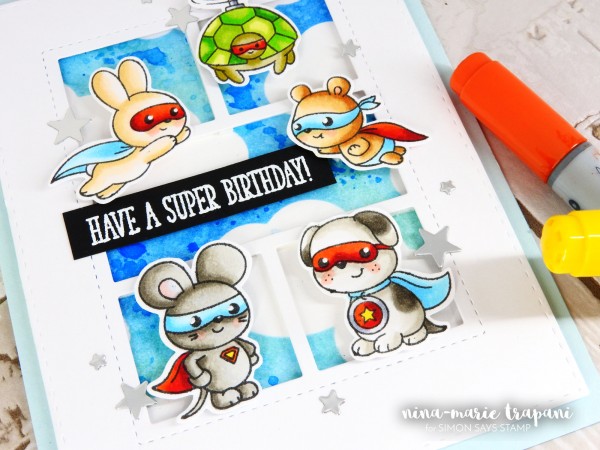
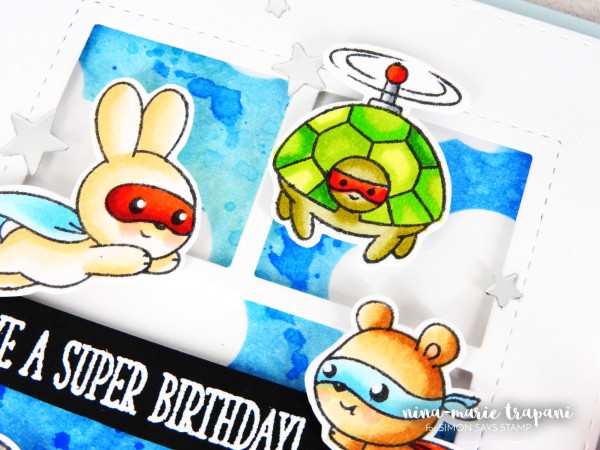
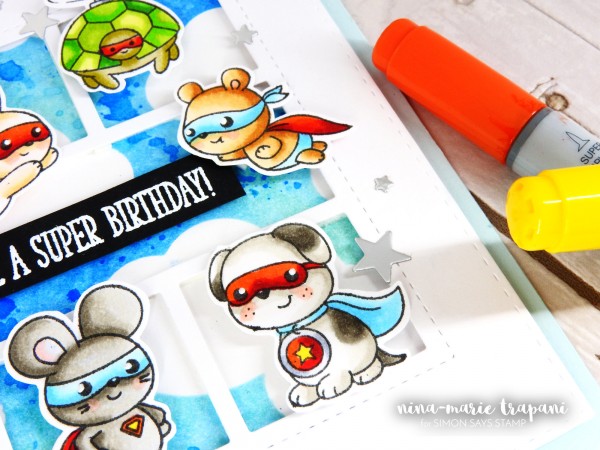
Hi friends and welcome back to another Studio Monday! Today I have a super fun birthday card to share with you featuring the ADORABLE Caped Cuties stamp set from Clearly Besotted!
This stamp set has got to be one of the cutest, kid themed sets I’ve seen in a long time; I love that the stamp set includes so many different animals in it that can be used on their own, or together! I have used almost all of the critters for my card and I’ll be sharing my process on how I built this card in the video below.
First I want to talk a bit about my coloring process; because there are SO MANY images in this card, I needed to use a limited color palette. This not only makes it easier to replicate (because it does not require a lot of marker colors; I used Copics today), but it also helps the card coordinate well together. If I had used a bunch of different colors on each critter, it would have created a more confusing design and the images would have competed with each other a lot more.
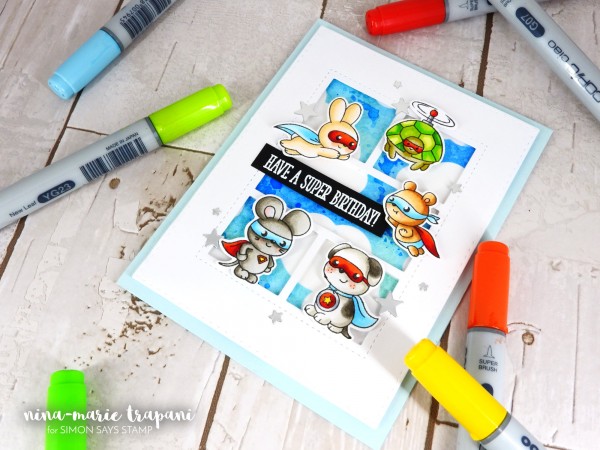
I also made sure that my overall card design was clean lined and simple; again, because there are so many critters to fit into this design, having a distracting card front for the critters to sit on would not allow them to take such a dramatic center stage. Keep this in mind when you are creating an heavy action/embellished card; it will allow your main focal point to be the star of the show (especially if you’ve put a lot of hard work into it)!
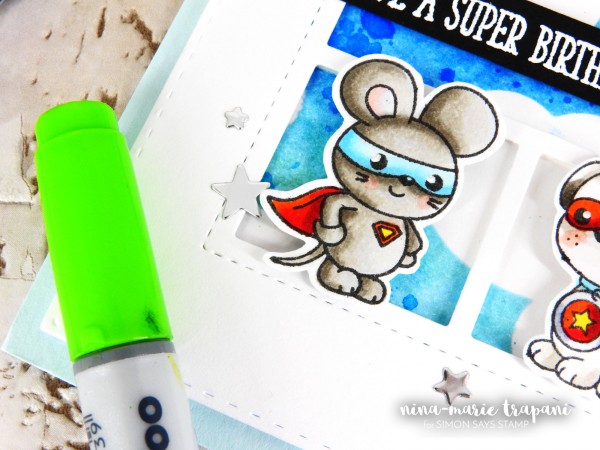
I used distress inks to create a nice backdrop for the critters and laid a Pretty Pink Posh Storybook 4 die cut over top to give the critters some separation from the sky. I also added some foil stars using foil paper and our Simon Says Stamp Holiday Shapes die; these little embellishments are a simple finishing touch that adds so much to the overall card!
So to see how I put this card together, be sure to watch the video below or over on our Youtube channel! And if you enjoy, please give it a big thumbs up and subscribe for more weekly inspiration!
WATCH THE VIDEO:
SUPPLIES
 |
 |
 |
 |
 |
 |
 |
 |
 |
 |
 |
 |
 |
 |
 |
 |
 |
 |
 |
 |
 |
 |
 |
 |
 |
 |
 |
 |
 |
 |
 |
 |
 |
 |
 |
 |
 |
 |
 |
 |
 |
 |
 |

Blog Candy Alert!! Follow our blog via email and comment on this post for a chance to win a special blog candy!
Summer Fun In the Sun DIY Watercolor Single Layer Scene
Hi friends! Happy Sunday! If you’re in the USA, Happy Father’s Day to all you Dad’s out there! Be sure to give your Dad a hug or at least a call and tell him he’s loved! Please welcome back special guest Debby Hughes with her monthly Creative Uses post. I always love to see what she cooks up! Be sure to watch the video for the full tutorial, and enjoy!
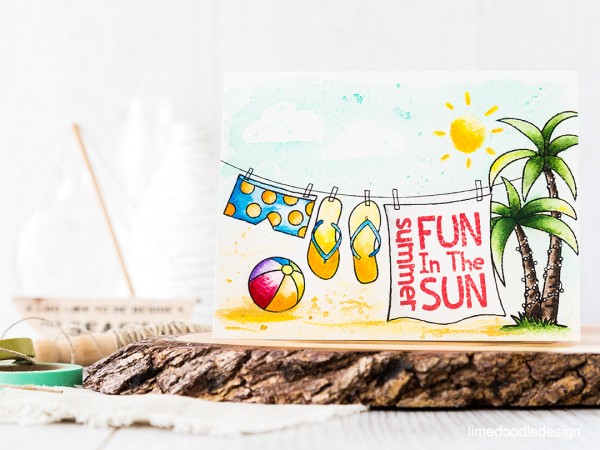
Hello, Debby here. I was inspired by one of Suzy Plantamura’s watercolor card fronts for today’s post.
The fun ‘I want to hang out with you’ clothes line design on the bottom row just got me thinking about all the stamp sets I have with clothes, such as the new Summertime Animals set with the cute bear in his swim trunks. Well that got me thinking to how when we come back from the beach we wash and rinse everything down and hang them to dry ready for the next day. In the video below you can see how I stripped the bear of his trunks with a little partial stamping and turned a sentiment from the Summertime Animals set into a beach towel!
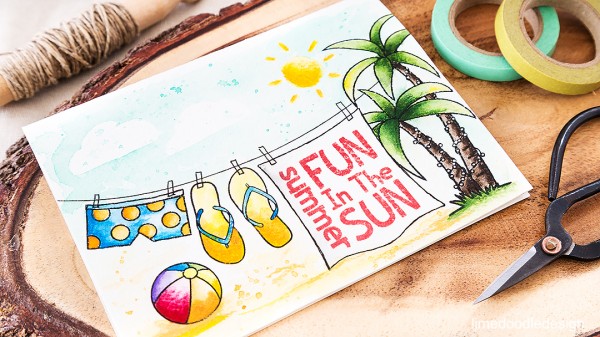
As I wanted to create a true one-layer card I found it helpful to plan the layout using printer paper first. I wanted to block out a couple of areas for clouds and a sun and so started the card by masking these areas with a Molotow masking pen. This protected those areas from the paints and allowed me come in later to paint the sun without having to worry about the sky background. While the masking fluid was drying I could then start on the rest of the design. I masked off an area for the towel before stamping the palm trees from Warm Christmas Wishes then used a waterproof pen and the A2 Card Curved Edge die to draw a washing line.
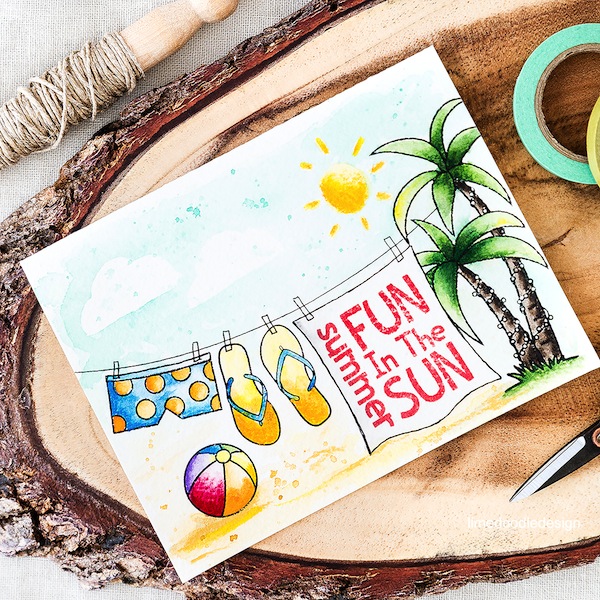
The flip-flops from Flip Flop Season were an easy addition to add, as was the beach ball from the Warm Christmas Wishes set. The only slightly tricky bit really was partially stamping the bears trunks and I used washi tape to cover up the areas I didn’t want ink; it is probably better if you watch the video to see how that is done. As for the towel, I drew the outline with the waterproof pen and then stamped a sentiment from Summertime Animals with Teeny Bikini ink. For once I liked the texture that stamping on watercolor card gave the letters as to me they have more of a look of a fluffy towel :D Once I’d got the design sorted it was simply a case of adding a little color and for this I used Gansai Tambi watercolors and then came in afterwards with some Prismacolor Pencils for extra depth and contrast.
Thanks for joining me today and I hope you give this washing line design a try; I’m sure most of us have stamp sets that would work :D
Watch the video:
SUPPLIES:
 |
 |
 |
 |
 |
 |
 |
 |
 |
 |
 |
 |
 |
 |
 |
Blog Candy Alert!! Follow our blog via email and comment on this post for a chance to win a special blog candy!


