Weekender with Wanda – Birthday Cake Wishes!

Hello friends! Happy Saturday! Welcome back to the latest edition of Weekender with Wanda here on the Simon Says Stamp blog! Always nice to see you here on the weekend! Hope you had a great week. I have been crafting up a storm in my studio, which is a good thing, because it’s been over 100 degrees every day for a week where I live. Yuck! So Buddy, my trusty studio side kick, sleeps all day and I make cards. It’s a good life. Ha!
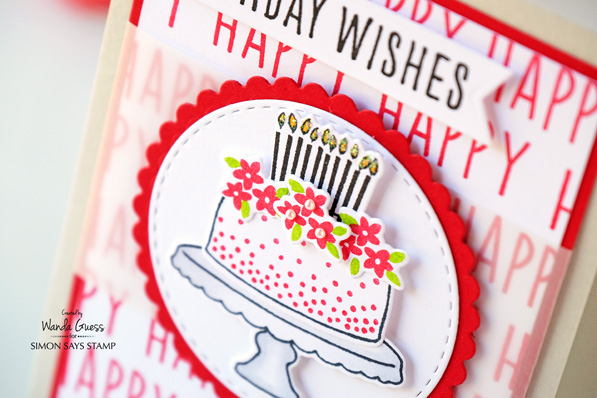
Today I’m sharing a happy birthday card made with products from one of the awesome companies we carry – Reverse Confetti! They have a new-ish line of cake building stamps (Candles n Confetti) and matching dies that I loved from the moment I laid eyes on them. They are so versatile and pretty, and you can make about 100 different combinations of cakes using all the pretty add ons. I always need more birthday cards, don’t you?
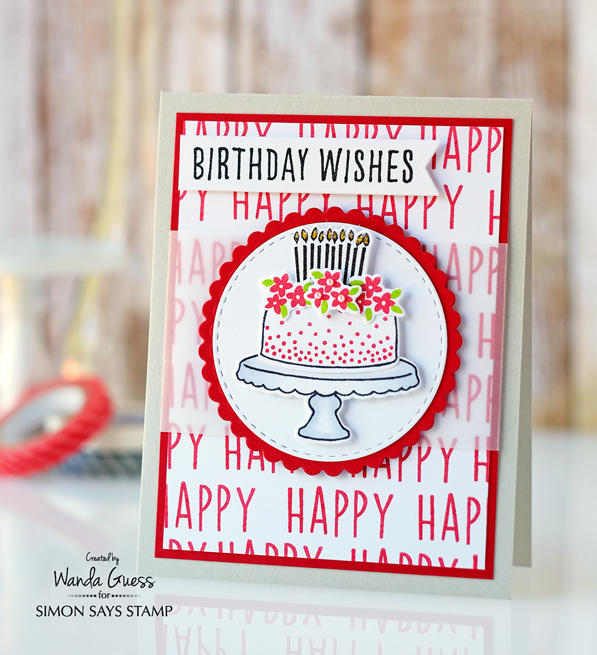
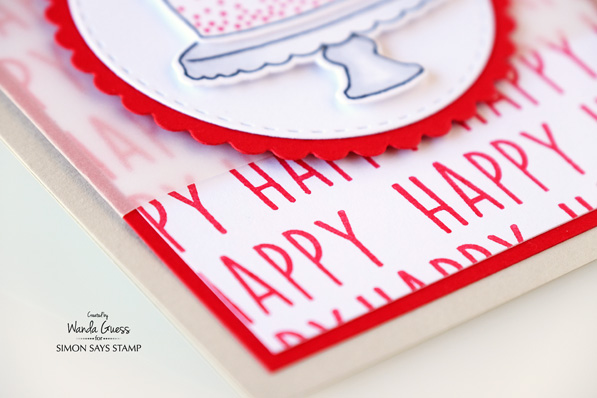
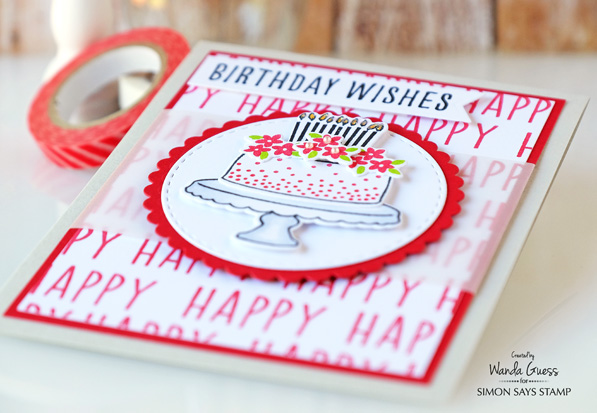
For this card I started with a Fog Cardstock card base. I layered pretty red cardstock with it. This is such a clean and classic color combination. I created my own background paper by stamping the word “happy” from the Whole Lotta Happy stamp set multiple times in red ink. This is a really fun way to tie a project together. I stamped the Birthday Wishes sentiment onto a banner using Intense Black Ink from Simon Says Stamp. You can also see that I wrapped a strip of vellum around the top two layers to tone down the color and make a frame for the center piece.
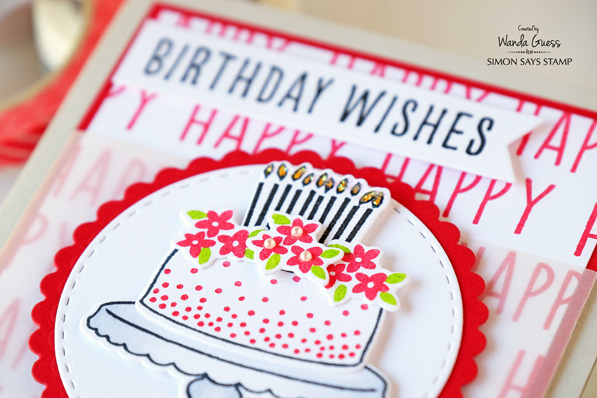
I stamped and die cut out the cake stand, the cake, and three of the little flower clusters. Then I stamped the red polka dots onto the cake. The cake stand was very lightly colored with a Copic Marker to match the grey cardstock base.

The fun part is assembling the card! I added tiny bits of Stickles to the candle flames and tiny pearls to the centers of the flowers. This would also make a great wedding card, just by not stamping the candles, and changing the sentiment. You could even match it to the wedding colors. Wedding cards are hard for me…

I layered a Stitched Circle die in crisp white onto a red scallop to create the center of my card. The cake, etc was attached using foam squares.
Here’s wishing a HAPPY day to all of you! Thank you for visiting and hope the rest of your weekend is delightful! FYI – Next Saturday we’ll be having a big blog hop with some exciting new products for you! So, Weekender with Wanda will be back on the 23rd!
SUPPLIES:
 |
 |
 |
 |
 |
 |
 |
 |
 |
 |
 |
 |
 |
 |
 |
 |
 |
 |
 |
 |
 |
 |
 |

Color Coordinates! A Rainbow of Color!

Welcome back to the blog everyone! It’s been awhile since I’ve played with a Color Coordinate recipe! We have come out with so many more ink colors so I was overdue in showing you some new combinations.
Todays colors are bright and cheery, some of the ones that Laura Bassen hand picked! What better way to show them off than to put them in a rainbow.
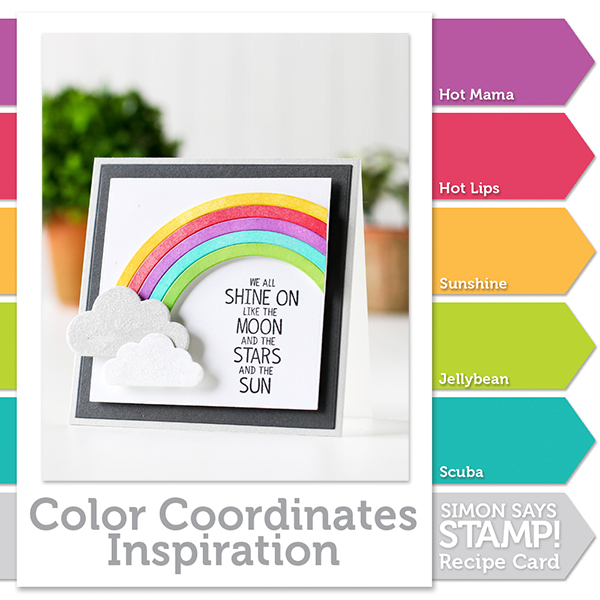
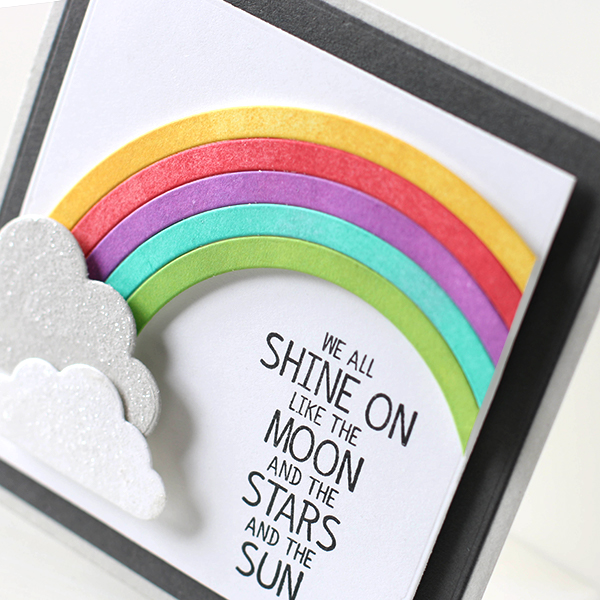
This is an easy card to create using the Build A Rainbow die, one run through the die cut machine and you have all the pieces you need! Then I used a blending tool to color with the Simon Says Stamp inks Sunshine, Hot Lips, Hot Mama, Jellybean and Scuba!
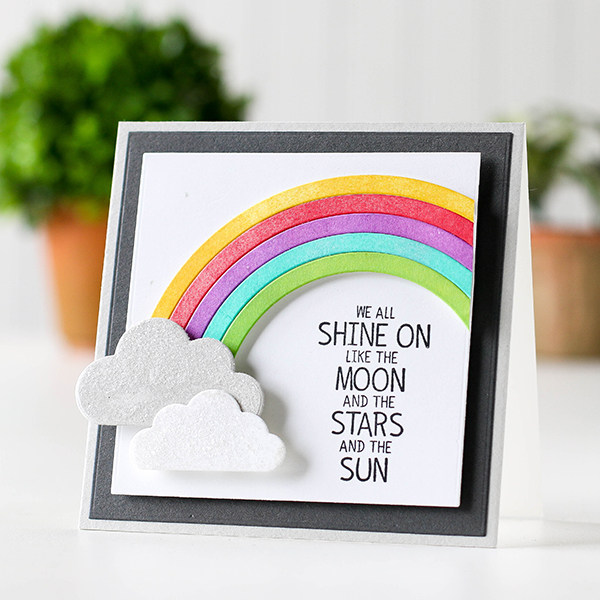
I stamped my greeting using Intense Black ink. Then I added foam squares to the back my rainbow pieces to hold them together and mounted them to a die cut square panel. I die cut some clouds, covered them with Rock Candy Distress Glitter and put them over the bottom of the rainbow.
I’ve create a video or how this card came together. You can view it below or over on our YouTube channel.
Blog Candy Alert!! Follow our blog via email and comment on this post for a chance to win a special blog candy!
Thanks for coming by today, I hope I’ve given you some color inspiration and have a great weekend!
 |
 |
 |
 |
 |
 |
 |
 |
 |
|
 |
 |
 |
 |
 |
|
 |
 |
 |
 |
|
 |
|
 |
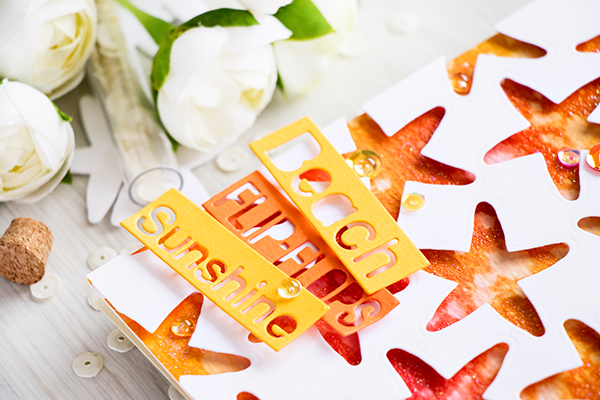
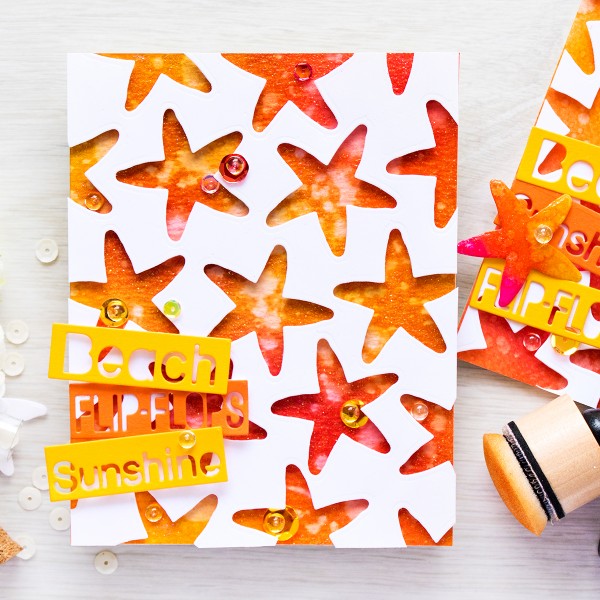
Negative Die Cut Star Fish
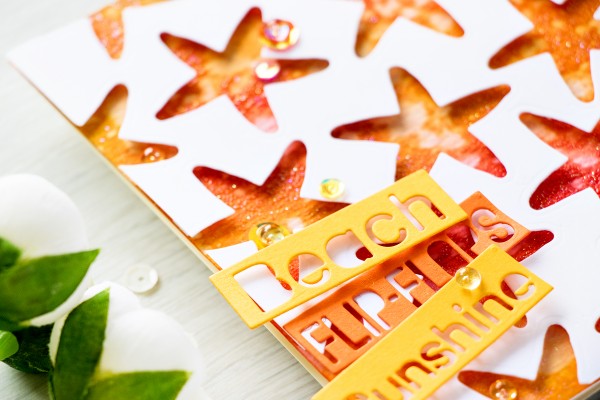
Hi friends! Happy Thursday! As always, I’m happy to welcome back very special guest Yana Smakula to our blog today! She’s thinking outside the box by using a die from the coordinating die set, Set Sail, to make a custom background!! She used some of her favorite Tim Holtz distress ink colors and a blending tool to get that nice sunset color combo. Love the shimmer you see? Yana used Sparkle embossing powder to get the look! She finished the card off with a die cut sentiment from Summer Greetings using Orange Peel and Sunshine cardstock! Be sure to watch the video to learn more! Enjoy!
Watch the video:
SUPPLIES:
 |
 |
|
 |
 |
 |
 |
 |
 |
 |
 |
 |
 |
 |
 |
 |
 |
 |
 |
 |
 |
 |
 |
 |
 |

Blog Candy Alert!! Follow our blog via email and comment on this post for a chance to win a special blog candy!
Congrats! Blog Candy Winners!
From: Dreamy Mixed Media Canvas: Mary Holshouser!
From: Red White And/Or Blue!: Shona Chambers!
From: Studio Monday with Nina-Maire: Copic Birthday Scene Featuring Avery Elle!: Teresa Doyle!
From: Weekender with Wanda – Coffee Talk!: Brenda Lubrant!
From: Die Cut Bows of Beauty: Megan Harp!
From: Whatever Takes Your Fancy!: Wahnita Hammond!
From: July 2016 Card Kit: Sponge Inked Die Cut Shapes: Susan Pezza!
From: Sun Ray Ink Blending with Laura Bassen: Cynthia Johnson!
Please email [email protected] with your mailing address (if applicable), the name of the blog you won from, and the prize you won to claim your prize!


