Weekender with Wanda – No Line Watercoloring with Altenew!

Happy Saturday! It’s the middle of August…which means it’s almost time for one of my favorite things – STAMPTEMBER! Yeah! Just a couple more weeks until we roll out the biggest release of the year here at Simon Says Stamp! I love it – and I’m ready for Autumn! The light is changing in the mornings – have you noticed it too? Today I’m sharing the latest edition of Weekender with Wanda, and I have a cool technique to share with you. I truly do hope that you try this because it is so nice to sit and color/paint and the results are so rewarding. I’m talking about No Line Watercoloring! Today’s post features beautiful stamps from one of our favorite member companies – Altenew. I used the gorgeous “Beautiful You” Stamp set for my card.
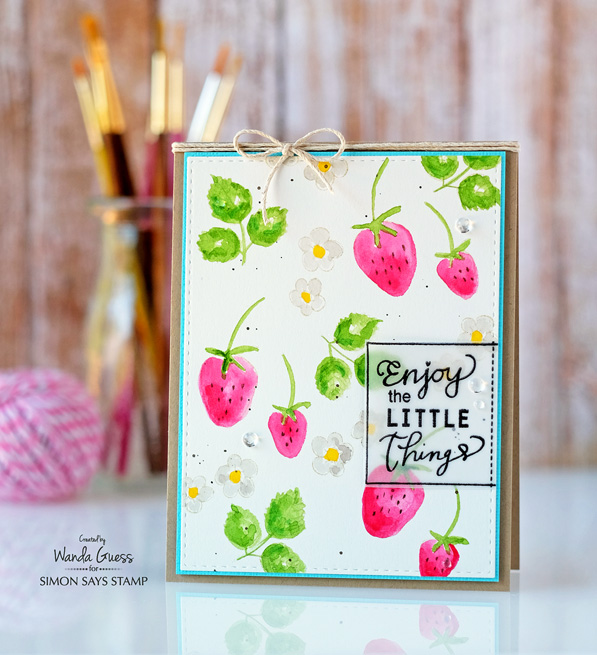
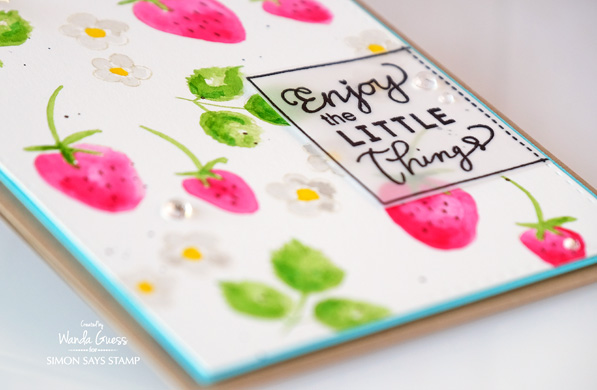
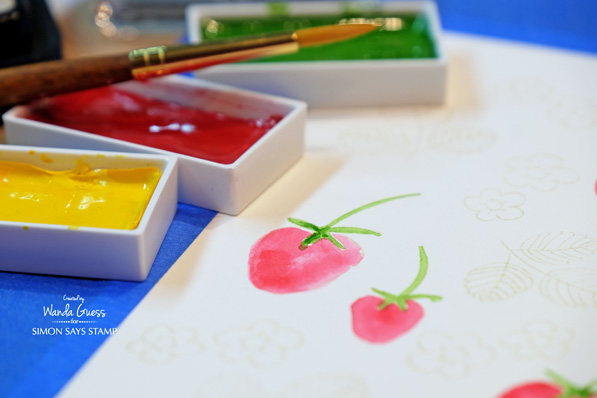
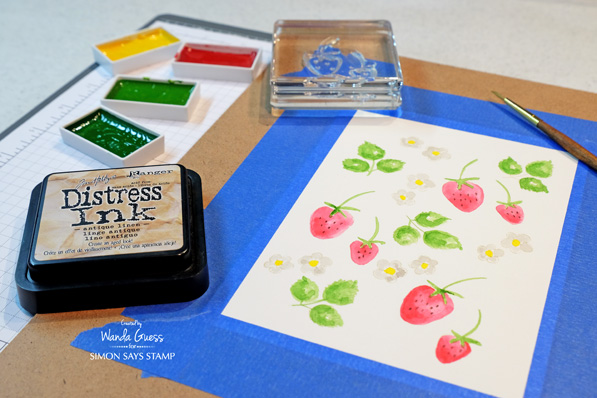
Doesn’t it look like I painted this? I actually fooled my husband when I showed it to him! Hee hee. I started with a sheet of watercolor paper and taped it to my hardboard to keep it nice and flat. (See photos and supplies below) No Line Watercoloring is simple! I took my Antique Linen Distress Ink pad and randomly stamped the strawberries, leaves and flowers onto the paper. This ink color is so light that you can barely see it. And, that’s the trick. After stamping in light ink, you color over it with watercolor paints! If you look closely you can barely make out the stamped images.
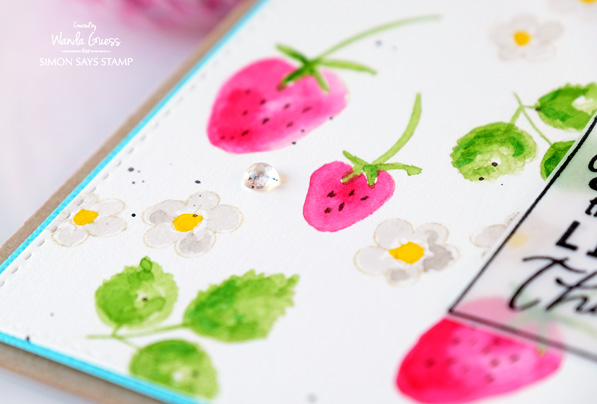
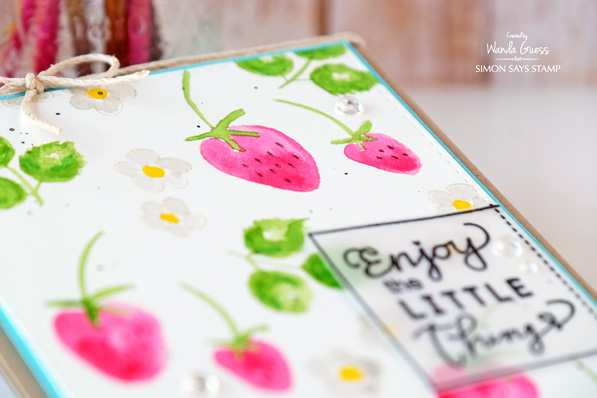
The pretty sentiment is stamped onto vellum paper because I wanted the color to show through it!
Here is what the center panel looked like when I started. Later, I die cut out my card layer by using the Simon Says Stamp Stitched Rectangles Dies.

I used Kuretake Gansai Tambi Watercolor paints. These are the most beautiful paints! I use mine all the time. The colors are very rich and creamy and they paint like a dream. In this photo you can see that I started with the strawberries and colored them in. I let each color dry before using a new color. This kept the paint colors from running together.
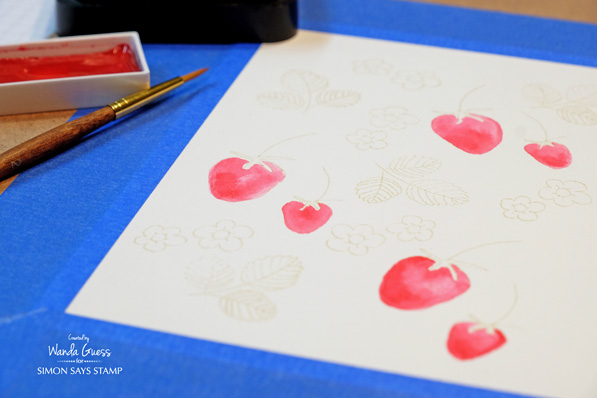
Next I used green watercolor paint and did the leaves and stems.
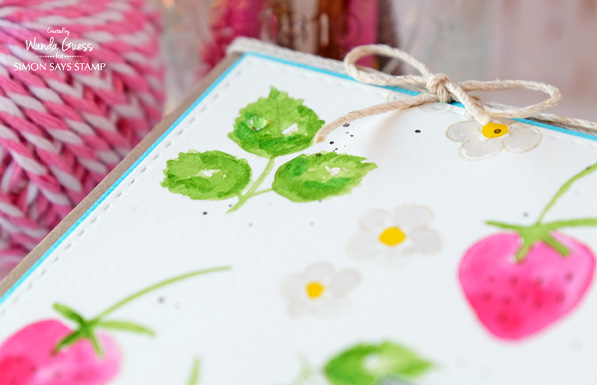
Here is the whole panel before I cut it out with the Stitched Rectangles Die. One tip for coloring white items – use a soft grey. Strawberry flowers are white with yellow centers and I wanted my project to have those colors too. The grey tricks your eye into seeing this as a white object.
I ended up splattering a bit of brown paint over my finished panel. I always like paint splatters! I wanted a tiny pop of a bright color, so I layered a thin layer of aqua around my center panel before mounting it onto a kraft card base. The finishing touch was a twine bow.

Thank you for spending part of your weekend with me! I hope this technique will inspire you – and hope you try it yourself! See you soon!
SUPPLIES:
 |
 |
 |
 |
 |
 |
 |
 |
 |
 |
 |
 |
 |
 |
 |
 |
 |
 |
 |
 |
 |
 |
 |

Color Coordinates: Birthday Boy

Hi everyone, it’s Shari here with a Color Coordinates for you. I know masculine cards and colors are the most difficult so I’ve put this one together to use as a combination for young boys and toddlers.
I’ve used four main colors for my card and have suggested a fifth color (Sparrow) for a little bit older boy.
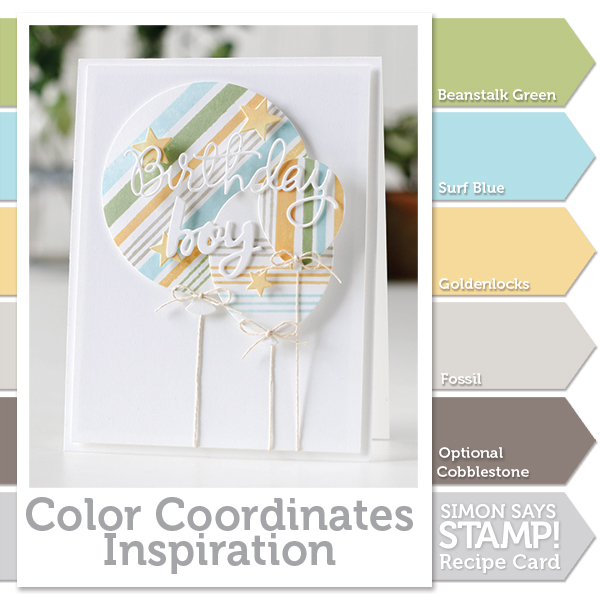
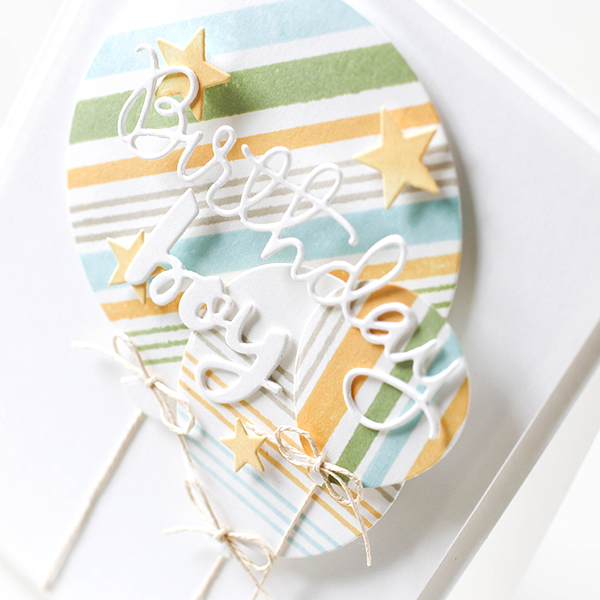
Stripes are perfect to create patterns for gender neutral and masculine cards. I’ve stamped my colors onto die cut balloons using the Misti tool and grid paper to help me keep everything aligned.
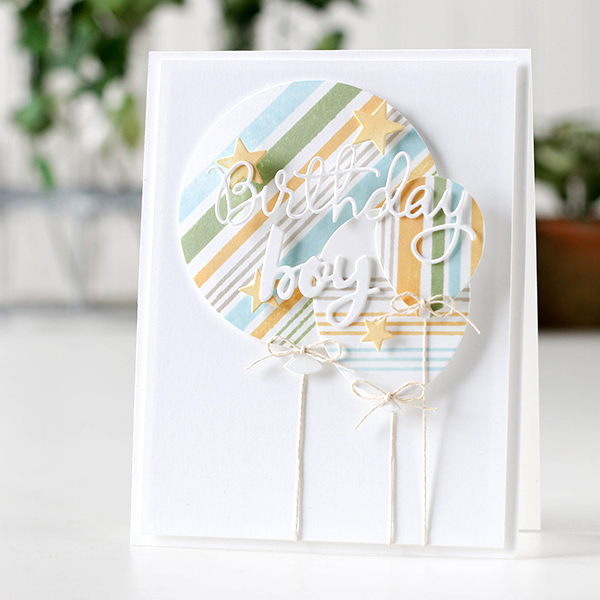
To help suspend my die cut messages, I’ve die cut small stars which I colored with Duckling ink using a sponge dauber. I used small pieces of foam squares to get the height I needed.
I have created a video that you can watch below or on our YouTube channel.

Blog Candy Alert!! Follow our blog via email and comment on this post for a chance to win grab bags and blog candy!
Thanks for coming by today, hope you have a fantastic weekend!
 |
 |
 |
 |
 |
 |
 |
 |
 |
 |
 |
 |
 |
 |
 |
 |
 |
 |
|
 |
 |
 |
 |
|
 |
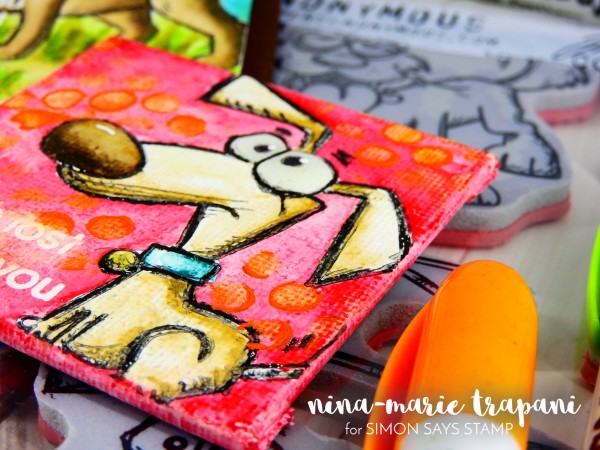
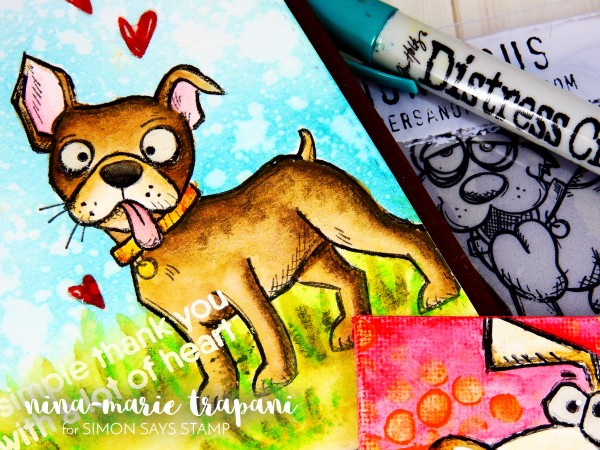
Watercoloring Stamped Images + Canvases with Distress Crayons
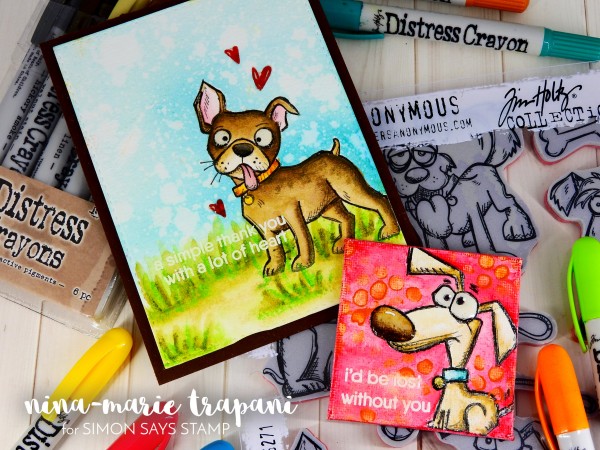
Hey friends, it’s Nina-Marie here with you today bringing you a video featuring the Tim Holtz Distress Crayons and how to do some fun watercoloring techniques with this unique medium! This video also features the super cute and BRAND NEW Crazy Dogs stamp set from Tim Holtz… lots of Tim Holtz inspiration to be had today! ;)
The Distress Crayons are one of the newest additions to the Distress line that was revealed by Tim Holtz and Ranger in early 2016. What makes the crayons unique from the other Distress mediums is that they become permanent once they’ve reacted with water. Whereas a Distress ink, stain or spray can be reactivated with water over and over, once Distress Crayons are activated the first time, you cannot reactivate them again.
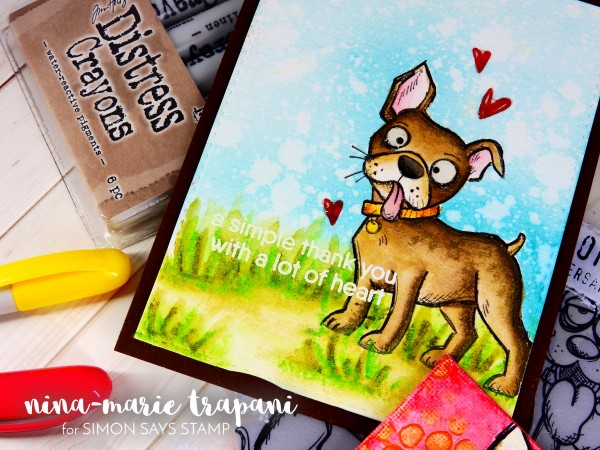
In today’s video, I’ll be showing you how you can watercolor with the Distress Crayons on both watercolor paper and media board (canvas-covered chipboard). I chose both surfaces because they each have a bit of “tooth”; in other words, they are more rough in texture. If you want a watercolor paper that is more smooth, try Strathmore Bristol paper.
The watercolor paper I will be using today is the Canson XL paper and the canvas media boards are ones I picked up from my local craft store. However, I will link to a Dina Wakley media board assortment we have in the Simon store that is pretty much the exact same thing as what I used in today’s video. Do keep in mind that you will want to prep the canvas media board with gesso before applying your Distress Crayons over top because the coating on the media board is a bit slick; I’ll talk about this in the video as well and show you how I applied some Dina Wakley gesso over the canvas before watercoloring.
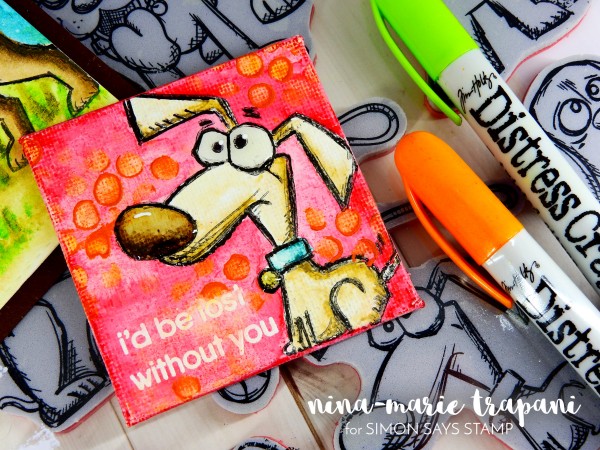
One of the things I love most about using a paper or canvas that has more of a rougher texture, is that it allows the texture of the crayons to show up better. The natural texture of the Distress Crayons adds a lot of interest to your project, and you can use this to your advantage when creating with this medium. In today’s video, I’ll show you how I enhanced the texture of the Distress Crayons when I applied the dot background to my mini canvas to create a bit more visual interest.
So to see these crayons in action and learn some tips and tricks for how to best use them in your watercoloring, be sure to check out the video below! If you enjoy the video, please give it a big thumbs up and subscribe to our YouTube channel and blog so that you do not miss any of our weekly posts and videos!
WATCH THE VIDEO
SUPPLIES
 |
 |
 |
 |
 |
 |
 |
 |
 |
 |
 |
 |
 |
 |
 |
 |
 |
 |
 |
 |
 |
 |
 |
Remember to tag your awesome projects with #simonsaysstamp on Instagram… We LOVE to see what you are creating!


