Lets Have Some Summer Fun!
This week, let’s have some Summer Fun with the girls on the Monday Challenge! Summer is in full swing and before we have to pull out our sweaters and blankets, let’s have some fun and enjoy the sunshine while it lasts! Maybe you would like to create a beach scene in your art journal, or maybe design a layout with some favorite summer photos. Whatever you decide to make we will be looking forward to seeing your creations!
Once you have made your creation just go ahead and upload it into the linky on the Simon Says Stamp Monday Challenge blog! We can’t wait to see what you make!
As always, we’re offering a chance to win a $50 Gift Voucher to Simon Says Stamp! All YOU need to do is join in with the challenge!
Below are three projects created by the design team, that showcase this weeks theme! You can visit the challenge blog to get all the details and see the amazing cards and projects that the design team has created this week. If you click on each designers name, you’ll be taken directly to their blog where you’ll get more details about their project! Be sure to give these talented ladies some comments!
Out Designer In The Spotlight, Chris Bedford, created a bunch of summer fun activity sticks!
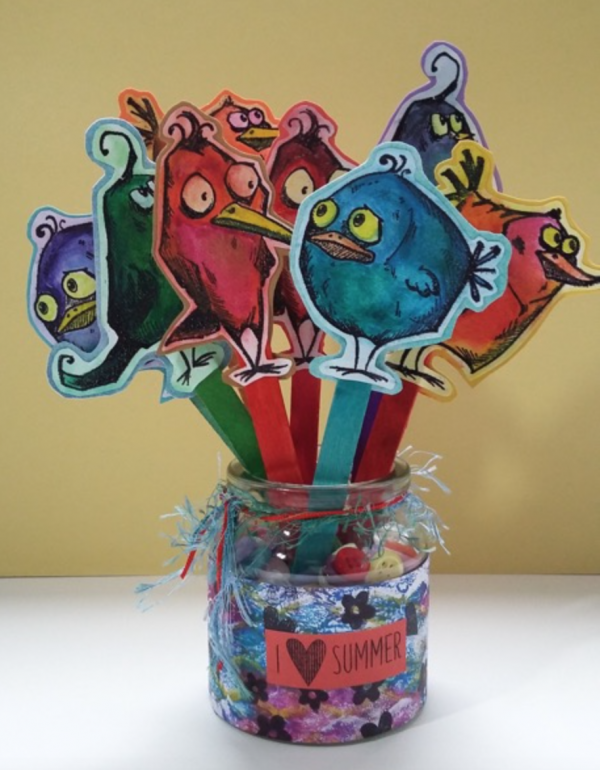
Chris used:
 |
 |
 |
 |
 |
 |
 |
 |
 |
 |
 |
 |
 |
 |
Cheiron Brandon made a mixed media card with some bathing beauties:
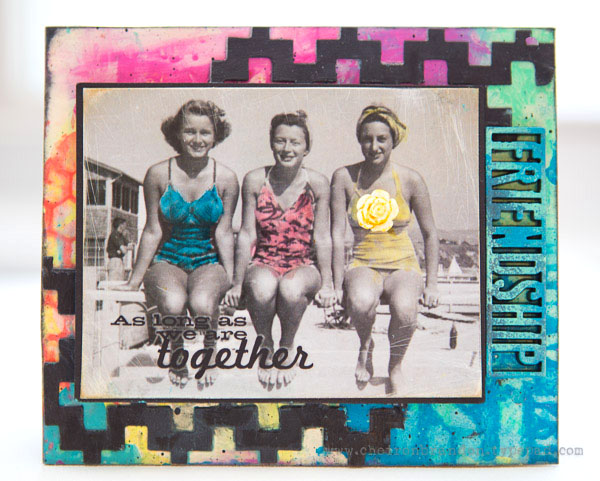
Cheiron used:
 |
 |
 |
 |
 |
 |
 |
 |
 |
 |
 |
 |
 |
 |
Zoey Scarpelli made an art journal page depicting the crashing waves of the Mediterranean Sea:
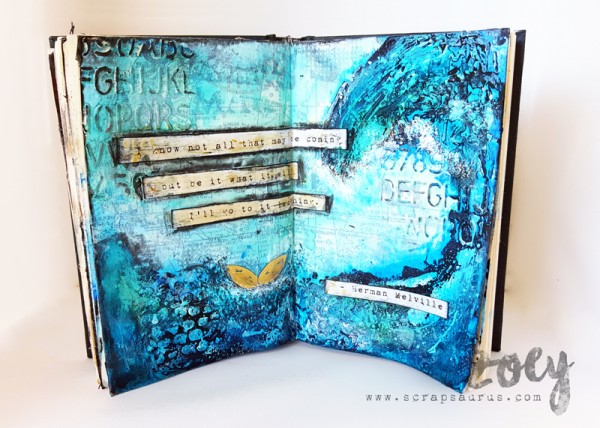
Zoey used:
 |
 |
 |
 |
|
 |
 |
 |
 |
 |
|
 |
 |
 |
 |
|
 |
So now it’s YOUR turn to get your inks, stamps, pastes and paints out and have some Summer Fun!

Do you use Instagram? If so please add #sssmchallenge to your challenge entry uploads so we can see them on there too!
Blog Candy Alert!! Follow our blog via email and comment on this post for a chance to win a special blog candy!

Sunny Studio Stamps Autumn Inspiration
Hi readers! Happy Tuesday! Please welcome back special guest Mendi Yoshikawa of Sunny Studio Stamps to our blog today! Check out both of the beautiful cards and read on for more info!
Hi there! It’s Mendi here today and I’m so happy to be back today sharing some playful cards using a couple of Sunny Studio’s newest sets for Fall!
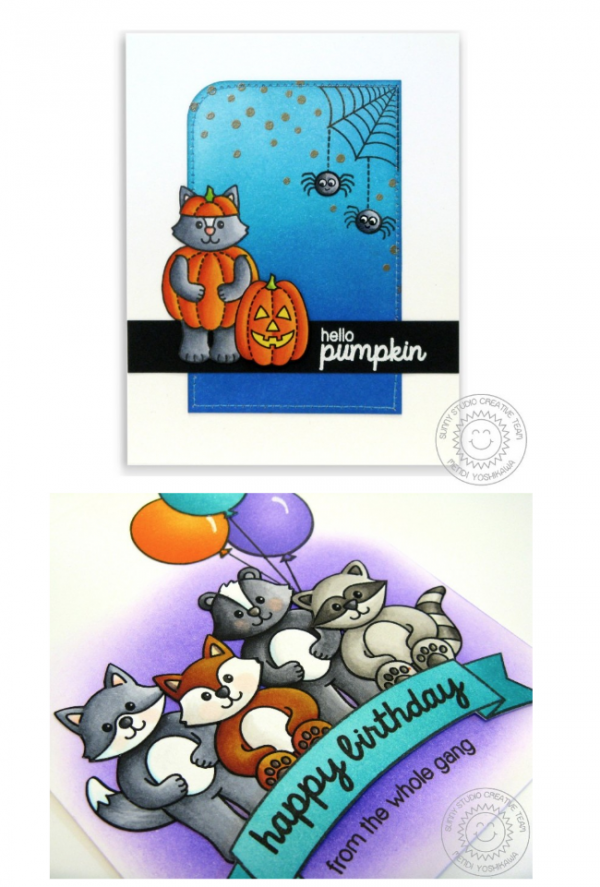
Up first I have a card using our new Woodsy Creatures stamps which were designed as a follow up to our Comfy Creatures and Sending My Love sets–I love how when used together these sets provide endless design options!
This set comes with 5 different woodland critter faces and three unique tails that can easily be stamped together with the provided body or die-cut with the coordinating dies and layered together. For my card I chose to use the birthday sentiment and sitting body from Comfy Creatures together with the images from the new set to form my “gang” of critters for a fun group themed birthday card.

I started by sponging on Wilted Violet Distress ink to the bottom center portion of my card panel where my critters would be, fading it out towards the edges. This gives them a nice glow and sort of grounds them on my card. To give them a base to stand on, I stamped my sentiment on a banner from our Sunny Borders set which was inked up in Peacock Feathers distress ink. I completed my card with some balloons from our Birthday Smiles set which were also sponged with distress ink and given highlights with a white gel pen.


For my next card I turned to our new Halloween Cuties set. Designed with scene building in mind, this set is filled the brim with iconic Halloween images and five fun sentiments.
I don’t know about you, but I’m crazy about using the complimentary colors orange and blue together–I just adore how they pop when paired together. With that in mind I started my card by inking up a cardstock panel with all my favorite blue distress inks working from lightest to darkest. I then trimmed my panel down to 2.75″ x 4.25″ and rounded my top, left corner with a corner punch for just a little something different. I stamped my web in the top, right along with my spiders. I then stamped the bodies of the spiders on some extra scraps of cardstock, colored them with Copics and fussy cut them out to layer over the legs on my background. I love doing this when images are simply too tiny to cut out!
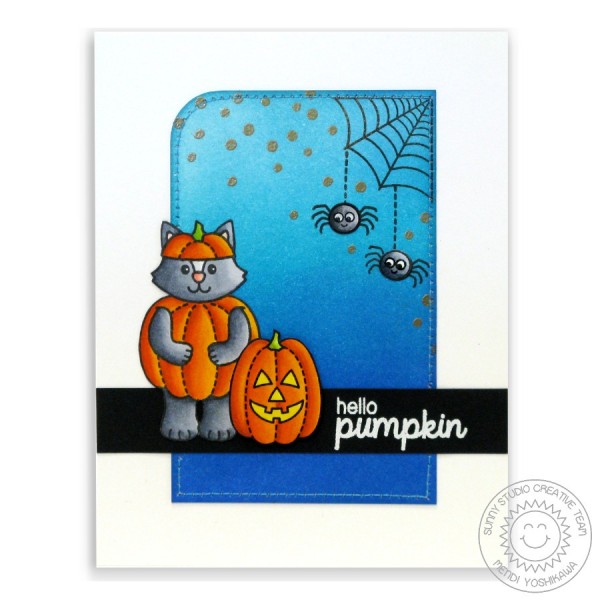
As my scene was starting to take shape, I thought it would be fun to add some stars to my evening scene so I used some solid “sprinkle” stamps from our Birthday Smiles and Sweet Shoppe sets to stamp some scattered dots using clear embossing ink and gold embossing powder. I love when I’m able to stretch my stamps like that, don’t you?
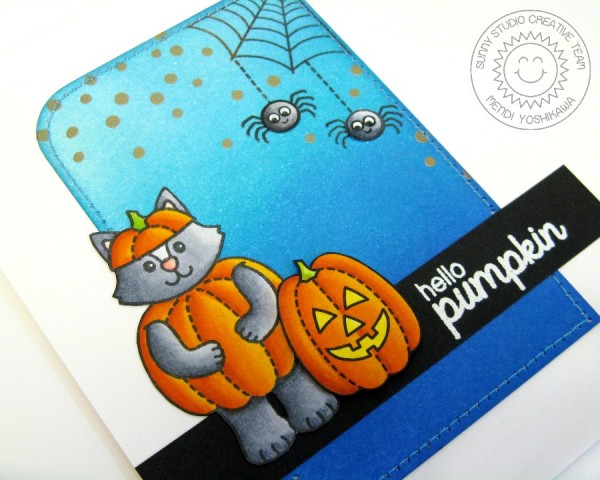
I completed my card by coloring the kitty and jack o’lantern with my Copic markers and stitching around my card panel on my sewing machine with some coordinating thread. When I’m feeling like my project could use a little something extra, stitching always comes to my rescue.
Thanks so much for having me today. I hope you’ve enjoyed my cards and are feeling inspired to create some fun fall projects of your own.
Supplies:
 |
 |
 |
 |
 |
 |
 |
 |
 |
 |
 |
 |
 |
 |
Thanks for reading today, and thanks to Mendi for being our special guest!

Blog Candy Alert!! Follow our blog via email and comment on this post for a chance to win a special blog candy!
Congrats! Blog Candy Winners!
From: Creating Patterns with Shapes: Rebecca Ednie!
From: We’re Going Wild on Wednesday!: Regina Furman!
From: Watercoloring Stamped Images + Canvases with Distress Crayons: Colleen Howell!
From: Color Coordinates: Birthday Boy: Snazzy JJ!
From: Weekender with Wanda – No Line Watercoloring with Altenew!: Jen Metcalf!
From: Studio Monday with Nina-Marie: Trifold Card + No Line Coloring: Vicki Smith!
Please email [email protected] with your mailing address (if applicable), the name of the blog you won from, and the prize you won to claim your prize!
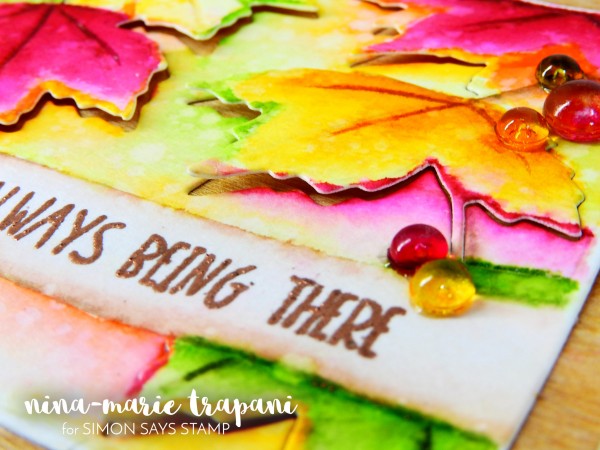
Studio Monday with Nina-Marie: Trifold Card + No Line Coloring
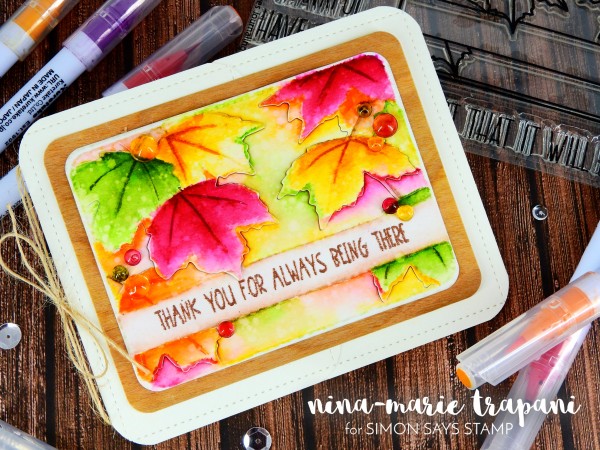
Hello crafters, it’s Nina-Marie here with you today with a brand new Studio Monday feature for you! This week we are showcasing Neat & Tangled products and I will show you how I used their Maple Leaves stamp and die set to create this beautiful fall-inspired card that has LOTS of techniques incorporated into it!
The first technique I’ll cover in today’s video is no line watercoloring. For this card I used Zig Clean Color markers to do my watercoloring, but keep in mind that you can use any watercoloring medium you have on hand to create this card. I love the look of no line coloring because it gives your card a hand-painted artwork feel. When doing no line coloring, you want to make sure you choose a light ink color; for today’s card I used Altenew’s Morning Frost dye ink, but you could use any type of light colored ink for this.
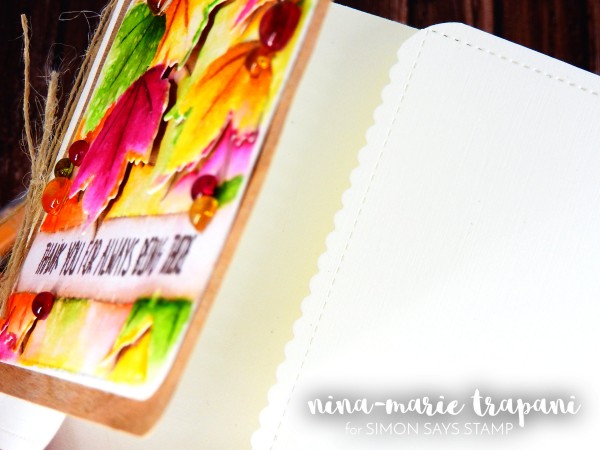
Another technique I’ll be sharing with you is creating a trifold; this could also be classified as a variation to a gatefold card because it’s kind of a blend between the two fold types. In the video, I will walk you through the steps I took to create my version. I love incorporating different card folds into my designs; I don’t always think of it as I am creating, but I love it when I do! :)
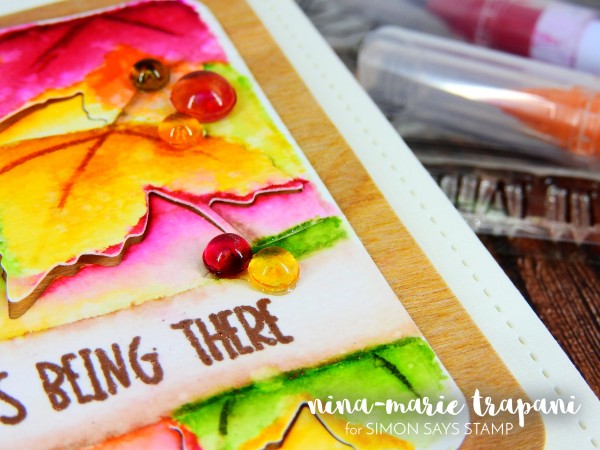
Finally, the last technique I will be sharing with you today is coloring Pretty Pink Posh clear droplet embellishments to match the colors on your card. This technique is SO much fun… although I will warn you that it can be a bit messy sometimes! I used Copic markers to do this, but I’ll also share with you some tips on how you can color your droplets a bit faster.
So I hope you’ll be checking out the video to see how this card came together! Be sure to give the video a thumbs up and subscribe to our channel for more weekly inspiration!
WATCH THE VIDEO:
SUPPLIES:
 |
 |
 |
 |
 |
 |
 |
 |
 |
 |
 |
 |
 |
|
 |
 |
 |
 |
 |
 |
 |
 |
 |
 |
 |
 |
 |
 |
 |
 |


