Studio Monday with Nina-Marie: Faux Letterpress
Hi friends, it’s Nina-Marie here with you today with a brand new video tutorial featuring some of the newest stamps and dies from Hero Art’s Winter collection!
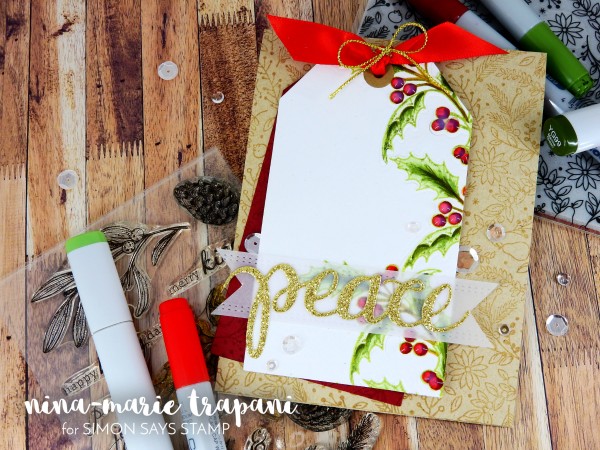
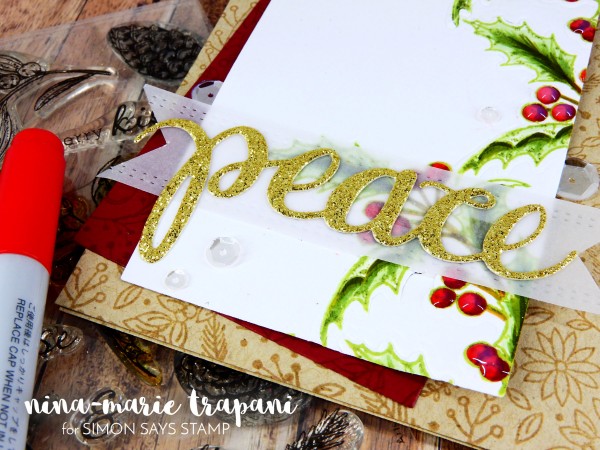
There are SO many fabulous new products from Hero Arts’ newest release; it was so hard to decide what to use! I wanted to share with you a faux letterpress technique and I felt that the Happy Holly Days stamp and die set would be the perfect sets to use for this. I also incorporated a few of my other favorites from the release; Peace stamp and die set, Holiday Florals background and the Nesting Tags die set.

Faux letterpress is a fantastic way to highlight stamped or colored images, as the texture from the letterpress adds relief to the design, helping push the images to the forefront. For this technique, you’ll need to have an embossing mat for your die cutting machine. Depending on the machine you use, you may need to experiment with your sandwich before trying it on your project. I personally use the Big Shot machine, so for my sandwich I used the Sizzix Texturz rubber silicone mat and impressions plate. I placed my platform on tab 1 and laid down the sandwich as follows: Texturz impression plate, rubber silicone mat, paper, die, clear cutting plate. I’ll show you all the steps for this in my video below.
All of the coloring on this card was done with just a handful of Copic markers; I have them listed out for you below as reference:
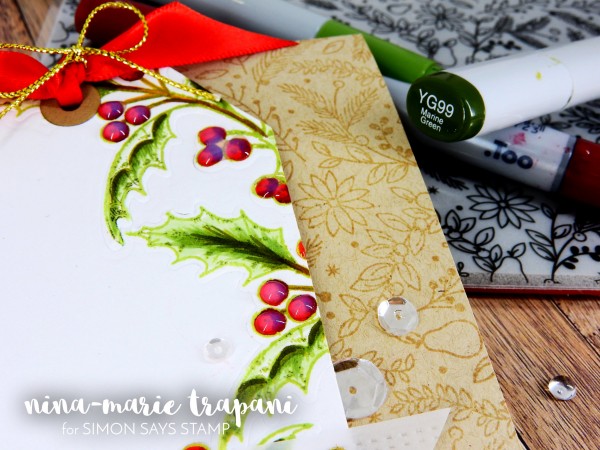
- holly leaves: YG61, YG63, YG95, YG99
- berries: R46, R59
- branches: E35, E47
I hope you’ll check out the video to see how I created this card from start to finish! And I hope it inspires you to try the faux letterpress technique with your stamps and dies as well!
WATCH THE VIDEO:
SUPPLIES:
 |
 |
 |
 |
 |
 |
 |
 |
 |
 |
 |
 |
|
 |
 |
 |
 |
 |
 |
 |
 |
 |
 |
 |
 |
 |
 |
 |
 |

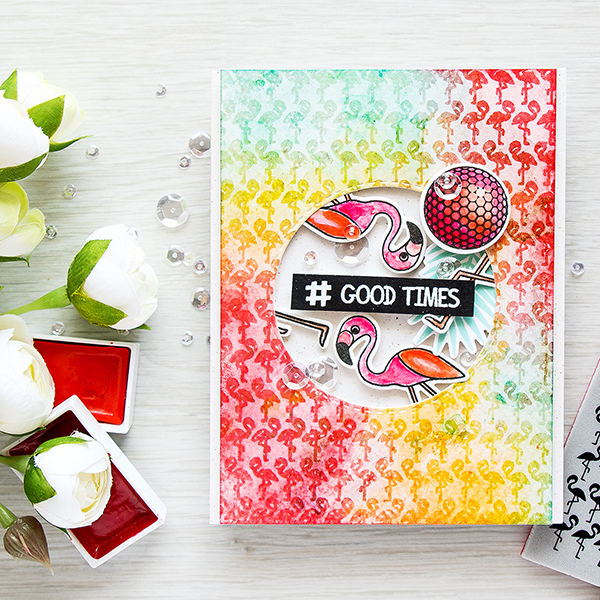
Bright idea: Emboss Resist
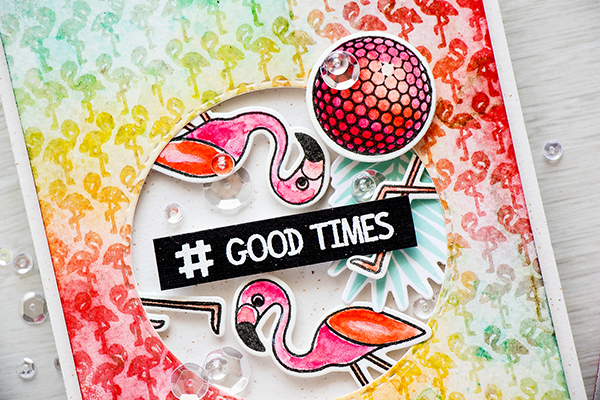
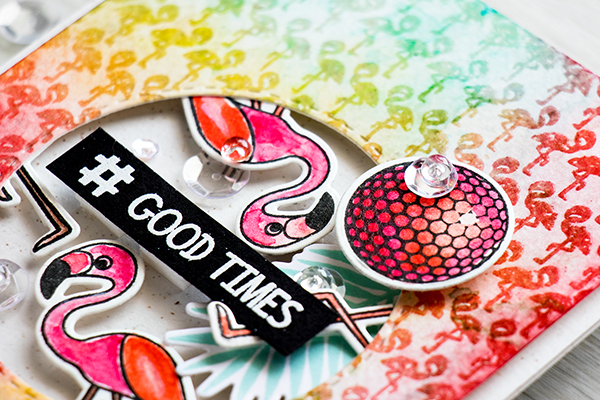
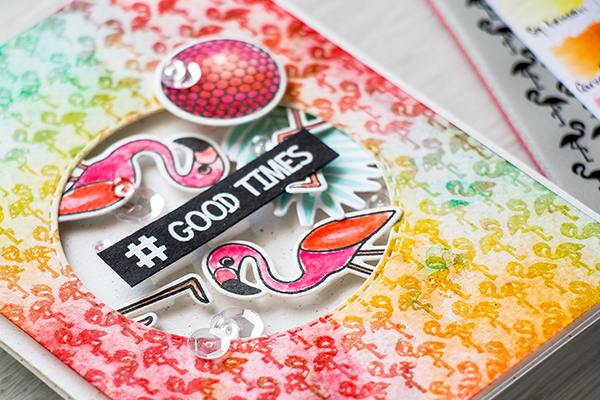
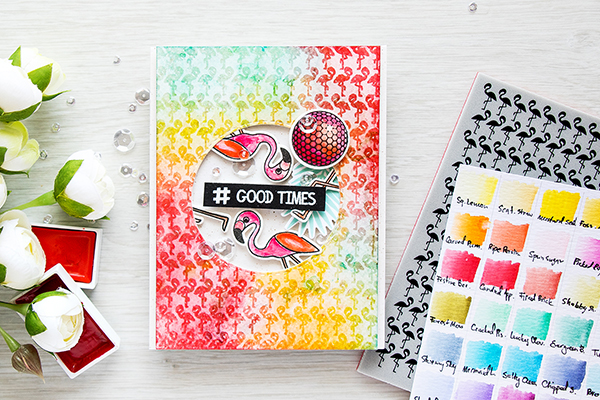
Hi friends! Happy Sunday! Please join me in welcoming back special guest Yana Smakula as a guest on our blog today! Flamingos are so on trend for summer and this card gives you DOUBLE the fun with our Flamingos Background and the Flamingo from our Warm Weather Animals set! I love how she got creative and used a golf ball from our Sports and Planner stamp set! So fun! Be sure to watch the video, and enjoy!
Watch the video:
SUPPLIES:
 |
 |
 |
 |
 |
 |
 |
 |
 |
 |
 |
 |
 |
 |
 |
 |
 |
 |
 |
 |
 |
 |
 |
 |
 |
 |
 |
 |
 |
 |
 |
 |
 |
 |
 |
 |
 |
Thanks so much for reading today and a big thanks to Yana for this fun card idea!

Blog Candy Alert!! Follow our blog via email and comment on this post for a chance to win a special blog candy!
Weekender with Wanda – Getting ready for Autumn with Tim Holtz Stamps!

Happy Saturday! Happy Weekend everyone! I’m back with the latest edition of Weekender with Wanda on the Simon Says Stamp blog! Did you have a good week? I had a really fun week! My husband had to travel for work this week, and I decided to tag along to San Diego! It was a peaceful week. Did some shopping and sight seeing during the days and then we went out exploring in the evenings. It did feel strange to not stamp anything for a week though! I’m back in the studio today and eager to start getting ready for Fall crafting and Stamptember! I made the card I’m sharing today a week or so ago when it was 100 degrees at my house. I am definitely ready for Fall breezes and Pumpkin Spice Lattes! Bring it on!
BONUS: Keep scrolling for a special blog hop below! Today’s post coincided with a fun blog hop being put on by Simon Hurley over at Inklipse! Details at the bottom of my post!
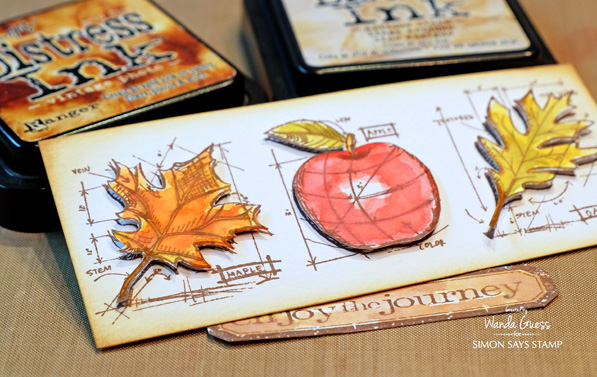
Today is my monthly feature using awesome supplies from Tim Holtz, Stampers Anonymous, Ranger and Sizzix. I look forward to this each month and I look forward to sharing something fun with you. Today is all about my favorite Tim Holtz Mini Blueprint Stamps – and they are the star of the show. I used Distress Markers and a bit of glitter too!
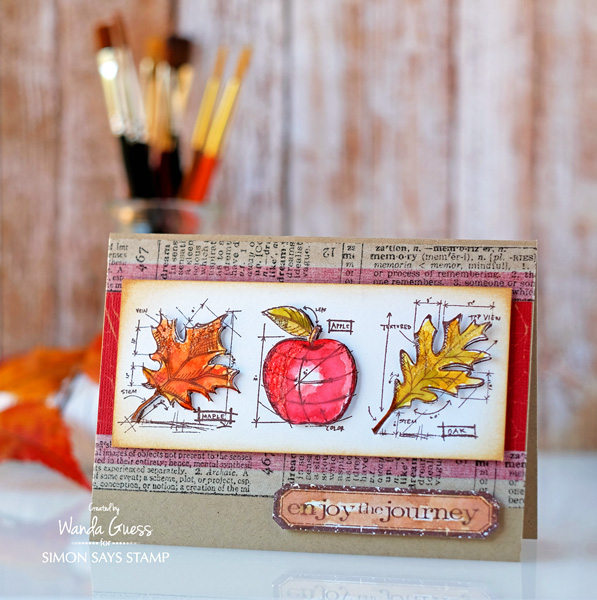
I started with a Kraft card base cut into an A2 size. Next I layered Shattered Cardstock in a beautiful Autumn Red color. I felt like I wanted a bit more interest, so instead of layering another piece of paper, I layered using Tim Holtz Tissue Tape! I will definitely use this technique again. I love that the red paper shows through the tape.
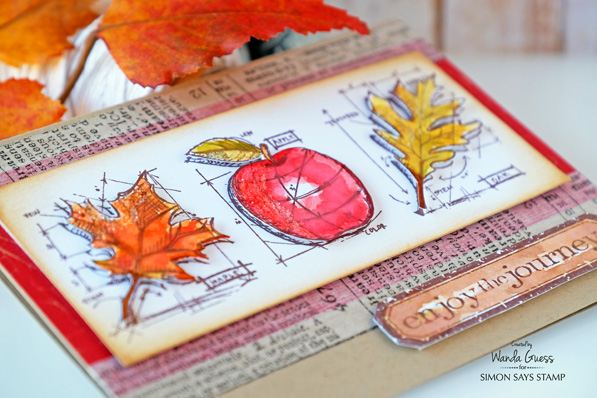
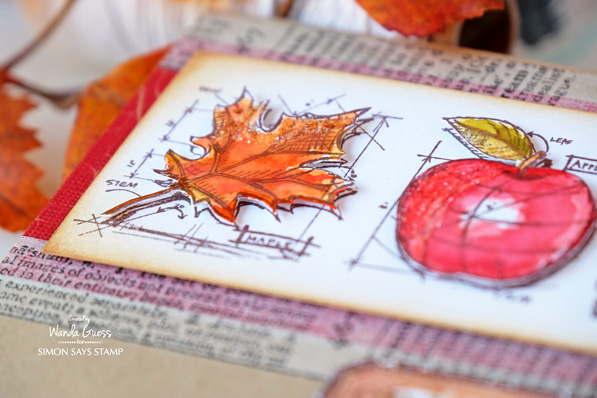
For the three images, I stamped them in brown ink twice onto the smooth side of watercolor paper. I stamped them once in a row – in their final configuration. Then I stamped them a second time to color and cut out for layering. This photo shows a close up of the finished look. You can also see that I used a sponge dauber and Distress Inks (Antique Linen and Vintage Photo) to edge around the panel.

A few photos of my coloring process! I used only Distress Markers to color the images. I softened the look by using a water brush to move the color around on the paper. I think that juicy red apple is my favorite!
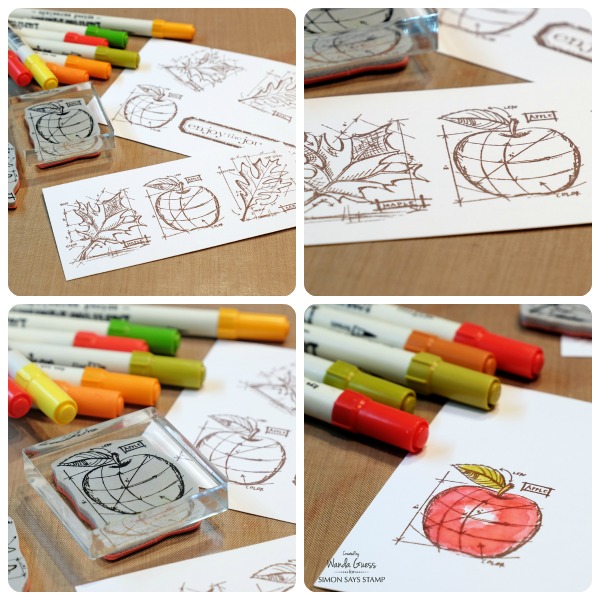
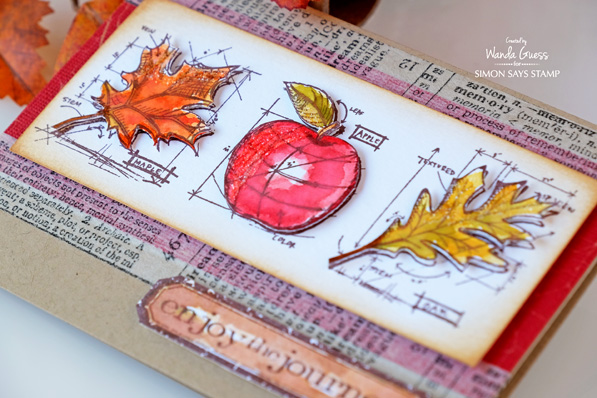
After I colored all the images I cut them out with detail scissors and then layered them onto my panel using foam squares. I really do love this look. It’s my favorite way to use the Blueprint stamps.
At the last minute I added Rock Candy Distress Glitter accents! Glitter makes anything (and everything) better!
I think these would make nice Thanksgiving cards. You could even modify it and use one image – to make some placecards for your Fall table. Yes, I’m totally thinking ahead right now! Also, there are SO MANY blueprint stamps! You could use this layout with any theme – just choose your favorite three stamps!
Thank you for coming by today! Are you ready for Fall? Or are you still going to hold on to Summer for a while longer? Have a great week and I will see you back here soon!
SUPPLIES:
 |
 |
 |
 |
 |
 |
 |
 |
 |
 |
 |
 |
 |
 |
 |
 |
 |
 |
 |
 |
 |
 |
 |
 |
 |
 |
 |
 |
 |
INKLIPSE BLOG HOP! CLICK HERE FOR DETAILS!

Be sure to check out this fun hop that we are honored to be a part of! The next stop is Newton’s Nook!


