Holiday Inspiration from Sunny Studios
Hi friends! TGIF! Thanks for popping back over to the blog this afternoon for some BONUS weekend inspiration! Were here with Mendi Yoshikawa who has made FOUR gorgeous holiday cards to get you inspired and in celebration of the newest collection release from Sunny Studio Stamps! Read on & enjoy!
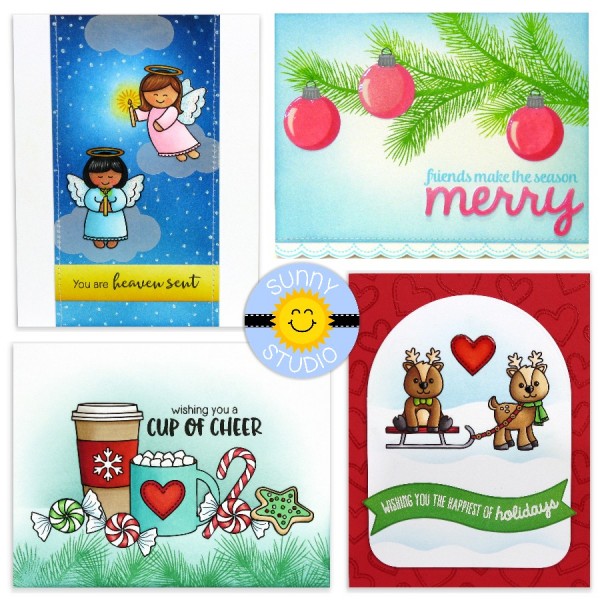
Hello there! It’s Mendi here today. I’m so happy to be back sharing a handful of holiday cards using Sunny Studio’s new Winter Release!
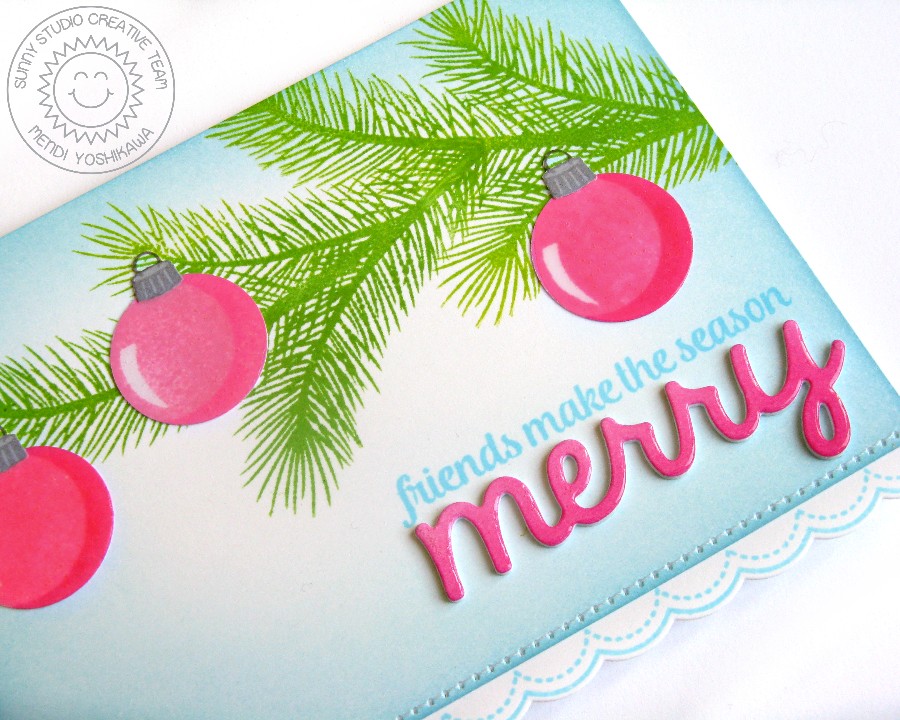
For my first card I paired the new layering set called Holiday Style with a phrase from the new Merry Sentiments stamps and coordinating Merry Word die. I love that the branch from this set can be used in so many fun way for completely unique looks. For this card I stamped the branch twice so that it would stretch across the length of my card.
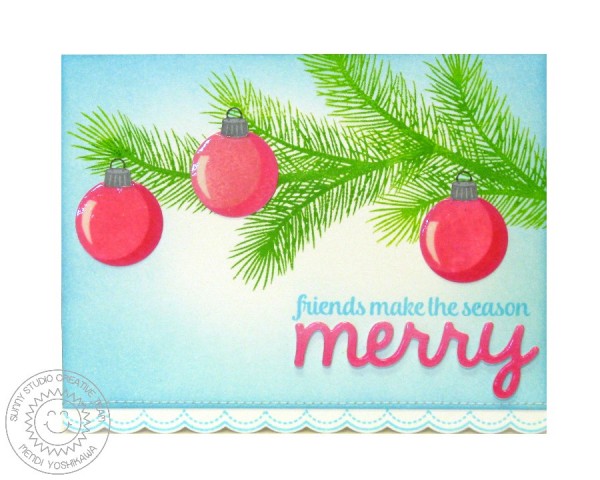
This set comes with a number of layering images to decorate the tree with including glass ball ornaments, a life-like jingle bell and holiday bows. For this card I layered the ornament in fun shades of pink and then topped them & my merry word with glossy accents for a touch of shine. I finished off my card with a sweet scalloped border using the Sunny Borders Stamps & coordinating dies.
Ornament Card Supplies:
 |
 |
 |
 |
 |
 |
 |
 |
 |
 |
 |
 |
 |
 |
 |
 |
 |
 |
 |
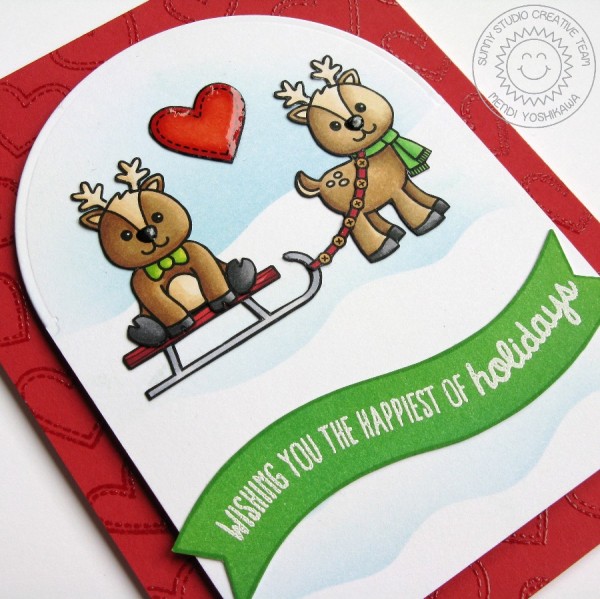
For my next card I turned to the new Gleeful Reindeer stamp set. This set comes with three sweet Reindeer images, trees in three sizes (perfect for scene building) and a number of supporting images including decorations for the trees, gifts and a sled.
I started by stamping my card base with the hearts from the new Mug Hugs set and Sending My Love set using Versamark ink and clear powder on red cardstock. I stamped an extra Heart from the Mug Hugs set with Copic Friendly ink, colored it in with Copics and topped it with Glossy Accents before setting it aside to dry.
To create my arched panel, I used the new Sunny Semi Circle Dies. These dies were designed to be ultra flexible for creating tags, labels, bookmarks, card panels and shaped cards from 1/2″ wide to 4″ wide. To use them, I drew a faint pencil line on my cardstock with a T-square ruler, used some washi tape to secure them in place along the line that was drawn, ran it through my die-cutting machine and then used my paper trimmer to trim them down each side. Because they are sized at exact 1/2 increments they are super easy to trim.

I stamped and colored my images from the Gleeful Reindeer set with Copic Markers and then cut them out. I inked up a small piece of white cardstock with mowed Lawn Distress Ink and stamped the banner from the Little Angels set with the same color of ink before fussy cutting it out. I then heated it up with my heat gun to make sure the ink was completely dry before heat embossing my sentiment with white embossing powder.
To create my snowy hills, I used the Wavy Border dies which were cut from masking material and then inked along the edge with my jumbo dauber and tumbled glass distress ink to create soft snow drifts. I love the results! When I was done I just assembled my pieces as pictured using a glue pen to adhere the smaller pieces.
Reindeer Card Supplies:
 |
 |
 |
 |
 |
 |
 |
 |
|
 |
 |
 |
 |
 |
 |
|
 |
 |
|
 |
|
 |
|
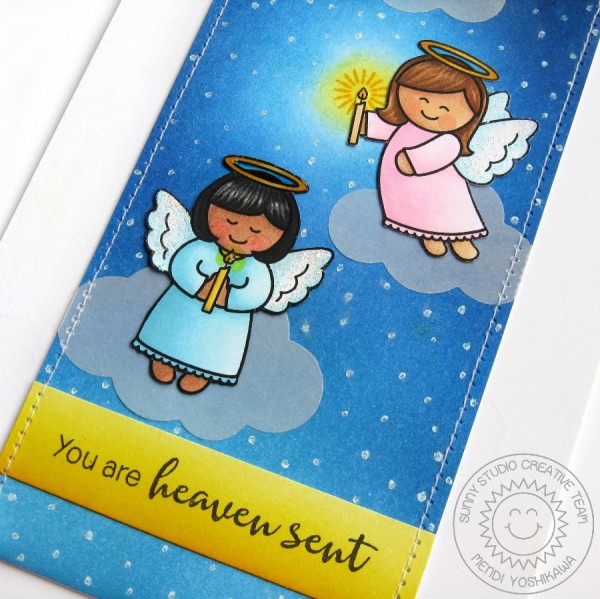
For my third card I wanted to focus on the sweet angel images in the new Little Angels set. To create my background I started by inking a panel of white cardstock, starting with a small spot of squeezed lemonade where I thought one of my angels with her candle would go. I then applied some Broken China distress ink around the edge to create my glow and some more along the bottom of my card panel. Next I switched to Salty Ocean distress ink and I blended it out to the edges of my panel, applying it lighter towards the bottom as it blended into the Broken China. As a last step, I added some Chipped Sapphire distress ink on the outer edges.
I then die-cut some clouds from vellum using the Rain or Shine dies and Sunny Sentiment dies which I applied using 3M spray mount for an almost invisible application. Some simple dots with a white gel pen became my starry sky.

The sentiments in this set are geared towards the Christmas season, but there is a smaller companion set that I used for my card today call Angelic Sentiments which can extend it’s use to all year ’round.
To finish my card I trimmed down my panel, added a simple stamped sentiment and stitched it along the edges with my sewing machine before adhering it to my card base. As a final step I adhered my little angels which were colored with Copics and given glittery wings using Stardust Stickles.
Angels Card Supplies:
|
|
|
 |
 |
 |
 |
 |
 |
 |
|
 |
|
|
 |
|
|
 |
 |
 |
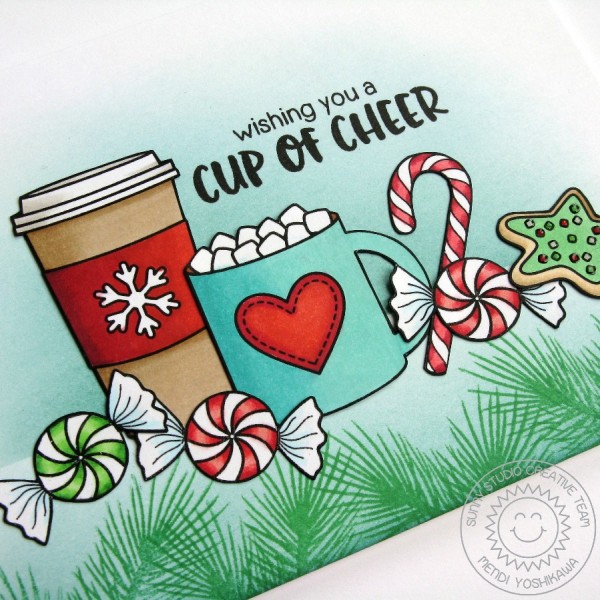
My last card lets the fun images from the new Mug Hugs set take center stage. I stamped all my images from the set (along with the mint candies from Sweet Shoppe set) using Black Licorice Hybrid ink and then Copics to color them in. After my images were colored and cut out, the rest of the card came together quickly.

I applied Evergreen Bough distress ink along the bottom of my card base and then again about 1-1/2″ from the bottom using a jumbo dauber and a post-it to mask off a “table” of sorts to rest my images on. I then stamped the tree branch image from the Holiday Style set repeatedly along the bottom to give my card a soft border.
I finished my card by adhering my images with a glue pen and stamping my sentiment with my favorite VersaFine Black Onyx ink (using the Mini Misti because I wasn’t wanting to risk messing it up at this point). A little bit of glossy accents was added to my cookie sprinkles and I was done.
Phew! Are you still with me? Sorry to be so long winded. ;)
I hope I’ve inspired you in all your holiday card making endeavors. I would love to hear which products are your favorite from our new release! Thanks so much for having me today. :)
Coffee & Cocoa Card Supplies:
|
|
 |
|
 |
 |
 |
|
|
|
|
|
|
|
|
 |
|
|
Thanks for reading our special Friday BONUS post today, and thanks to Mendi for all this GORGEOUS content! See you tomorrow! :)

Blog Candy Alert!! Follow our blog via email and comment on this post for a chance to win a special blog candy!
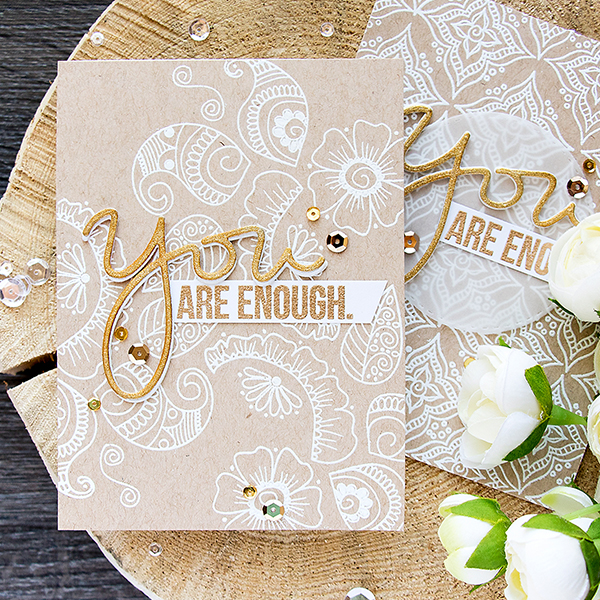
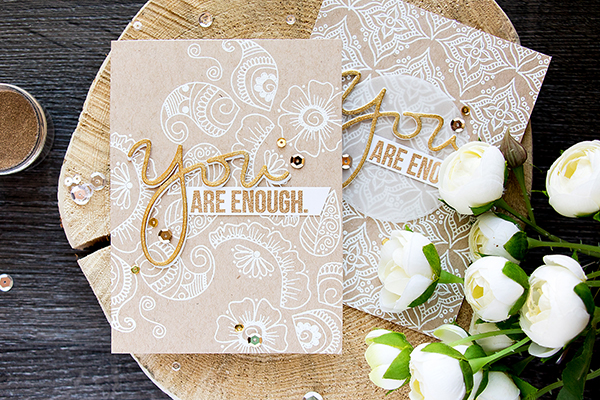
Henna Patterns Background
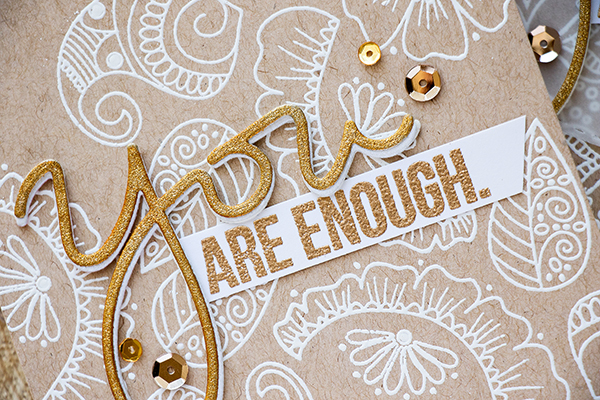
Helloooo crafty friends! Happy Friday!! Week’s just fly here at Simon headquarters, but it’s fun to take a crafty pause each day to share some inspirations from some of the brightest shining stars in the biz! Welcome back Yana Smakula to our blog for her first of two features this month! I love the classic route she went with our Henna Patterns exclusive design. Read on, enjoy, and be sure to watch the video! Cheers!
Watch the video:
Supplies:
 |
 |
 |
 |
 |
 |
 |
 |
|
 |
 |
|
 |
 |
 |
 |
 |
 |
Thanks for reading today, and thanks to Yana for being our guest!
Blog Candy Alert!! Follow our blog via email and comment on this post for a chance to win a special blog candy!
How To: Nuvo Products from Tonic Studios
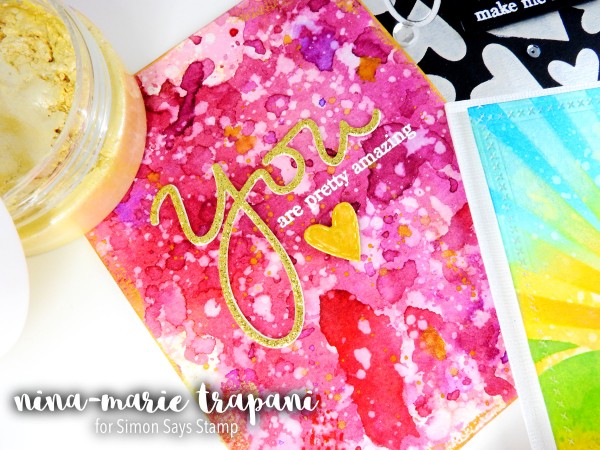
Hi crafty friends! Its Nina-Marie here with you today with a close up look at some of the fun Nuvo embellishment products from Tonic Studios!
Tonic’s Nuvo embellishment line consists of many different types of glitters, pastes, embossing powders, and more. Today we will be looking at the Pure Sheen Glitter, Crystal and Glitter Drops, Glimmer Pastes and Embellishment Mousse. I’ll be sharing not only a close up look at each product, but I’ll also be putting these products into action and showing a few different techniques that you can achieve with each product.
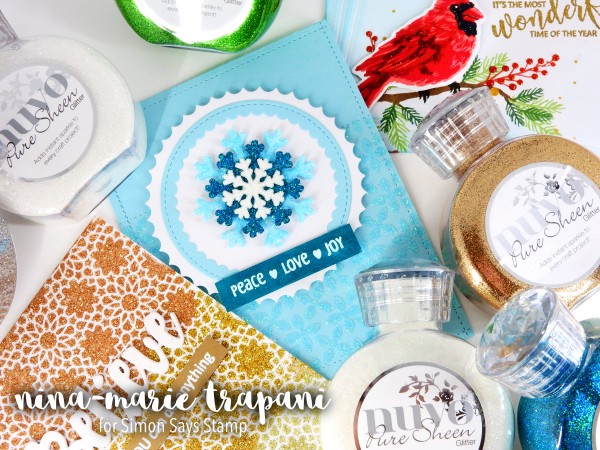
Because there are SO many things you can do with these products, I’m breaking this post up into separate videos (one for each product type). This will allow you to focus solely on the products you are interested in, rather than watching one long video of everything. So let’s get to it…!
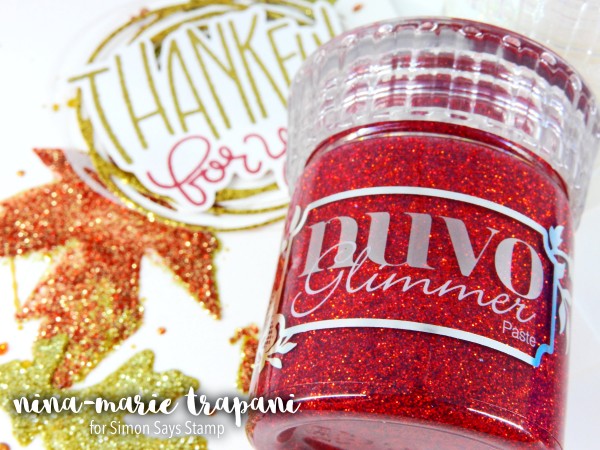
PURE SHEEN GLITTER
Our first close up is going to be the Nuvo Pure Sheen Glitters. The glitter colors in these bottles are DIVINE! I could literally line these up onto a shelf and use them as decoration, that’s how pretty they are!
The bottles are just over 3.3 oz, which means they contain A LOT of glitter! We carry 12 different colors of the glitter bottles here at the Simon Says Stamp store and you can find them all HERE.
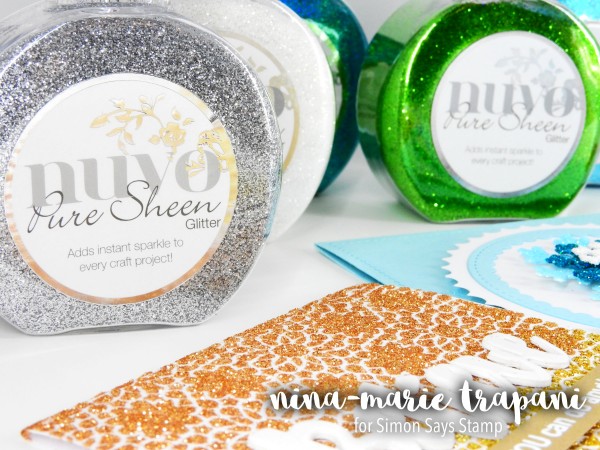
Glitter can sometimes pose challenges in keeping it contained from flying all over your workspace; I find having coffee filters to use as a “catch-all” beneath the paper I am pouring glitter onto very handy. For clean up, both baby wipes and a microfiber cloth are something I reach for most often!
In the video below, I’ll be sharing techniques such as creating glitter die cuts, glitter backgrounds, adding accents of glitter and more, so be sure to check it out!
WATCH THE VIDEO
SUPPLIES
Many of the products featured in this Pure Sheen Glitter video are linked below:
 |
 |
 |
 |
 |
 |
 |
 |
 |
 |
 |
 |
 |
 |
 |
 |
 |
 |
 |
 |
 |
 |
 |
 |
 |
 |
 |
 |
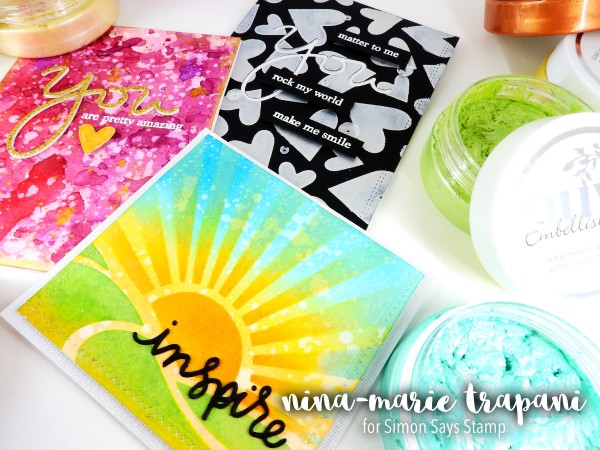
GLIMMER PASTE
Nuvo Glimmer Pastes are much like the many embossing and texture pastes on the market, except with one key difference… these are VERY glittery! The Glimmer Pastes come in 12 stunning colors, which you can find at the Simon Says Stamp store HERE. I love the fun sparkle that these pastes add to cards, and how beautifully they stand off both dark and light colored cardstocks alike.
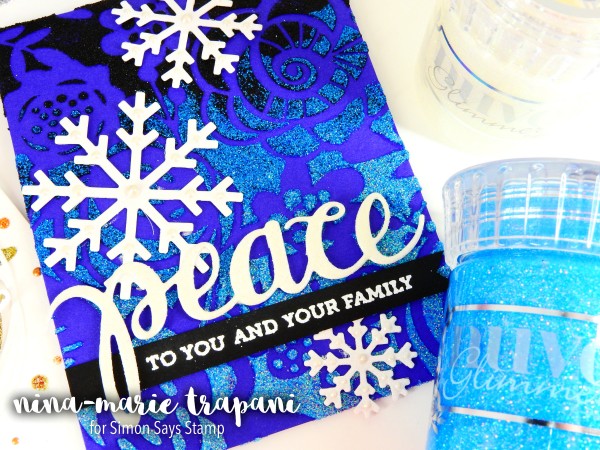
These pastes can obviously be applied through a stencil onto paper, but did you know that you can create embellishments with the pastes too? In the video below, I’ll walk you through the traditional application of paste onto cardstock, as well as a couple of fun ways to add pastes on both die cuts and as stand alone embellishments!
I find a good, metal palette knife very handy to use when applying pastes into my stencils, because the metal isn’t quite as “flexible” as a plastic palette knife; hence I feel as if I have a bit more control in the application process. I also like to use a non-stick surface underneath my paper as I apply the paste onto my project; the pastes do not bond onto non-stick surfaces, such as certain craft mats, adhesive backing sheets, photo sleeves/page protectors, or freezer paper. I like freezer paper most of all, because it is easy to clean up and reuse over and over, as well as disposable when I’m finished. I also like that I can make the freezer paper as large or as small as I like, making it fit to either my workspace or project perfectly!
Be sure to check out the video below for a look at these amazing pastes, techniques and additional information!
WATCH THE VIDEO
SUPPLIES
Many of the products featured in this Glimmer Paste video are linked below:
 |
 |
 |
 |
 |
 |
 |
 |
 |
 |
 |
 |
 |
 |
 |
 |
 |
 |
 |
 |
 |
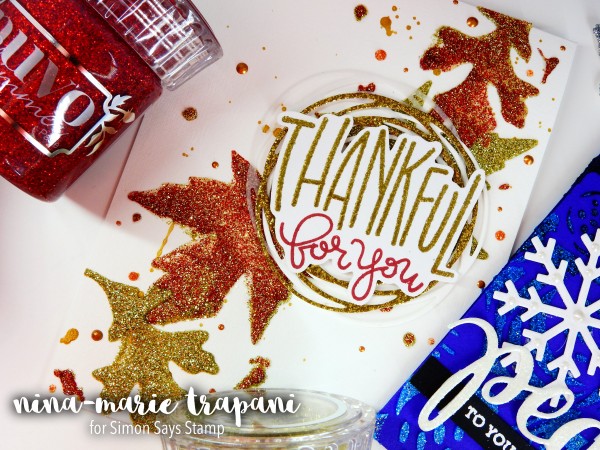
CRYSTAL & GLITTER DROPS
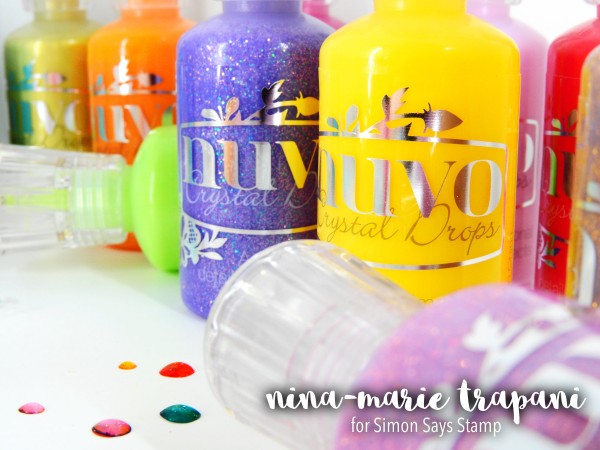
The Nuvo Crystal and Glitter Drops have probably been one of THE hottest items of this year! And after having even just one of these gorgeous embellishment bottles, you can see why… their versatility is endless, and the results are simply STUNNING. You can see all the amazing colors of these embellishment drops products at the Simon Says Stamp store here: Crystal and Glitter Drops.
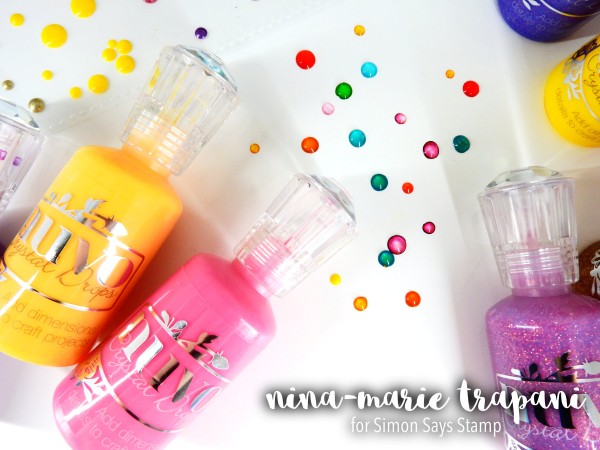
These Crystal and Glitter Drop embellishments can be used in a variety of ways; in the video below, I’ll be sharing details and examples of the obvious -and not so obvious- ways that they can add fun accent details to your cards!
COLOR CHART
I like to keep organized; so much so, that I like to have things labeled and sorted by color (as in, rainbow order… I know, I am weird! LOL!). I find that having color charts are very handy for me, not only to know what I have and what I’m missing, but also as I am working, I reference my color charts very frequently to help me select the right hue or shade for my project.
In the video, I referenced and shared a look at this color chart, which I use for keeping my Nuvo Crystal and Glitter Drops organized; you are welcome to download/print the chart to use for your organization needs as well.
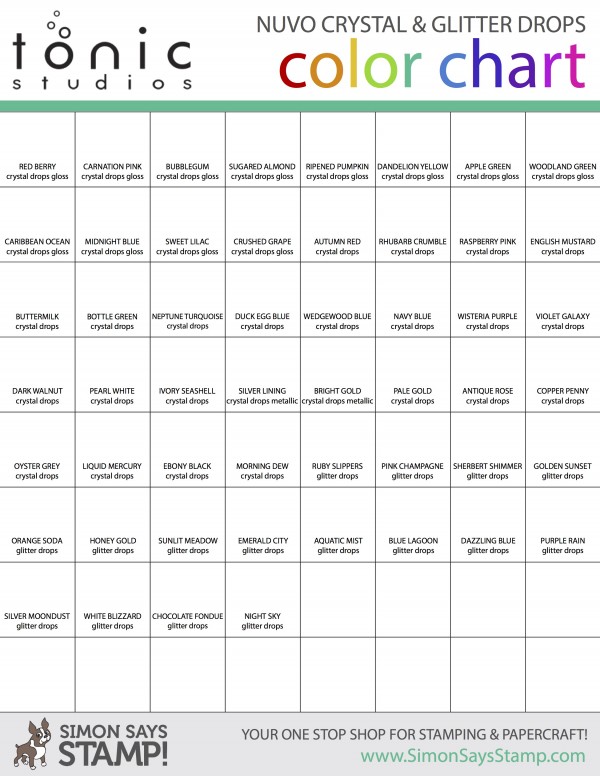
CLICK HERE for the Nuvo Crystal & Glitter Drops Color Chart PDF.
WATCH THE VIDEO
SUPPLIES
Many of the products featured in this Crystal & Glitter Drops video are linked below:
 |
 |
 |
 |
 |
 |
 |
 |
 |
 |
 |
 |
 |
 |
 |
 |
 |
 |
 |
 |
 |
 |
 |
 |
 |
 |
 |
 |
 |
 |
 |
 |
 |
 |
 |
 |
 |
 |
 |
 |
 |
 |
 |
 |
 |
|
 |
 |
 |
 |
 |
 |
 |
 |
 |
 |
EMBELLISHMENT MOUSSE
The Nuvo Embellishment Mousse in one word: butter. This stuff is like embossing paste, but even better! First, the metallic, shimmery colors are to die for. Second, they are REALLY easy to use. And three, they look AMAZING in a variety of techniques! From applying through a stencil, to adding over a die cut to create a beautiful embellishment, to even watercoloring, you can do so much with these Embellishment Mousse products! You can see all of the mousse products at the Simon Says Stamp store HERE.
I’ll be sharing all three of these techniques, a close up look at these Embellishment Mousse jars, plus tips and tricks along the way in the video below.
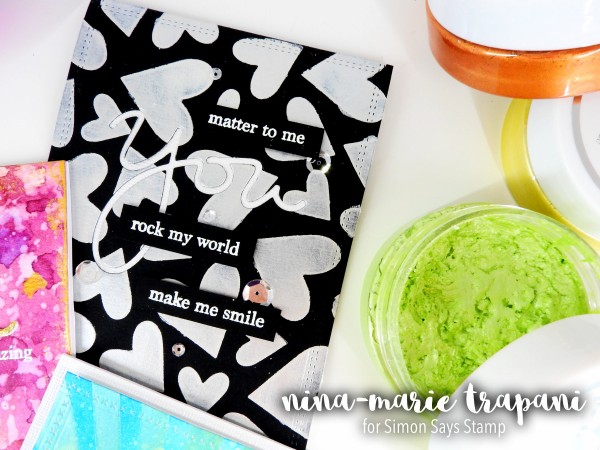
You can apply the Mousse with a palette knife, but I find it easiest to add the paste with either a soft, dry cloth or my finger (which is even more fun!). I’ll be showing both application processes in the video.
WATCH THE VIDEO
SUPPLIES
Many of the products featured in this Embellishment Mousse video are linked below:
 |
 |
 |
 |
 |
 |
 |
 |
 |
 |
 |
 |
 |
 |
 |
|
 |
|