Studio Monday with Nina-Marie: Die Cut Scene Featuring Paper Smooches
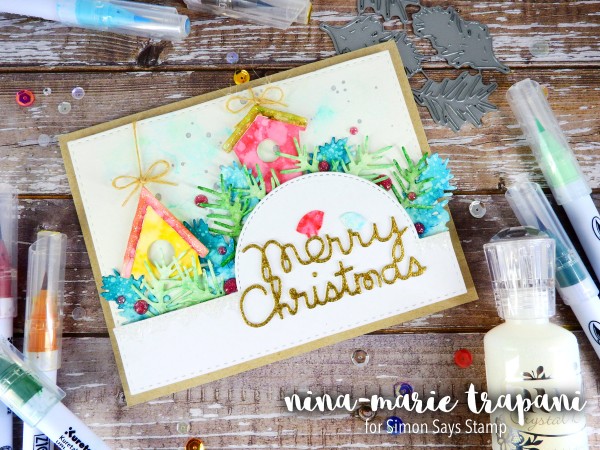
Hi there crafty friends! It’s Nina-Marie here with you today, sharing a brand new Studio Monday video featuring Paper Smooches dies!

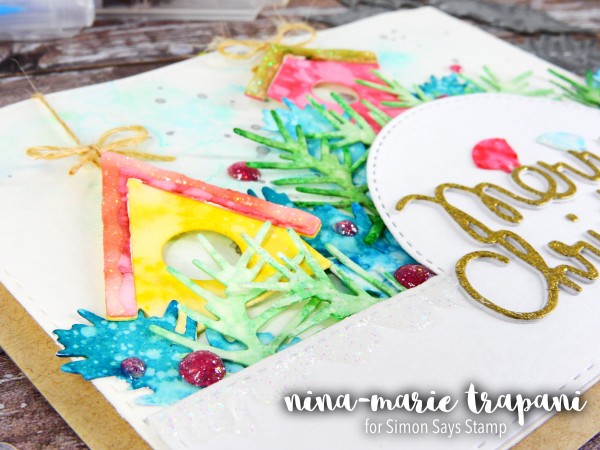
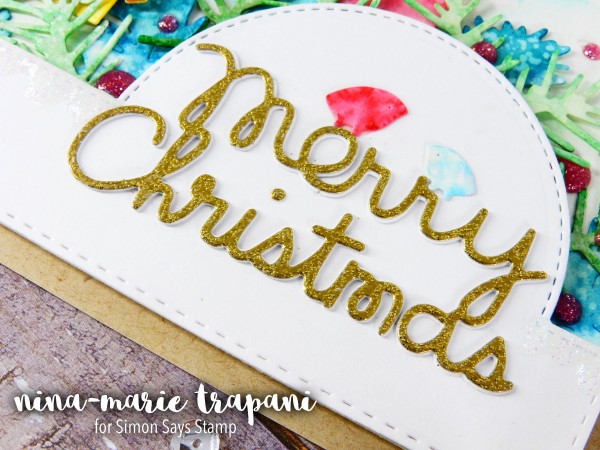
Paper Smooches is well known for their adorable, whimsical style and these dies that I am using in today’s card (Wreath Builder, Merry Christmas and Bird Houses), are a perfect example of that! I love how easy it is to pair Paper Smooches products together, because they carry that fun style throughout their entire collection of stamps and dies.
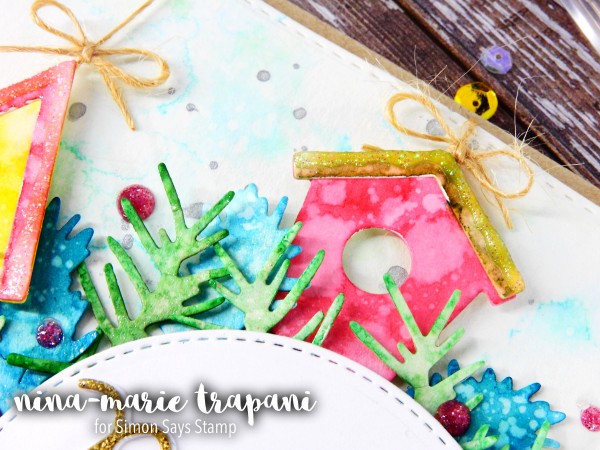
In this video, I’ll be sharing not only how I built this cute, little scene but also how I did an ink smooshing watercolor technique using Zig Clean Color markers! I’ll be walking you through how I did the ink smooshing and also share a few tips on what I find works best for me when doing this technique.
Be sure to check out the video below to see this card come together! And also be sure to subscribe to our channel (and blog!) if you don’t already, because we post weekly inspiration all year long… which you won’t want to miss!
WATCH THE VIDEO
SUPPLIES
 |
 |
 |
 |
 |
 |
 |
 |
 |
 |
 |
 |
 |
 |
 |
 |
 |
 |
 |
 |
 |
 |
 |
 |

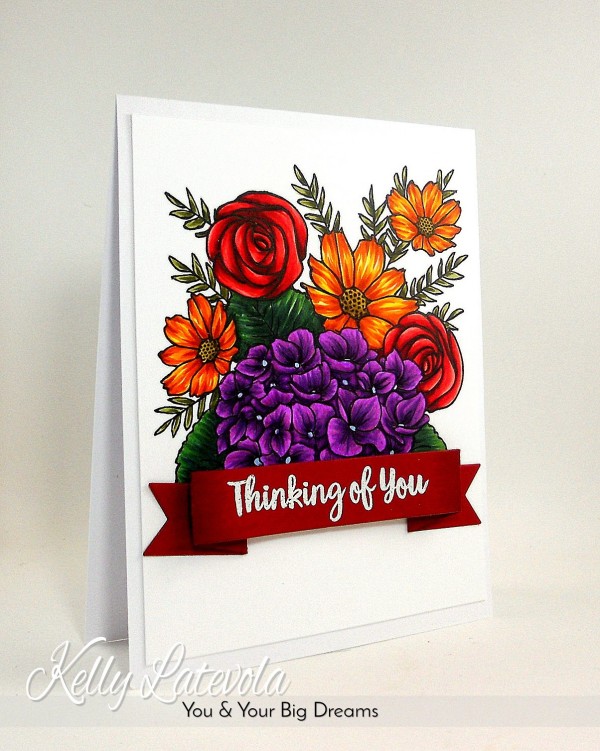
Oh Happy Day + Copic Coloring
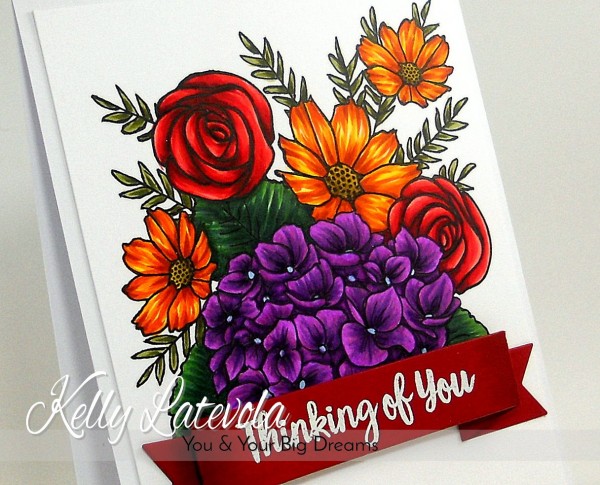
Hi friends! Happy Sunday! We’re back with a GORGEOUS Copic colored floral arrangement card with the super talented Kelly Latevola! In this card she makes a custom floral bouquet by combining our Oh Happy Day, Hydrangea Blooms, & Best Mom Ever stamp sets! Of course, she’s also made a video to take you through the process so be sure to watch that and enjoy!
Watch the video:
SUPPLIES:
 |
 |
 |
 |
 |
 |
 |
 |
 |
 |
 |
 |
 |
|
 |
 |
 |
 |
 |
 |
 |
 |
 |
 |
 |
 |
 |
 |
 |
 |
 |
 |
 |
 |
 |
 |
 |
 |
 |
 |
 |

Blog Candy Alert!! Follow our blog via email and comment on this post for a chance to win a special blog candy!
Weekender with Wanda – Mama Elephant Blooms!

Hello, and welcome back to another edition of Weekender with Wanda here on the Simon Says Stamp Blog! How was your week? Happy Saturday! It was a gorgeous week here in Northern California. Perfect weather and lots of Autumn activities happening. I hope you are enjoying the season! It’s really time to start thinking in earnest about holiday crafting. I always think to myself “I have plenty of time to think about Christmas cards” and then BAM it hits me… NO I DON’T! Haha. Maybe I need to get down the bins of holiday crafting supplies sooner rather than later!
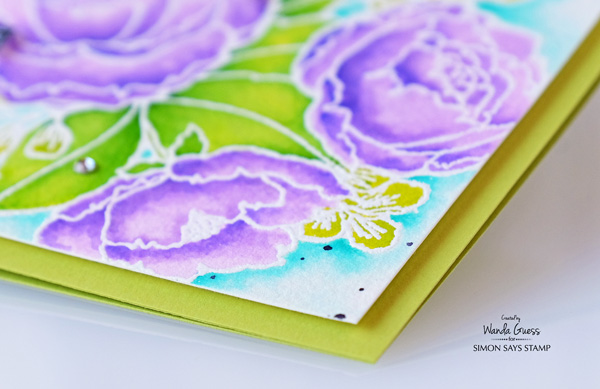
Today’s card uses pretty stamps from one of our favorite companies around here – Mama Elephant. Their style is so unique and they have something for everyone, from super adorable cute animals, to elegant florals. Today I’m using one of my favorite stamp sets from Mama Elephant. It’s called Organic Blooms and it is perfect for any type of coloring. I chose to use my Zig Clean Color Brush Markers this time. If you haven’t had the chance to work with these markers yet, you really should! The colors are so vivid and pure and clean. The tips of the markers are tiny brushes so it’s easy to get into tight areas, and just as easy to make a large wash of color.
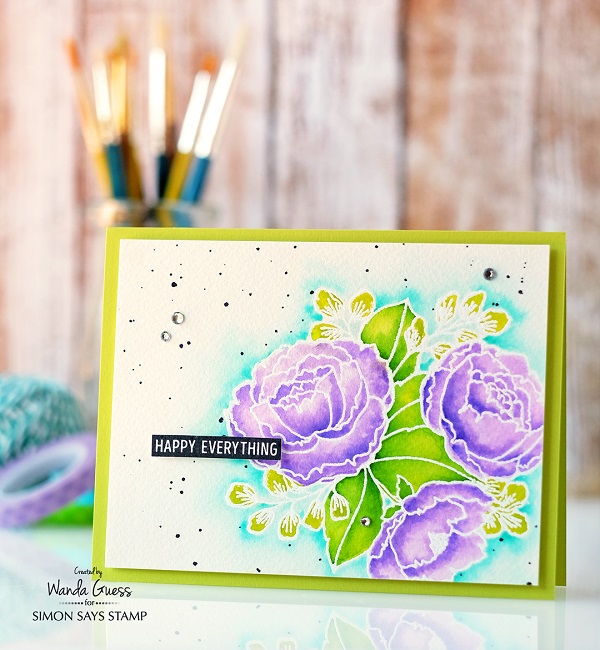
I started this card by stamping in clear ink and heat embossing in white embossing powder directly onto a watercolor cardstock panel. I let parts of the image go off the side of the watercolor panel for a bit of visual interest. This stamp is one large image and it’s arranged so beautifully.
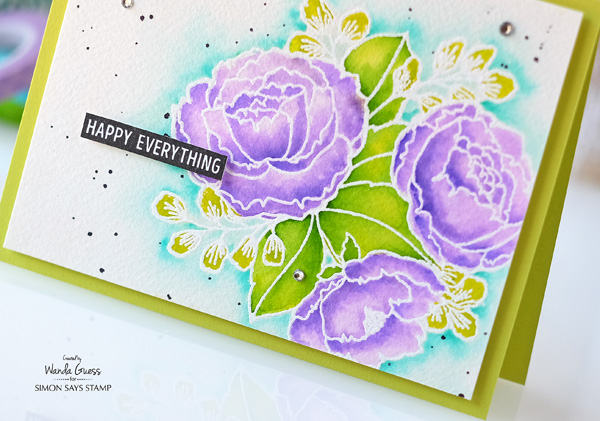
Here are some tips for watercoloring with Zig Markers. I use a small size brush for water and I generally wet the area of the paper with clear water first. Then I take the markers and color into the wet area. The color will spread nicely into the water. Then I take another, darker color, to add depth and shadow. Once a section dries, I see if I’m happy with it. If not, it’s so easy to go back and add more color! The key is to have fun with it and experiment until you find your own style! I used a few shades of purple and green on the different elements.
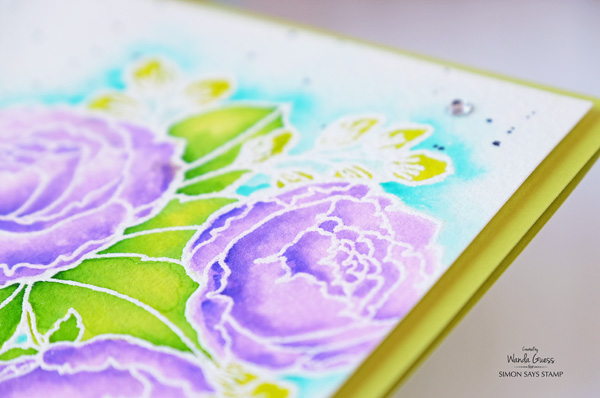
When I watercolor, especially florals, I love to have a soft wash of color around the edges. For this card I’ve chosen a nice teal/aqua color for the wash. To do this technique may seem kind of intimidating… But it doesn’t need to be! I wait until all the other colors are perfectly dry. Then I use clean water and wet the area right up to the edges of the flowers and leaves. Once the area is good and wet, touch the tip of the marker into the water. It naturally follows the path of the clean water and will spread and soften as it gets farther away from the edge. Again, here, I will let it dry – and often go back and add more color. I really hope you will try this!
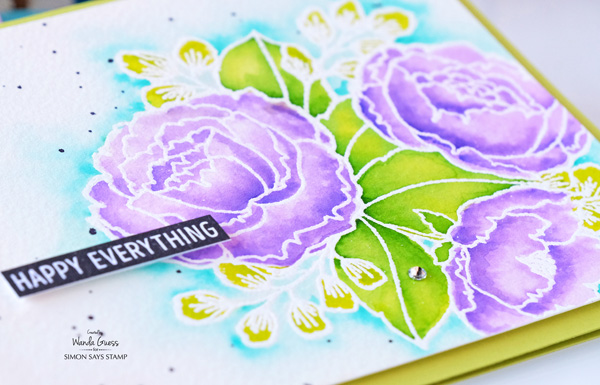
I decided to add a few black paint speckles and also a few clear rhinestone gems. The sentiment was stamped in Intense Black Ink and then cut out by hand with scissors. I adhered the sentiment with a few small foam squares. I made my A2 card base using bright green cardstock. The watercolor panel was adhered to the green card using foam squares.
Thank you for joining me today! Have fun watercoloring!
SUPPLIES FOR TODAY:
 |
 |
 |
 |
 |
 |
 |
 |
 |
 |
 |
 |
 |
 |
 |


