Bright Multicolor Autumn Stamping (Thank You Card)
Happy November! Kristina here. :)
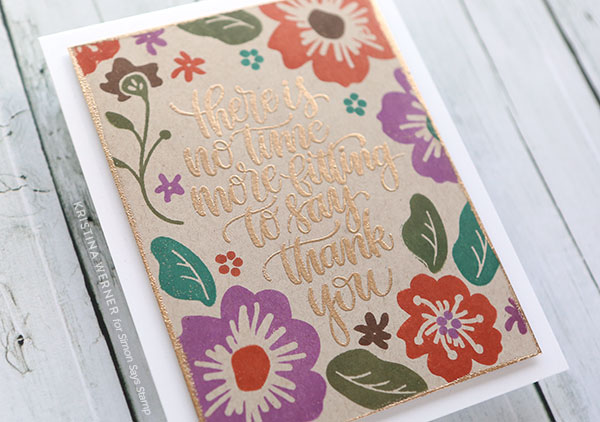
For my card today, I wanted to create an autumn colored card, but with a pop of color. I used quite muted autumn colors but then added some Hot Mama ink to brighten it up. :)
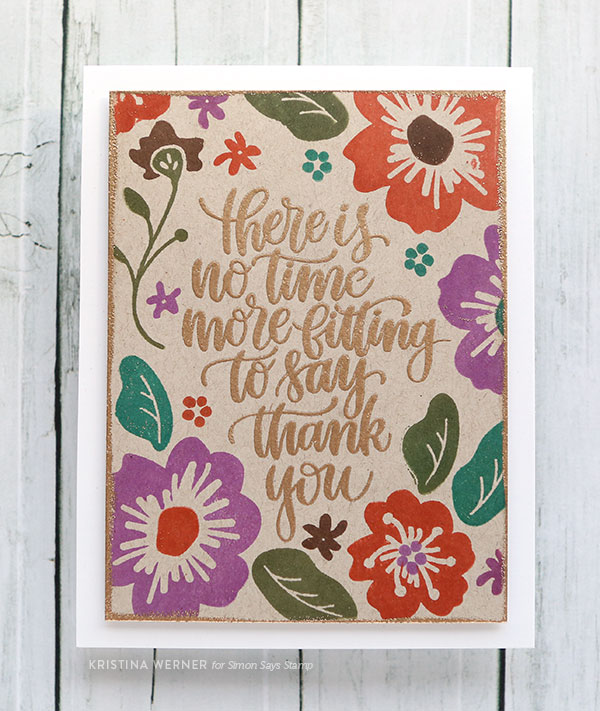
As for stamps, I first stamped one of the large greetings from the Thankful Heart stamp set and heat embossed it using Simon Says Stamp Antique Gold embossing powder. Then I was able to stamp flowers and leaves from the Flowers on My Mind stamp set in of multiple colors around the greeting area.
This is a fairly easy card design and could be adapted to different floral stamps and greeting stamps.
I hope you enjoy the video! :)
Supplies
 |
 |
 |
 |
 |
 |
 |
 |
 |
 |
 |
 |
 |
 |
 |
 |
 |
 |
 |
|
Studio Monday with Nina-Marie: Stamped Ornaments & Hero Arts
Hello crafty friends! Happy Monday! It’s Nina-Marie here with you today, back again to share my newest Studio Monday tutorial with you!

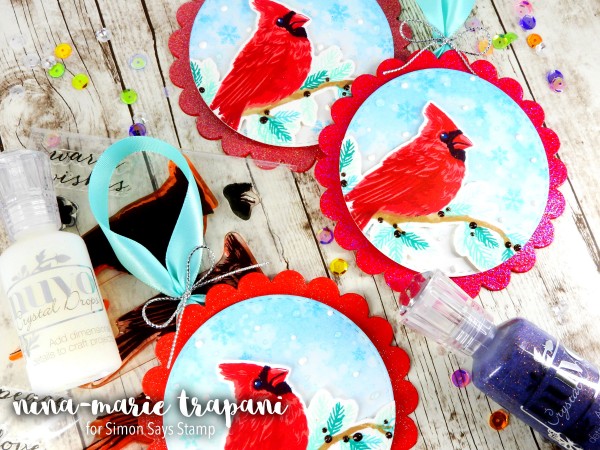
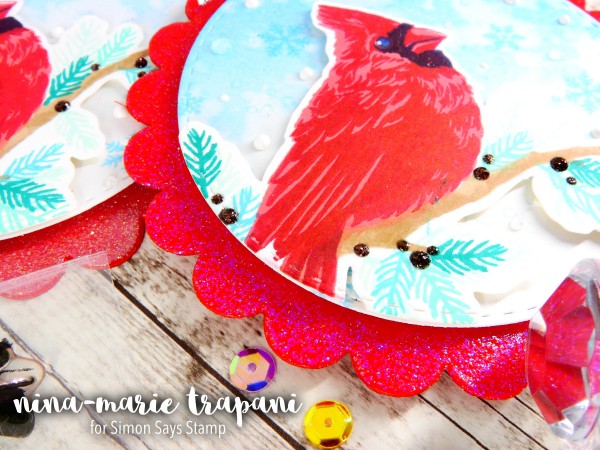
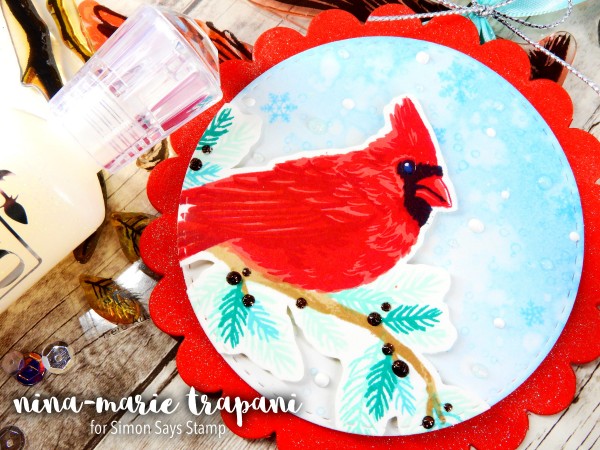
This week I wanted to share how you can create fun ornaments with your stamping and papercrafting products! In today’s video, I will be using the Hero Arts Color Layering Cardinal set. This stamp set is one of my favorite Hero Arts layering sets. The bird is so detailed and I love that you can customize the scene around him any way that you like.
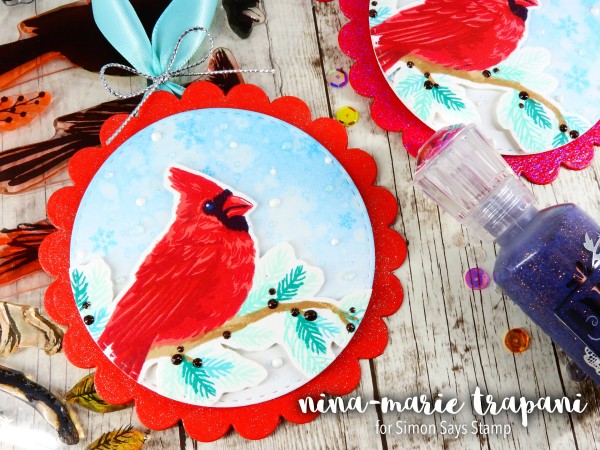
I used the Cardinal color layering set to create the frosty winter scene you see in the pictures, along with a few other fun products to help build the ornaments.
In the video, I will share tips on how I layered up these birds, including the method I use to line these particular images up together. And for those of you that don’t use as many ink colors as I do, I also will share some thoughts and ideas for how you can achieve similar color layering results using less inks!
Another technique I will be sharing in the video are three options for creating different types of glitter papers; including Nuvo’s Shimmering Pearl glitter embossing powder and Wow’s Clear Hologram glitter embossing powder, as well as adding glitter with a Wink of Stella brush pen.
These ornaments were VERY easy to mass produce, making them perfect for creating as gifts for friends and family members during the holidays! I hope you will check out the video below to see how easy it really is! Note that the video is a bit longer than usual this week because there were many details I wanted to share with you to best help you create these ornaments yourselves, and hopefully pick up some new tricks to use on other projects as well!
WATCH THE VIDEO:
RESOURCES MENTIONED
In the video I mentioned and showed the Nuvo Crystal and Glitter Drops color chart that I created exclusively for Simon Says Stamp. You can view and download the color chart HERE.
I also mentioned the Tonic Studio Nuvo product line close up videos that can be found here on the Simon blog. Visit that blog post HERE.
SUPPLIES:
 |
 |
 |
 |
 |
 |
 |
 |
 |
 |
 |
 |
 |
 |
 |
 |
 |
 |
 |
 |
 |
 |
 |
 |
 |
 |
|
 |
|
|

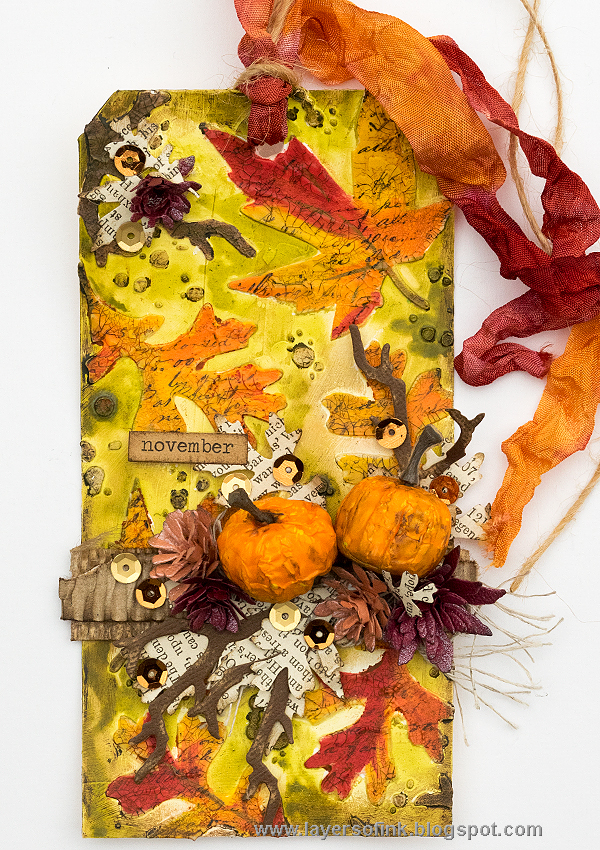
Leafy Pumpkin Tag
Hi readers! Happy Sunday, thanks for popping by today! Please give a big warm welcome to special guest and Monday Challenge DT member, Anna-Karin Evaldsson! She dreamed up this GORGEOUS Autumn inspired tag, and I just love how it turned out! Read on to learn more!
Hi everyone! I am so happy to be here with you today, on the second last day of October, with a fun tutorial. I love to see the seasons change and autumn has been absolutely gorgeous. This tag celebrates the beauty of the season, but the techniques would work just as well for any theme or project. You can easily adapt the techniques for a card, scrapbooking layout or art journal page.
I love to try different background techniques and for this tag I wanted to play around with a stencil to create a textured leafy background, with lots of yummy embedded layers. I used mainly products by Tim Holtz for this tag and took step photos so that you can easily see what I did.
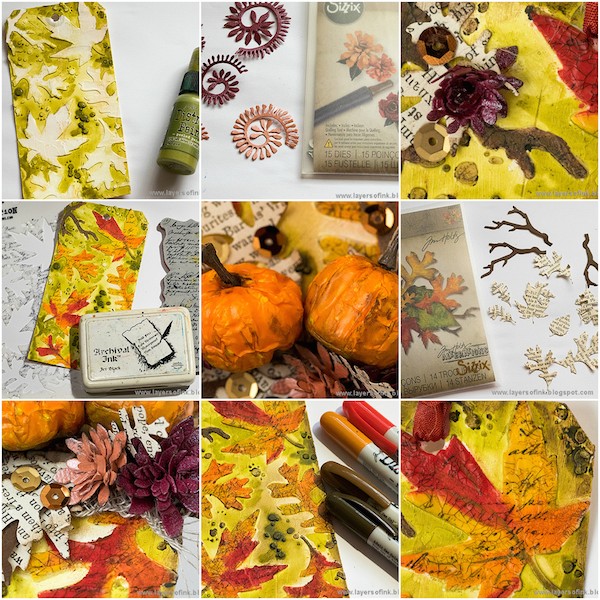
1. Start by coating a manila tag with white gesso and when that is dry, apply Texture Paste through the Autumn Layering stencil. You can also use another stencil, but make sure that it isn’t too detailed, but has some open space for you to work on.
2. Paint the background with Peeled Paint Distress Paint. Let dry.
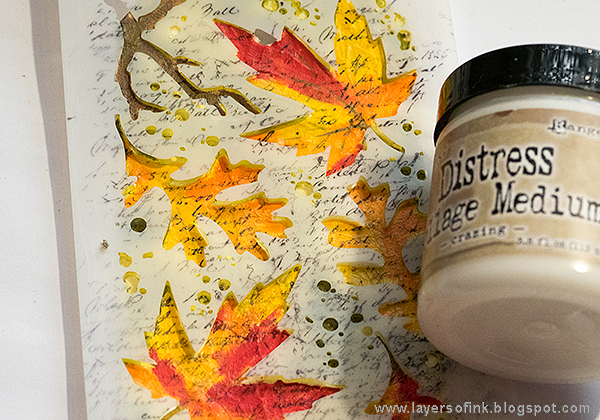
3. Coat the background with a layer of Distress Collage Medium Matte. The reason for doing this is that the Texture Paste is very porous, which can make paints and ink look lighter on top of it, since some of the paint is absorbed into the paste. I wanted my leaves to be vibrant, and the Matte Medium sealed the paste.
4. Paint the leaves with a variety of Distress Paints and add a few veins. Don’t worry if it doesn’t look perfect.
5. When dry, put the stencil back on the tag and stamp through the stencil with a script stamp. I stamped on scrap paper first, and then stamped repeatedly before re-inking again.
6. Place the stencil back again and apply Distress Collage Medium Crazing with your finger, varying the thickness. The thicker the paste, the thicker the cracks. Let dry.
7. Rub Distress Crayons into the cracks. I used Rusty Hinge, Candied Apple and Vintage Photo. Add a bit of Walnut Stain around the edges. It is easiest to leave the stencil in place when applying the crayon. Remove excess with a slightly moist paper towel.
8. I die cut some Tim Holtz Tiny Tattered Florals from Simon Says Stamp wonderful Glimmer Cardstock.
9. Use the slotted quilling tool that comes with the die set to roll the flowers. If you want to see this in action, I have a tutorial, including a video, on my blog, for the Tiny Tattered Florals.
10. Die cut branches from brown kraft-core cardstock and leaves from old dictionary paper. Ink the edges of the leaves.
11. Place a strip of burlap and a torn strip of cardboard on the tag as a base for the embellishments.
12. Glue a piece of Linen Ribbon to the cardboard and then glue the leaves and branches in place. Continue with the pumpkins and the flowers.
13. Did you see that my pumpkins look textured and a little different from what they look like in the packaging? By mistake, my box of idea-ology Pumpkin Pieces Findings got squashed at home. First, I was upset when I saw that some of the pumpkins were damaged, but then I realised that it actually made them look interesting. So I squashed them up some more and used them on this tag.
14. The Glimmery Cardstock is so glimmery in real life that it is hard to capture on a photo. You can see it a little better here perhaps. I love it. I also used quite a bit of the Glimmery Cardstock on a recent art journal page, made with the new Believe in the Season release . I also added some 28 Lilac Lane Neutrals Sequins to the tag.
15. I really like the look of the layered leaves, with the paint, script stamping, Crazing Medium and Distress Crayons. It makes them stand out from the background, and be a part of it, at the same time. I think the same technique would look great with a snowflake stencil too.
16. Add one more flower, a couple of leaves and sequins at the top of the tag. The Crinkle Ribbon was dyed with Aged Mahogany and Rusty Hinge Distress Ink.
I hope you enjoyed this tutorial and that it inspired you to play around with some background techniques.
Thank you so much for looking!
Happy crafting!
Anna-Karin
Supplies:
 |
 |
 |
 |
 |
 |
 |
 |
 |
 |
 |
 |
 |
 |
 |
 |
 |
 |
 |
 |
 |
 |
 |
 |
 |
 |
 |
 |
 |
 |
 |
 |
 |
 |
 |
 |

Blog Candy Alert!! Follow our blog via email and comment on this post for a chance to win a special blog candy!


