Shine Bright Like A Diamond

This week on the Monday Challenge we’re adding lots of bling and sparkle for a ‘Shine Bright Like a Diamond’ theme. I think I was a magpie in a previous life as I have always loved everything sparkly. Whether you choose to add gems, glitter or tinsel, we will be looking forward to seeing what you make!
As it is the first Monday of the month we will be showcasing a company/designer and this week we are all using products designed by the super talented Tim Holtz! I am sure you will all have at least one of his products and we would love to see them used.
Once you have made your creation just go ahead and upload it into the linky on the Simon Says Stamp Monday Challenge blog!
As always, we’re offering a chance to win a $50 Gift Voucher to Simon Says Stamp! All YOU need to do is join in with the challenge! Below are three projects created by the design team, that showcase this weeks theme! You can visit the challenge blog to get all the details and see the amazing cards and projects that the design team has created this week. If you click on each designers name, you’ll be taken directly to their blog where you’ll get more details about their project! Be sure to give these talented ladies some comments!
Created by Anita Houston, our Designer In the November Spotlight
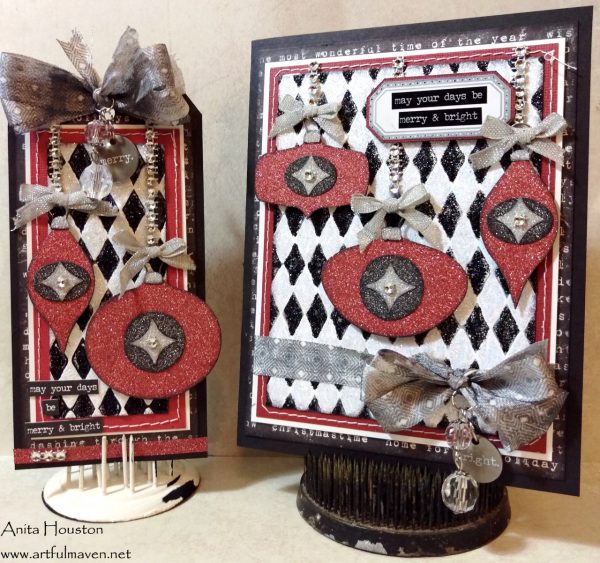 Anita used:
 |
 |
 |
 |
 |
 |
 |
 |
 |
 |
 |
|
 |
 |
 |
 |
 |
Created by Andrea Ockey Parr:
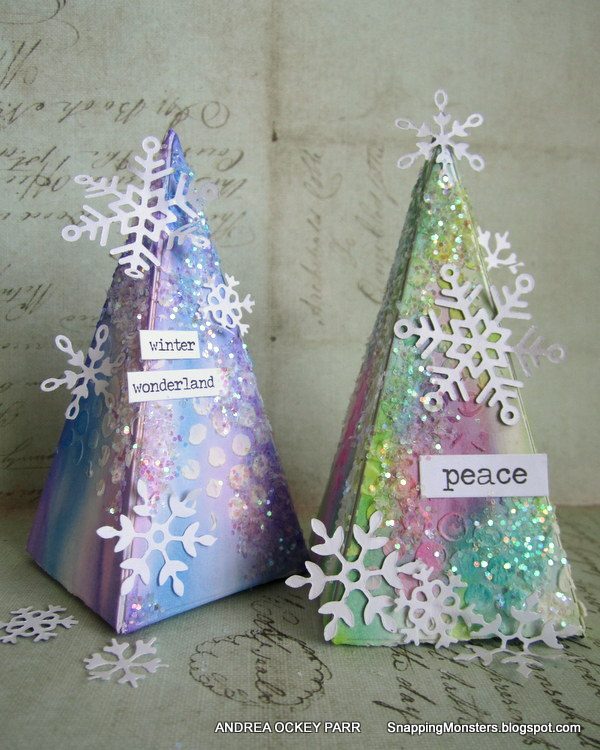 Andrea used:
 |
 |
 |
 |
 |
 |
 |
 |
 |
 |
 |
 |
 |
 |
 |
 |
 |
Created by Barbara Schiassi:
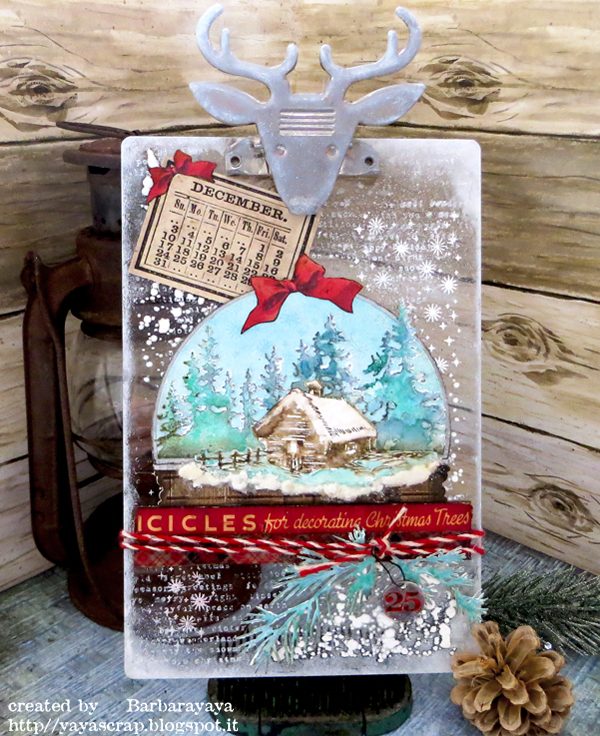 Barbara used:
|
|
 |
 |
 |
 |
|
 |
 |
 |
 |
 |
 |
 |
 |
So now it’s time for you to get out your craft supplies and join in the fun!
Do you use Instagram? If so please add #sssmchallenge to your challenge entry uploads so we can see them on there too!

Blog Candy Alert!! Follow our blog via email and comment on this post for a chance to win a special blog candy!
Quirky Christmas Robin
Hi friends! Happy Sunday! I hope you’re having a great weekend so far! I’m delighted to welcome back the fabulous Debby Hughes as a guest to our blog with this delightfully adorable Quirky Christmas Robin card! Be sure to watch the video and enjoy!

Hello it’s Debby here today looking at how to create a quirky Robin from leaf dies to stretch my supplies for the Holiday season. I die cut two of the Nature leaf dies from white card and started with the larger one blending in Apricot and Lipstick Red ink in to the Robin’s breast area and for the rest of the Robin I used Goldenlocks and Khaki inks. For the legs it was Sparrow ink, for the beak Sunshine and finally for the second leaf die cut acting as a wing I used Willow ink. A wiggle eye bought the little guy to life and then to dress things up a bit I added Wink Of Stella to the breast and wing followed by dots of white enamel accent on the breast area.

Wink of Stella adds a lovely shimmer but I felt I needed to take things up a notch so rubbed Ranger Multi Medium Matte over the wing and then dunked it in a tub of Rock Candy distress glitter. I love the sugary look this glitter gives everything. Next I stamped the gorgeous Merry Christmas sentiment from the Christmas Essentials set and die cut around it with a Stitched Slope. On a panel blended with Lake Shores ink I mounted the sentiment snowy slope and Robin with foam adhesive and then decorated the panel with Snow Flurries snowflakes again dunked in Rock Candy distress glitter. I also added a few, appropriately named for this card, Robin’s Egg sequins too.

To finish the card I added loop of twine and bow around the top of the panel and then mounted on a Fog card base. Well that’s it from me today; I hope you take a second look at your supplies to see if you can stretch their use for the coming season.
Watch the video:
Supplies:
 |
 |
 |
 |
 |
 |
 |
 |
 |
 |
 |
 |
 |
 |
 |
 |
 |
 |
|
 |
|
 |
 |
 |
 |
 |
Thanks for reading today, and thanks so much to Debby for being our guest!
Blog Candy Alert!! Follow our blog via email and comment on this post for a chance to win a special blog candy!
Weekender with Wanda – Altenew Bamboo Rose!

Hello and welcome back to the latest edition of Weekender with Wanda here on the Simon Says Stamp Blog! And, Happy November! Yay, my favorite month for all kinds of reasons! My birthday was this week which is one of the reasons I love November…. But it’s also time for college football rivalry games, cozy evenings inside by the fire, and Thanksgiving of course!! Best wishes to you for a happy November! I’m getting really into my Christmas crafting right now in hopes of just once, being ahead of things. (Check back with me later on that! LOL)
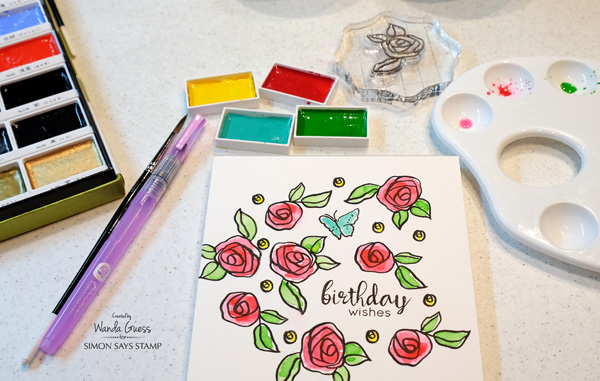
Today I’m sharing some beautiful red Winter roses on a birthday card I made using stamps from Altenew. Altenew images are some of our favorites here at Simon Says Stamp. Their style and look is so unique and always on trend. Their floral stamps are always amazing. Today I chose to use the relatively new stamp set called Bamboo Rose. Sigh. The rose stamps are really just perfection. What else can I say? And, they are perfect for watercoloring.
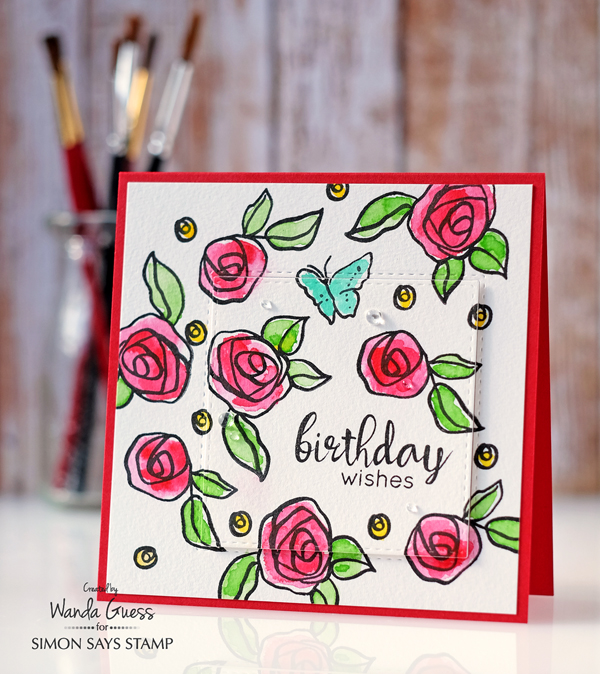
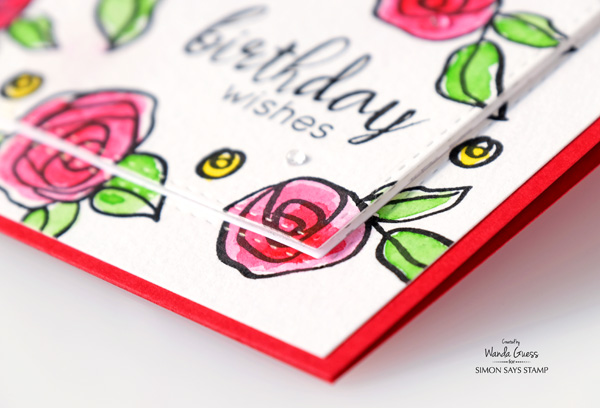
This technique is always fun! Layering part of your panel up on foam squares after first creating the entire image. Couldn’t be easier, but boy what a great effect! I used a square die here, but this also looks pretty with ovals, circles or rectangles. My finished card is a 5 inch square this time around. Sometimes a square card is an elegant touch.
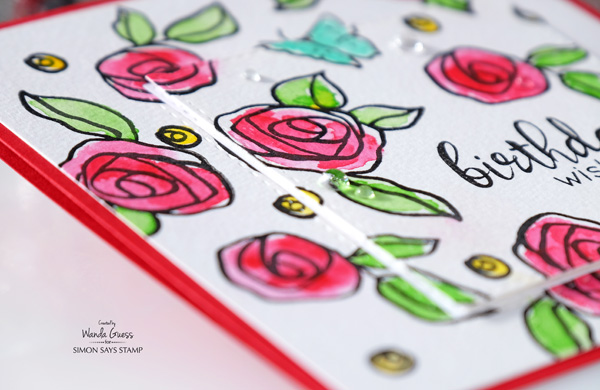
My finishing touches on this card were some Pretty Pink Posh Droplets adhered with glossy accents and tweezers. I find that the glossy accents works best with these clear stones. The sentiment on this card is from another beautiful Altenew stamp set called Floral Frame.
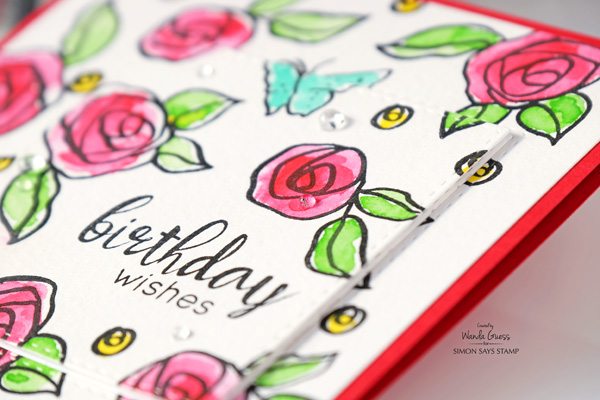
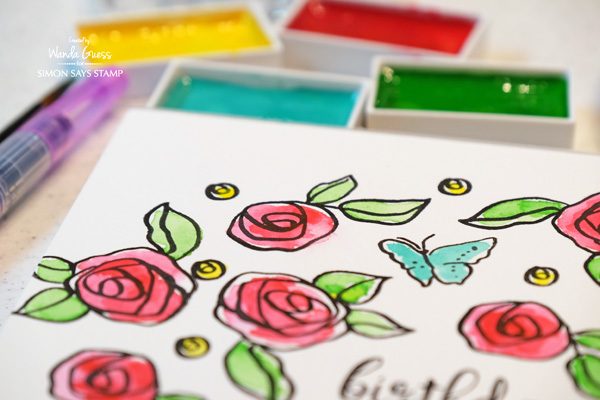
I started my card with a 6×6 watercolor panel which I would trim down later. I used Archival Jet Black Ink since it is waterproof. I randomly stamped all the roses, the butterfly and the sentiment and let the ink dry for about five minutes. Then I used my Kuretake Gansai Tambi Watercolors to watercolor the images.
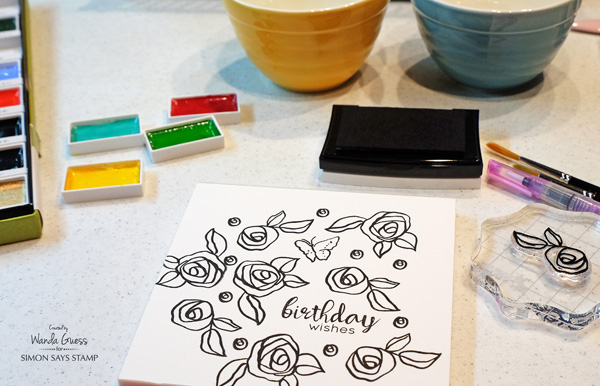
I used only four colors of watercolor paints for this project. I think the red is so striking!
Here is my completed panel before trimming.
This part always makes me nervous because now I used a die cut right on my pretty panel! I always use washi tape to secure my die in place before running it through the Big Shot machine. Success! I used the Exclusive Simon Says Stamp Stitched Squares die for this card.
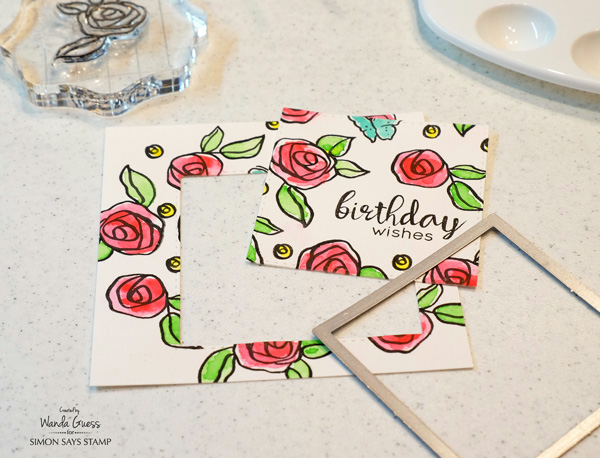
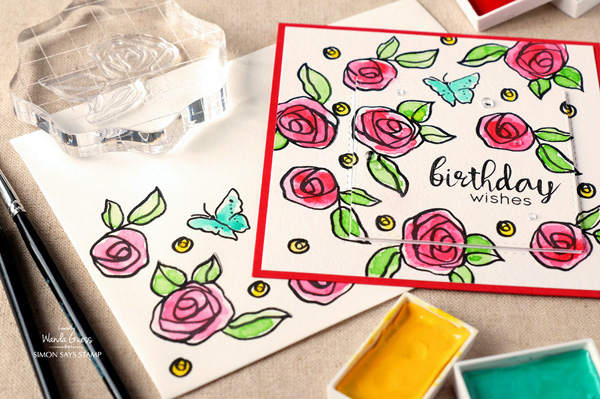
I made my own card base out of pretty SSS Lipstick Cardstock. I first attached the bottom layer to the red card base. Now the center is cut out of that part. You can leave it red underneath. I usually choose to die cut a piece of white paper and insert it in the open square first. I think this makes it “pop” more. Then, I used foam squares to attache the center, smaller square to the card, lining up the stamped images. Voila!
I wanted a matching envelope for this pretty greeting so I stamped and watercolored an A7 envelope to fit my larger square card. This really ties the whole project together nicely! When I’m making cards I try to remember to grab an envelope and stamp it at the same time since I already have all the supplies out.
Thank you for stopping by this weekend! Have fun, and happy crafting! See you very soon!
SUPPLIES:
 |
 |
 |
 |
|
 |
 |
 |
 |
 |
 |
 |
 |
 |
 |
 |
 |
 |


