Studio Monday with Nina-Marie: Mixing Stamp Sets + Featuring Avery Elle
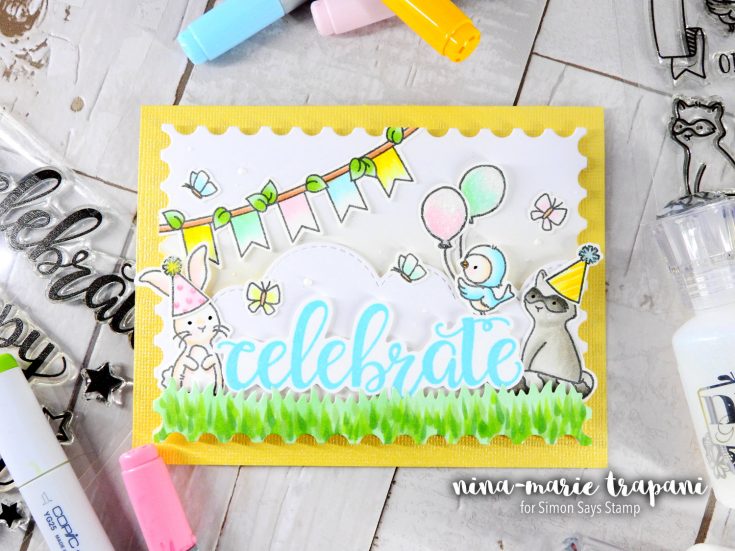
Hello crafty friends and Happy Monday! It’s Nina-Marie here with you, sharing a new Studio Monday video! This week I am featuring Avery Elle and I wanted to show how fun it can be to mix and match your stamp sets to create a custom, one-of-a-kind scene.
Scene cards are one of my most favorite styles of cards to make; there is something special about watching a blank card transform into a lively scene. You almost feel like you could dive into it! Many of you are probably familiar with making scenes; but if they are something new to you, this video should be helpful!
Often a company has a certain style they adhere to throughout many of their products, or in a certain line of products. By working with a particular product collection, it makes building scenes really easy; and its a great tip for those of you who might not feel as comfortable creating a scene. I worked primarily with products from Avery Elle in today’s card.
Avery Elle is a great example of working with a certain product line. Many of their stamps are sized perfectly to be used with each other. By selecting different stamp sets as I did today, you can achieve a scene effortlessly because the guess work is taken out of deciding whether or not a stamp set will work well with another.
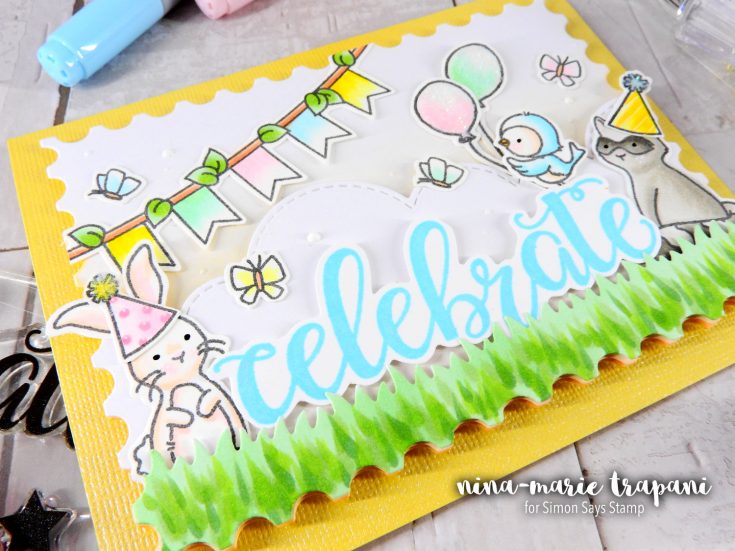
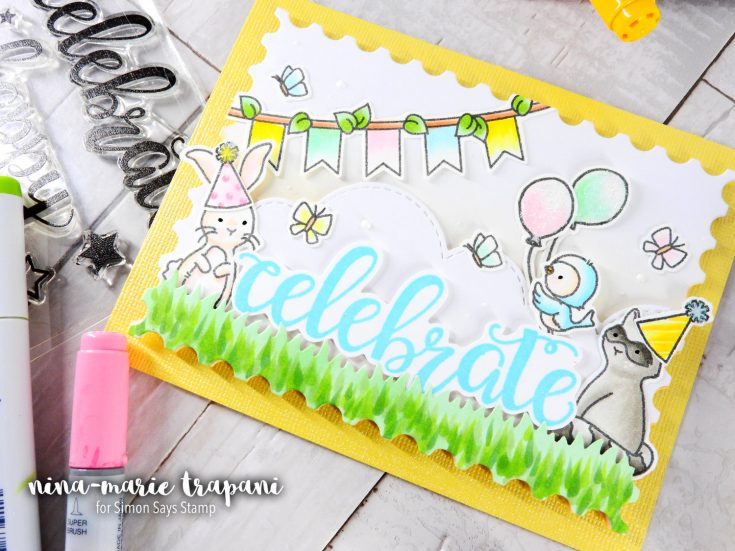
For this card, I chose to work with the Woodland Wonders, Big Greetings, Storybook and Wild Birthday stamp sets (all from Avery Elle). I also used a Postage Stamp die from Hero Arts, the Landscape Trio dies from Mama Elephant and the Grassy Hills border dies from My Favorite Things. These dies were used as supporting elements to help build the rest of the scene.
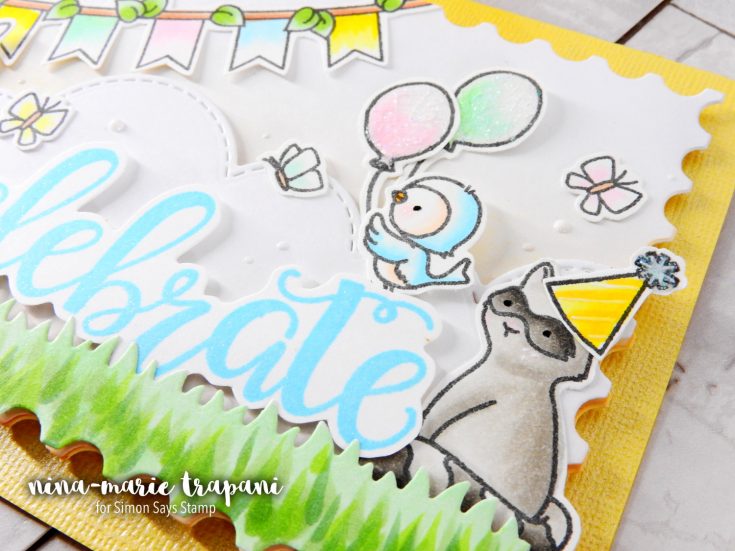
In this card, I colored all the images with Copic markers. I was going for a soft shading on everything, so I used lighter colors and did a lot of feathering. All of the colors I used are listed below for reference:
- Bunny: YR00, YR0000, RV10, T0, T2
- Raccoon: W1, W3, W4, W6, W7, RV10
- Bird: B0000, B00, B01, YR0000, YR00, RV10, YR15
- Butterflies: Y11, B00, G00, E13
- Banner: Y11, Y08, G00, YG41, RV00, RV10, B0000, B00, E13, E15, YG25, G12
- Party Hats: RV00, RV10, RV13, Y11, Y08, Y35, B00
- Balloons: RV00, RV10, G00, YG41
- Grass: G12, YG25, G24, YG17, G46
You’ll notice how I created a soft blended effect on the sky and clouds in the scene as you watch the video. For this I used the Inkylicious Ink Duster brush, which is a newer product that we recently added to the Simon store! I love how these brushes are dual-ended; the brushes come in a pack of three, which means you have a total of nine brush heads to work with. They blend inks very smoothly across your paper because the bristles are a natural fiber and hold the ink better, unlike synthetic brushes. I am really enjoying working with these brushes and I encourage you to give them a try for unique blending techniques like I used in this card.
I hope you will be checking out the video below to see how this card came together! I also hope that it will inspire you to try making a scene card of your own. Whether its with the stamps I used today or a few stamps from another company, try combining sets together to build a custom scene that jumps off the card!
Thanks for visiting me today and I will be seeing you again next week for a brand new Studio Monday video!
WATCH THE VIDEO
SUPPLIES
 |
 |
 |
 |
 |
 |
 |
 |
 |
 |
 |
 |
 |
 |
 |
 |
 |
 |
 |
 |
 |
 |
 |
 |
 |
 |
 |
 |
 |
 |
 |
 |
 |
 |
 |
 |
 |
 |
 |
 |
 |
 |
 |
 |
 |
 |
 |
 |
 |
 |
 |
 |
 |
 |
 |
 |
 |

Amore LauraFadora Feature: Love You to Pieces
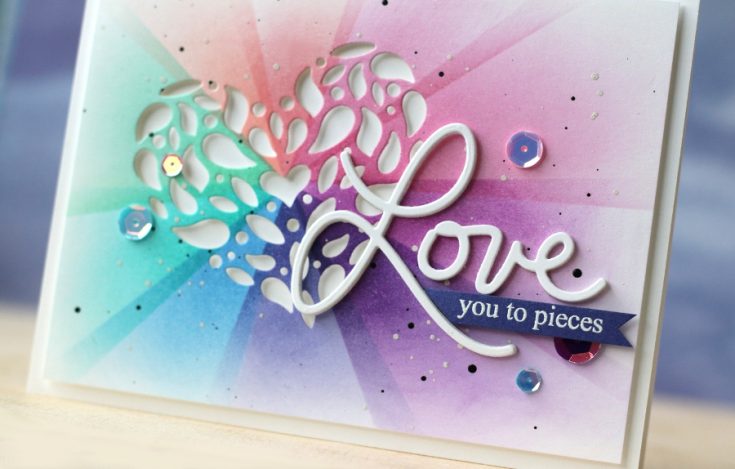
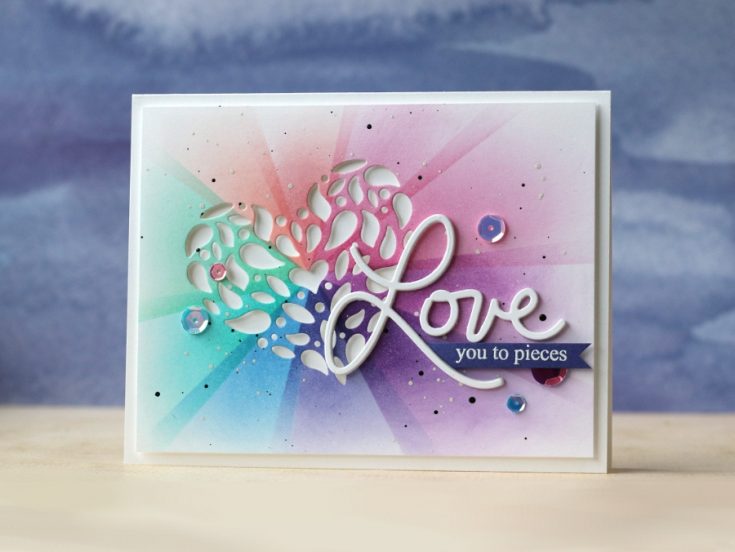
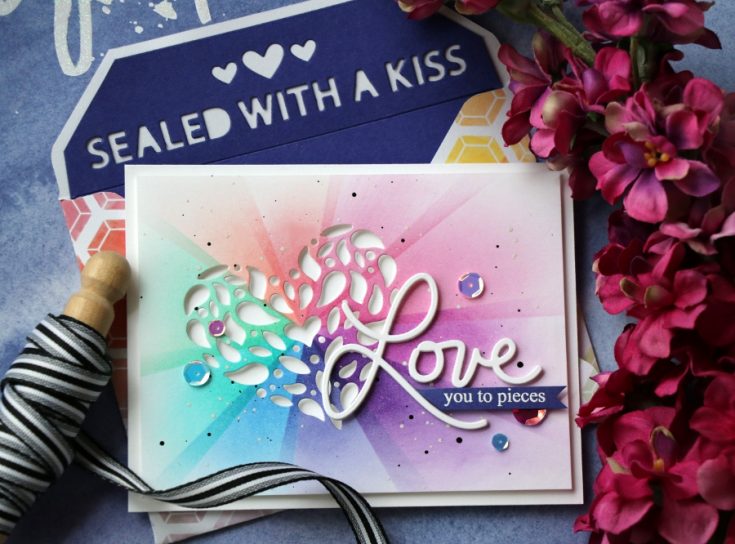
Hi friends! Thanks for stopping by today! I’m so excited to share this gorgeous Love You to Pieces card by Laura Bassen! She will continue to do bi-monthly features with us in 2017 (yay!!), but we’ve decided to give her posts a header and name so we lovingly created this banner just for Laura’s posts (above) and called her feature Amore, LauraFadora! We know that you all love Laura as much as we do and are excited to be sharing lots of new inspiration from her in 2017! Be on the look out for AMORE! :) In this gorgeous card, Laura uses some of her favorite Simon Ink, our new Corbel Heart Die and Love 2 die to assemble this fabulous card! Be sure to watch the video for more and enjoy!
Watch the video:
SUPPLIES:
 |
 |
 |
 |
 |
 |
 |
 |
 |
 |
 |
 |
 |
 |
 |
 |
 |
 |
 |
 |
 |
 |
 |
 |
 |
 |
Blog Candy Alert!! Follow our blog via email and comment on this post for a chance to win a special blog candy!
Weekender with Wanda – Hedgehog Valentine with Memory Box!

Hi everyone! Welcome back to the latest edition of Weekender with Wanda here on the Simon Says Stamp Blog! I’m very happy to be with you today! I missed you last week, but boy, was I having a good time! I hope you followed along with us at the CHA show! I’m still recovering from so much fun and laughter and joy. It’s the best time of the year for us crafty gals. All the people I work with and talk to – I get to see them in person – and get loads of hugs. It’s the best. Now, we just need to try to be patient and wait for everything to arrive at the SSS store! I hope you had a great week and I have a fun project to share with you today!
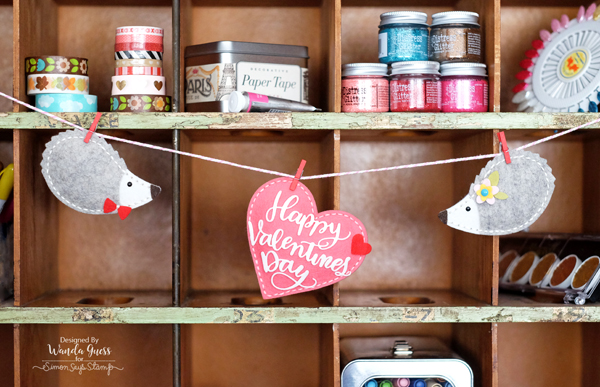
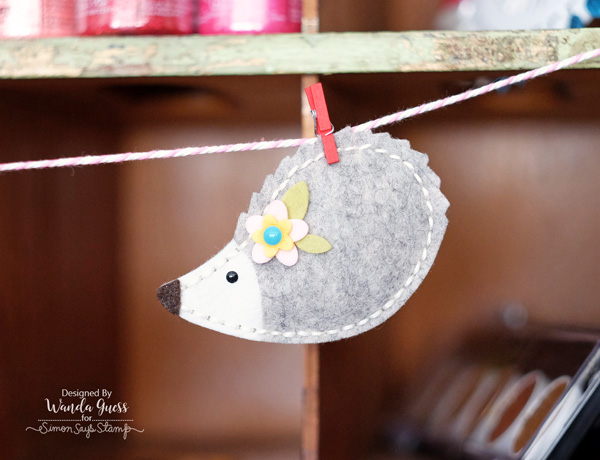
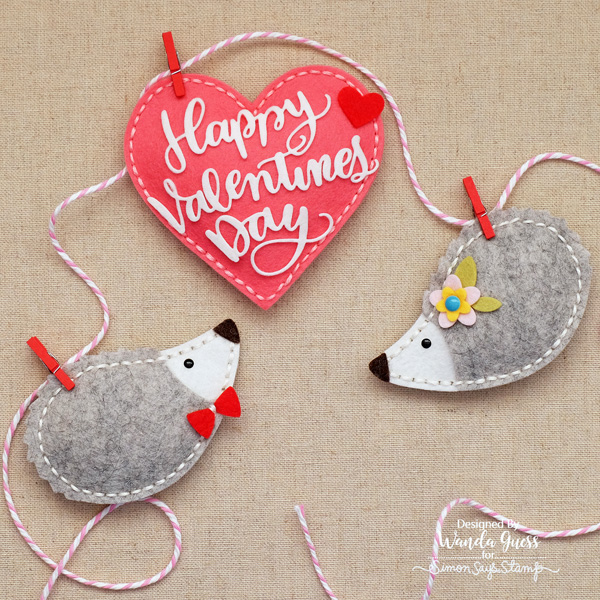
I am featuring products from one of our very favorite companies today – Memory Box! I love their plush dies, and also their very pretty intricate dies. Oh, heck, I love everything from Memory Box! I combined the MB Humble Hedgehog Die with some beautiful Exclusive Simon Says Stamp dies and created a felt banner for Valentine’s Day. This project has been in the back of my mind for a while and it was good to finally sit down and make it. It’s so cheery hanging in my studio. I made two felt hedgehogs – a girl and a boy – and then hung a heart in the middle of them.
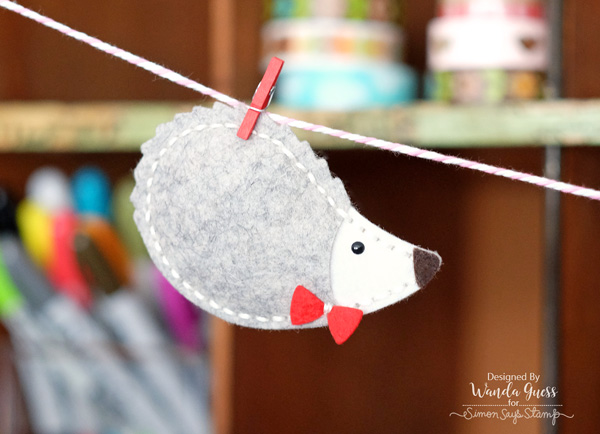
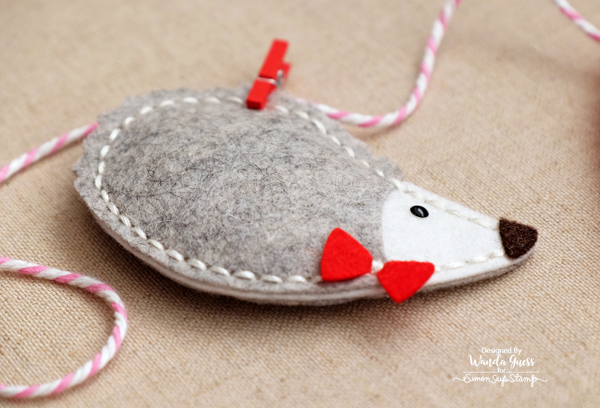
Here is dapper Mr. Hedgehog in his red bow tie.
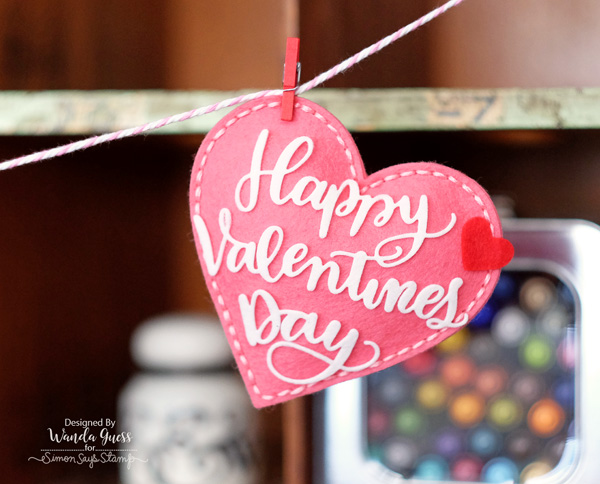
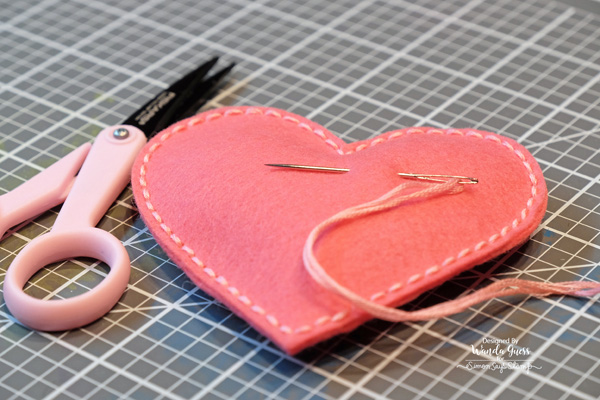
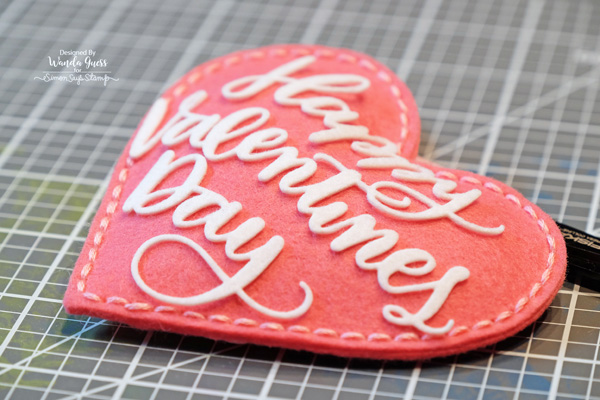
And this is the center heart piece
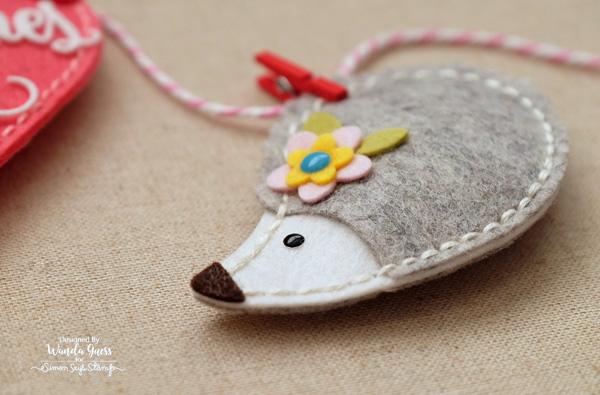
And here is sweet Mrs. Hedgehog with some cute flowers in her hair!
The felt heart is the Simon Says Stamp Plush Charmed Heart Die. I made it with beautiful coral pink felt and a lighter pink floss to sew it together. The Happy Valentines Day words are also cut out of felt! I have to talk about this for a minute. At first I die cut the Big Valentines Die out of paper and I just didn’t like how it looked against the felt. I thought – let me try to die cut this with felt and see what happens! Well, it cut like a dream! It fell out just so nicely. I used my metal shim to make sure I got a good clean cut from the die. One tip: Be careful with the delicate die cut after it’s out. I used my tweezers to move it around on the felt heart. I love that this came out so nicely.

A close up of the girl hedgehog. I used the Memory Box Humble Hedgehog die and shades of cream and grey to make her body. I used a black enamel dot for her eye and some felt scraps to make flowers for her to wear. Just a very tiny amount of poly fill inside to make her puffy.
And a close up of the boy hedgehog. I attached his bow tie with a bit of thread. In this photo you can see that I used the Chunky Doodlebug Twine as my holder. It’s nice and thick, and perfect for this use. The red clothespins were in my stash. You can get pink ones and other colors here at SSS.
See how crisp that white felt cut out? I’m going to try to die cut more felt – trying different dies! (Maybe some alphabet dies?)

I laid everything out on my work table to see what I wanted the final piece to look like.
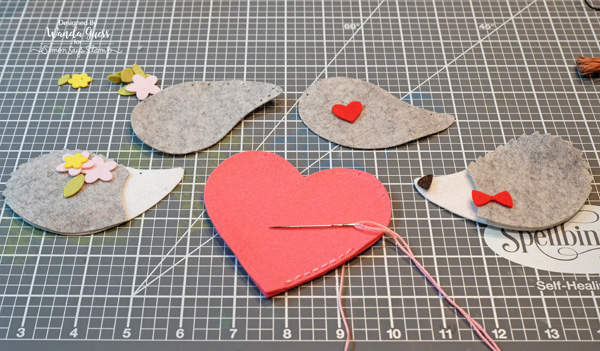
These are so much fun to stitch and sew. I use a plain straight stitch and all the dies come with the holes already spaced out perfectly for us. Makes it easy to get a pretty and professional result. I could make a million of these!
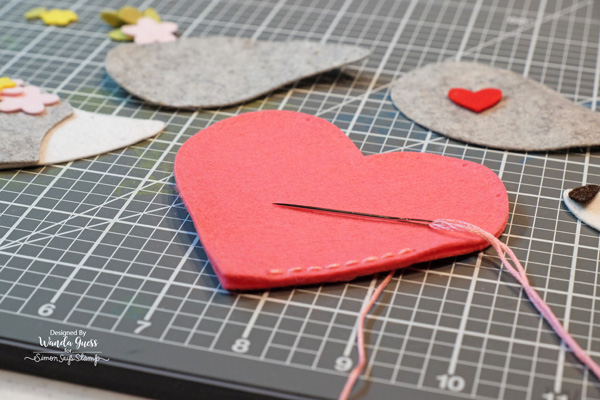
Simon Says Stamp has soooo many felt options! So many colors and packages. CLICK HERE to see all the felt supplies! I use a large needle for this project and then I use all six strands of embroidery floss.
And here is a top down shot of the banner. I might add on some more hearts! I’m not sure yet if I want it nice and simple or to add more. I can totally imagine making a bunch of cute and colorful animals as a banner for a baby present! My mind is working….
I hope I’ve inspired you today to get out the felt projects and have some fun! I’m glad to share with you and I appreciate your support here. Have a great weekend and I’ll see you back here soon!
SUPPLIES:
 |
 |
 |
 |
 |
|
 |
 |
 |
 |
 |
 |
 |
 |
 |
 |


