Weekender with Wanda – Hedgehog Valentine with Memory Box!

Hi everyone! Welcome back to the latest edition of Weekender with Wanda here on the Simon Says Stamp Blog! I’m very happy to be with you today! I missed you last week, but boy, was I having a good time! I hope you followed along with us at the CHA show! I’m still recovering from so much fun and laughter and joy. It’s the best time of the year for us crafty gals. All the people I work with and talk to – I get to see them in person – and get loads of hugs. It’s the best. Now, we just need to try to be patient and wait for everything to arrive at the SSS store! I hope you had a great week and I have a fun project to share with you today!
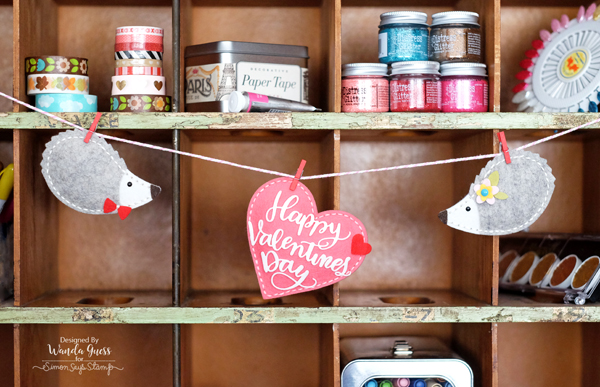
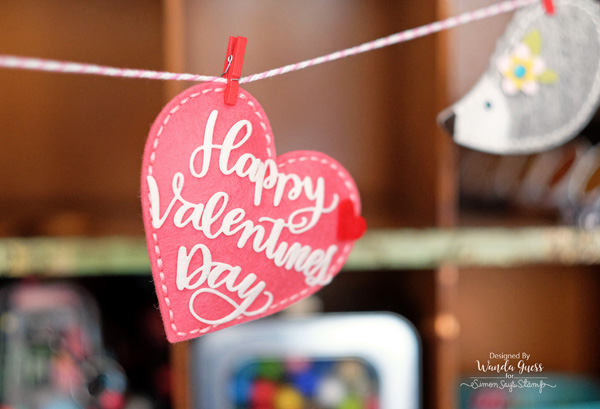
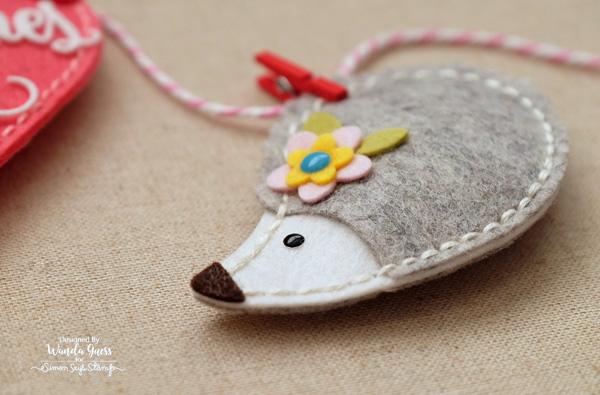
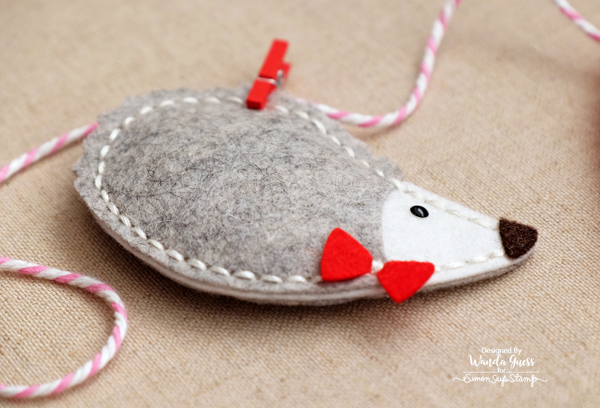
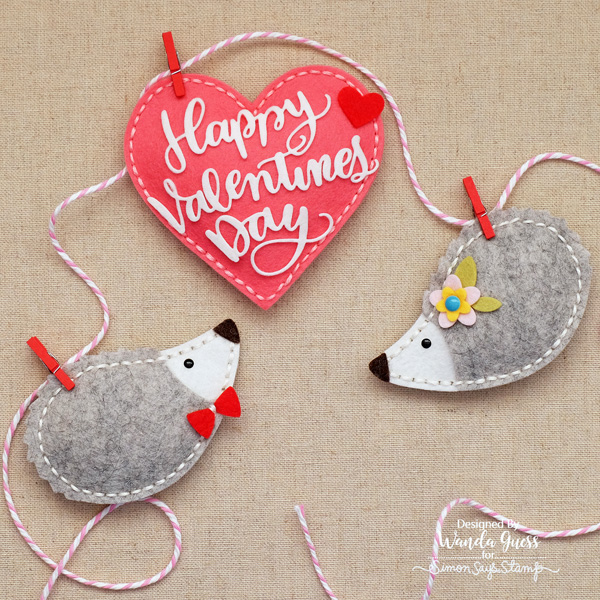
I am featuring products from one of our very favorite companies today – Memory Box! I love their plush dies, and also their very pretty intricate dies. Oh, heck, I love everything from Memory Box! I combined the MB Humble Hedgehog Die with some beautiful Exclusive Simon Says Stamp dies and created a felt banner for Valentine’s Day. This project has been in the back of my mind for a while and it was good to finally sit down and make it. It’s so cheery hanging in my studio. I made two felt hedgehogs – a girl and a boy – and then hung a heart in the middle of them.
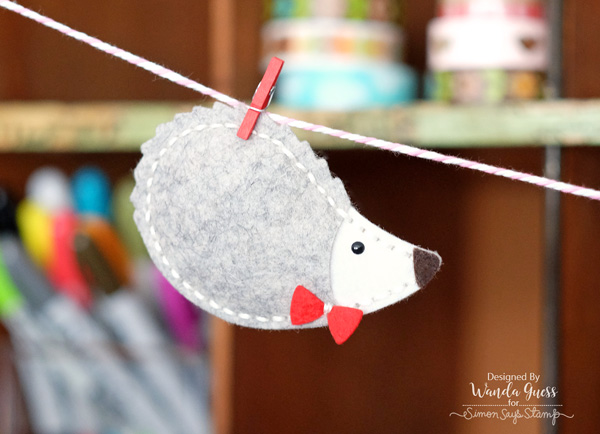
Here is dapper Mr. Hedgehog in his red bow tie.
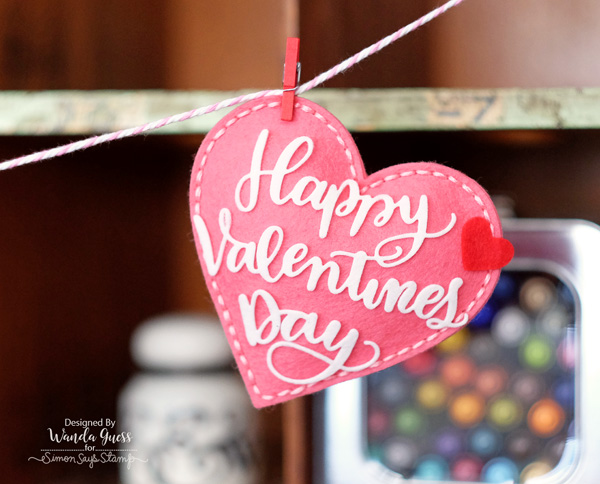
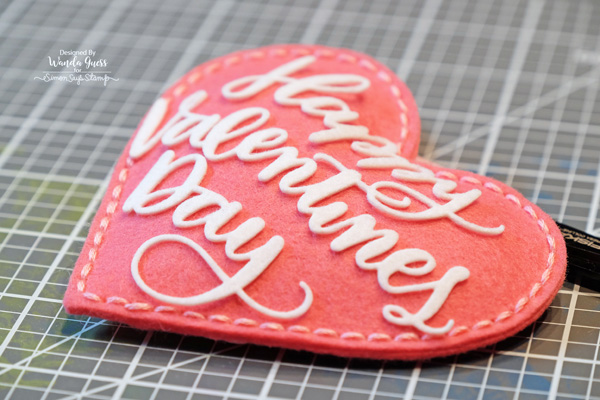
And this is the center heart piece
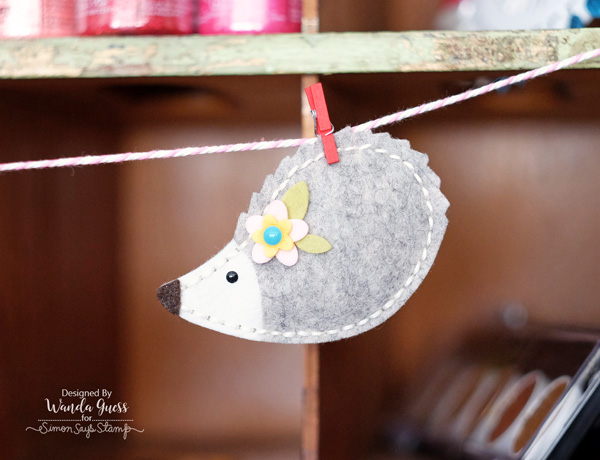
And here is sweet Mrs. Hedgehog with some cute flowers in her hair!
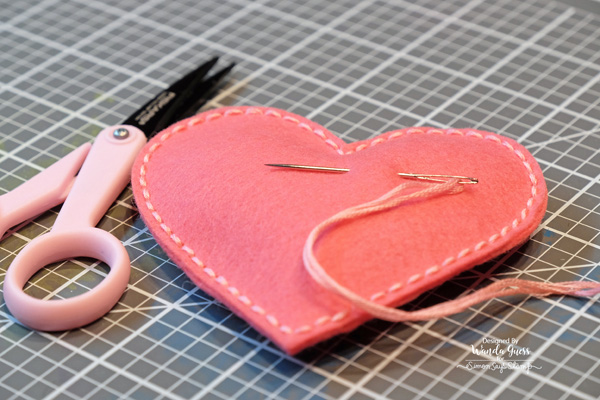
The felt heart is the Simon Says Stamp Plush Charmed Heart Die. I made it with beautiful coral pink felt and a lighter pink floss to sew it together. The Happy Valentines Day words are also cut out of felt! I have to talk about this for a minute. At first I die cut the Big Valentines Die out of paper and I just didn’t like how it looked against the felt. I thought – let me try to die cut this with felt and see what happens! Well, it cut like a dream! It fell out just so nicely. I used my metal shim to make sure I got a good clean cut from the die. One tip: Be careful with the delicate die cut after it’s out. I used my tweezers to move it around on the felt heart. I love that this came out so nicely.
A close up of the girl hedgehog. I used the Memory Box Humble Hedgehog die and shades of cream and grey to make her body. I used a black enamel dot for her eye and some felt scraps to make flowers for her to wear. Just a very tiny amount of poly fill inside to make her puffy.
And a close up of the boy hedgehog. I attached his bow tie with a bit of thread. In this photo you can see that I used the Chunky Doodlebug Twine as my holder. It’s nice and thick, and perfect for this use. The red clothespins were in my stash. You can get pink ones and other colors here at SSS.
See how crisp that white felt cut out? I’m going to try to die cut more felt – trying different dies! (Maybe some alphabet dies?)

I laid everything out on my work table to see what I wanted the final piece to look like.
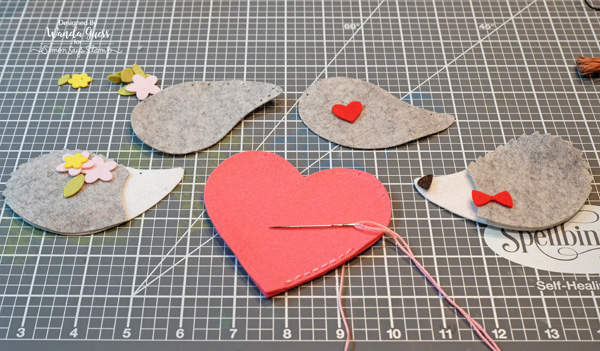
These are so much fun to stitch and sew. I use a plain straight stitch and all the dies come with the holes already spaced out perfectly for us. Makes it easy to get a pretty and professional result. I could make a million of these!
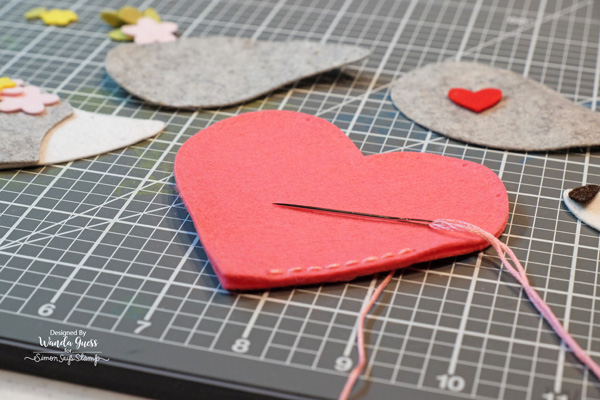
Simon Says Stamp has soooo many felt options! So many colors and packages. CLICK HERE to see all the felt supplies! I use a large needle for this project and then I use all six strands of embroidery floss.
And here is a top down shot of the banner. I might add on some more hearts! I’m not sure yet if I want it nice and simple or to add more. I can totally imagine making a bunch of cute and colorful animals as a banner for a baby present! My mind is working….
I hope I’ve inspired you today to get out the felt projects and have some fun! I’m glad to share with you and I appreciate your support here. Have a great weekend and I’ll see you back here soon!
SUPPLIES:
 |
 |
 |
 |
 |
 |
 |
 |
 |
 |
 |
 |
 |
 |
 |
 |

A Look into Creativation 2017
Hello all! We thought you all might enjoy a glimpse into Creativation 2017, the Association for Creative Industries’ trade show that took place January 19-23, 2017. Many brand and companies were there and we had a chance to see new products and order new things for the Simon store!
Even though this video is nearly 20 minutes long, this is a very small glimpse of the different booths at Creativation. There is even more coming your way in the Simon Says Stamp store soon!
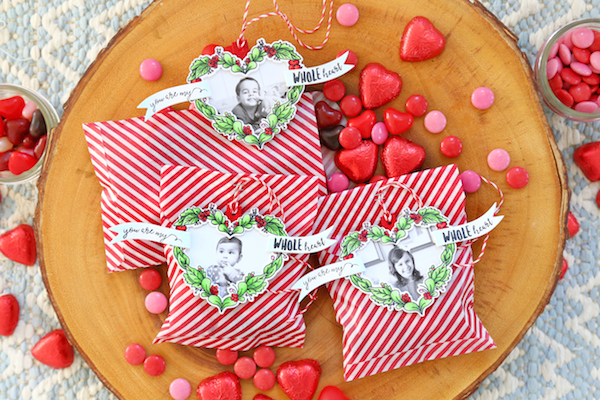
DIY Valentine Treat Bags


I love the idea of personalizing little treat bags for my kids for Valentine’s day! They are my whole heart! I created the custom sentiment by fitting together “you are my” (from My Favorite Nut,) the word “whole” (from Say Yes to Donuts,) and the word “heart” (from Into the Woods.) By the way, after years of using and loving Memento’s tuxedo black ink, I have a new favorite. The new copic-friendly black in from Lawn Fawn is so great! I highly recommend it.
The pictures of the kids are not recent, but I think seeing younger versions of themselves will make them smile even bigger. They are some pretty cute kids! I printed them on my home computer in black and white (but if you’d like them to look perfectly glossy you can get them printed on photo paper,) and used the largest of the 2 floral heart dies to cut them out.
I stamped and colored the heart wreath image and then used foam tape to layer the frame over-top. I added a strip of red cardstock to the tops to turn them into tags, and attached them to treat bags using a tiny stapler.
I hope you like this idea! Instead of kids, how about a picture of you and your loved one? Happy Valentine’s Day crafting!
SUPPLIES:
 |
 |
 |
 |
 |
 |
 |
 |
 |
 |
 |
 |
Blog Candy Alert!! Follow our blog via email and comment on this post for a chance to win a special blog candy!


