Studio Monday with Nina-Marie: WOW! Glitter Die Cuts with Heat Embossing
Hello everyone! It’s Nina-Marie here with you today and I have a SPARKLY set of cards to share with you this week that feature WOW! Sparkles Glitter.

A couple of the most popular ways to add glitter to projects is by using sticky-backed adhesive sheets or with liquid glues. I have done both of these before, and while they work equally as well, I find I actually prefer today’s method most of all. That is, by using Ranger’s Sticky embossing powder.
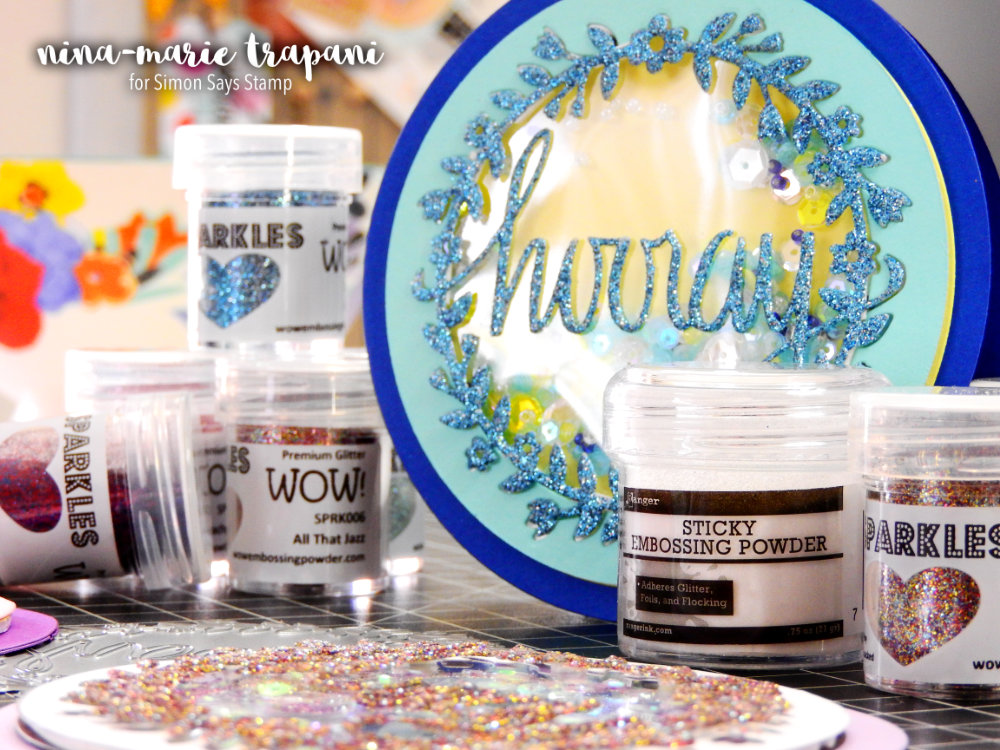
This powder is just like any other embossing powder, except that has a sticky finish when heat set. In the video below, I’ll be sharing the exact steps I took to use the embossing powder with the WOW! Sparkles glitter.
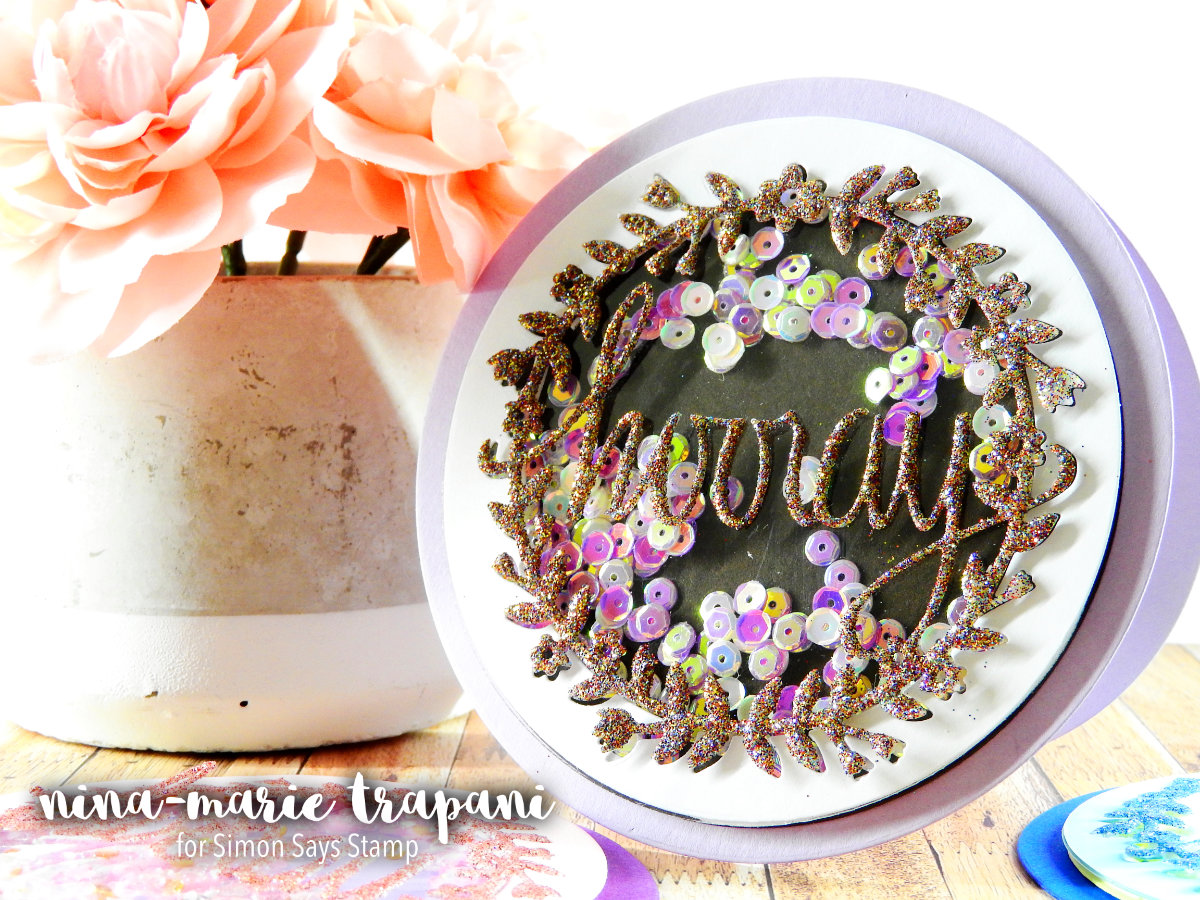
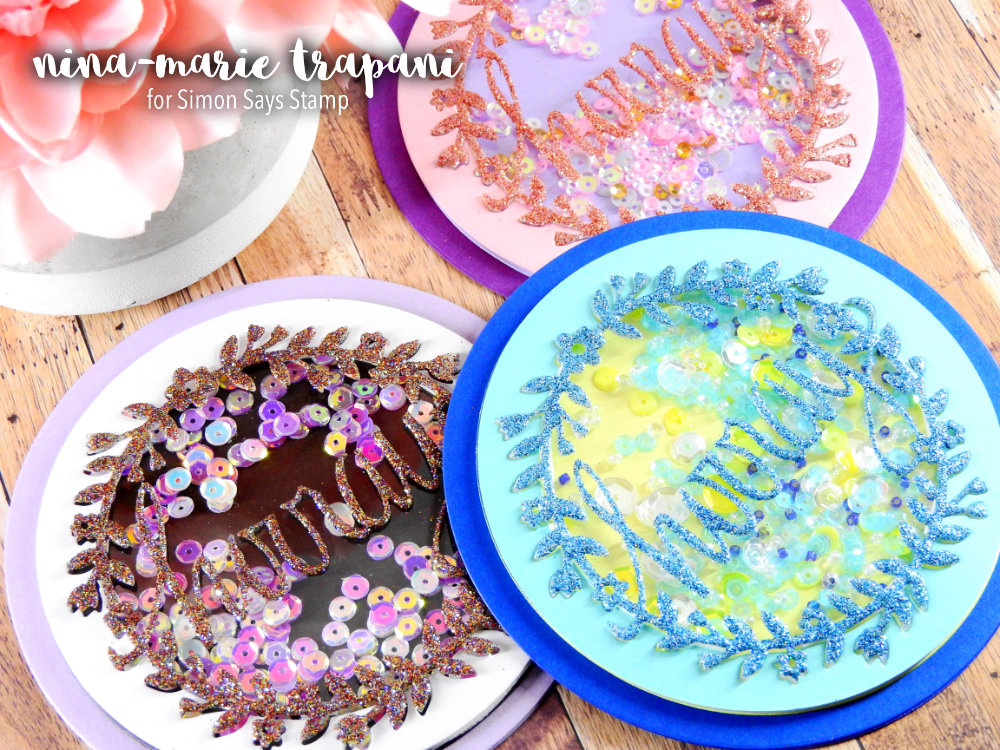
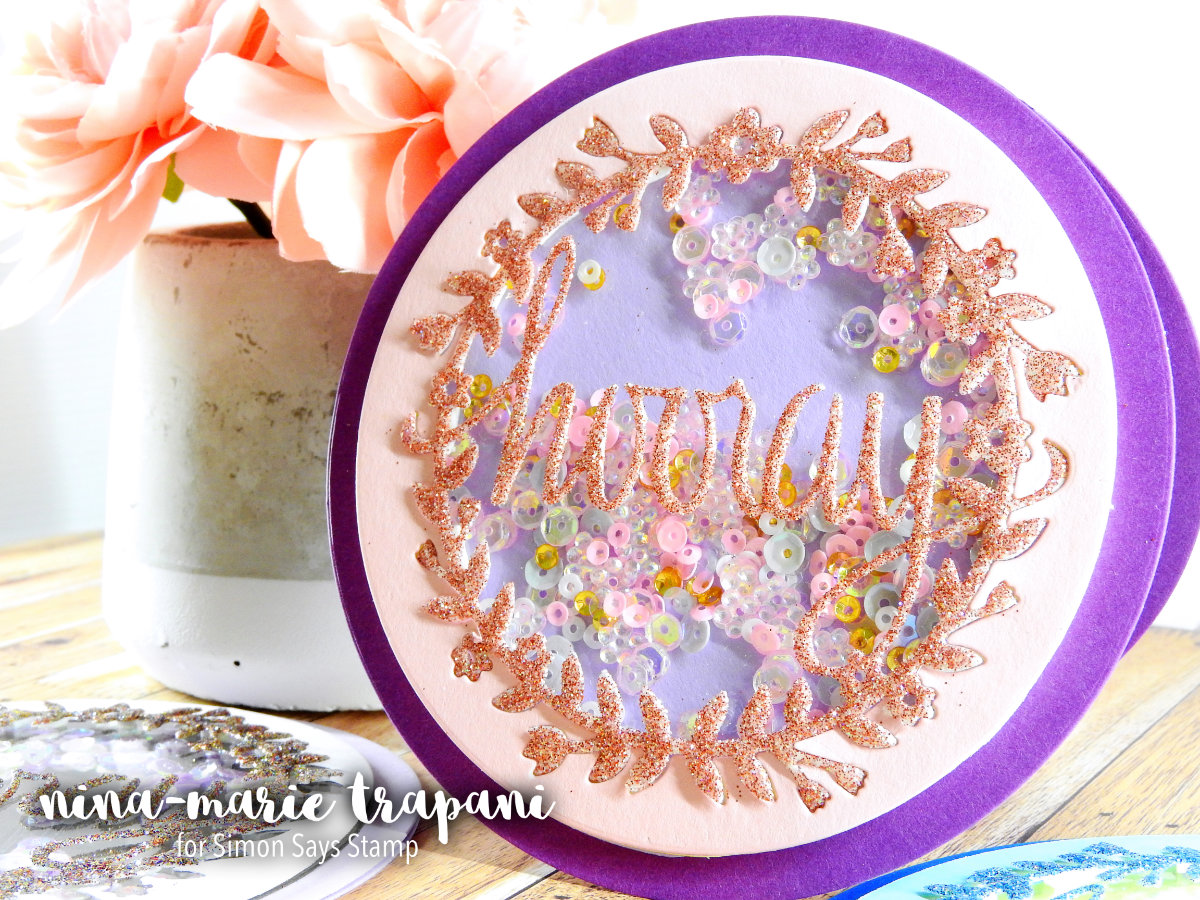
Speaking of the WOW! Sparkles glitter, have you tried any of it before?? It’s simply GORGEOUS! I am particularly fond of the multicolored powders, such as the one you see in the photo above. I have a few of the Sparkles glitters and chose to work with the Santorini, Fireworks and Peachy Keen colors today. Which color is your favorite? Mine would be Fireworks (the one pictured in the purple card).
One of my favorite aspects of these glitters is that they are static free! This means they won’t stick to anything and everything as badly as some other glitters can. Because of that, clean up was much easier!
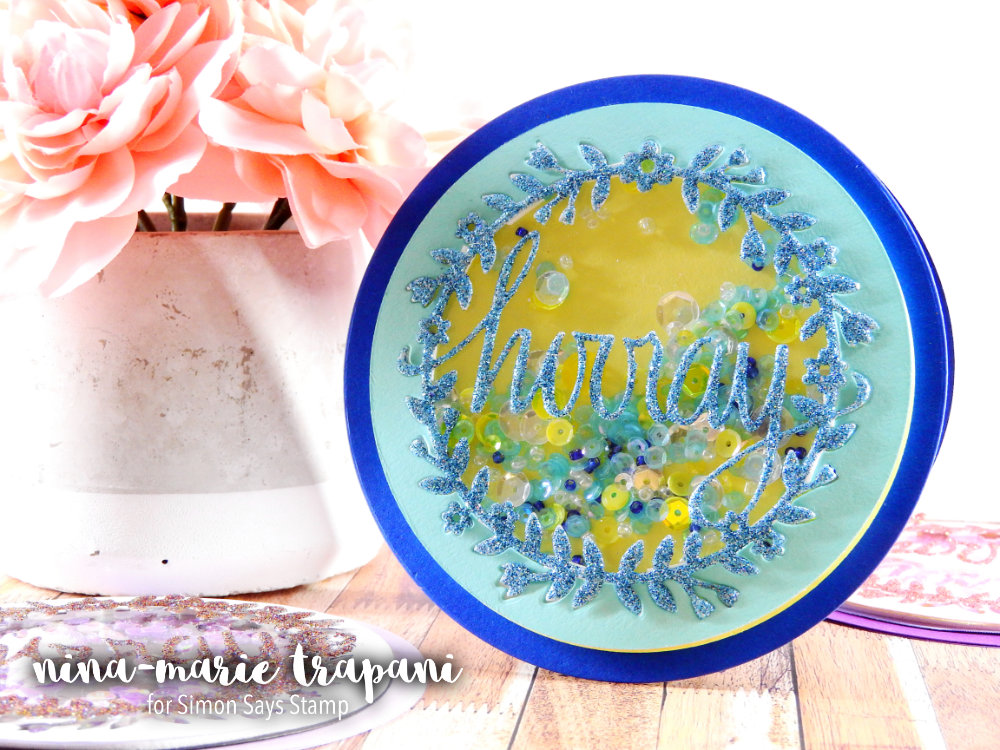
The die you see in each of these cards is the Hooray die from Neat & Tangled. Very delicate and perfect for this technique! For inside the shakers, I used Sunshine, Rain, Little Princess and Sweet 16 mixes from Simon Says Stamp. I also used a random mix from Neat & Tangled that is no longer available; however, it is comparable to a mix of both the Pretty Pink Posh 4mm Lavender sequins and Darice’s Iridescent sequins.

I hope that today’s video inspires you to try both the WOW! Sparkles glitter and the Ranger Sticky embossing powder together to see what beautiful glitter effects you can create! The embossing powder would be perfect to use over top of solid stamped images as well for a beautiful glittery image. Lots of ways you could use these products! Thanks for visiting me today; I’ll be back again later this week with another video tutorial for you!
WATCH THE VIDEO
SUPPLIES


Blog Candy Alert!! Follow our blog via email and comment on this post for a chance to win grab bags and blog candy! Remember to tag your awesome projects with #simonsaysstamp on social media so we can see what you are creating!

Animation May 2017 Card Kit Inspiration
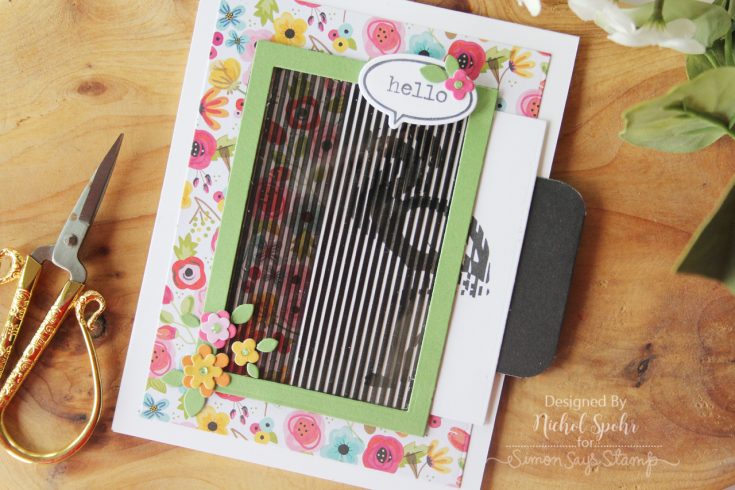
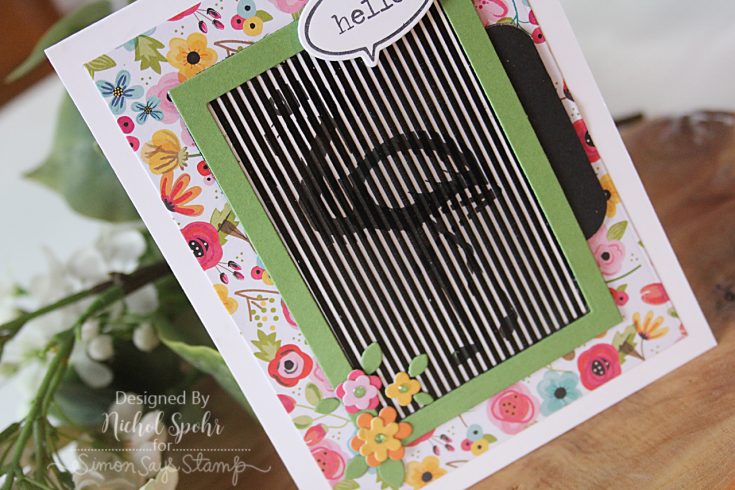
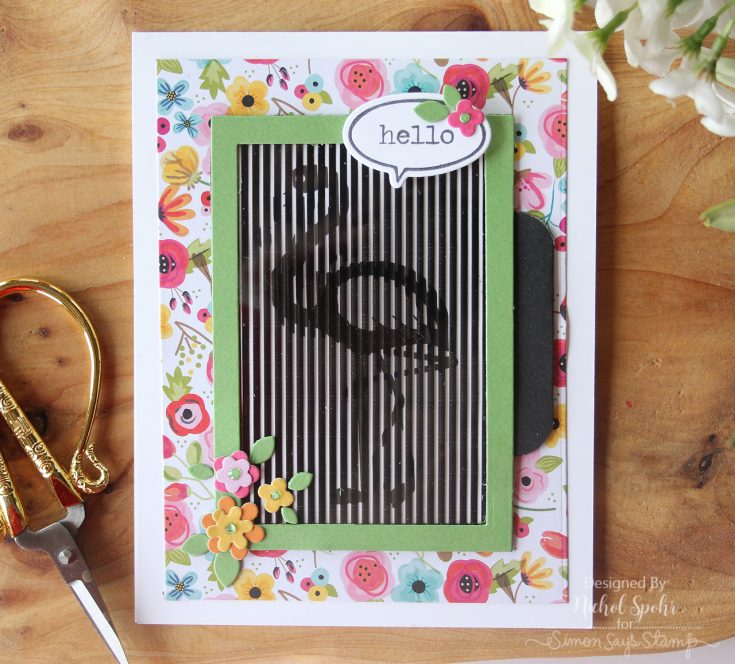
Hi friends! Thanks for stopping by today! We hope you’re excited about our newly revealed Animation May 2017 card kit! We just love the innovation of this stamping process and wanted to provide lots of inspiration on how to make your own animated projects! Today we welcome back the awesome Nichol Spohr to our blog to provide some animated inspiration! Be sure to watch the video and enjoy!
Watch the video:
SUPPLIES:
 |
 |
 |
 |
 |
 |
 |
 |
Blog Candy Alert!! Follow our blog via email and comment on this post for a chance to win a special blog candy!
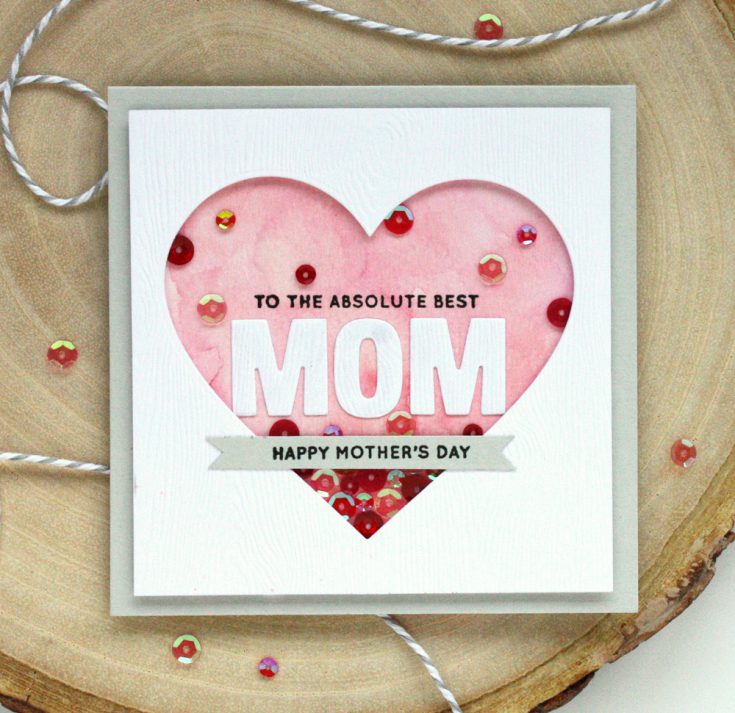
Absolute Best Mom
Hi friends! Happy Saturday! Please welcome back special guest designer, Kelly Rasmussen to our blog! Read on for more information on this lovely card design for Mom and enjoy!
 Today I’ve created a Mother’s Day card using some Hero Arts and Simon Says Stamp goodies. My design was inspired by a card I created last month on the Hero Arts Blog that you can find HERE.
I started out by die-cutting the heart opening from a 4.25 inch square piece of woodgrain cardstock. Then I created a watercolor background using Picked Raspberry and Abandoned Coral Distress Inks. I adhered the watercolor panel to a Fog Gray card base, followed by the heart window.
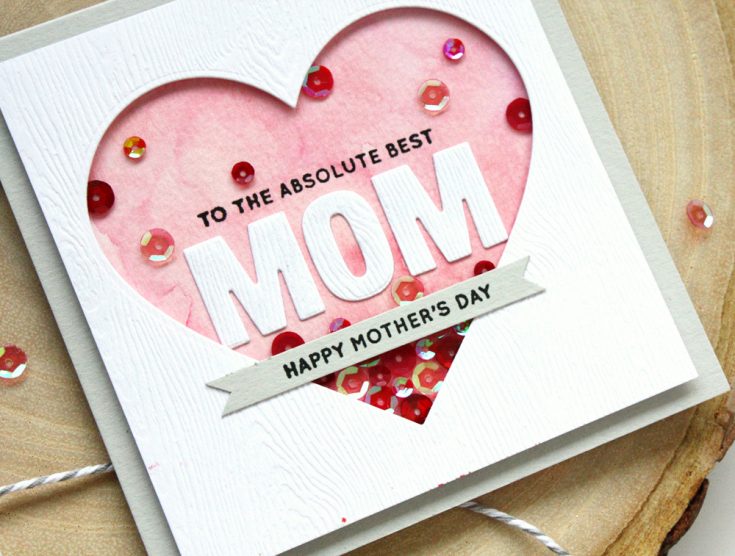 Next, I die-cut the letters for the word “mom” using the Hero Arts Luggage Tag Alphabet Frame Cuts and the same woodgrain cardstock. I adhered these letters to the watercolor panel and then finished stamping my sentiment using the Simon Says Stamp Mom and Dad Icons set.
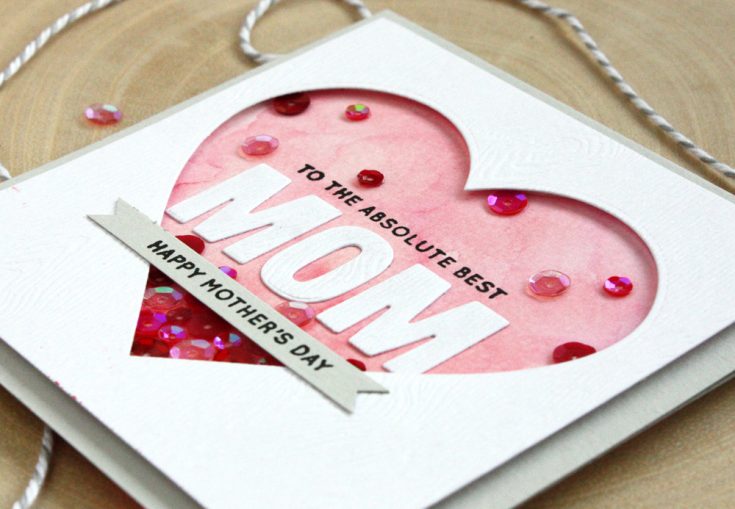 And the part that I think really makes the card is the sequins! These are Hero Arts Blush Ombre Sequins, which come in a pack that includes a variety of sizes and colors. The arrangement of the sequins gives the illusion of a shaker card, but they are all firmly adhered in place using Mini Glue Dots.
I’m thinking this design would work great for a Father’s Day card as well! You could change up the color scheme and switch out the heart for a circle.
SUPPLIES:
 |
 |
 |
 |
 |
 |
 |
 |
 |
 |
 |
 |
Thanks for reading today, and to Kelly for being our guest!
Blog Candy Alert!! Follow our blog via email and comment on this post for a chance to win a special blog candy!


