Art Journal: Be Authentic
Welcome everyone!! It’s the beginning of the month and that means it’s time for my Art Journaling feature! Each month I create a page, taking you through techniques that are easy to try and working you into ones that are more challenging.
Today I’m working with Distress Spray Stains and the Swirling Garden stencil. I’ve chosen colors that are in my muted pallet when mixed together; Iced Spruce, Cracked Pistachio and Antique Linen.
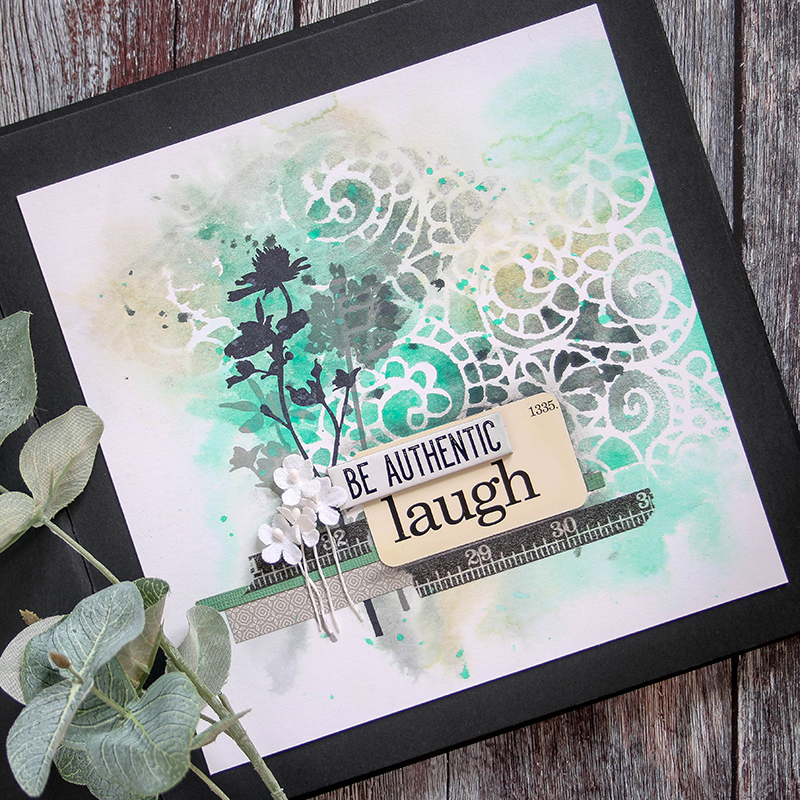
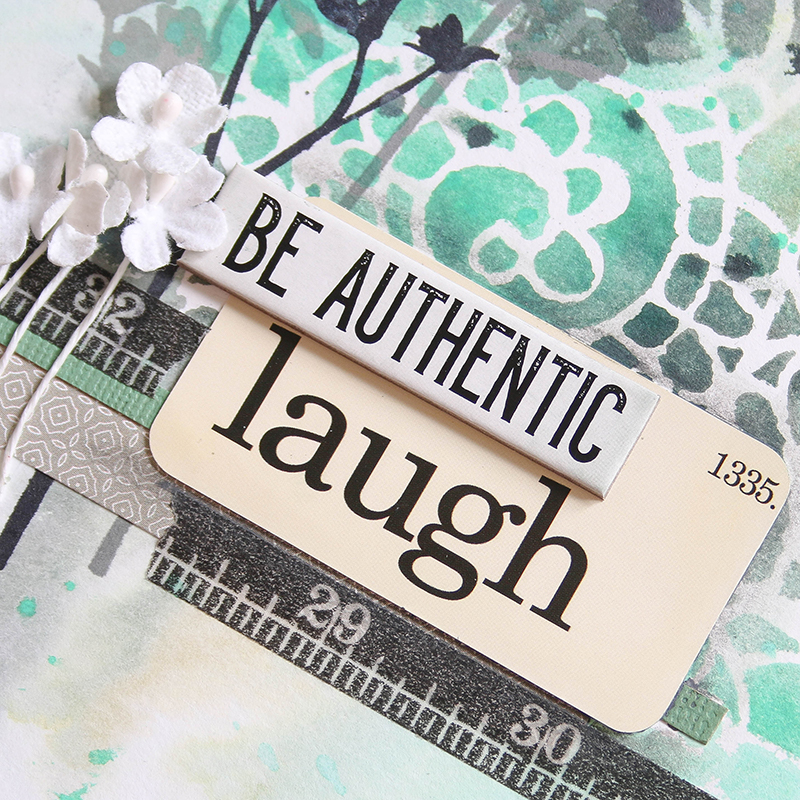
Once I had my background sprayed and dry, I stampded the Tim Holtz Wildflowers using Jet Black and Watering Can Archival ink and Simon Says Stamp Smoke ink for varying colors of grey. Check out how the stamped images react over the stenciled background… this is why I love layering!

I put together an arrangement of typography items with the Tim Holtz Flash cards and Quote Chips to create my title. To fiinsh off the design, I added a few flowers from the Tim Holtz Bouquet Findings.
I’ve filmed a full process video which you can view below or on our YouTube Channel HERE.

Blog Candy Alert!! Follow our blog via email and comment on this post for a chance to win grab bags and blog candy! Remember to tag your projects with #simonsaysstamp on social media so we can see what you are creating!
I hope I’ve inspired you to try your hand at art journaling! Thanks for stopping by!
 |
 |
 |
 |
 |
 |
 |
 |
 |
 |
 |
 |
 |
 |
|
|
 |
 |
 |
 |
Studio Monday with Nina-Marie: Doodlebug Coffee Love Action Wobble
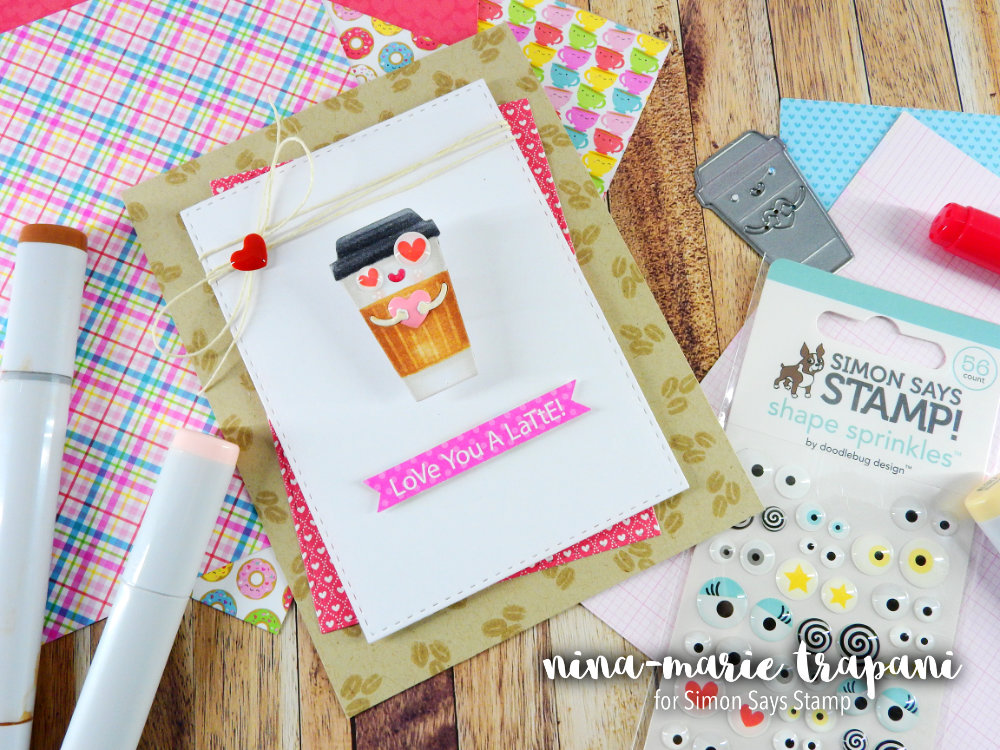
Happy Monday everyone! Today I have a card that I think you will love it A LATTE (sorry, couldn’t resist the pun)! I’m featuring Doodlebug this week and what better to choose than their adorable Coffee Love collection?

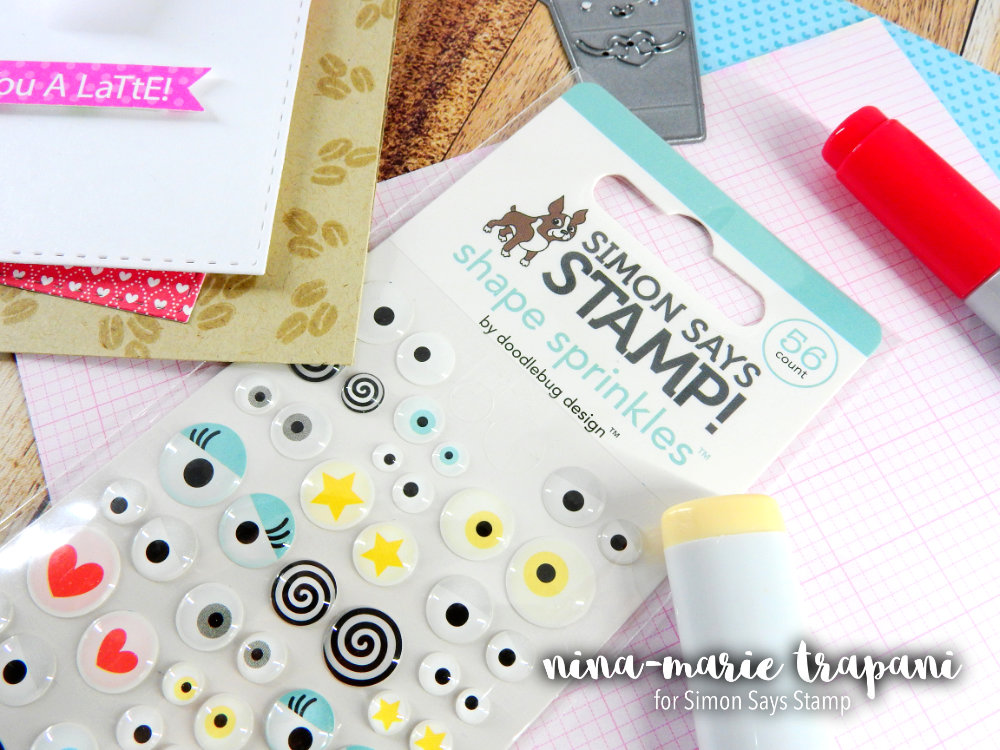
Another thing I am very excited about with today’s card is that I also used the Doodlebug and Simon Says Stamp collaboration All Eyes On You Shape Sprinkles! These Sprinkles are exclusive to Simon Says Stamp. Aren’t these just to die for??? I was thrilled to see these released last month!
Have you ever made an action wobble card? Action wobbles are a really clever way to add something totally unexpected to a card. This is my first one and I love how it turned out… I had never made one before because up until recently, I had never had any small action wobbles, just large ones. The large ones work great, but are hard to fit behind certain stamped images and the large action wobbles were always too big for the stamped images I wanted to use them with.
So I was happy when Art Impressions recently released mini action wobbles, and let me tell you, they are the perfect size! I used one behind Simon’s cute Coffee Love die, which was part of a recent card kit (as were some of the items from the Doodlebug Coffee Love collection). Here’s a close up of how the action wobble looks and the dimension it gives:
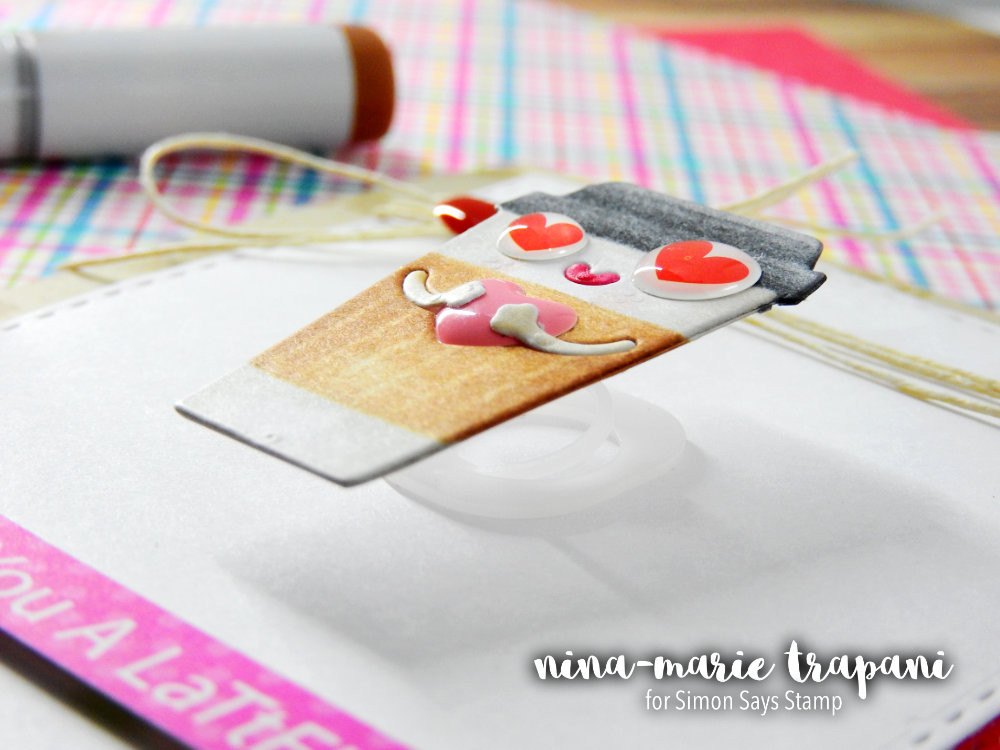
I die cut the coffee cup from white cardstock and colored it in with a few Copics; nothing fancy for shading, as I stuck to two markers per color. I did however use the Copic Colorless Blender to add texture and highlights. By using the Colorless Blender to create lines for the brown paper sleeve and highlights for the lid, it adds the perfect amount of interest to the cup.
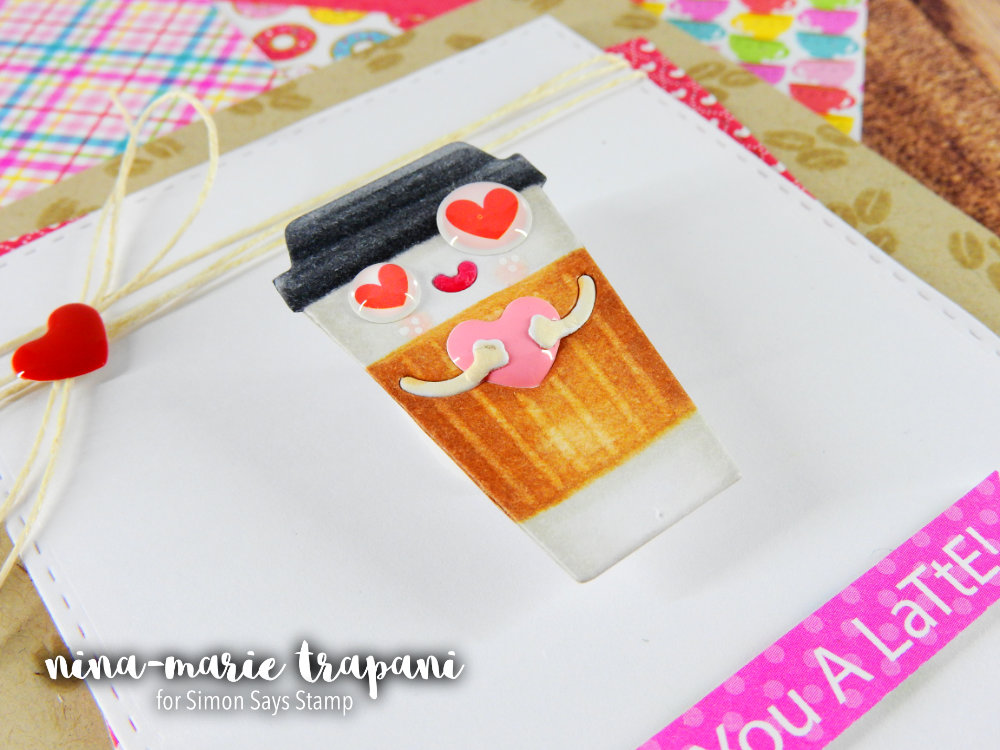
After coloring the cup, I added a pair of heart eyes from the All Eyes On You Sprinkles (its a love card, so there has to be heart eyes, right?). I also added a little pink heart Sprinkle in between the hands of the cup.
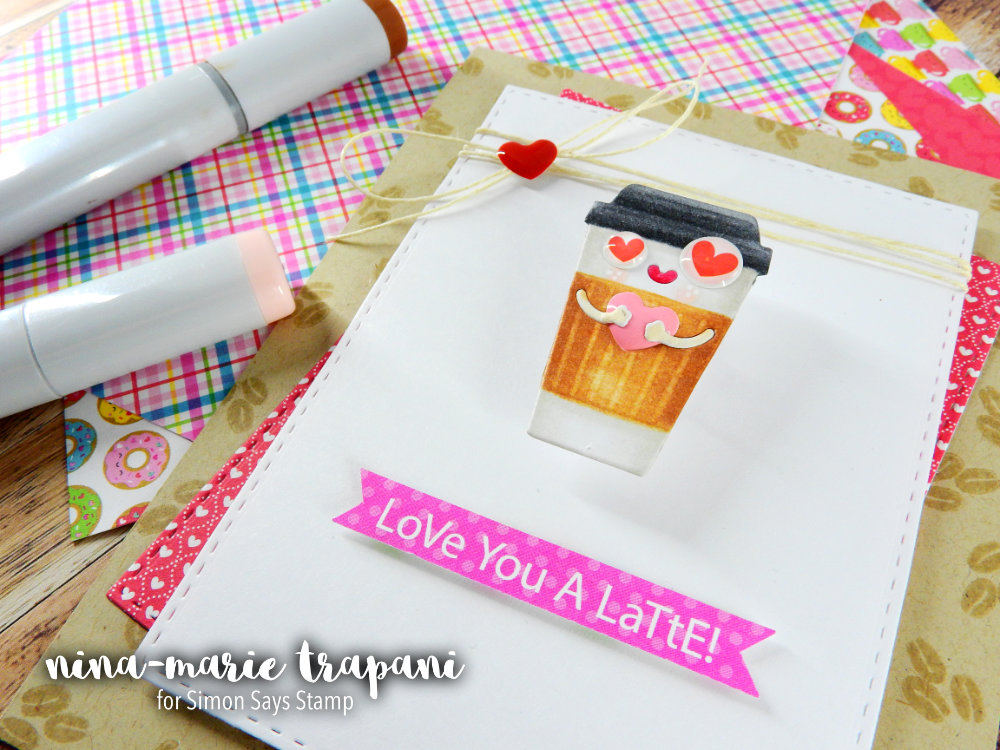
I thought the sentiment was totally perfect; I found it on one of the sentiment strip collage papers (from Doodlebug’s Cream and Sugar 6×6 paper pad). I trimmed it out with some scissors and cut little banner ends on either side. I popped that up with foam tape under the coffee cup.
For the card base, I used Neenah Desert Storm cardstock, which I stamped coffee beans onto with the Newton Loves Coffee stamp set from Newton’s Nook. I layered some more pattern paper behind the panel my action wobble and sentiment were adhered to, and also tied on some hemp. For a final touch, I used another heart Sprinkle on the bow of the hemp.
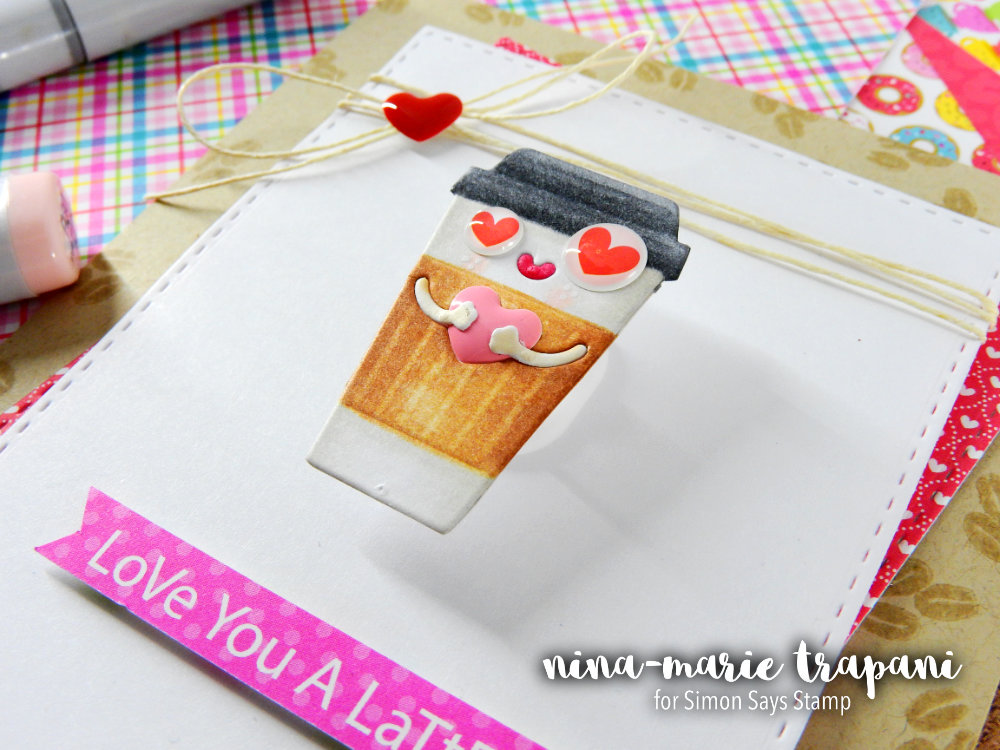
Isn’t it cute how those Sprinkles from Doodlebug and Simon Says Stamp really bring this coffee cup to life? This card is FULL of love!
I hope you love it as much I do, and that you will check out the video below to see how this all came together! Be sure to subscribe to our blog and YouTube channel to make sure you always catch the latest inspiration. Thanks for visiting me today!
WATCH THE VIDEO
SUPPLIES


Blog Candy Alert!! Follow our blog via email and comment on this post for a chance to win grab bags and blog candy! Remember to tag your awesome projects with #simonsaysstamp on social media so we can see what you are creating!

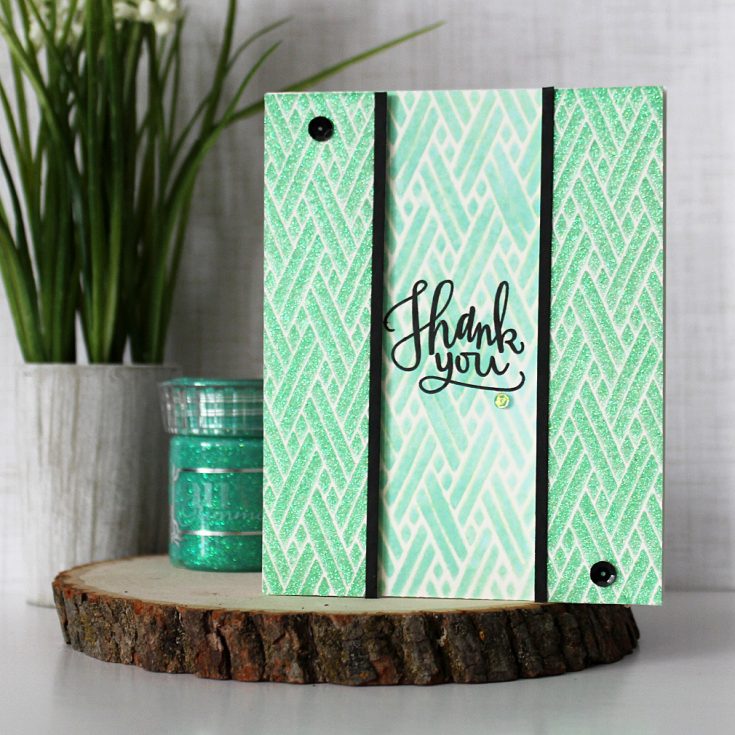
Sparkly Thank You
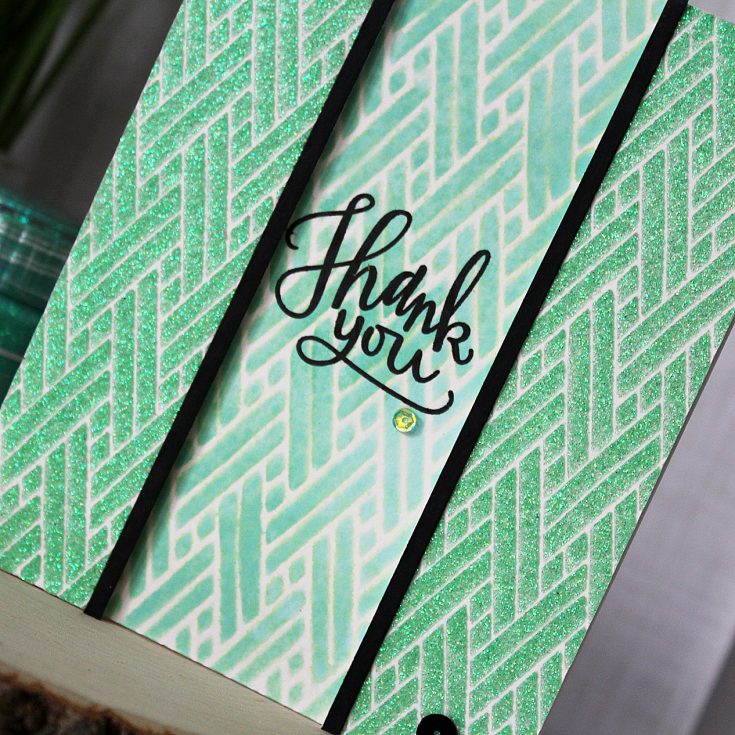
Hi friends! Thanks for stopping by today and please welcome back special guest Dana Joy!! This very talented crafter made a gorgeously glittered “thank you card” as inspiration. Please read on and enjoy!

I love working with anything that sparkles and this Peridot Green nuvo glimmer paste does that and so much more. To begin, I made sure to temporary tape down my Tim Holtz layering stencil in Woven with over my watercolor paper to keep it in place. This stencil is very delicate so I didn’t want it to move around. I added a thin layer of glimmer paste over the stencil with gentle and even strokes. This will ensure an even coverage. I made sure to put any excess paste back in the jar as to not waste any of it. Once I removed the stencil I had this gorgeous background. I set the panel aside to dry and started working on my background panel.
Continuing onto my base panel, I cleaned off my stencil and reused it to blend on some cracked pistachio distress oxide ink onto another piece of watercolor paper. I left the stencil in place and spritzed on some water to activate the oxidization process. I let the water sit for approximately 10 seconds then removed the stencil and blotted up the excess water. Heat setting it with my heat gun ensured the color was locked in place.
Now that my glitter panel is dry, I cut it down the center. I trimmed each piece down to 1 ¼ inches wide cutting from the outside edge. I attached a thin strip of black cardstock to each inside corner for added contrast. I used some multi medium matte to attach a black sequin to each panel.
Next I stamped a thank you greeting from Simon Says Clear Stamps Big Scripty Greetings in Versafine onyx black ink in the center of my card panel with my mini Misti and added a pale green sequin underneath it. Keeping the sentiment very simple kept the focus on the gorgeous stencil work. To assemble the card, I used some foam tape and pop the two glitter panels to each side of the sentiment panel and attached that panel to a white card base.
I have already made several of these cards in different colors. I hope you enjoyed your visit here today and have been inspired to create something beautiful. Have a great day and we will see you back here soon.
 SUPPLIES:
 |
 |
 |
 |
 |
 |
 |
 |
 |
 |
 |
 |
 |
 |
 |
 |
 |
 |
Thanks so much for reading today, and thanks to Dana for being our guest!
Blog Candy Alert!! Follow our blog via email and comment on this post for a chance to win a special blog candy!


