Watercolor Thank You Card
Hi Friends! Please join me in a big welcome back to Kelly Rasmussen as a especial guest on our blog today! Be sure to read on to learn more about this fun card and enjoy!
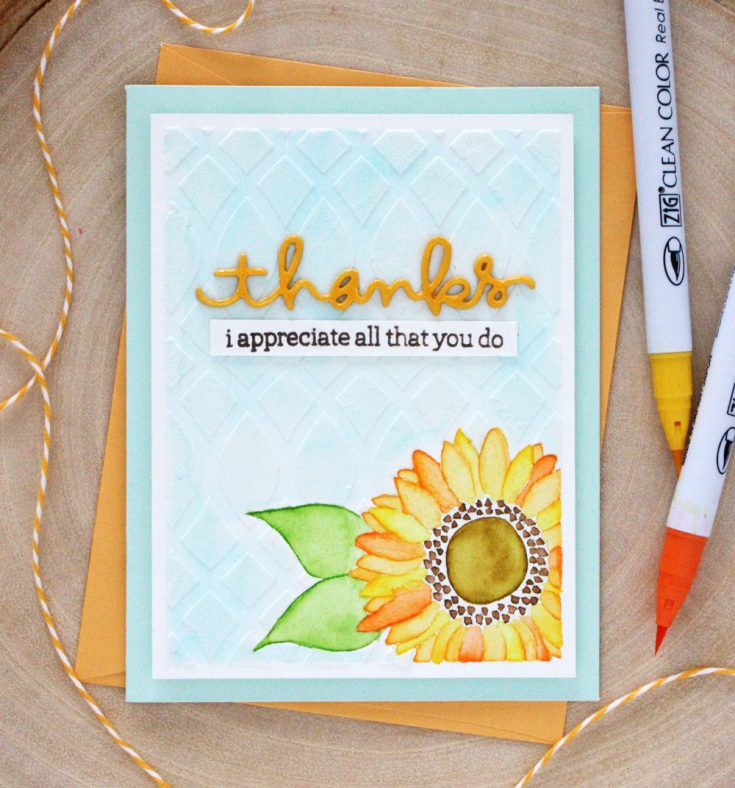
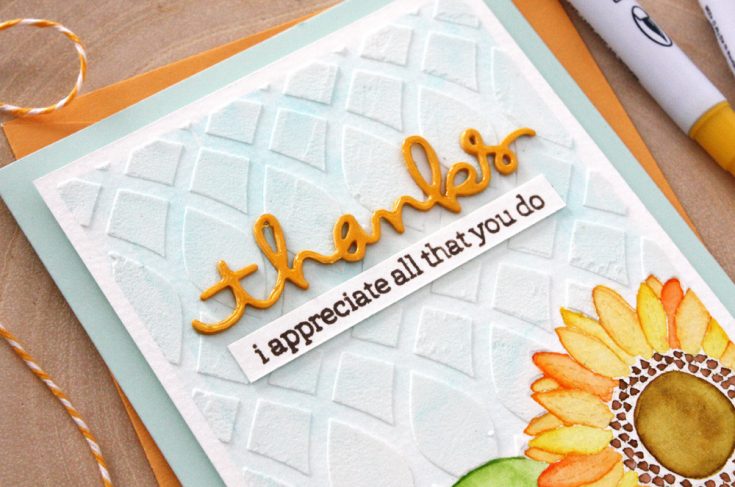
Hello, crafters! I’m so happy to be back as a guest on the Simon Says Stamp blog! Today I’ve got a card to share that use lots of Simon Says Stamp and Hero Arts goodies! I didn’t have a plan in mind when starting this card, so I wasn’t sure exactly where it was going, but in the end everything fell into place. :)
I started out with a piece of watercolor paper that I taped to a solid surface. One of my favorite watercolor papers is the Canson Montval — it seems to work so well with any watercolor mediums! I stamped the sunflower image from the Simon Says Stamp Summer Flowers set using Antique Linen Distress ink. Then I used various colors of Zig Clean Color Real Brush Markers to color in the image. To avoid any colors bleeding together on the petals, I jumped around and colored petals that weren’t touching. Then once a petal was dry, I could go in a color the next petal. Once the flower was done, I created a mask of the flower using Inkadinkadoo Stamping Mask Paper, placed it over the flower and then stamped and colored my green leaves.

This card showed me that I don’t always have to have a plan in mind before starting a card, just grab one product to start and then go from there! :)
SUPPLIES:
 |
 |
 |
 |
 |
 |
 |
 |
 |
 |
 |
 |
 |
 |
 |
 |
 |
 |
 |
 |
 |

Blog Candy Alert!! Follow our blog via email and comment on this post for a chance to win a special blog candy
Collage Summer Love You Card
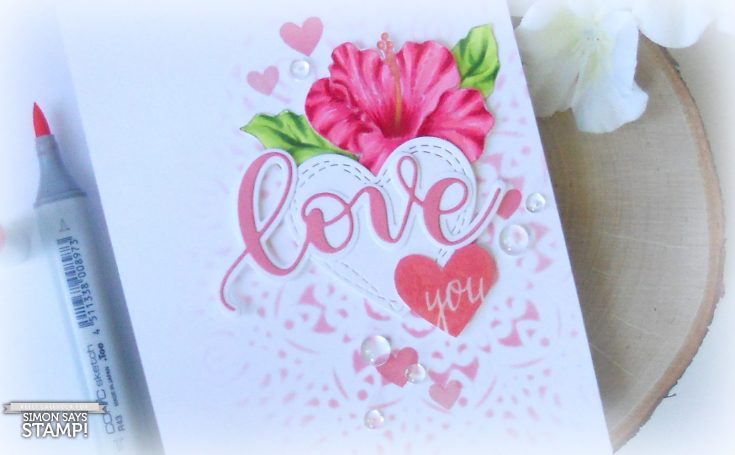
Hi Friends! Thanks for stopping by today! Please join me in a warm welcome back to special guest Kelly Latevola as our guest on the blog today! She’s made this very gorgeous feminine no line coloring floral love card to inspire you today! She uses a mixture of new and old exclusive products including our Circlular Lace stencil, Wonky Hearts dies, and Summer Flowers stamps! the Be sure to watch the video and enjoy!
Watch the video:

Supplies:
 |
 |
|
 |
 |
 |
 |
 |
 |
 |
 |
 |
 |
 |
 |
|
 |
 |
 |
 |
 |
 |
|
 |
|
 |
 |
 |
 |
 |
 |
 |
 |
 |
 |
Thanks for reading today, and thanks to Kelly for being our guest!
Blog Candy Alert!! Follow our blog via email and comment on this post for a chance to win a special blog candy
Love Your Guts by Cathy Zielske!
Hi friends! TGIF! Thanks for stopping by today! Please welcome very special guest, Cathy Zielske to our blog! Have you checked out her new exclusive line with us?! It’s super fun! Please read on for more information on this colorful card and enjoy!
 Hello everyone! It’s Cathy Zielske here, a long-time scrapbooker who just discovered the magic of card making a few months ago and today I’m sharing a card using a sentiment from one of my stamp sets from Simon Says Stamp. You should know that I am pretty much geeking out over every new technique and and working on learning about All The Things that go into having fun with card making. I had so much fun making this card and I’m excited to share it with you.
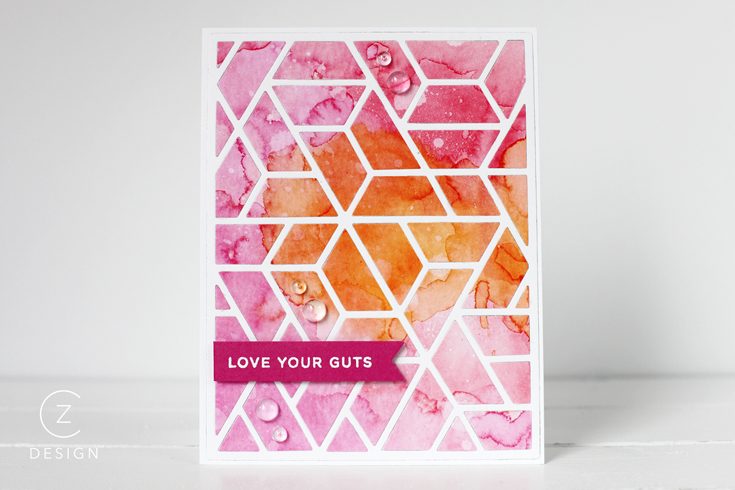
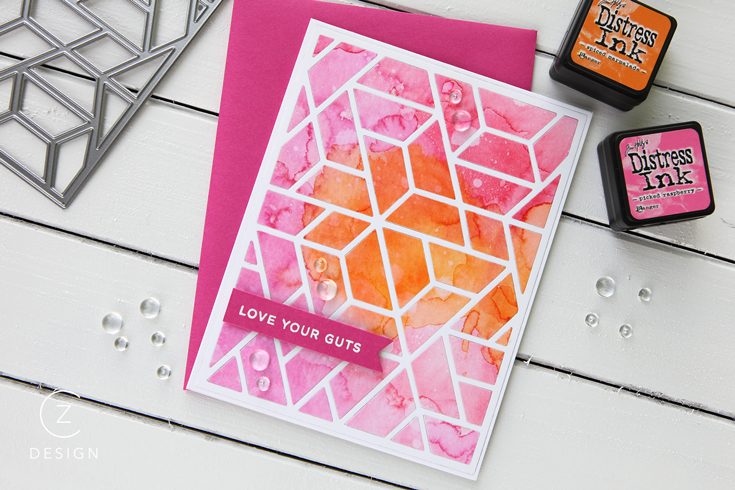
This card was completely inspired by the amazing Laura Bassen, and specifically this card and tutorial. Once I got my hands on the Polygon Cover Plate from Neat & Tangled, I knew I had to give it a shot!
I started by smooshing some Distress Inks (Picked Raspberry, Worn Lipstick, Spun Sugar and Spiced Marmalade) onto my craft mat, generously spritzing them with water using my Distress Sprayer, and then pressing the smooth side of my Tim Holtz Watercolor Cardstock directly onto the moistened inks. I repeated this process, using my heat tool to dry the paper between rounds, alternating between smooshing and spritzing the ink, and using a big paint brush to dab on color. Once I had it to my liking, I spritzed on a bit more water using my Distress Sprayer, blotted it off with a paper towel and set it aside to dry.
Next I used the Polygon Cover Plate die to cut out the frame from some Neenah 80#Solar White Cardstock using my Big Shot. I used a metal shim to ensure a crisp cut the first time. I discarded the guts and just kept the white frame.
Once the watercolored paper was dry, I ran it through my Big Shot, again using the metal shim for a crisp, clean cut.
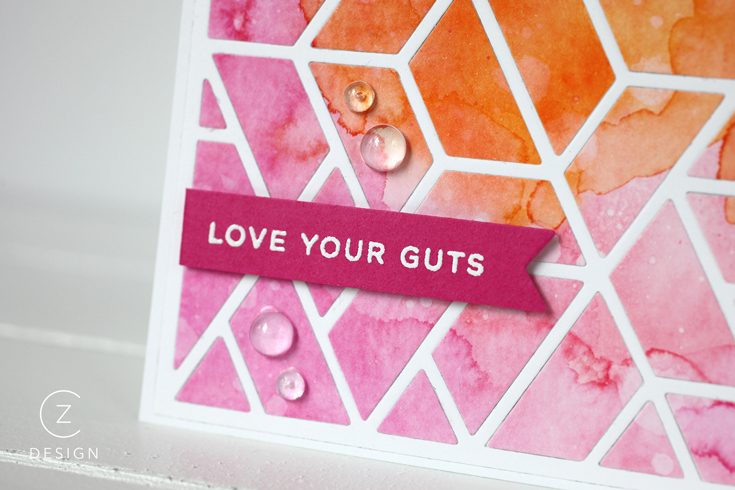
To make the card, I created a 4.25 x 5.5 top folding card base from the Neenah Solar White cardstock, adhered the white frame using Elmer’s Spray Adhesive and then filled it in with all of the popped out watercolored pieces using my Zig 2-Way Glue Pen. Using the Silhouette Pick Up Tool made placement of the pieces quick and easy.
Next I stamped “LOVE YOUR GUTS” onto some Gina K Designs Passionate Pink cardstock (using my Mini Misti tool for perfect stamping—it’s seriously such a help to this new stamper!), and heat embossed the sentiment using some white Hero Arts Embossing Powder. The last step was to die cut the sentiment using the Lawn Fawn Everyday Sentiment Banner set, add a bit of foam tape for dimension and adhered to the card. I finished it off by adding some Clear Droplets from Pretty Pink Posh in both 4mm and 6mm sizes.
I feel like there are so many options for this type of card! I plan to make several in different ink combinations featuring different sentiments. Colorful, shape-filled and fun! If you’d like to see a clip of me making a similar card, check out my blog for a short tutorial.
SUPPLIES:
 |
 |
 |
 |
 |
 |
 |
 |
 |
 |
 |
 |
 |
 |
 |
 |
 |
 |
|
|
 |
 |
|
 |
|
Thanks for reading today, and thanks to Cathy for being our guest!
Blog Candy Alert!! Follow our blog via email and comment on this post for a chance to win a special blog candy


