Yippee for Yana: Dimensional Pattern Stamping
Hi friends! Happy Saturday Let’s hop right into the latest edition of Yana Smakula’s bi-monthly feature: Yippee for Yana! This gorgeous card is in full gear for a tropical Summer. Read on, watch the video, and enjoy!
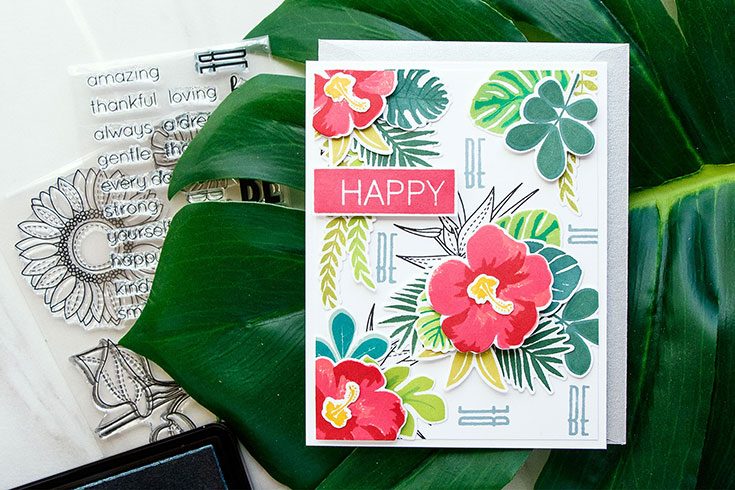
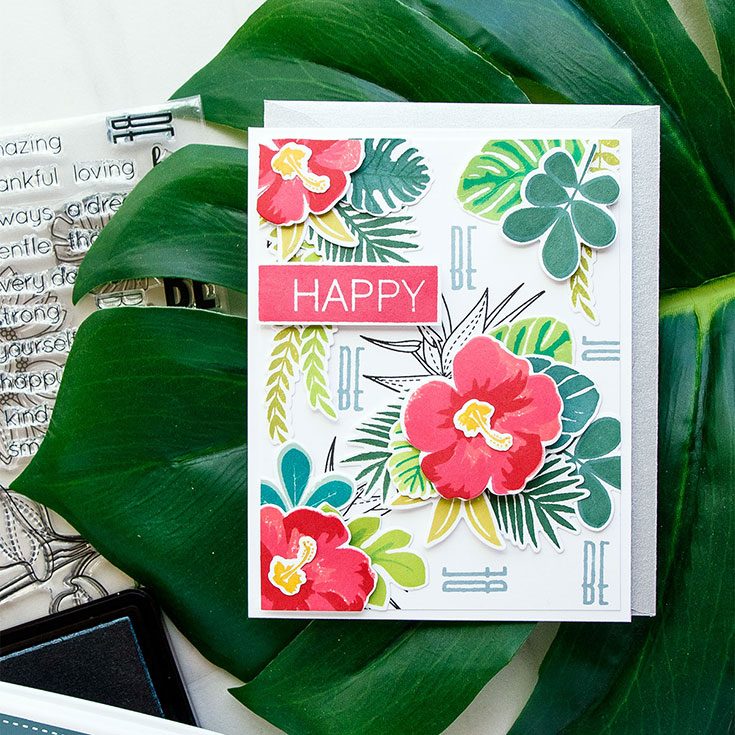
Hi everyone, this is Yana Smakula and I’m excited to bring you another episode from my by-monthly “Yippee For Yana” video series! In today’s video I’m showing something I like to call Dimensional Pattern Stamping! We are going to create a dimensional looking pattern for our card using stamps, coordinating dies and inks!
Since Summer is hot upon us the pattern or the background I am creating today is tropical, but keep in mind by changing images to be fall or spring you can make this idea for work any season.
I started working on this project by doing all of my stamping and die cutting first. I used images from the Tropical Leaves stamp set from Simon Says Stamp as well as Color Layering Hibiscus set from Hero Arts; stamped images using a various colors of ink and cut out with the help of coordinating dies.
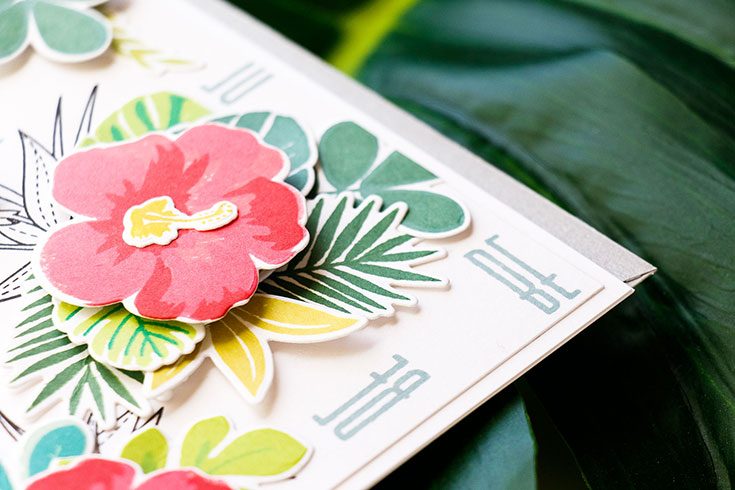
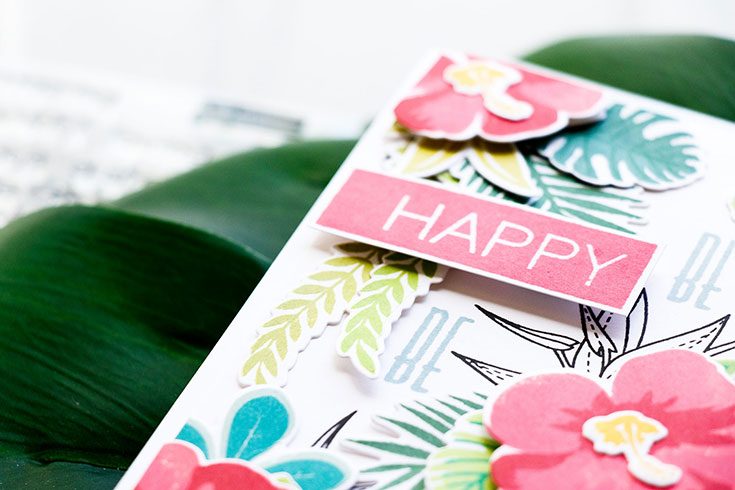
Next, I stamped bird of paradise images from the Summer Flowers stamp set from Simon in black ink onto a 4 x 5 ¼” panel and arranged my die cuts around them to form a background or pattern. Once I was happy with the placement I adhered my die cuts in place using glue and foam adhesive.
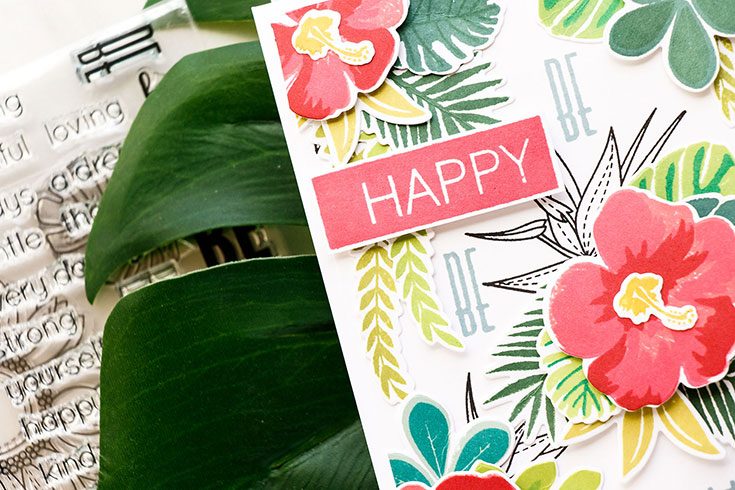
Lastly, I stamped “Happy” from the Happy Block Greetings stamp set in Watermelon ink, cut it out and foam mounted onto my panel that was already adhered onto an A2 top folding card base. I also stamped “Be” anywhere on my background where I was able to find a spot.
Have you ever tried making dimensional patterns like this? I hope you’ll give this a try. Have fun stamping!
WATCH THE VIDEO:
Supplies:
|
|
 |
 |
 |
 |
 |
 |
 |
 |
 |
 |
 |
 |
 |
 |
 |
 |
 |
 |
 |
 |
 |
 |
 |
 |
 |
 |
 |
Thanks for reading today, and thanks to Yana for being our guest!

Custom Envelope Watercoloring – Monthly Mail Art – July 2017
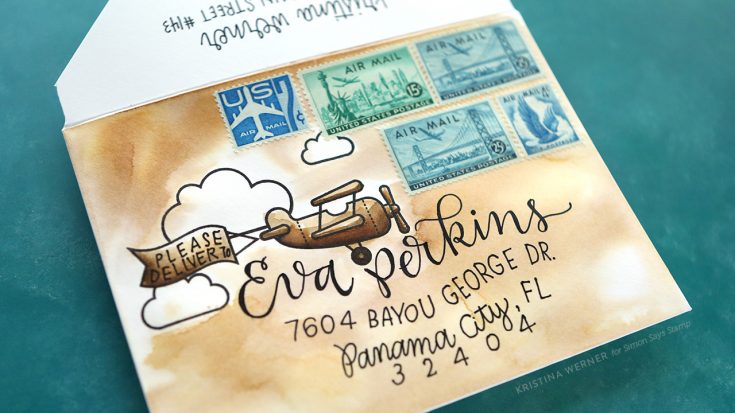
Hi all! Kristina here with another Monthly Mail Art! I’m excited to share with you a custom watercolored envelope created using Lawn Fawn’s Plane and Simple stamp set and Distress Inks.
NOTE: Address used with permission. Thanks, Eva!
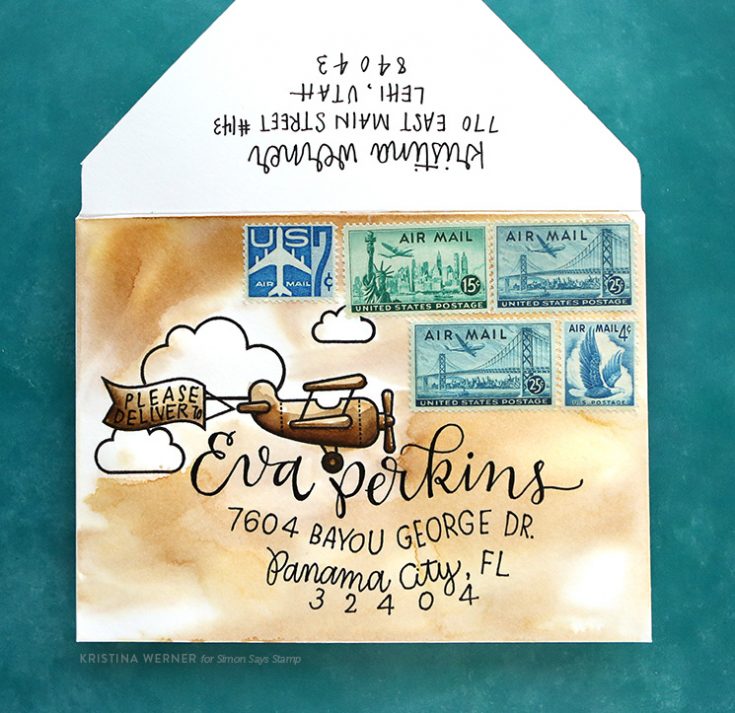
I stamped the airplane, banner, and cloud images in Versafine Onyx Black ink and then used just two colors of Distress Ink for the watercoloring (including the sky!). I used Vintage Photo and Ground Espresso.
Next I picked out some vintage postage stamps (I got purchased these from an Etsy shop). After adhering vintage postage stamps, I penciled on Eva’s name and mailing address so that I could get the spacing just right. I then went over the name and address with a black pen. Then I erased the pencil lines.
To seal the artwork and prevent any moisture damage, I rubbed some Distress Micro Glaze over the envelope and buffed off the excess with a paper towel. NOTE: Do NOT put Distress Micro Glaze over the postage stamps. The postal service will need to be able to cancel out the postage.
I hope you enjoy today’s video! :)
Supplies
 |
 |
 |
|
 |
 |
 |
 |
 |
 |
 |
 |
 |
 |
 |
 |
 |
 |
|
Petals & Pallets by Concord & 9th
Hi friends! Happy Thursday! Please welcome back special guest Angie Backman of Concord & 9th! She made this adorable card pictured below with some newer releases from Concord & 9th! Please read on for more information and enjoy!
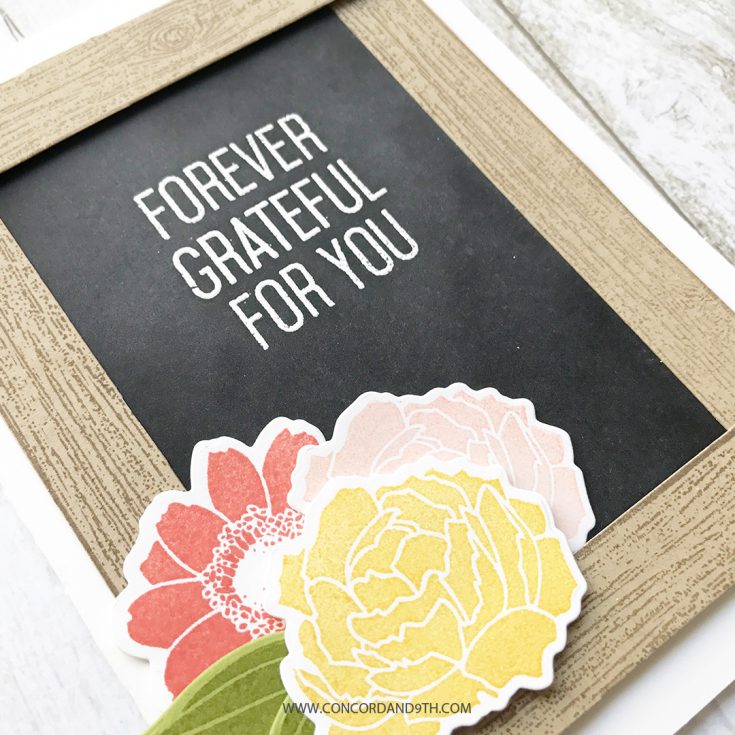
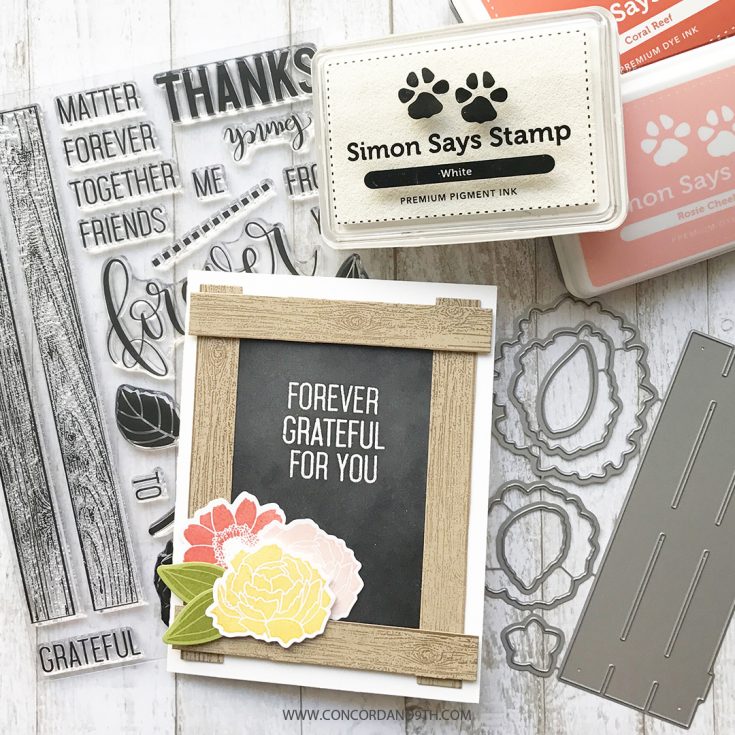
We have had such fun with our new Petals & Pallets stamp set and dies! We had the trendy pallet art and farmers-market-type crates in mind when we designed the products! We envisioned crates full of beautiful blooms, pallets with words stamped on top and wanted a way to create a little 3D crate to hold gift cards too!
Today we decided to ‘think outside the crate-box’ and we created a chalkboard frame with the wood slats instead.
Here are the steps to create this fun card:
1. Create a card base with your white card stock.
2. Cut black cardstock to 3 3/4” x 4 3/4”.
3. Stamp and die cut the 3 flowers and leaves in your favorite colors.
4. Die cut 2 pallets, and stamp on 4 of the slats with your woodgrain stamps.
5. Trim off 4 of the slats, clipping the little connectors in-between the slats off. Leave two at full size for the sides of the frame. Cut 1” off two of the slats for the top and bottom of the frame.
6. Use your embossing powder tool on the black cardstock before embossing. Rather than wipe away the chalk residue, we left it on to give it more of a used chalkboard feel. Build your sentiment of choice (there are many to mix & match), stamp with white pigment ink, sprinkle with white embossing powder and heat set.
7. Adhere the black card stock to the front of the card base.
8. Adhere the side frames with tape adhesive. Attach the top and bottom frame pieces, and the flowers/leaves by using some foam tape to give it a little dimension.
It was pretty quick & easy to create!
Check out all the different samples on Simon Says Stamp HERE to see how to use the flowers in bunches, single flowers, pallets & crates too! We also have two videos you can watch. THIS VIDEO is instructional showing how to use the pallet dies with stamps. THIS VIDEO shows how to make a 3D crate & tissue paper flower and include a tasty treat for someone special!
We hope this has inspired you and given you even more ideas for Petals & Pallets stamps and dies! We love seeing what you create so be sure to #concordand9th. We also love working with Simon Says Stamp and really appreciate being highlighted on their blog today!
HAPPY CRAFTING!
❤️ Angie

SUPPLIES:
 |
 |
 |
 |
 |
 |
|
 |
 |
 |
 |
 |
 |
 |
 |
 |
 |
 |
 |
|
Thanks for reading today and thanks to Angie for being our guest!
Blog Candy Alert!! Follow our blog via email and comment on this post for a chance to win a special blog candy!


