What Would Kelly Make: 10th in the series!
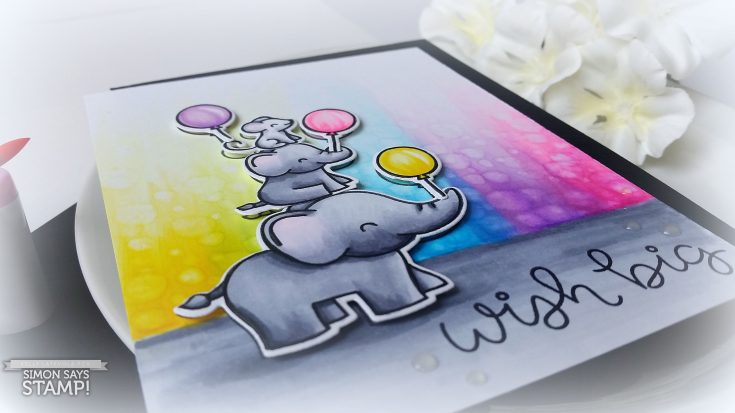
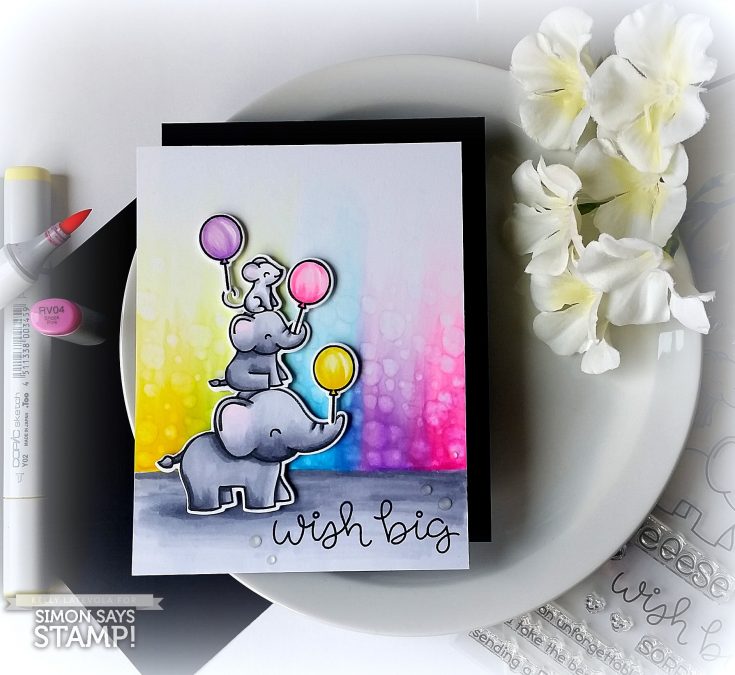
Hi friends! Happy LAST Wednesday of the month!! You may know that that means it’s time for our latest edition of a fun series with Kelly Latevola called: What Would Kelly Make? This is the 10th card in the series. In this edition, Kelly is working with Lawn Fawn’s Elphie Selfie stamp and die set! Kelly’s technique focuses on making a “bubble background” with Copic Markers! Be sure to watch the video for more information! If you missed the first 9 features, please click HERE to view them!
WATCH THE TECHNIQUE VIDEO:
WATCH THE FULL CARD VIDEO:
 SUPPLIES:
 |
 |
 |
 |
 |
 |
 |
 |
 |
 |
 |
 |
 |
 |
 |
 |
 |
 |
 |
 |
 |
 |
 |
 |
 |
 |
 |
 |
 |
 |
 |
 |
 |
 |
 |
 |
 |
 |
 |
 |
Thanks for reading today, and thanks to Kelly for the fabulous inspiration!

Blog Candy Alert!! Follow our blog via email and comment on this post for a chance to win a special blog candy.
Summer Succulents Lawn Fawn Card
Hi friends! Happy Tuesday! Thanks for popping by our blog today! Please join me in a big welcome to special guest Lynette Lundquist! Please read on and enjoy!

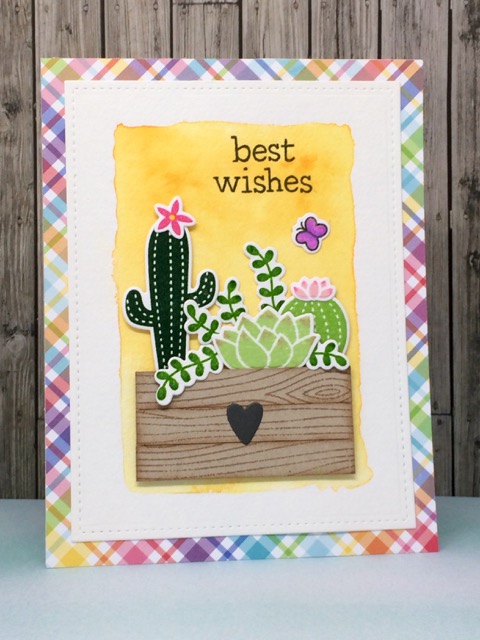
Hi friends! Lynette here! Thanks for checking out my card! The first step I took when creating this card was to make a watercolor background using Zig Kuretake Gansai Tambi colors in yellow and orange. Next, I stamped Woodgrain Backdrops with Doe ink onto a piece of kraft cardstock, cut into strips, and layered to make the look of a planter box.
The cacti are stamped in Noble Fir, Jalapeño, Freshly Cut Grass, and Celery Stick using the stamp set Stuck On You. Then I layered them in the planter box to make a cool succulent mix. Marvy pens were used to add additional color to the cacti tips and I applied adhesive strips to the back of the kraft cardstock to create the dimensional look. The small butterfly is from the stamp set Chirp Chirp Chirp. The cardbase is from Lawn Fawn’s Perfectly Plaid Rainbow collection.
Thanks for stopping by! I hope you like my card and got some inspiration!
 SUPPLIES:
 |
 |
 |
 |
 |
 |
 |
 |
 |
 |
 |
 |
 |
 |
 |
 |
 |
 |
 |
Thanks for reading today and thanks to Lynnette for being our guest!
Blog Candy Alert!! Follow our blog via email and comment on this post for a chance to win a special blog candy.
Congrats! Blog Candy Winners!
From: Studio Monday with Nina-Marie: Lawn Fawn Magic Slider: Valerie DeWitt!
From: Dwell in Possibility by Paula Cheney: Kristy Vittetoe!
From: Celebrating Milestones: Mixed Medium with Shari Carroll: Teresa Doyle!
From: Yippee for Yana: Stamped & Watercolor Pattern with Nuvo Aqua Flow Pens: Tracey Magner!
From: Doodling with Debby: Pencils on Kraft: Jamie Vanskiver!
Please email [email protected] with your mailing address (if applicable), the name of the blog you won from, and the prize you won to claim your prize!
Studio Monday with Nina-Marie: Lawn Fawn Magic Slider

Hello crafters, it’s Nina-Marie here with you today for a new Studio Monday video! Have you tried out Lawn Fawn’s fun Magic Slider dies? These make the creating of slider cards SO easy! Today I am going to share this Fall-themed scene slider, which reveals a sentiment on the inside of the slider!
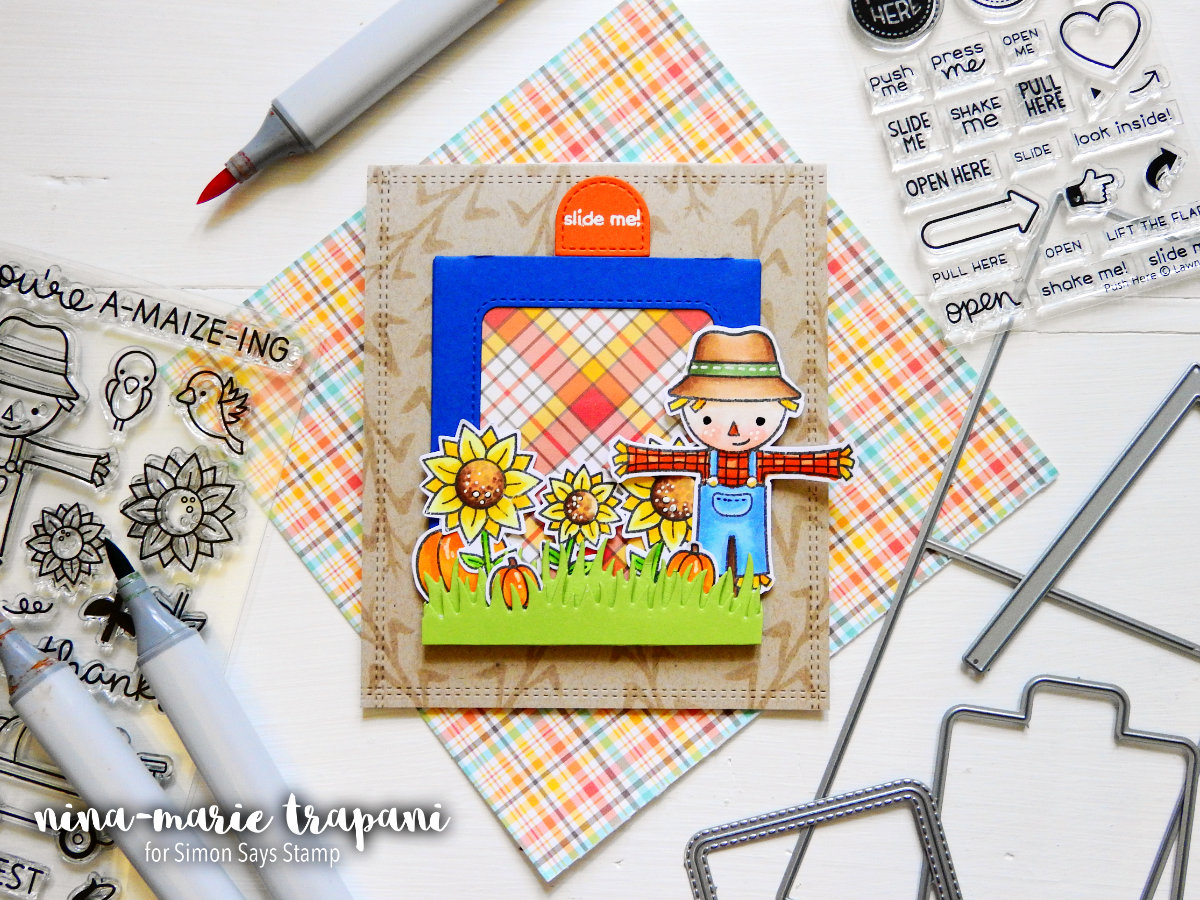
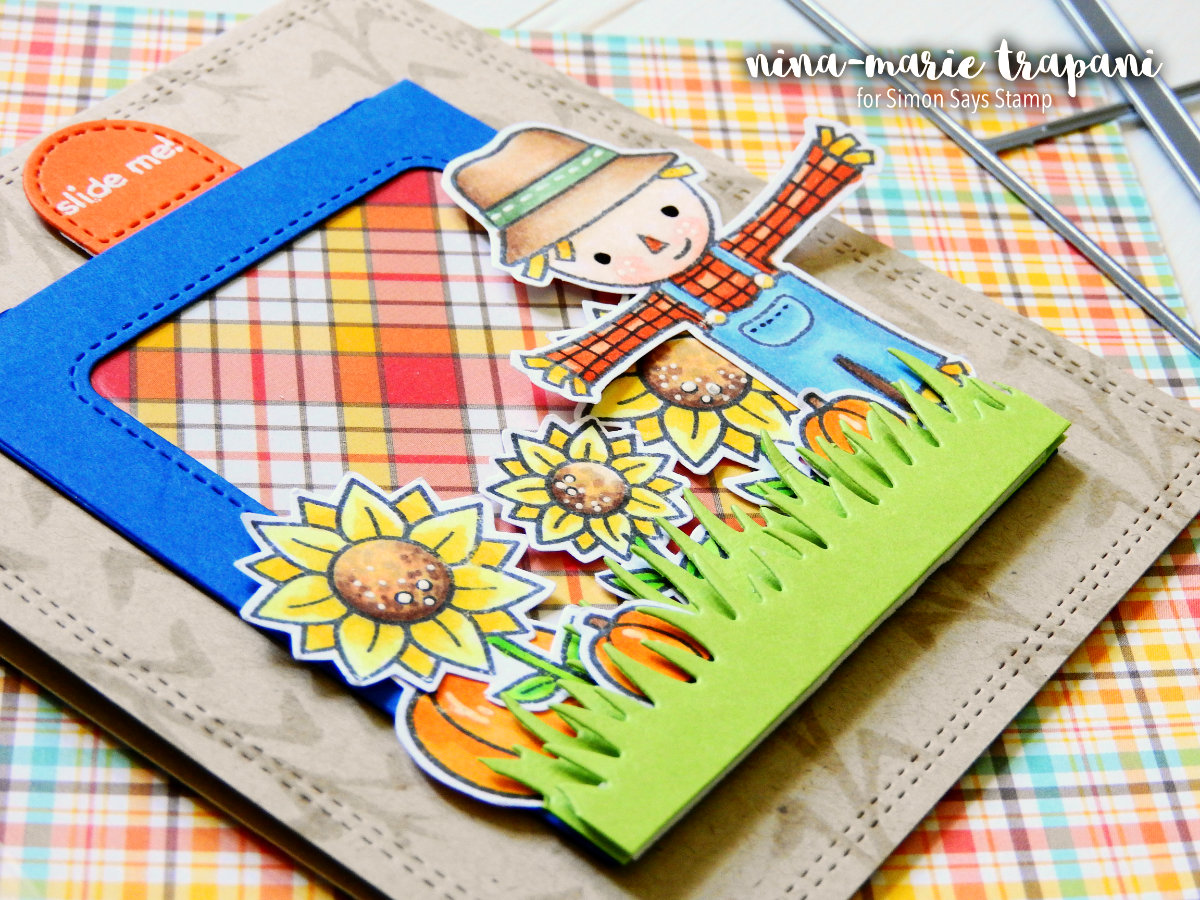
The Magic Slider dies can be used in a variety of ways. I wanted to use it to reveal the sky behind my scene, as well as the sentiment… I also love how the Push Here stamp set from Lawn Fawn allows you to add cute prompts on interactive cards for the recipient. Check out the reveal of the full scene below:
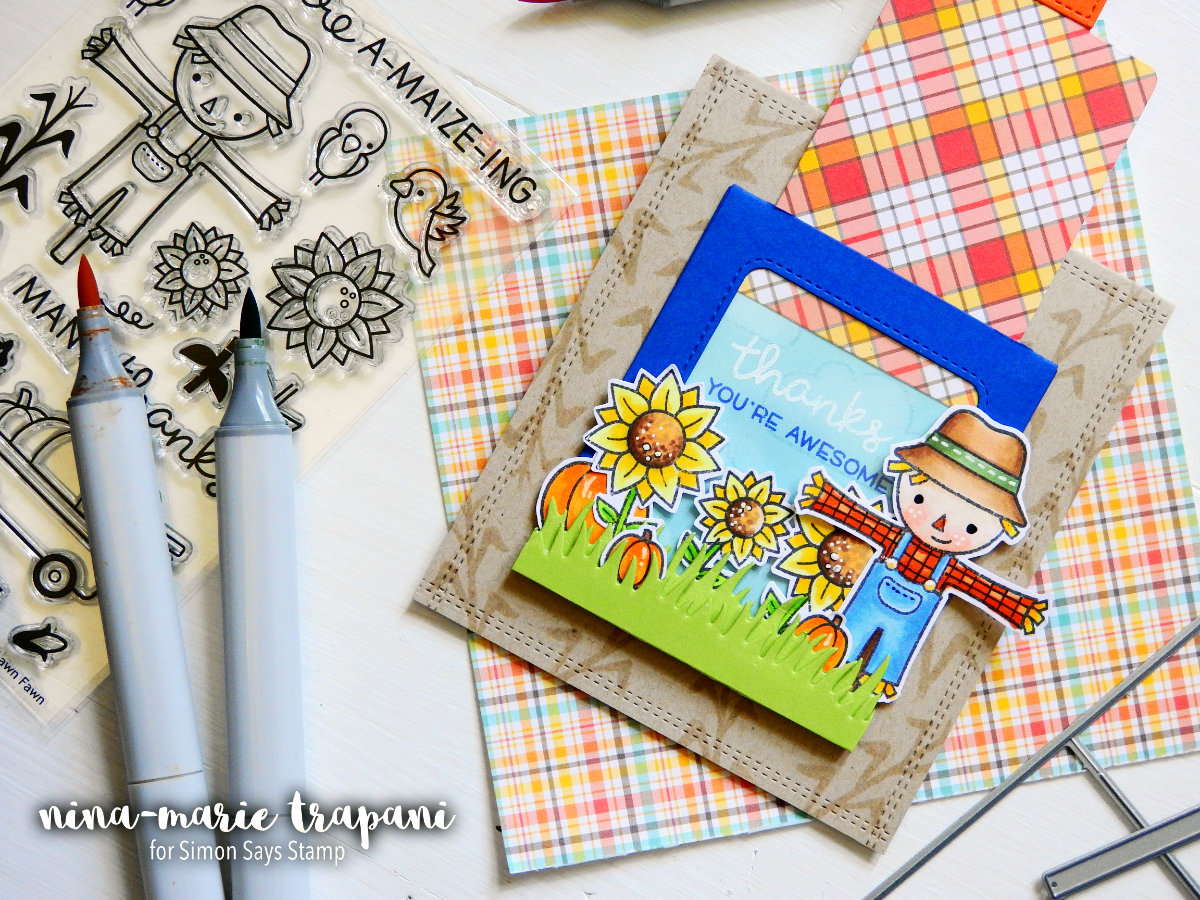
Isn’t that so cool!? All of the images I used in this card were from Lawn Fawn’s Happy Harvest stamp set and I colored everything with Copic markers. If you are interested in the colors I used, I have them listed below.
- Scarecrow; B32, B23 (overalls), YR12, YR09 (shirt), Y15, Y38 (straw), E51, R00, E93, YR18 (face), E53, E55, E57, G24, G94 (hat), E59, E57 (stick)
- Sunflowers: Y11, Y15, Y35 (petals), Y32, Y28, E55, E57, E59 (centers), YG05, YG25, YG09 (stems)
- Pumpkins: Y38, YR16, E57
Because the main focus of the video was building the slider itself and not the scene piece-by-piece, I wanted to touch on a few of the scene/card details that I didn’t get to touch on in the video.
The grass areas were cut with Lawn Fawn’s Simple Grassy Hilldsides dies and I popped those up with foam tape off of the slider housing piece (the navy blue frame). I love how these have a sloped appearance to them!
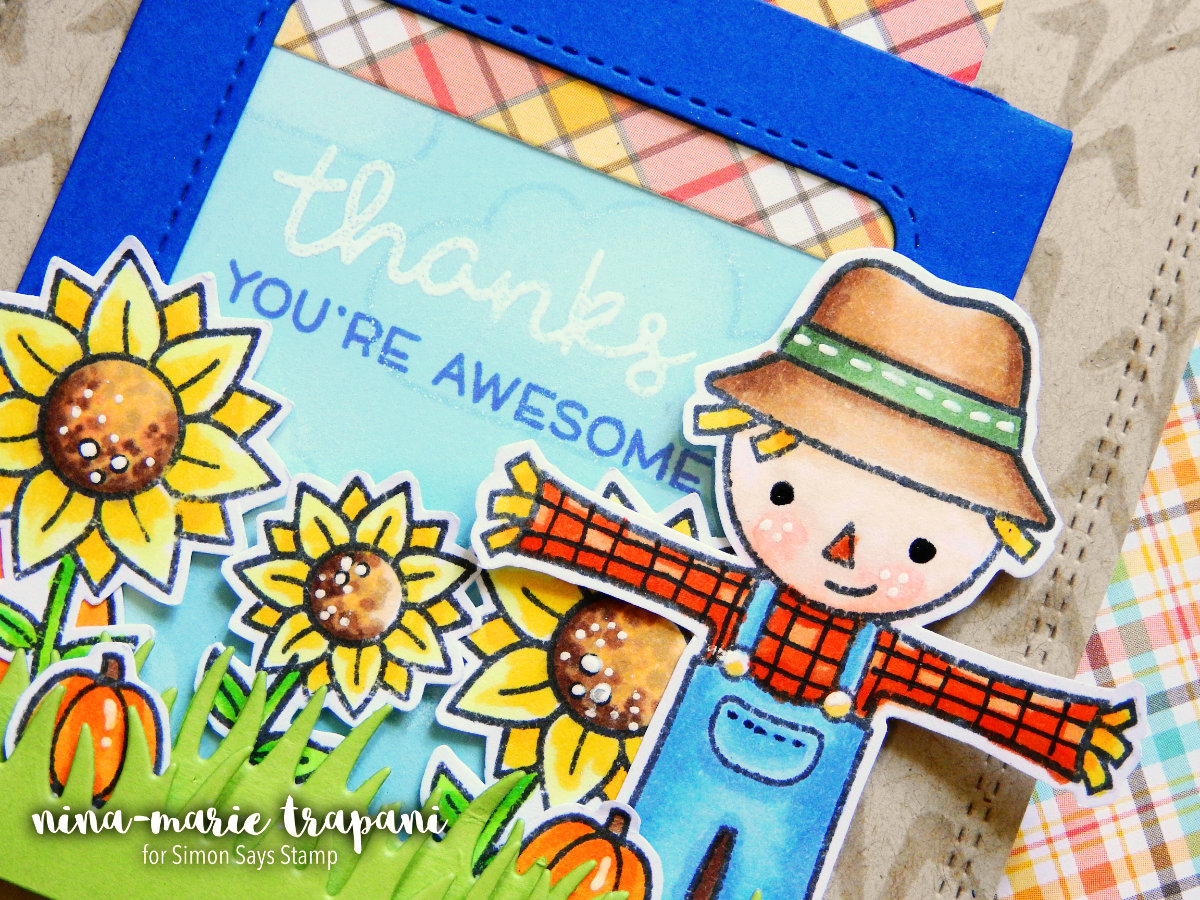
The scene INSIDE the slider was very simple; I cut down a piece of blue cardstock with the rectangle included in the Magic Slider die set. Then with some clouds from Lawn Fawn’s Plane and Simple stamp set, I stamped the entire piece to make a cloudy sky. I used some pigment ink and an ink dauber and randomly added spots of white in the clouds; I didn’t bother to try and stay inside the lines for this.
The sentiment is stamped used two stamp sets; the thanks is from Happy Harvest and the “you’re awesome” is from Plane and Simple. I heat embossed “thanks” and stamped the other sentiment in Indigo Bold ink from Hero Arts.
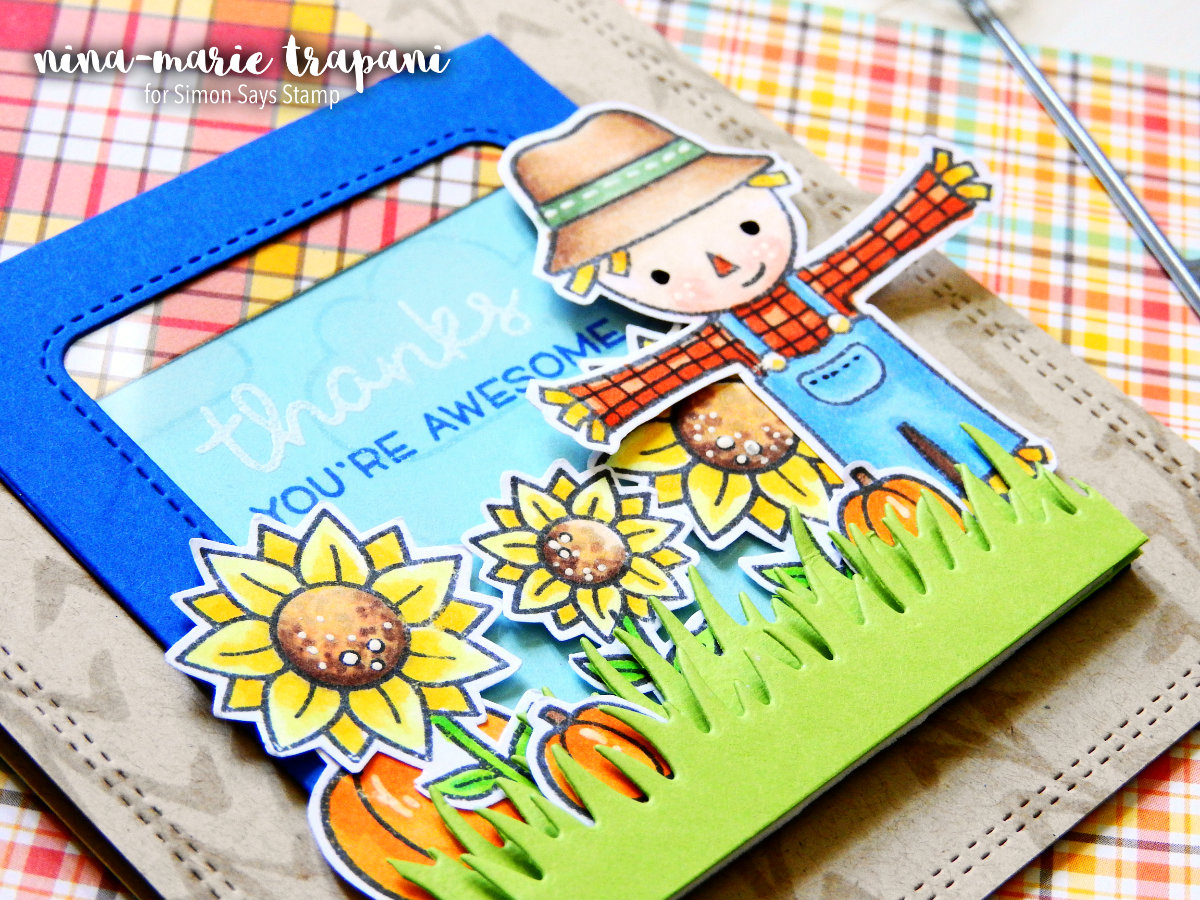
The cute plaid patterned paper from Lawn Fawn’s Perfectly Plaid Fall collection matched so well with the colors in my card! I cut my slider from this paper and I love how it looks.
I also stamped some of the wheat stalks from the Happy Harvest stamp set onto my Neenah Desert Storm card base and added some stitching details using My Favorite Things’ Basic Stitch Line dies.

I again want to quickly touch on one of my favorite aspects of the card; the cute “slide me” message! The Push Here stamp set from Lawn Fawn is a must have if you make a lot of interactive cards! I heat embossed this one onto orange cardstock.
I hope you will watch the video to see the Magic Slider dies used to make this cute Fall-themed thank you card! I’m so glad you stopped by and visited with me today; I’ll be back again very soon with a new tutorial to share with you!
WATCH THE VIDEO
SUPPLIES


Blog Candy Alert!! Follow our blog via email and comment on this post for a chance to win grab bags and blog candy! Remember to tag your awesome projects with #simonsaysstamp on social media so we can see what you are creating!


