Warm Winter Wishes with Channin from Waffle Flower Crafts
Hi friends! Happy Thursday! Please join me in a special welcome back to special guest Channin Pelletier from Waffle Flower Crafts! She made this GORGEOUS Warm Winter Wishes card using brand new stamps and dies from Waffle Flower Crafts! Be sure to watch the video for some cool tips and trick and enjoy!
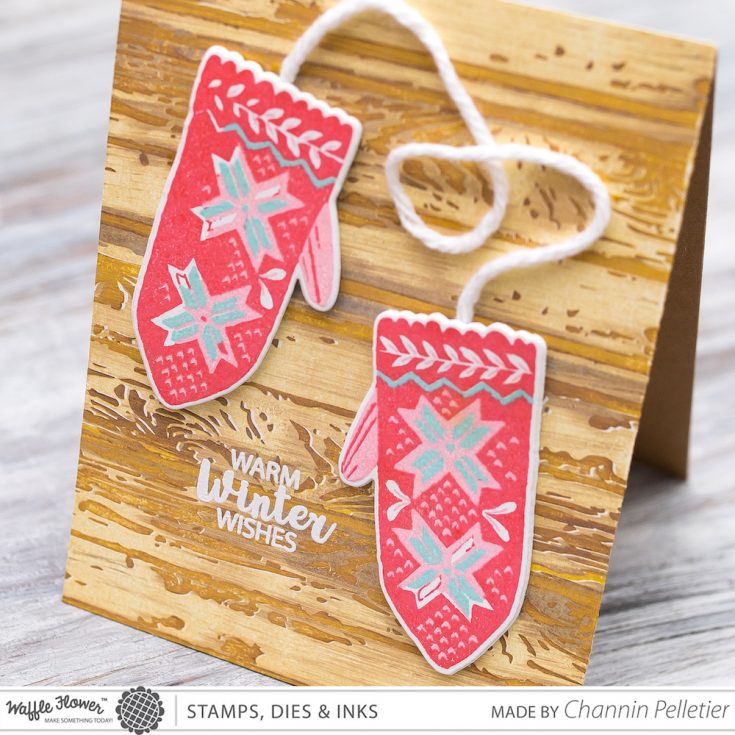
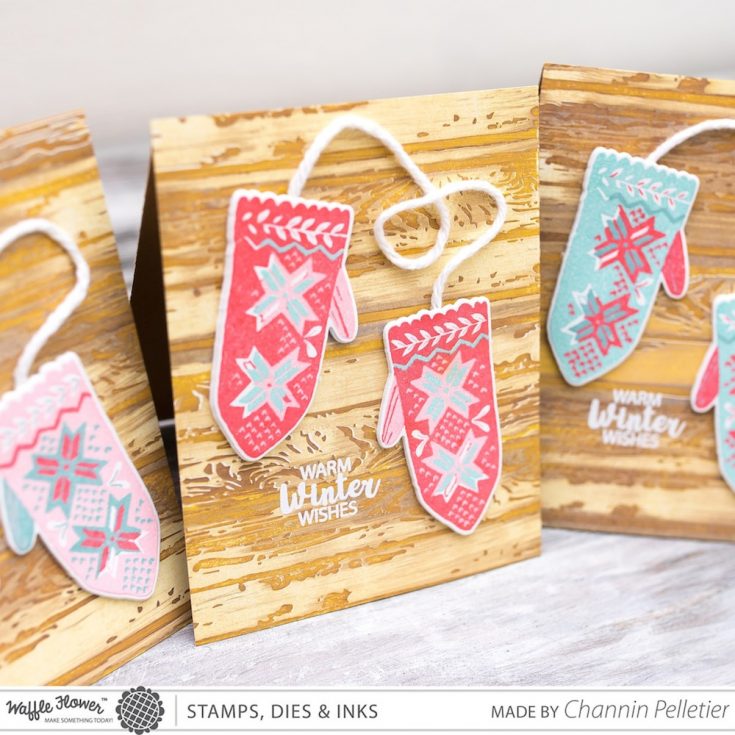
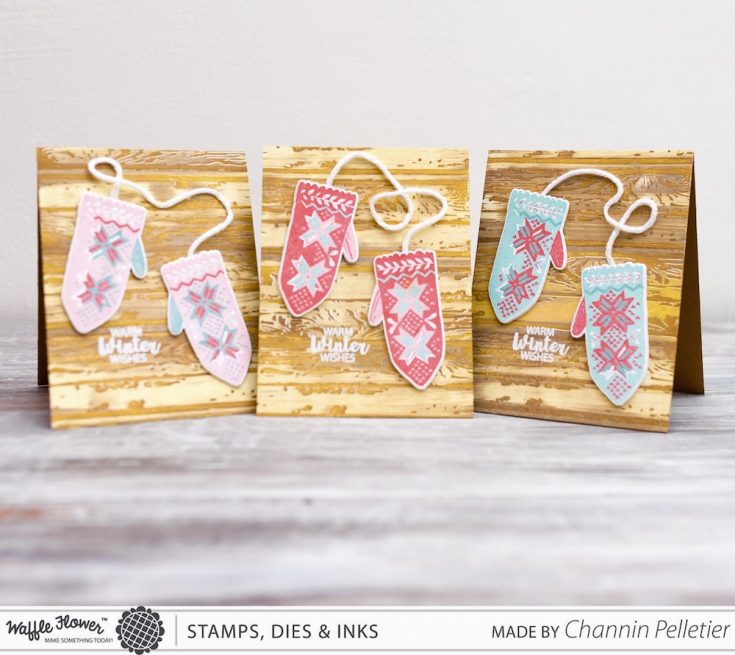
Hello everyone! It’s Channin here and today I have a few cards to share with you that I created with a few products from Waffle Flower’s new release! I used the new Layering Woodgrain Stamp Set with a simple inking technique to create the beautiful background. And I also used the new sweet Warm Hands Stamp Set and matching dies to create this charming pair of mittens. To get all the details please check out my video below.
WATCH THE VIDEO:
First, I created the woodgrain background on an A2 panel (4.25” x 5.5”) of white cardstock with the Layering Woodgrain Stamp Set and several Distress Oxides and a MISTI. I stamped the first layer of the Layering Woodgrain Stamp Set in Antique Linen, cleaned the stamp, and then inked it up again using a swiping motion to create streaks on the surface of the stamp with Frayed Burlap and then stamped again.
Next, I mounted the second layer of the woodgrain in my MISTI and stamped it in Fossilized Amber.
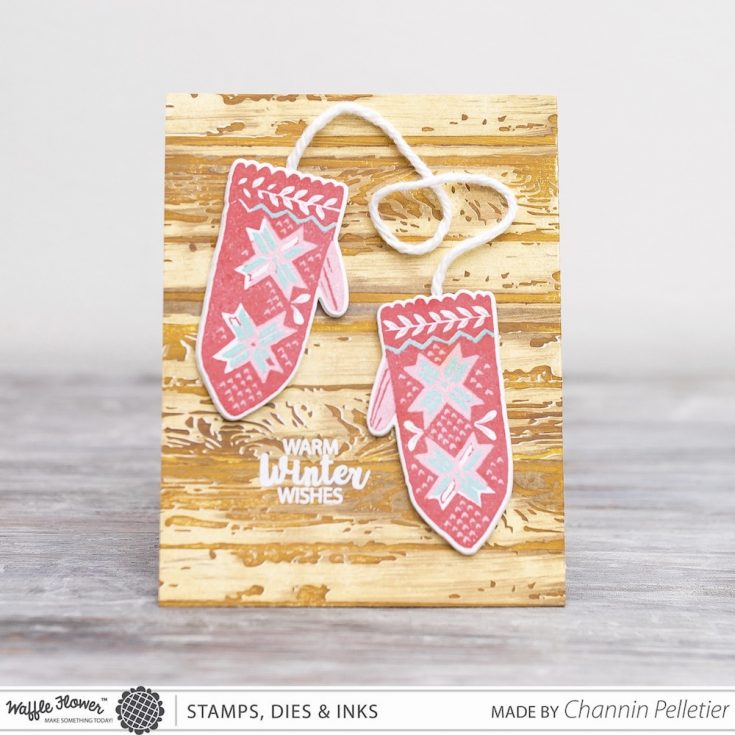
Then I cleaned the stamp, inked it up with the swiping method and stamped it in Vintage Photo. I repeated this process till the entire panel was cover with the woodgrain pattern. Next, I stamped mittens from the Warm Hands Stamp Set in Waffle Flower inks, My Pleasure, Tickled Pink, and New Fish in Pond, on a scrap of white cardstock.
I then die cut the stamped mittens as well as a pair from craft foam with the matching dies. I then glued the two together using Tombow Mono Multi Liquid adhesive. Next, I stamped and heat embossed a sentiment on the woodgrain panel with white embossing powder and then adhered the panel onto an A2 top-folding card base made from kraft cardstock. Lastly, I adhered the mittens and some yarn to complete the card.
I hope you enjoyed! Hope you have an awesome day!
~Channin
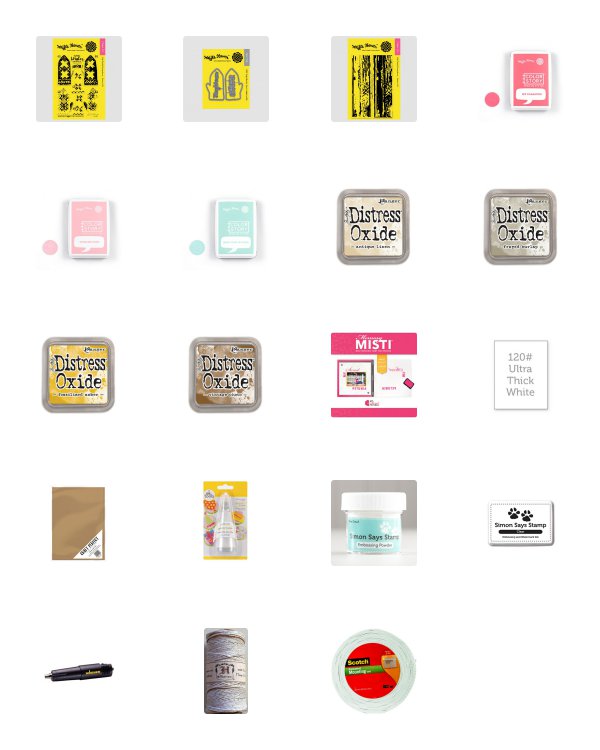
SUPPLIES:
Thanks for reading today, and thanks to Channin for being our guest!

Blog Candy Alert!! Follow our blog via email and comment on this post for a chance to win a special blog candy!
Flora and Fauna: Christmas by the Sea
Hi friends! Happy Wednesday! Please welcome one of the owners of Flora and Fauna, Lara Di Re as a special guest on our blog today! She’s showcasing some brand new Flora and Fauna sets to make tropical holiday cards using their new Christmas by the Sea clear stamp set! Please read on and enjoy!
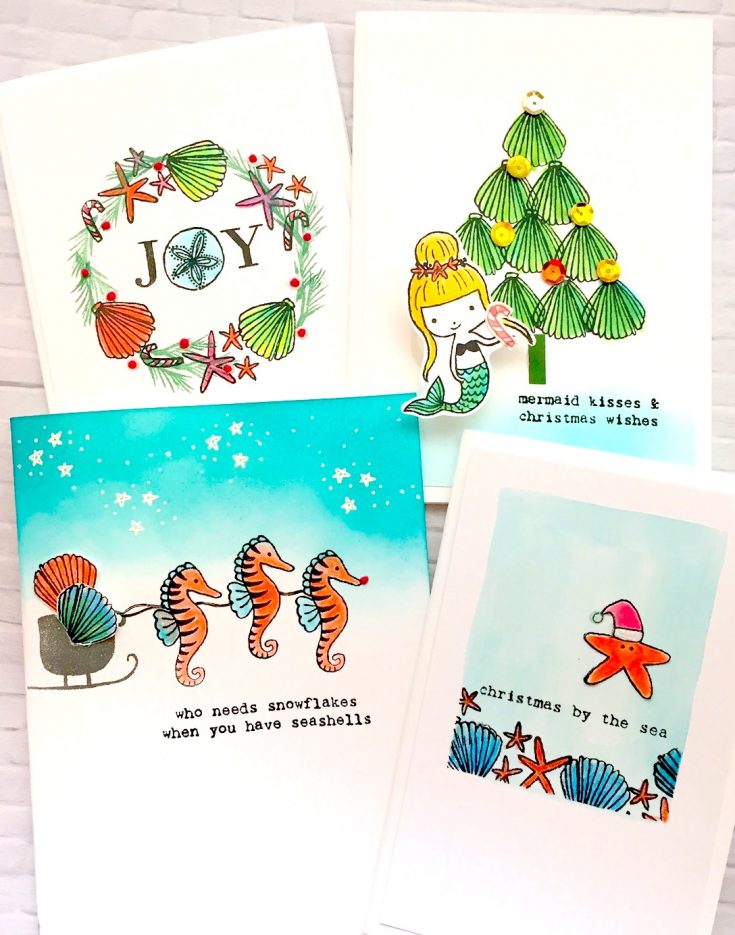
Hi! This is Lara from Flora & Fauna and we are so excited to be guest posting here on the Simon Says Blog again! Today we are excited about the holidays and using one of our new clear sets Christmas By the Sea for a fun take on a traditional holiday!
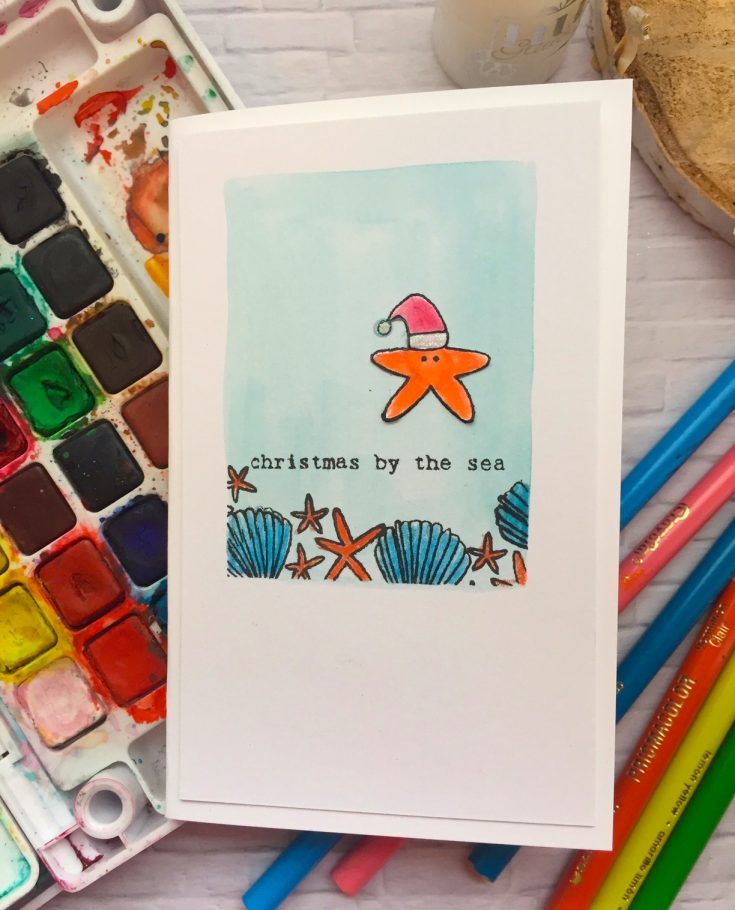 To make the first card we watercolored the background and then masked the border with seashells and starfish which we colored with colored pencils. Then we added White Blizzard Nuvo glitter drops to the hat which was stamped in our favorite classic versafine black onyx ink.
SUPPLIES:
|


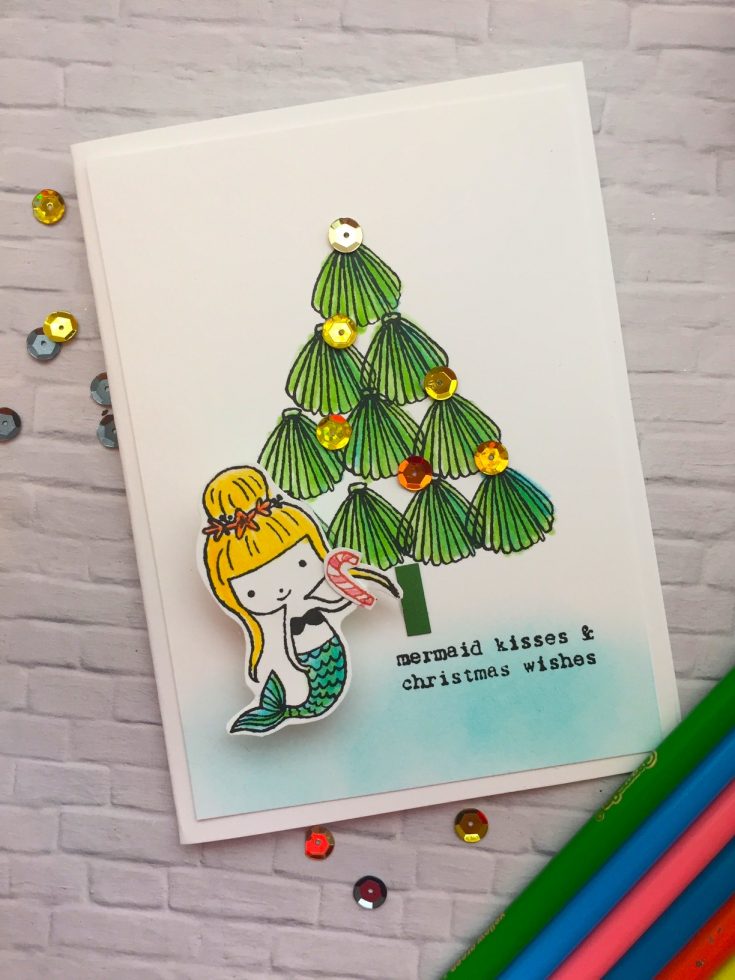 For the next card we stamped the shells in black and colored with colored pencils. To give it more sparkle we added gold sequins. Next we fussy cut the mermaid and tiny candy candy and colored with pencils and to finish added a mini wobble to the mermaid to make her move.
SUPPLIES:
|


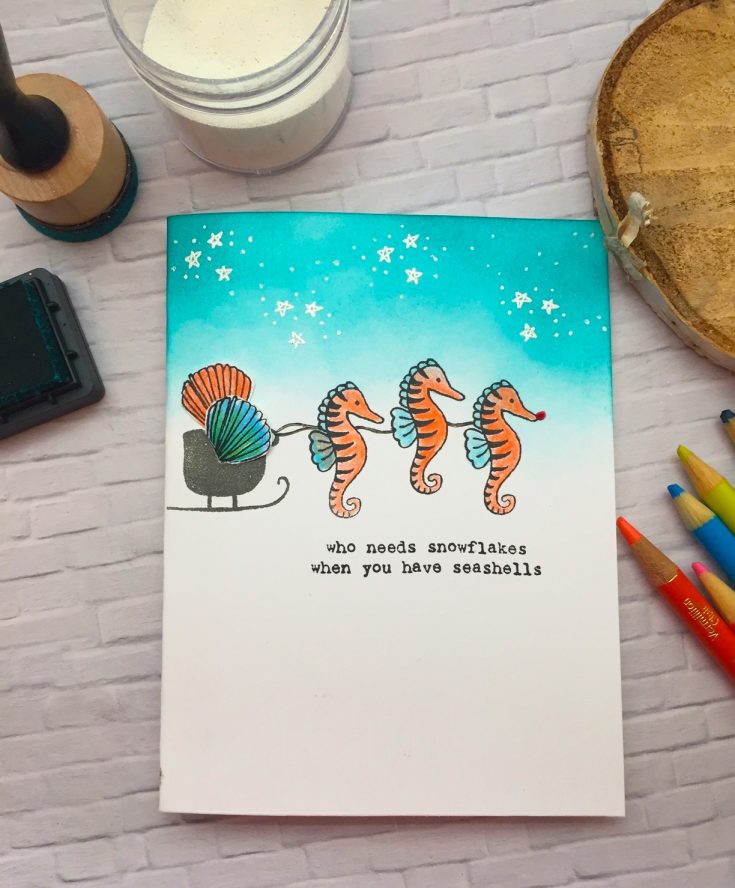 For our sled card we stamped the image with black and filled in with colored pencils. Next we used an exacto knife to open the sled and placed the shell packages in the sled. On top we used black glaze pen for the added ropes between seahorses and sled and used red Nuvo drops for nose. The next step was to emboss the stars with white embossing powder and to add additional snow dots using white Sakura pen. To finish we sponged the background with peacock feathers distress ink. The star stamp comes from our Cozy Cuddles Penguin set.
SUPPLIES:
|


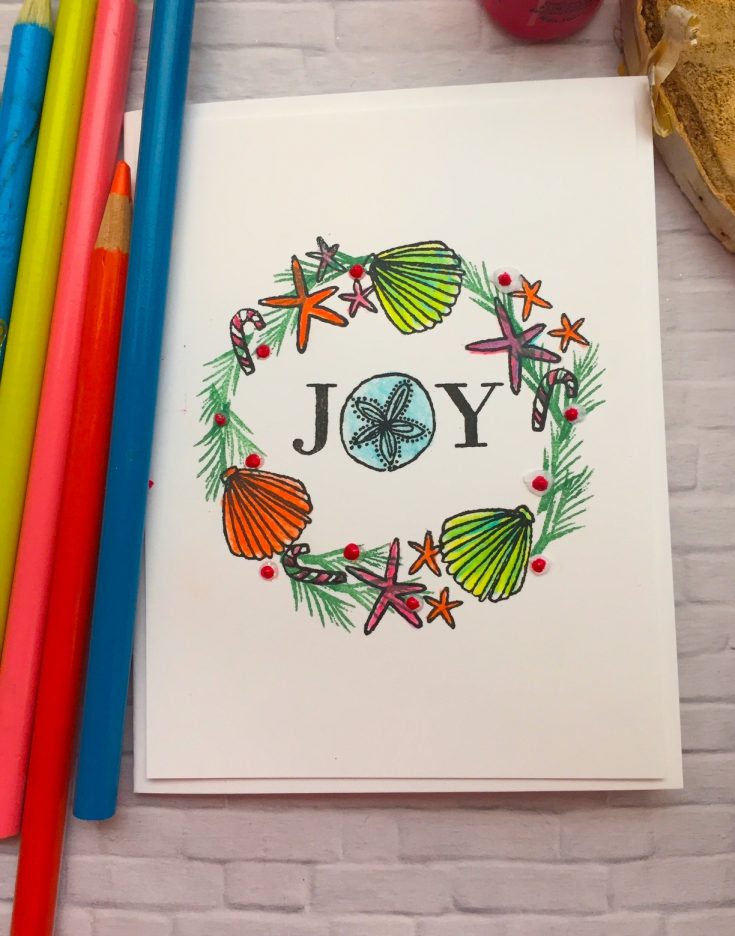 For our final card we first stamped the wreath with various sea life stamps from the set and then added the greenery from our poinsettia watercolor set. We first stamped sea life pieces in black, then colored with pencil and finally filled in with greenery stamp. To complete the card we added Nuvo red drops at the end.
We hope you enjoyed our samples with our new holiday sets. For more inspiration visit our Instagram page at florafauanclear. Happy Stamping!
SUPPLIES:
|


Thanks for reading today, and thanks to Lara for being our guest today!
Blog Candy Alert!! Follow our blog via email and comment on this post for a chance to win a special blog candy!
Art Journal: Change with Shari Carroll
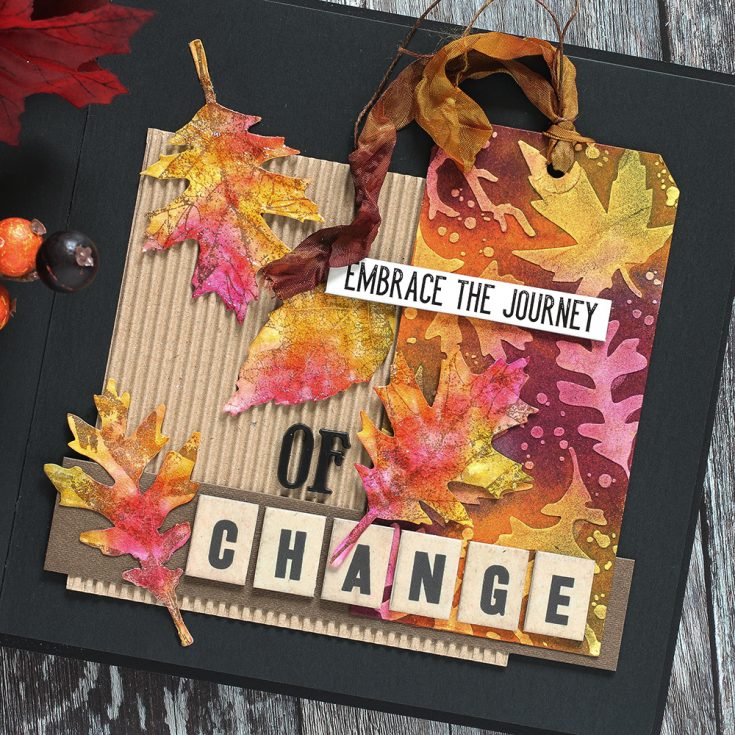
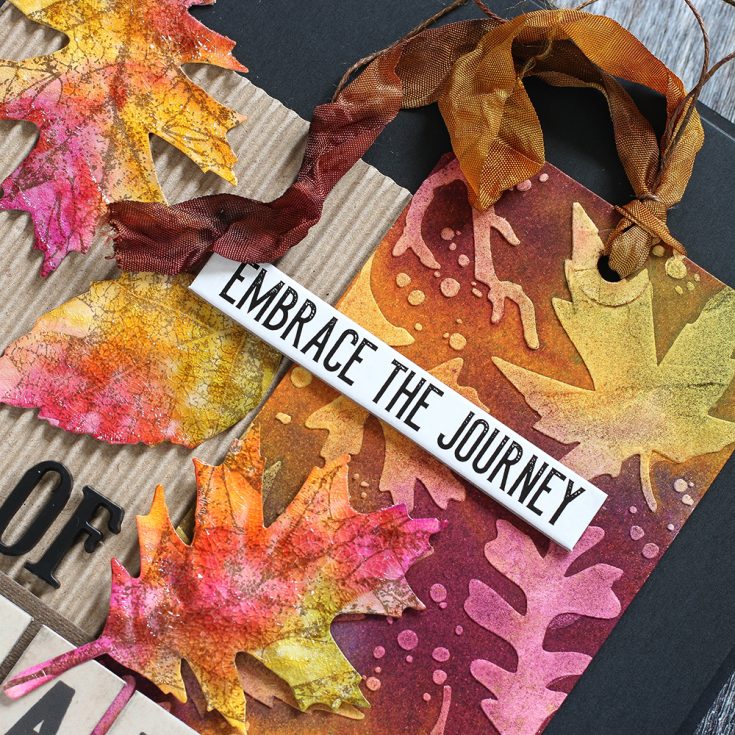
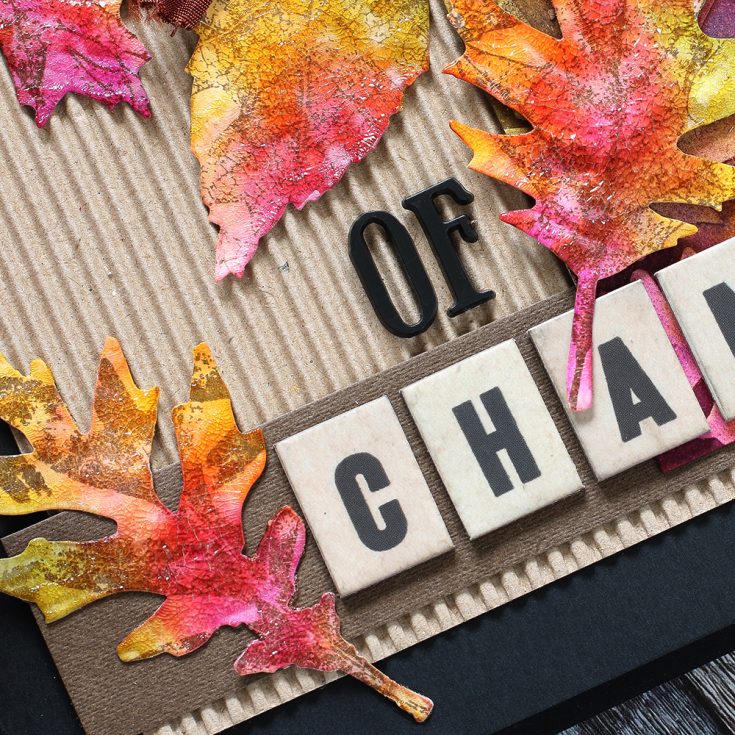
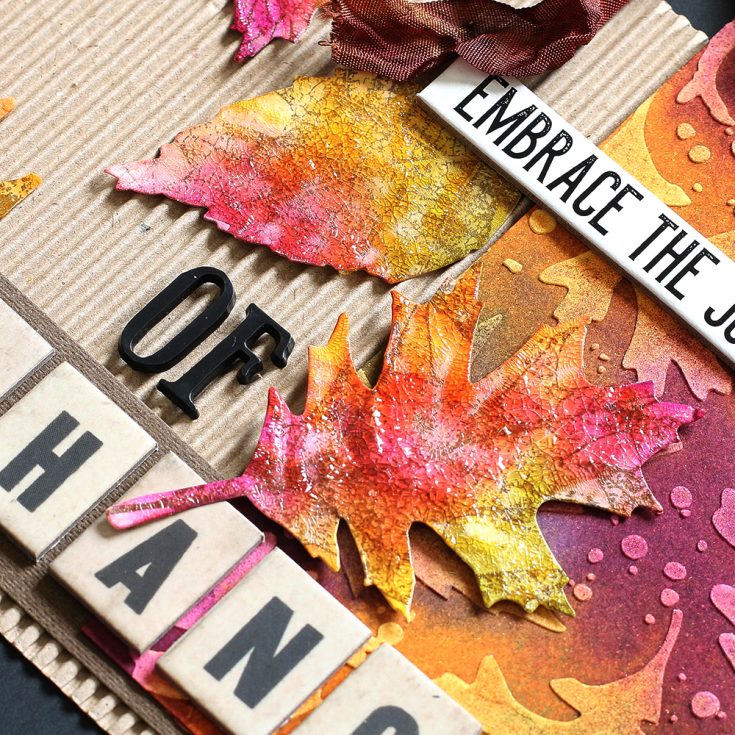
This time of year, I’m so inspired by the fall colors of the midwest!!! They are gorgeous!!! I’ve created my Art Journal page based on the changes of color and accepting change in our lives.
I started out using the Tim Holtz Autumn stencil on a tag with embossing paste. While that was drying, I die cut some tattered leaves shapes from Neenah cardstock.
Watch the video below, or on our YouTube Channel HERE.
Blog Candy Alert!! Follow our blog via email and comment on this post for a chance to win a special blog candy!
 |
 |
 |
 |
 |
 |
 |
 |
 |
 |
 |
 |
 |
 |
 |
 |
 |
 |
 |
 |
 |
 |
 |
 |
 |
 |
 |
 |
 |
 |
 |
 |
Thanks for reading today!


