Cathy Zielske + Tim Holtz Distress Oxide Inks!
Hi friends! Happy Sunday! Welcome back and thanks for stopping by! Please join me in welcoming special guest Cathy Zielske back on our blog today! Read on & enjoy!
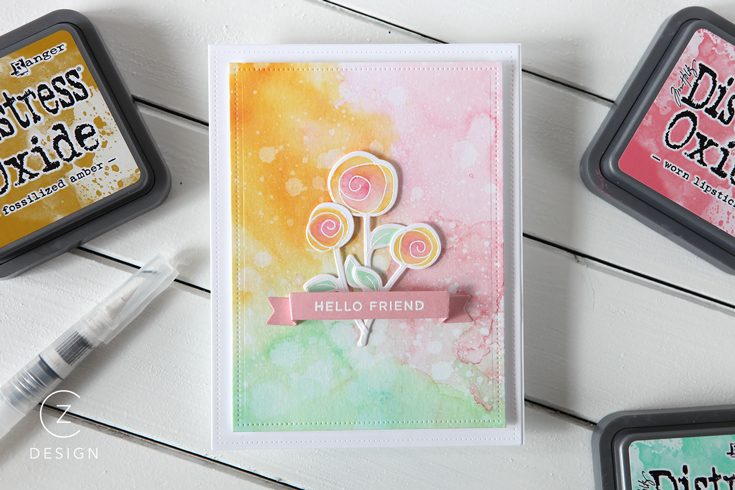
Hi everyone! Cathy Zielske here back with another card and this one features my first time playing and painting with Tim Holtz’s magical Distress Oxide inks. I smooshed my colors onto my craft mat, added lots of water, and pressed down a piece of Tim’s watercolor cardstock and simply repeated the process several times, drying it with my heat tool between every layer.
Once the panel was dry, I grabbed my Distress Sprayer and gave it a generous spritz to get that cool oxidization thing happening. I love how you really never know what it’s going to look like until you do it.
While waiting for that to dry, I stamped out a few roses from Simon’s Roses for You set, using Versamark Ink, then added white embossing powder to create a simple outline for adding some color with my water brush. I smooshed some more ink onto my mat and picked up the color with the brush, and painted my flowers to match the background of my card. I’m not super savvy with watercoloring and creating those white, heat embossed outlines is really helpful for a beginner like me.
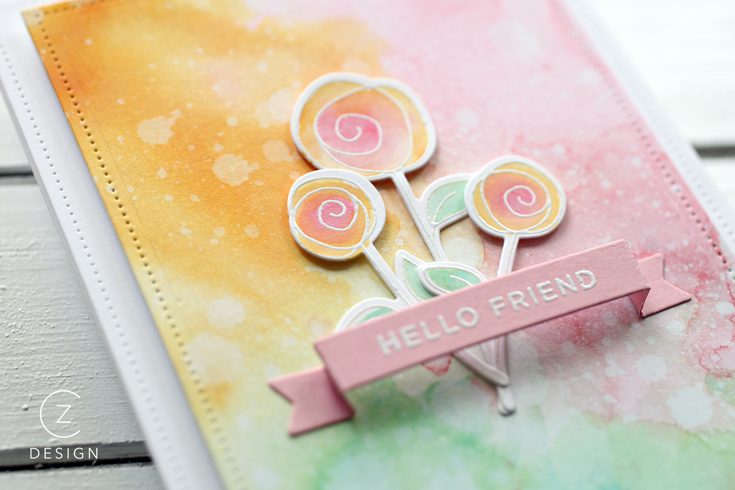
Once the flowers were dry, I used the matching dies to cut them out and also cut a panel from the dry watercolor piece using my favorite Dotted Rectangle dies from Lawn Fawn. I cut one more larger white panel to add onto my card base, and adhered the water color panel with some Fun Foam.
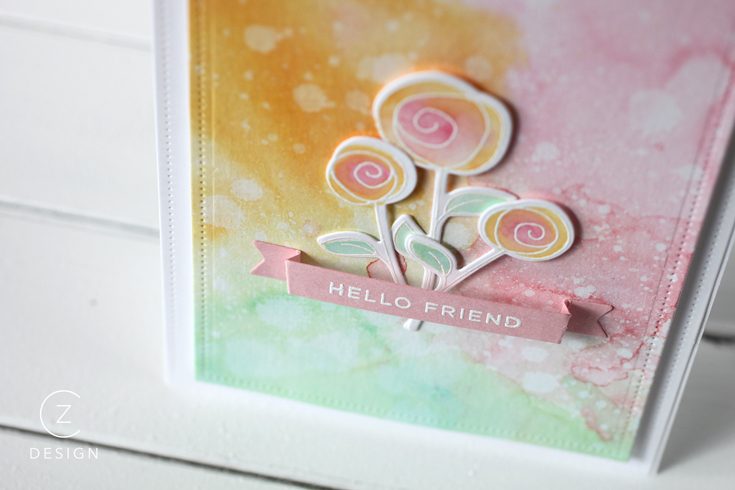
The last piece to add was the sentiment. I die cut a banner using the Lawn Fawn Fancy Folded Banners set, and then I stamped my sentiment using a stamp from my CZ Simple Sentiments No. 01 stamps. I adhered the banner first, and then layered in the flowers, putting a bit of foam adhesive behind each flower bloom to give them a bit of dimension.
And that, friends, is my card share today! I am looking forward to playing more with Distress Oxides!
SUPPLIES:
 |
 |
 |
 |
 |
 |
 |
 |
 |
 |
 |
 |
 |
 |
 |
 |
 |
 |
 |
Thanks for reading today, and thanks to Cathy for being our guest!

Blog Candy Alert!! Follow our blog via email and comment on this post for a chance to win a special blog candy!
Yippee for Yana: Dimensional Pattern Stamping
Hi friends! Happy Saturday Let’s hop right into the latest edition of Yana Smakula’s bi-monthly feature: Yippee for Yana! This gorgeous card is in full gear for a tropical Summer. Read on, watch the video, and enjoy!
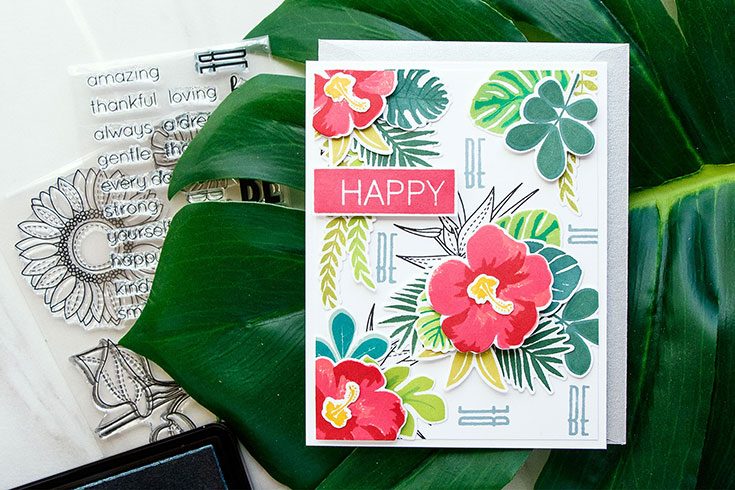
Hi everyone, this is Yana Smakula and I’m excited to bring you another episode from my by-monthly “Yippee For Yana” video series! In today’s video I’m showing something I like to call Dimensional Pattern Stamping! We are going to create a dimensional looking pattern for our card using stamps, coordinating dies and inks!
Since Summer is hot upon us the pattern or the background I am creating today is tropical, but keep in mind by changing images to be fall or spring you can make this idea for work any season.
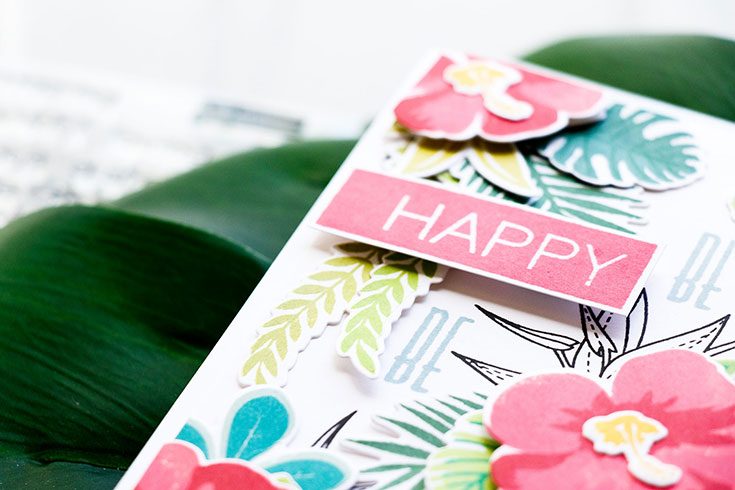
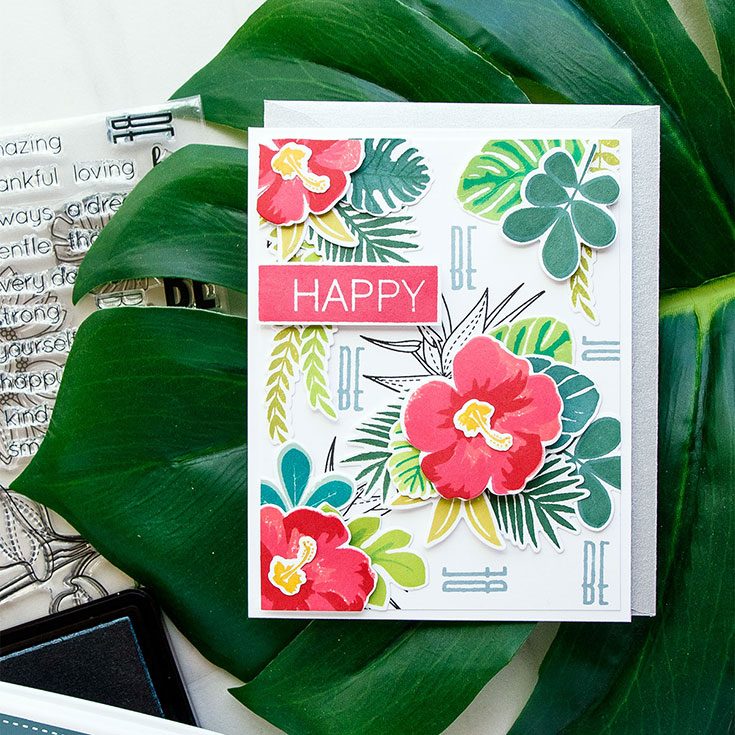
I started working on this project by doing all of my stamping and die cutting first. I used images from the Tropical Leaves stamp set from Simon Says Stamp as well as Color Layering Hibiscus set from Hero Arts; stamped images using a various colors of ink and cut out with the help of coordinating dies.
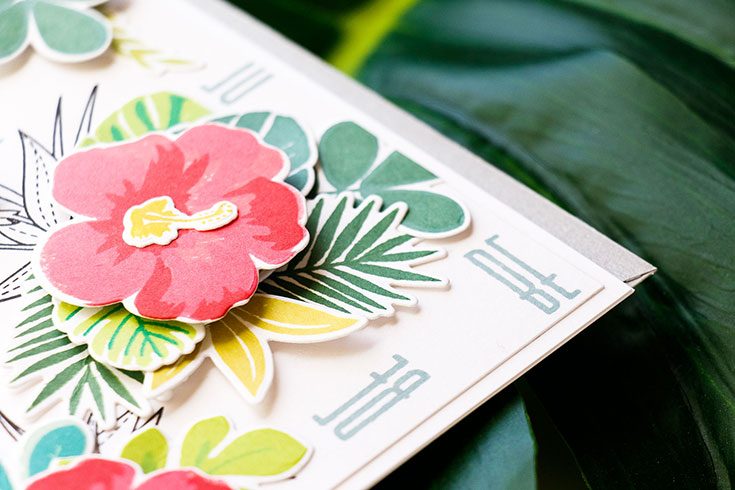
Next, I stamped bird of paradise images from the Summer Flowers stamp set from Simon in black ink onto a 4 x 5 ¼” panel and arranged my die cuts around them to form a background or pattern. Once I was happy with the placement I adhered my die cuts in place using glue and foam adhesive.
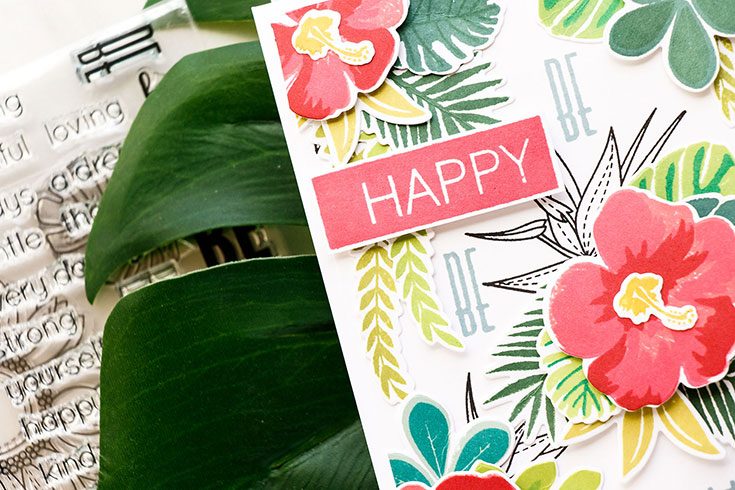
Lastly, I stamped “Happy” from the Happy Block Greetings stamp set in Watermelon ink, cut it out and foam mounted onto my panel that was already adhered onto an A2 top folding card base. I also stamped “Be” anywhere on my background where I was able to find a spot.
Have you ever tried making dimensional patterns like this? I hope you’ll give this a try. Have fun stamping!
WATCH THE VIDEO:
Supplies:
|
|
 |
 |
 |
 |
 |
 |
 |
 |
 |
 |
 |
 |
 |
 |
 |
 |
 |
 |
 |
 |
 |
 |
 |
 |
 |
 |
 |
Thanks for reading today, and thanks to Yana for being our guest!
Custom Envelope Watercoloring – Monthly Mail Art – July 2017
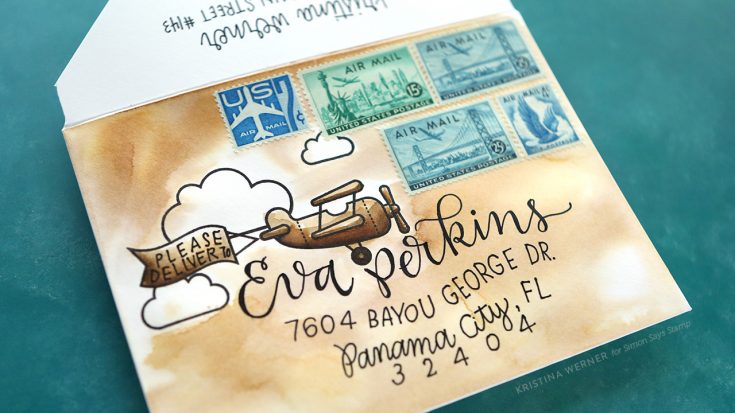
Hi all! Kristina here with another Monthly Mail Art! I’m excited to share with you a custom watercolored envelope created using Lawn Fawn’s Plane and Simple stamp set and Distress Inks.
NOTE: Address used with permission. Thanks, Eva!
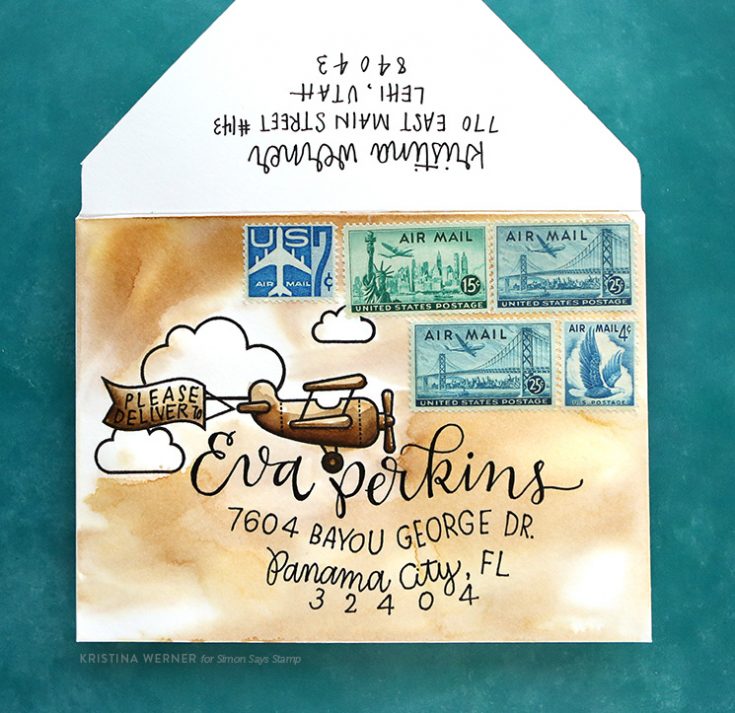
I stamped the airplane, banner, and cloud images in Versafine Onyx Black ink and then used just two colors of Distress Ink for the watercoloring (including the sky!). I used Vintage Photo and Ground Espresso.
Next I picked out some vintage postage stamps (I got purchased these from an Etsy shop). After adhering vintage postage stamps, I penciled on Eva’s name and mailing address so that I could get the spacing just right. I then went over the name and address with a black pen. Then I erased the pencil lines.
To seal the artwork and prevent any moisture damage, I rubbed some Distress Micro Glaze over the envelope and buffed off the excess with a paper towel. NOTE: Do NOT put Distress Micro Glaze over the postage stamps. The postal service will need to be able to cancel out the postage.
I hope you enjoy today’s video! :)
Supplies
 |
 |
 |
|
 |
 |
 |
 |
 |
 |
 |
 |
|
 |
 |
 |
 |
 |
|


