Neat And Tangled 5th Birthday Blog Hop
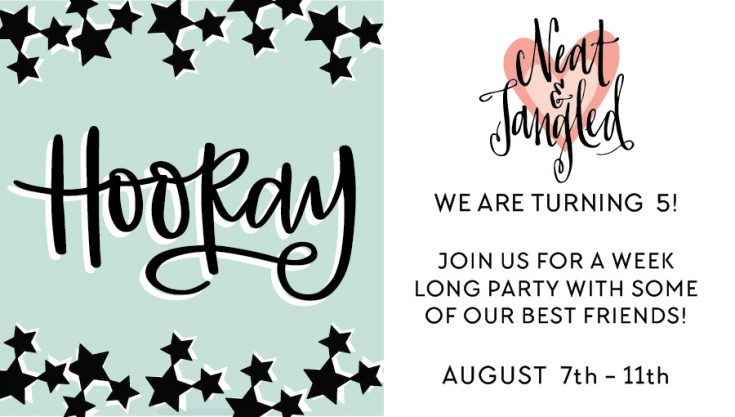
Welcome everyone! Today we are celebrating the 5th Birthday for Neat & Tangled! This is the last day of a five day blog hop so be sure to check out the their previous days hops for more inspiration!
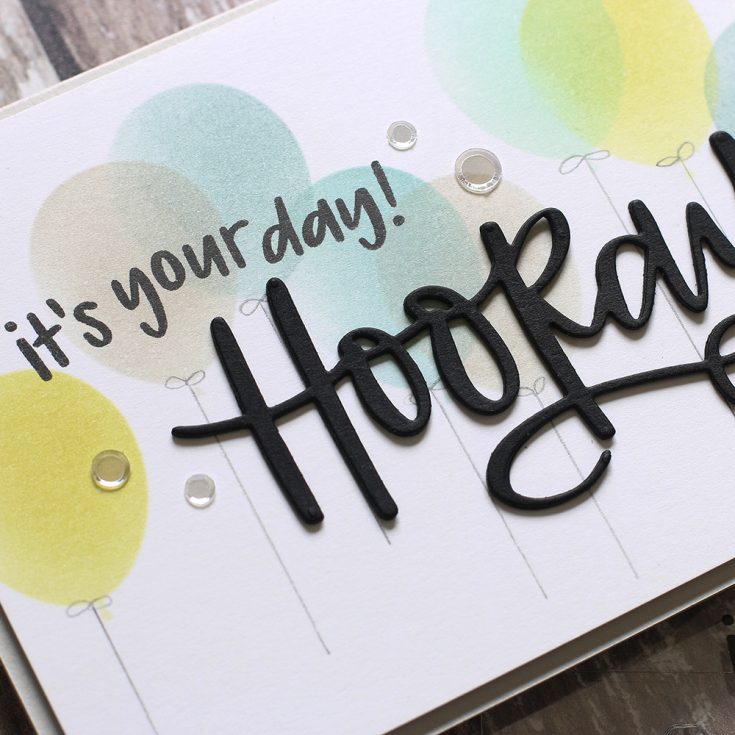
I’ve created a manly birthday card using Neat & Tangled Balloon Duo stencils, Hooray stamp set and Hooray Word dies. The stencils are in two pieces so you can easily layer your colors
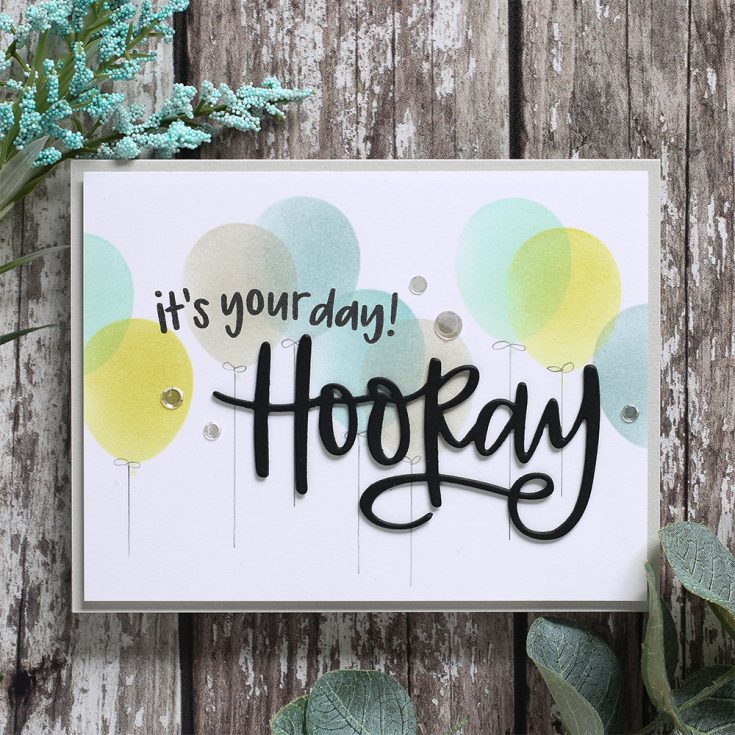
I chose Simon Says Stamp ink colors that would look nice when layered over top of each other. They are Cloudy Sky, Sea Foam, Lake Shores, Stone and Catkin. Once I had the balloons stenciled, I added strings with a pencil (easy to erase if you make mistakes!). I stamped the greeting and also die cut 3 Hooray’s (stacked up and glued together) for dimension.
I’ve filmed a video of how I made this card. You can view it below or on our YouTube channel HERE!
Neat & Tangled GIVEAWAY!!

Two $50 gift certificates to the Neat and Tangled Store!

One $100 gift certificate to the Neat & Tangled store!
Neat and Tangled winners will be chosen from comments all along the hop all week long.
Winners will be announced Sunday, August 13th on the Neat & Tangled Blog!
Check out todays stops on the hop!
 |
 |
 |
 |
 |
 |
 |
 |
 |
 |
 |
 |
 |
 |
 |
 |
 |
 |
 |
 |
 |
Monthly Mail Art – August 2017
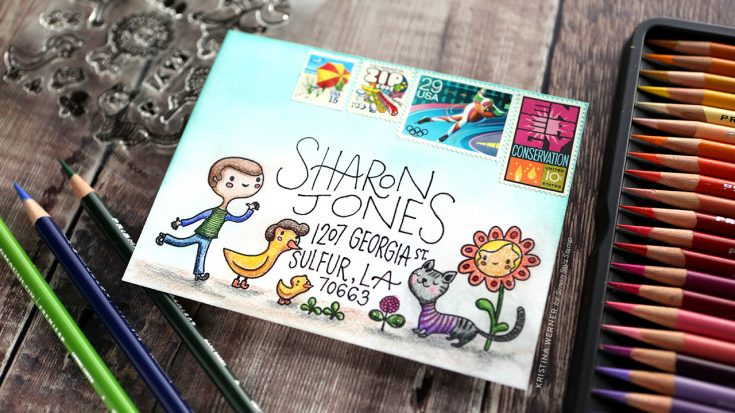
Hello again! Kristina here! :) I’m back today with another Monthly Mail Art envelope and video!
Since I knew I would be doing some coloring with colored pencils, I chose to use a thick white envelope from Simon. This particular envelope has a nice, thick paper with a soft texture. I thought it would be perfect for colored pencils.
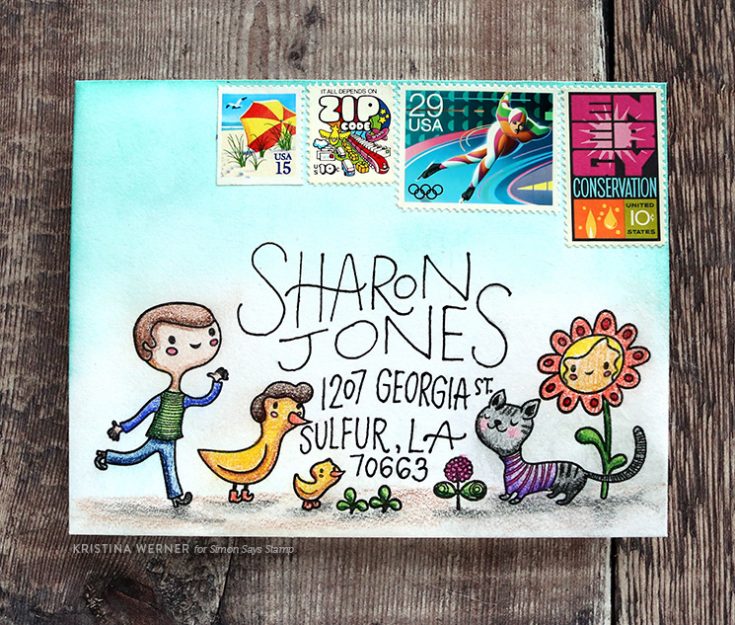
I used the new Hooray stamp set from Waffle Flower to create a whimsical scene on the bottom edge of the envelope. I stamped the images in Versafine Onyx Black ink. Before I starting coloring the images, I softly ink blended some Lake Shores hybrid ink (fount in this set of cube inks) from the top edge of the envelope. This created a soft sky background shade. I then colored the scene using some Prismacolor colored pencils.
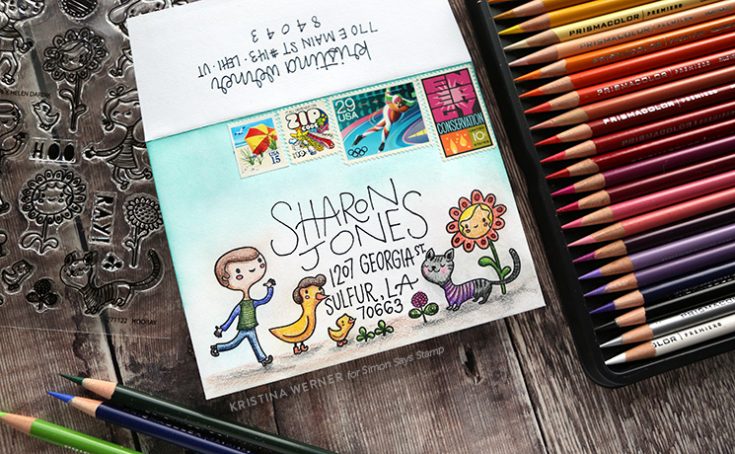
When writing the recipient’s mailing address on the envelope, I made sure to pencil it on first to avoid any mistakes. Then I went over the address with a black waterproof pen.
NOTE: Mailing address used with permission. Thanks, Sharon!
To protect the envelope from any moisture, I coated it with a thin layer of Distress Micro Glaze and buffed off any extra using a paper towel. Be sure to not put any glaze over the postage stamps! The postal service needs to be able to cancel the stamps and won’t be able to do so if the glaze is coating the stamps.
Thanks for stopping by!
Supplies
 |
 |
|
 |
 |
 |
 |
 |
|
|
 |
 |
 |
|


