Shaker Card with Partial Die Cutting
Hi friends! Happy Tuesday! Thanks for stopping by today! Please welcome back special guest Dana Joy to the blog today! She has made this gorgeous partial die cut star shaker card that provides a little extra and unexpected dazzle! Read on for more details and enjoy!
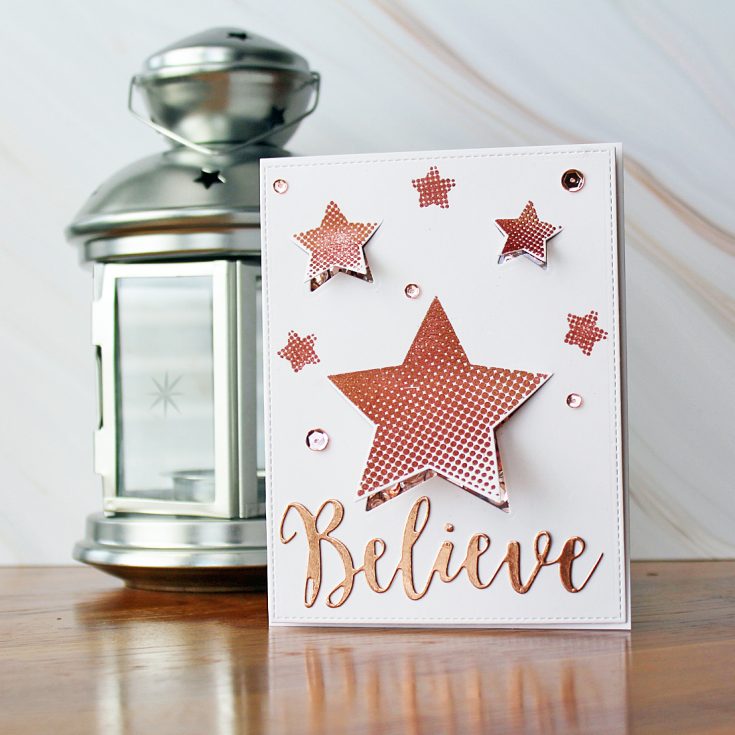
 Hey everyone. It’s Dana Joy here with you today and I’m super excited to share a different twist on partial die cutting incorporated with a shaker card. This is a great way to have both techniques on one card. You get the great look for a shaker card that is hidden under your partial die cut piece.
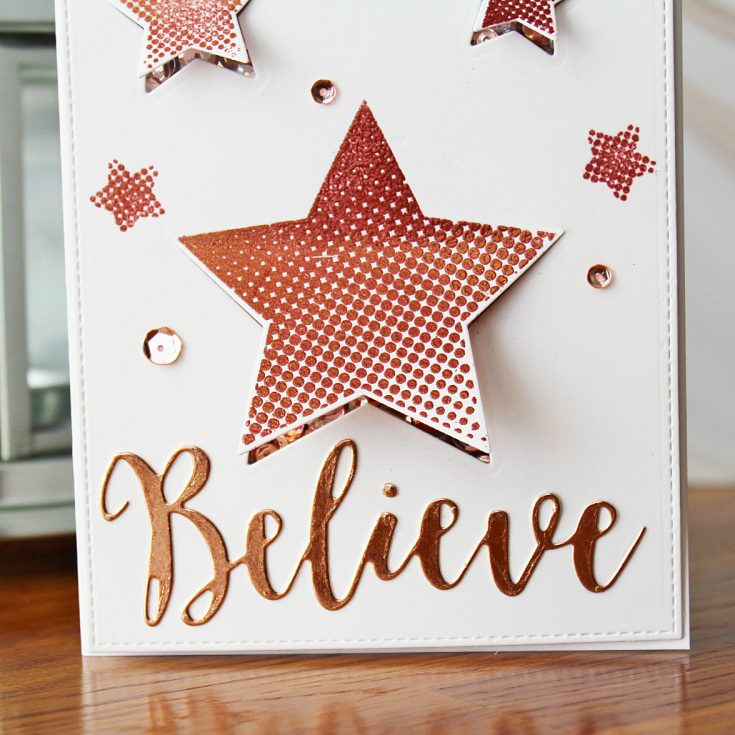
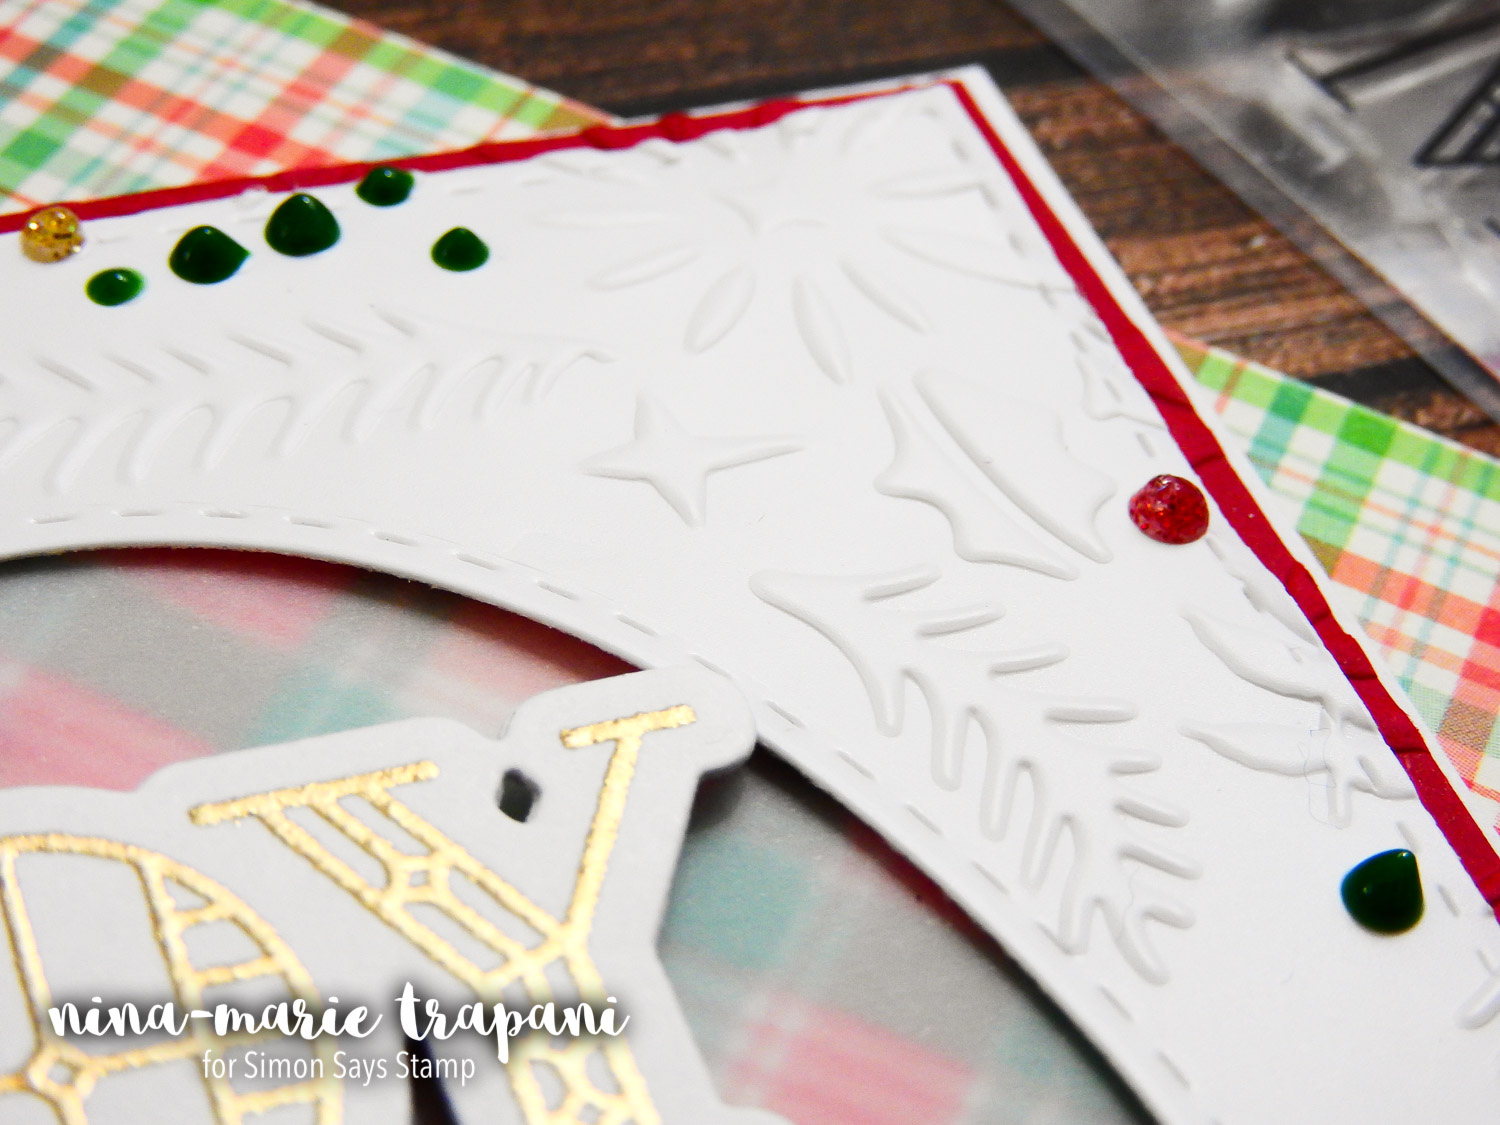
I started by stamping Altenew Halftone Stars with versamark ink on 80lb Neenah solar white cardstock and heat embossed it with Simon Says Stamp rose gold embossing powder. Next I chose three of the stars and partially die cut them with the matching Halftone Stars nesting die cuts leaving the top of each star attached to the card panel. To add some interest to my card, I ran my card panel with a My Favorite Things stitched rectangle die through my machine again for a nice detail along the edges. At this point, I continued with making a standard shaker card adding an acetate sheet, some sequins and a backing. Now I used a bone folder to lightly curl my stars away from the acetate to you can see that it’s a shaker card and all the beautiful sequin is revealed.
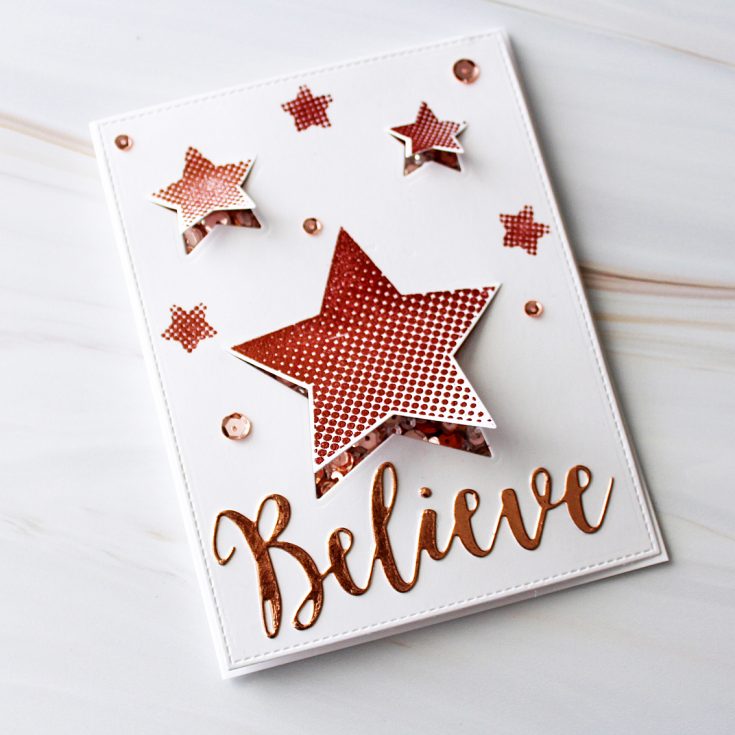
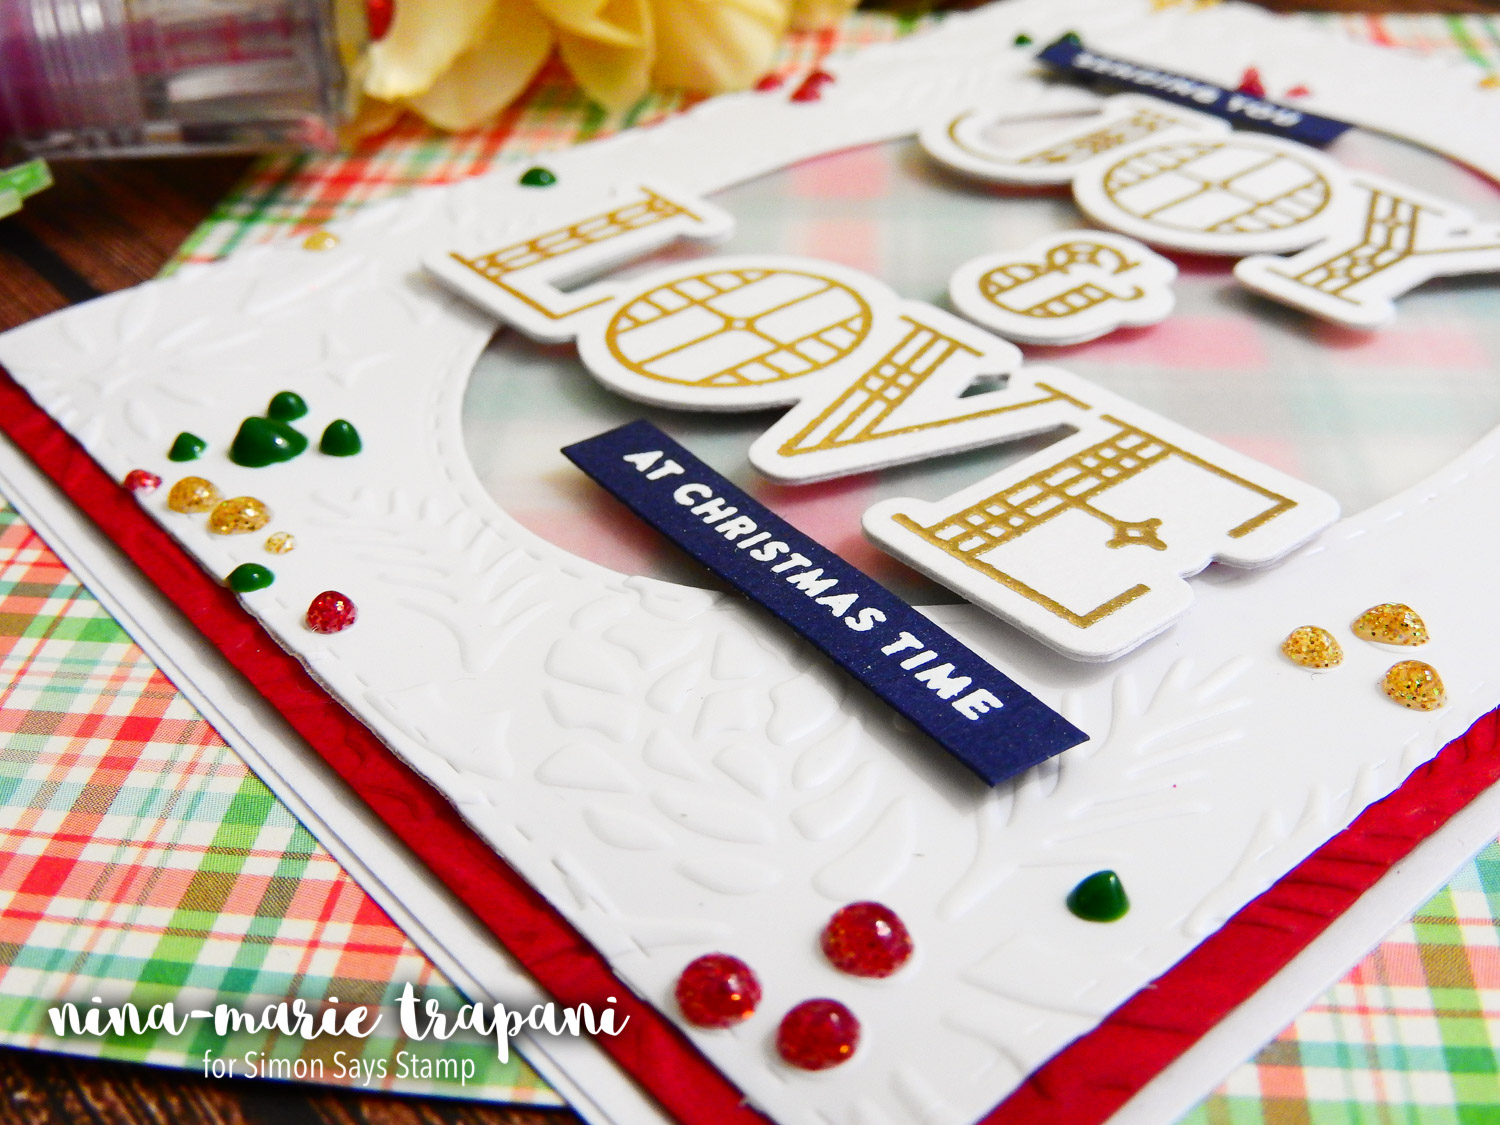
To bring in a shiny sentiment, I pulled out my DCWV Metallic Glitter and Foil Washi Stack and adhered some rose gold washi paper to 80 lb Neenah solar white cardstock. Next, I die cut out the word believe using the Altenew Holiday Script Words die and glued it to the front of my card panel using multi matte medium. For some added bling, I place just a few rose gold sequins to finish off my card. I adhered my card panel to a white card base made from 110 lb Neenah solar white cardstock using Scor-Pal ½ scor tape.
This is such a fun and easy way to surprise your friends with just a peek of a shaker card. You can also use this for masculine cards and use confetti pieces instead of sequins. Thanks for hanging out with me today. We will see you back here soon with more creative inspiration.
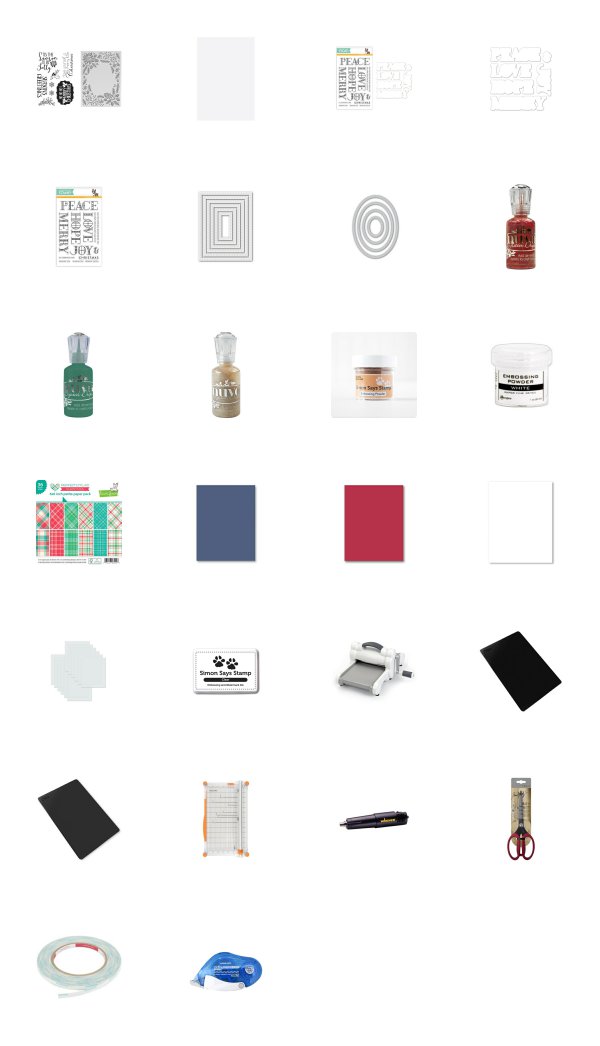
SUPPLIES:
|


Thanks so much for reading, and thanks to Dana for being our special guest!

Blog Candy Alert!! Follow our blog via email and comment on this post for a chance to win a special blog candy!
Congrats! Blog Candy Winners!
From: Studio Monday with Nina-Marie: Bazzill Embossing Paper + Embossing Folders: Adrianna Barbara!
From: Be Brave Journal Page: Karthikha Uday!
From: Art Journaling: To Dreamland with Shari Carroll: Chris Eder!
From: Eskimo Kisses from Heffy Doodle: Janice Carl!
From: 25 Days of Christmas Tags Event with Shari Carroll: Tracey Magner!
From: Happy Birthday to You… Brand NEW from CZ Design!: Steffi H.!
Please email [email protected] with the name of the blog you from, the prize you won, and your address (if applicable), to redeem your prize(s)!
Studio Monday with Nina-Marie: Bazzill Embossing Paper + Embossing Folders

Hello everyone and welcome back for a new Studio Monday tutorial! Today I am featuring Bazzill’s Plastic Embossing Paper, which is literally a paper that is made from plastic; providing a durable surface on which you can do dry embossing techniques without fear of the paper cracking or not holding up to certain embossing techniques.
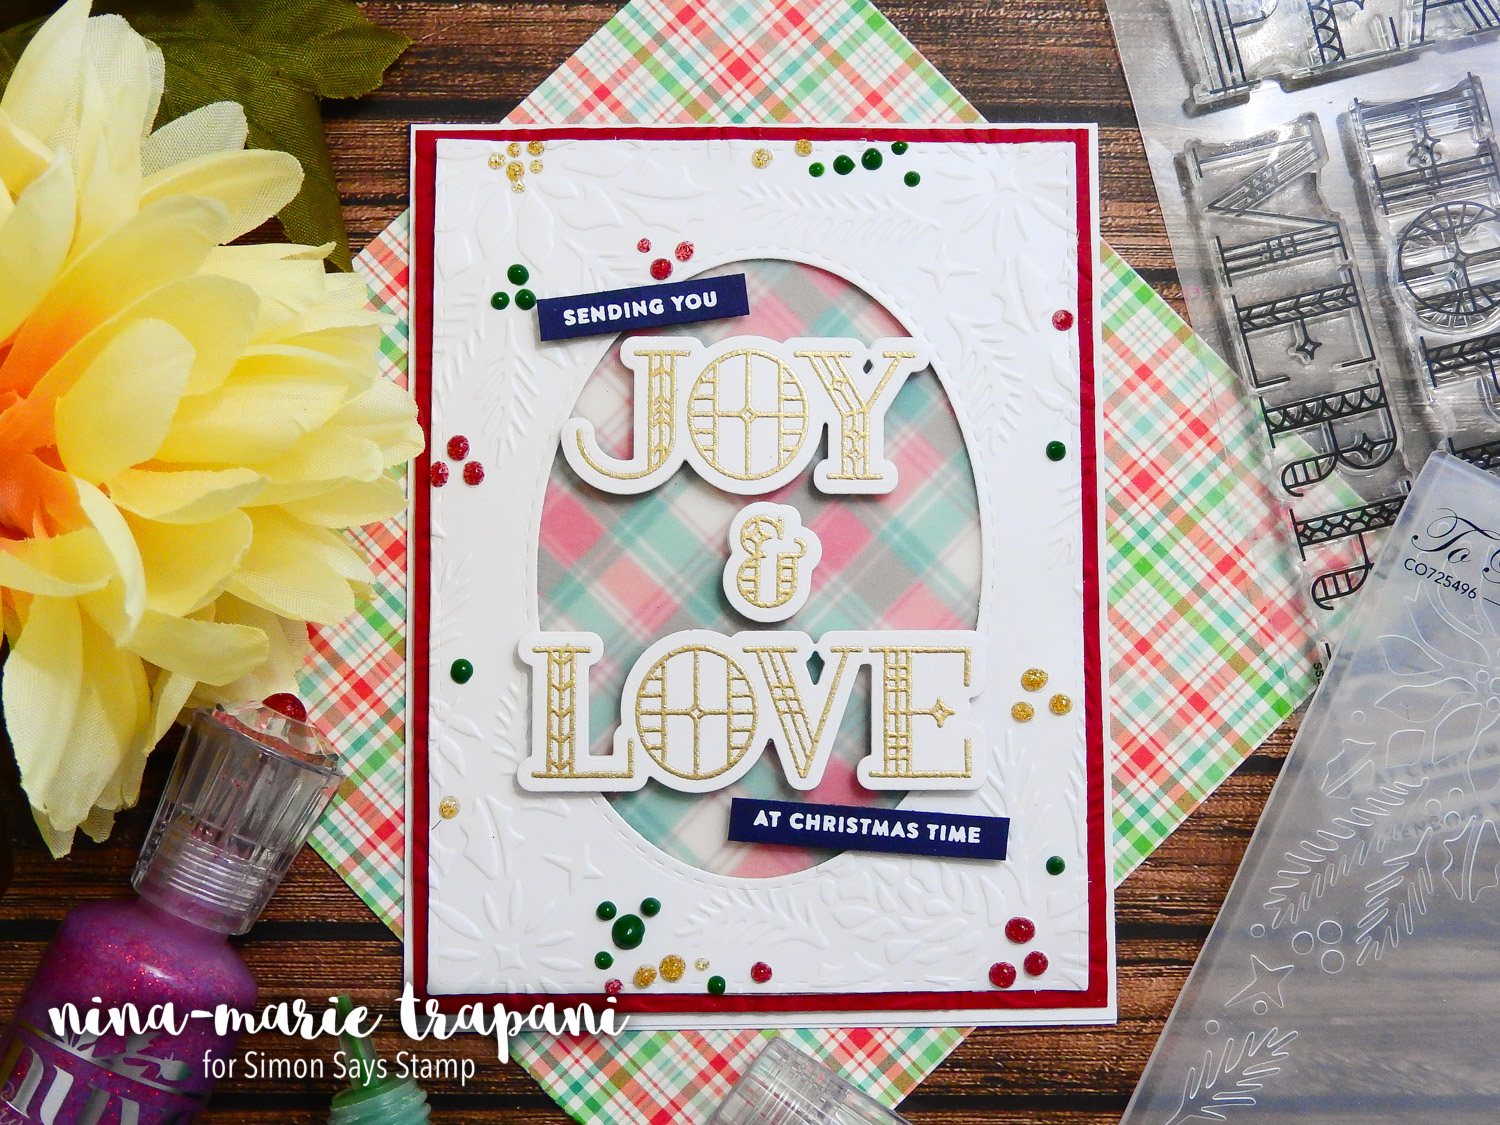
This card that I created featuring the Couture Creations To Be Jolly Embossing Folder, perfectly illustrates how crisply the Snowball Plastic Embossing Paper dry embosses. The impressions are extremely detailed and because of the plastic, the paper even has a subtle sheen to it.
The paper is not porous because of the plastic content, so it does not hold ink well (during my experimenting with the paper I had attempted to ink blend over it). But if you are looking for a great paper for doing some detailed dry embossing on, I would highly encourage you to try this out!
And by the way, those gorgeous sentiments in the center of the card? Those are from our new Stained Glass Greetings stamp and die set (part of our Making Spirits Bright release)! I really love how delicate and perfect they look on Christmas cards. Have you created any cards using this set? If you have, be sure to share your projects – using this or any of our other stamp and die sets from the Making Spirits Bright release – with us in our Simon Brand Gallery!
I hope you will watch the video below to see how to use the Bazzill Plastic Embossing Paper! Thanks for visiting with me today; I will be back on Saturday and Monday with new videos to share!
WATCH THE VIDEO
SUPPLIES
Blog Candy Alert!! Follow our blog via email and comment on this post for a chance to win grab bags and blog candy! Remember to tag your awesome projects with #simonsaysstamp on social media so we can see what you are creating!
Be Brave Journal Page
Hi friends! Happy Sunday! Thanks for tuning in today! I’m so pleased to welcome back the amazing Anna-Karin Evaldsson back to our blog as a guest writer today! To see more of her fabulous work, be sure to tune into our Monday Challenge Blog each week. For now, keep on scrolling to see how Anna-Karin created this gorgeous canvas page and enjoy!
Hi everyone! I am so happy to be here today with a fun and easy tutorial. Outside my window, most leaves have now fallen, after a really beautiful autumn season, and winter is knocking on the door. We had our first flurries of snow today. I was in the mood for an art journal page with some lovely fall leaves, but the techniques work just as well for cardmaking, scrapbooking, tags or 3D projects.
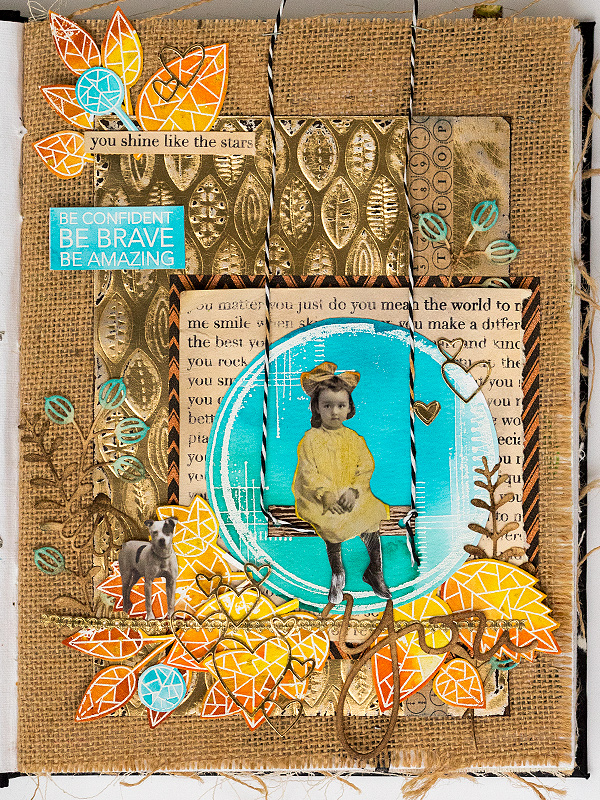
Fall is such a beautiful and vibrant part of the year, full of color and texture, and I wanted to capture that on an art journal page. I really like Dina Wakley’s Media Journal, which has four different surfaces: cotton rag watercolor, canvas, kraft and burlap. The latter works great for depicting the texture of fall, so I worked on one of the burlap pages. There are different types of leaves, and various layers on the page, but I avoided bulky elements, so that my art journal will close relatively flat.
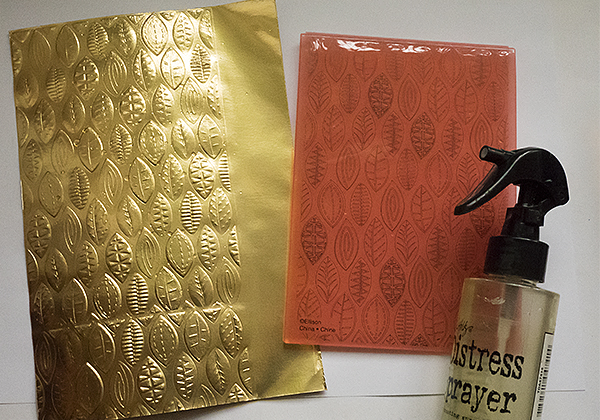
1.I wanted lots of gold on the page and embossed a piece of gold kraft paper (5.5 x 8 in) with Sizzix Impressions Leaves 3-D folder. These folders work best if the paper is slightly moist, so mist the gold paper on the back with water first. Use this sandwich: Sizzix Multipurpose Platform Tab 1, 3-D folder with paper inside, Cutting Pad. Repeat for the lower part of the paper. As you can see, I left the right-hand side of the panel without embossing, just for a different look from what I normally do.
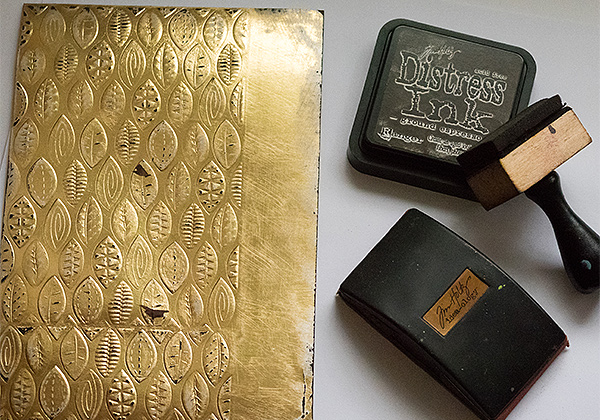
2.Sand the embossed area and the edges slightly and then ink with Ground Espresso. The ink will stick to the areas where the gold was sanded off.
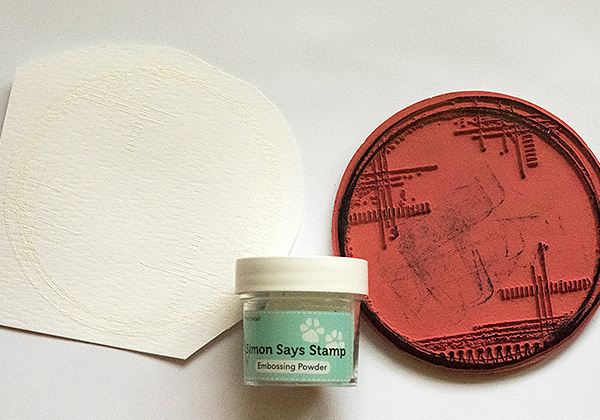
3.White emboss Wendy Vecchi’s Collage Circle on watercolor paper. Always be careful when using a heat tool so that you don’t burn yourself. (I am sorry about the slightly grainy photo, I had forgotten to change the ISO settings on my camera).

4.White emboss various leaves from the SSS Fractile Leaves set, also on watercolor paper.

5.Roughly cut out the circle and leaves. Smear Distress Inks on a non-stick craft sheet, mist with water and press the papers into the ink. The embossing will resist the ink. Try to vary the look of the leaves.
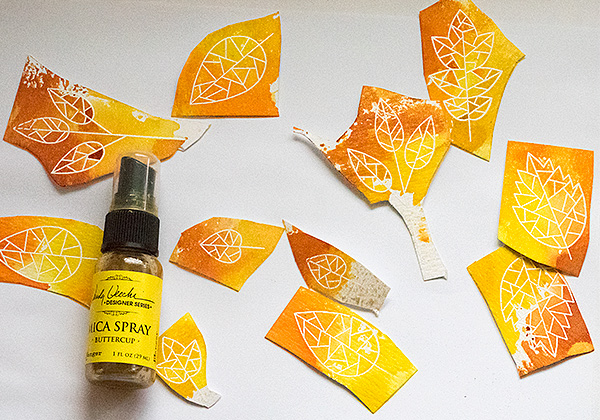
6.To make the leaves shine, they were misted with Buttercup Mica Spray.
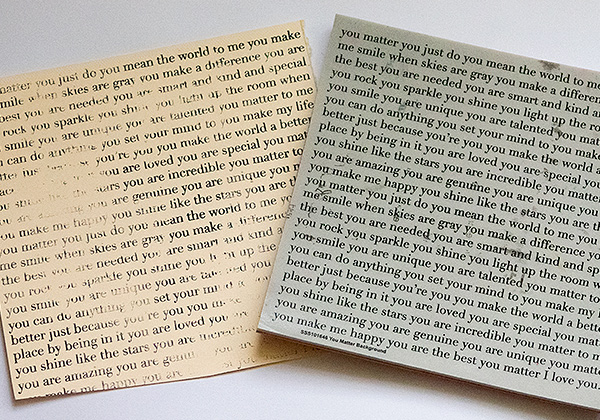
7.Stamp the You Matter Background stamp with Jet Black Archival Ink on manila cardstock. Don’t worry about getting a perfect impression. I wanted a partially stamped look.
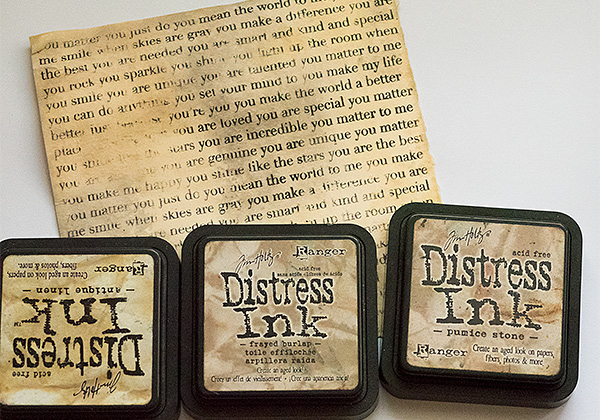
8.Smear Distress Inks on a craft sheet, mist with water and press the paper into the ink to distress it.
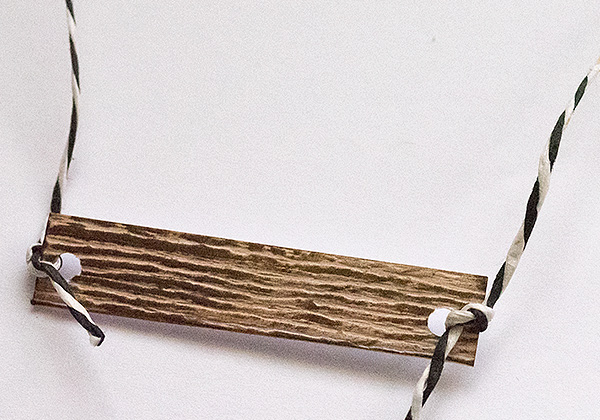
9.Cut a rectangle of woodgrain paper and ink it with Ground Espresso. Punch holes in the ends and tie with twine, to create a swing.
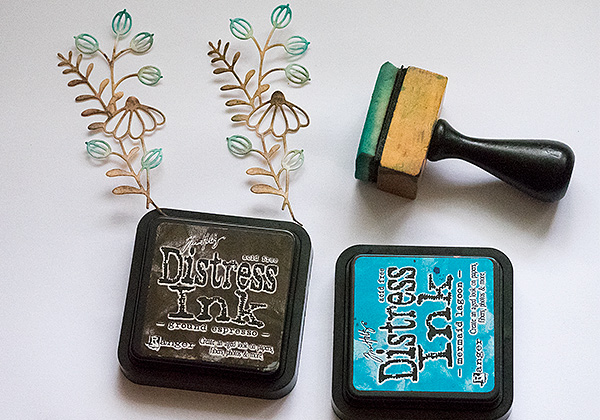
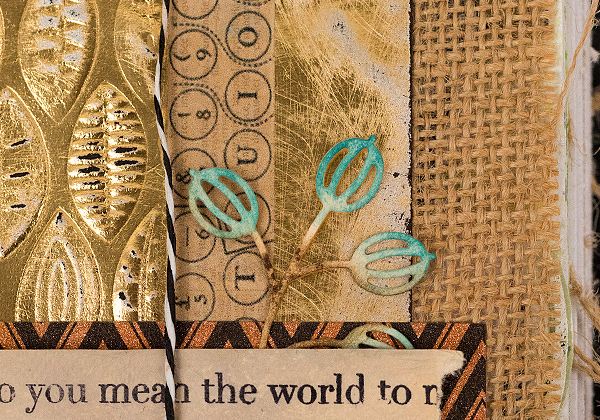
10.Die cut two Cottage Stems from manila cardstock and ink with Ground Espresso and Mermaid Lagoon.
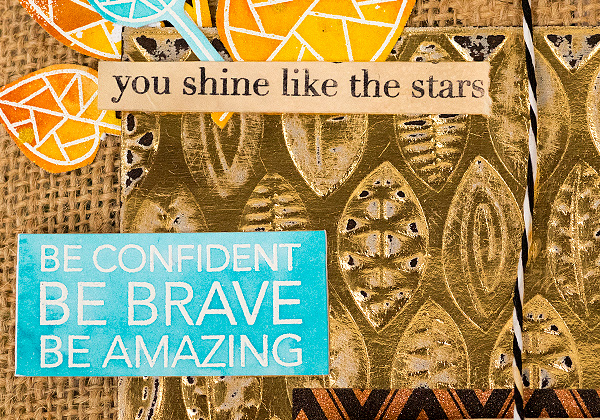
11.For the sentiments, I cut a line from the You Matter stamped background and also white embossed a sentiment from Uplifting Thoughts. The panel was colored in the same way as the blue circle. Here you can also see the effect of the sanding and inking on the gold paper better.
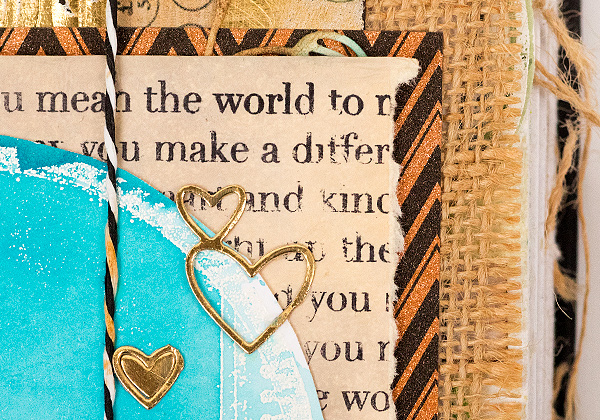
12.Tear some of the edges of the You Matter stamped paper and place a Halloween Deco Sheet underneath. Glue the blue circle on top. Everything was glued down with Distress Collage Medium Matte. The hearts were die cut with the Clipping Heart die.
13. I adhered a piece of design tape down the length of the embossed gold panel.
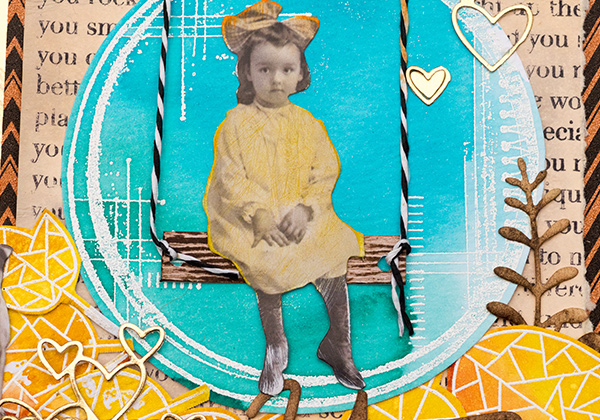
14. Glue the swing and a girl from Tim Holtz’s Paper Dolls set on the blue circle. She was colored slightly with Mustard Seed and Spiced Marmalade Distress Ink.
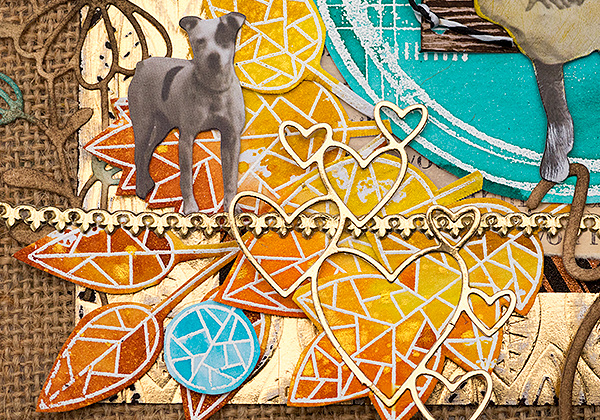
15. Tuck leaves below the circle to make it look like the ground is covered in leaves. I also added a Paper Doll dog, more hearts and a piece of Prima Dresden trim.

16.Glue the Cottage Stems in place. I cut one of them into two pieces.
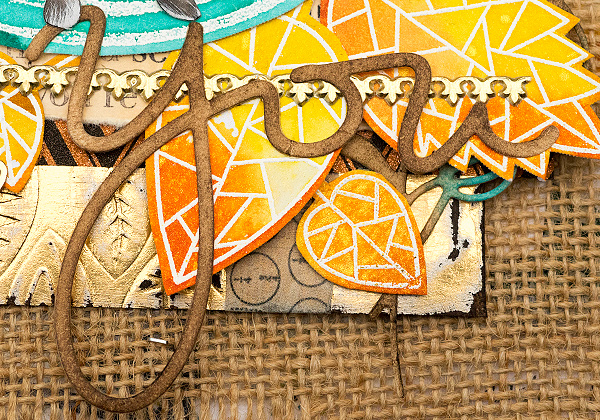
17.I also die cut You from manila cardstock and inked with Ground Espresso. This is a favourite die of mine, since it is so versatile.
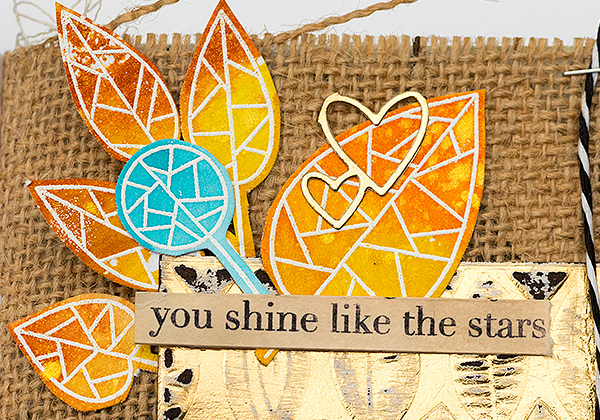
18.Add a little group of leaves at the top left corner of the page too. I hope you enjoyed this tutorial and that it inspired you to do a fall themed project, or play around with textures or Distress Inks.
Thank you so much for looking! Happy crafting! Anna-Karin
Supplies:
|


Thanks so much for reading, and thanks again to Anna-Karin for the fabulous inspiration!
Blog Candy Alert!! Follow our blog via email and comment on this post for a chance to win a special blog candy!


