Monthly Mail Art with Kristina Werner – November 2017
Happy Friday, all! Kristina here with another Monthly Mail Art installment. :)
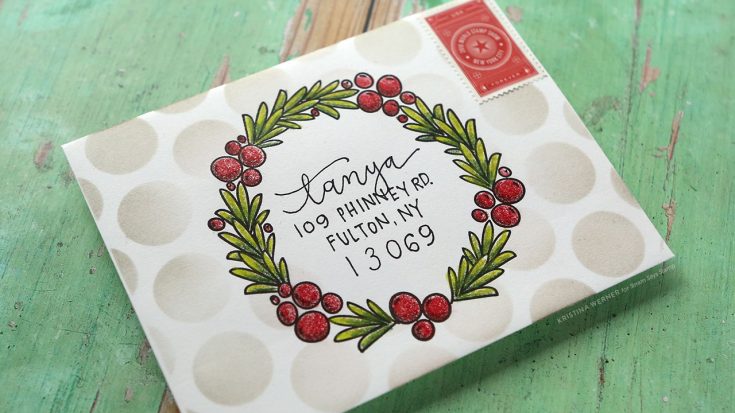
For this month’s envelope, I thought I would create a festive, holiday-themed envelope. I used Avery Elle’s Festive Wreath stamp set to stamp a large wreath in the center of a white envelope. I then used Prismacolor colored pencils to color the wreath.
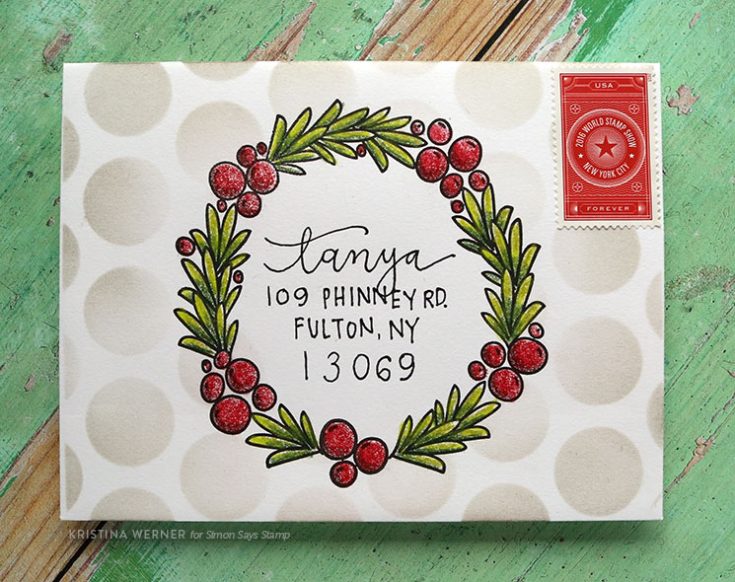
The envelope seemed a bit blank, so I then used a large dot stencil and Pumice Stone Distress Ink to add a pattern to the area outside of the wreath. I did the same thing last month to finish that envelope scene. This does the same effect for this envelope. It helps it to look finished. :)
For a bit of shimmer, I added some Wink of Stella Glitter Brush Pen in clear to the red berries on the wreath. The mailing address was written with a Pilot Envelope Addressing pen.
NOTE: Address used with permission. Thanks, Tanya!
Thanks for stopping by today! :)
Supplies
|


Eskimo Kisses from Heffy Doodle!
Hi friends! Happy Thursday! Thanks for stopping by today! Please join me in a VERY warm welcome to first time guest designer Lesley Oman! This very talented lady is the owner of Heffy Doodle and using the BRAND NEW Eskimo Kisses stamp and die set to inspire today! Be sure to read on and get the full details from Lesley herself and enjoy!
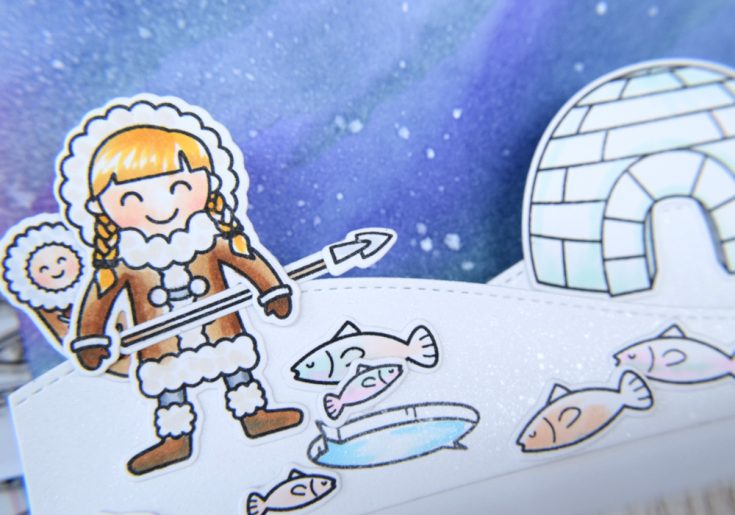
To make this card, I used the new Heffy Doodle Eskimo Kisses stamp set to stamp and die cut lots of the fun Eskimo images. I used my MISTI so I could stamp lots quickly at the same time, and used copic friendly ink and card so I could use my alcohol markers to colour the images. I thought it would be fun to create both a scene on the outside and on the inside, so I used some Lawn Fawn dies to help create snowy mounds and a pop up landscape for the inside of my card.
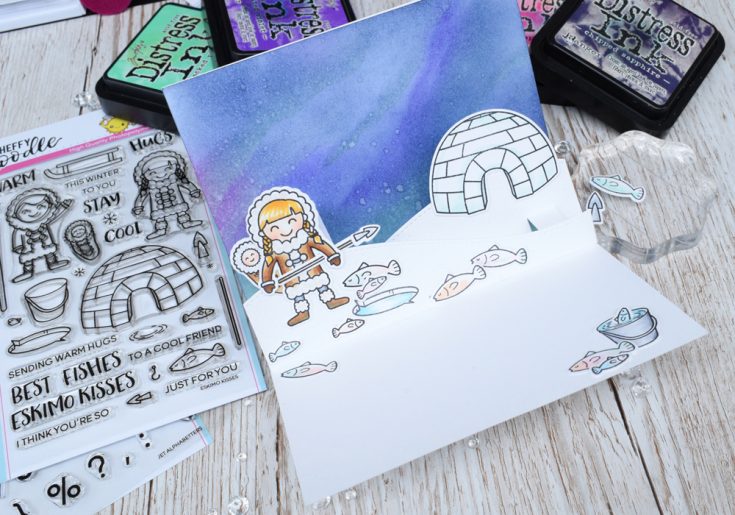
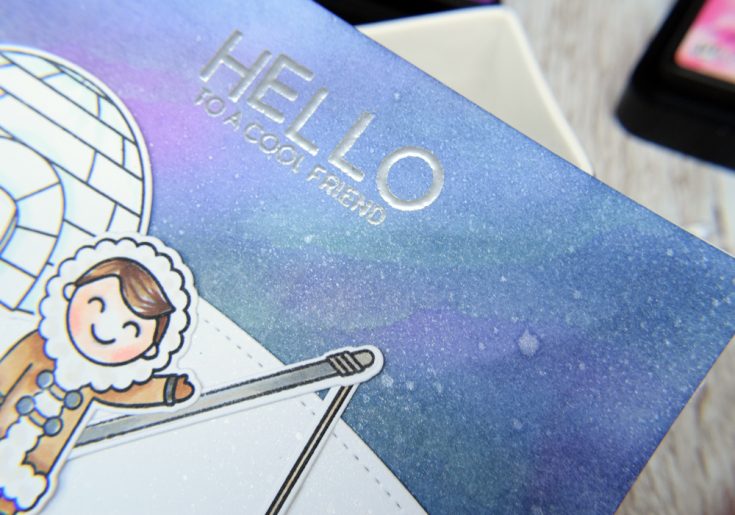
For the background, I wanted to create an Aurora Borealis effect, so I grabbed my Ranger Distress Inks, and used some bright colors first of all, then blended over the top with some chipped sapphire. I inked along the edge of a ripped piece of card to build up diagonal lines of colour on top for a more authentic look. To give my sky a lovely shimmer, I mixed a small amount of Perfect Pearls pigment powder with a little water in a spray bottle and spritzed the mixture over my inked card.
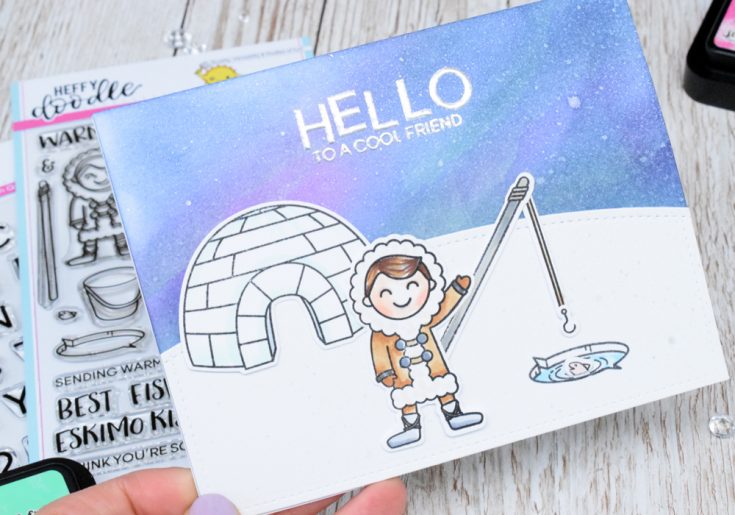
For my greeting I used one of the sentiments from the Eskimo Kisses set, but also used some of the new Heffy Doodle Jet Alphabetters to create the word HELLO. These letters are a great size for adding your own messages or names to your projects. I decided to use some silver embossing powder for my greetings to really make them pop!
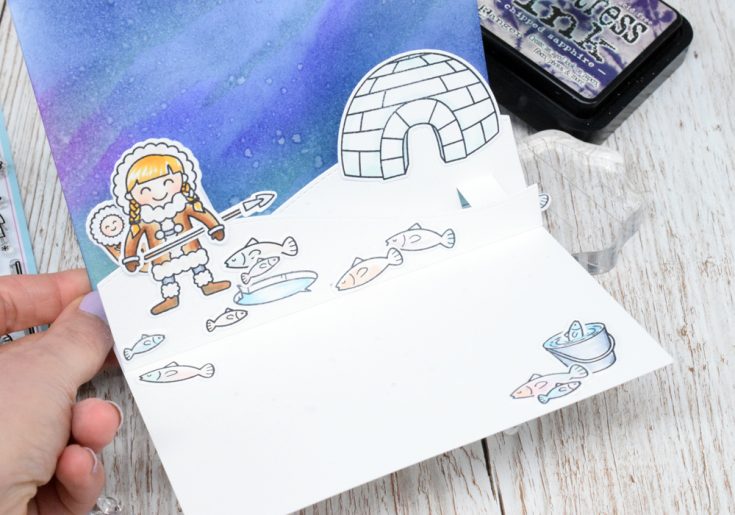
For the front of my card, I stamped the fishing hole and used water ripple stamp to add lines inside, and then cut a slit using the coordinating die. This meant I could tuck a little cheeky fish inside. I gave the boy Eskimo a fishing rod, but on the inside, I created a scene using the girl Eskimo, and instead of giving her a fishing rod, I added the spearhead image to the pole to create a spear! I also added the cute baby on her back and surrounded her with lots of fish so it looks like she is having much more success than her friend!
WATCH THE VIDEO:
SUPPLIES:
|


Thanks for reading today, and thanks to Lesley for being our guest!

Blog Candy Alert!! Follow our blog via email and comment on this post for a chance to win a special blog candy!
25 Days of Christmas Tags Event with Shari Carroll
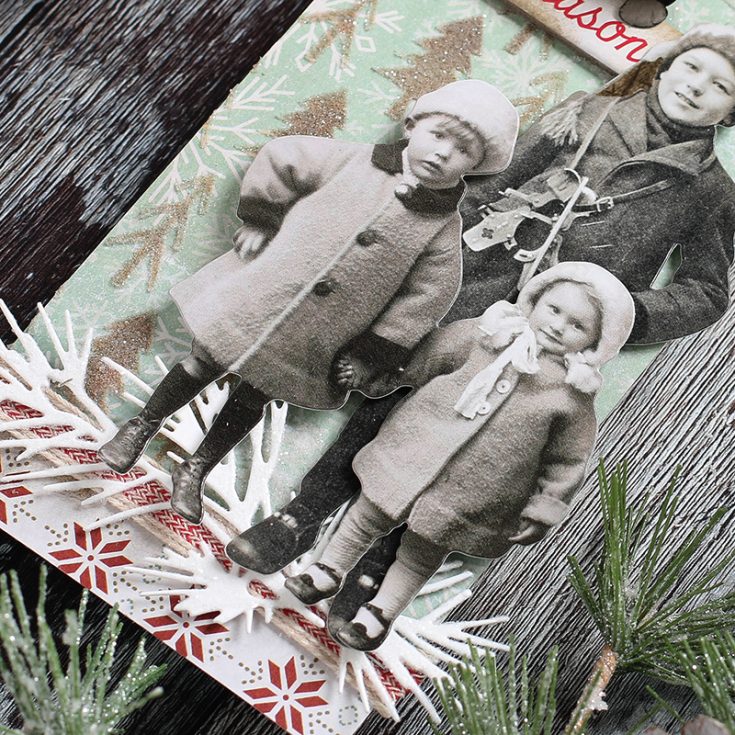
 Hi everyone! Welcome to November!!!! It’s Shari here with a special tag as part of the 25 Days of Christmas Tags event on the In My Creative Opinion Blog. I was inspired by all the amazing Tim Holtz products from his Christmas 2017 collection.
I started out with Tim’s Distress tags and Christmas Stash 8×8 papers. I’ve covered the tag using some one of my favorite papers from the collection and Collage Medium.
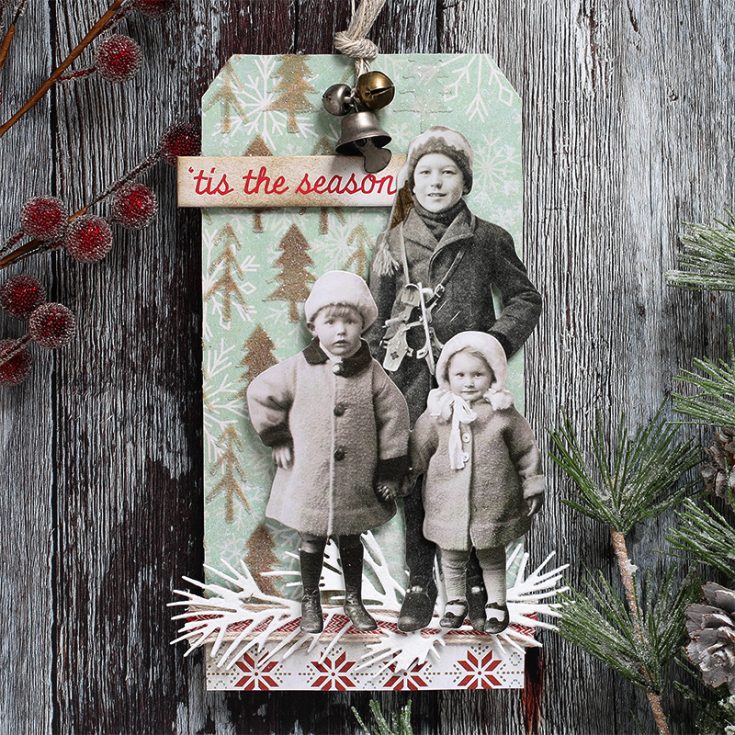
I stenciled some the Pines onto the background with Potting Soil Archival ink, then re-stenciled with Transparent Texture Paste and gave it a dash of Rock Candy Glitter for some winter sparkle!!
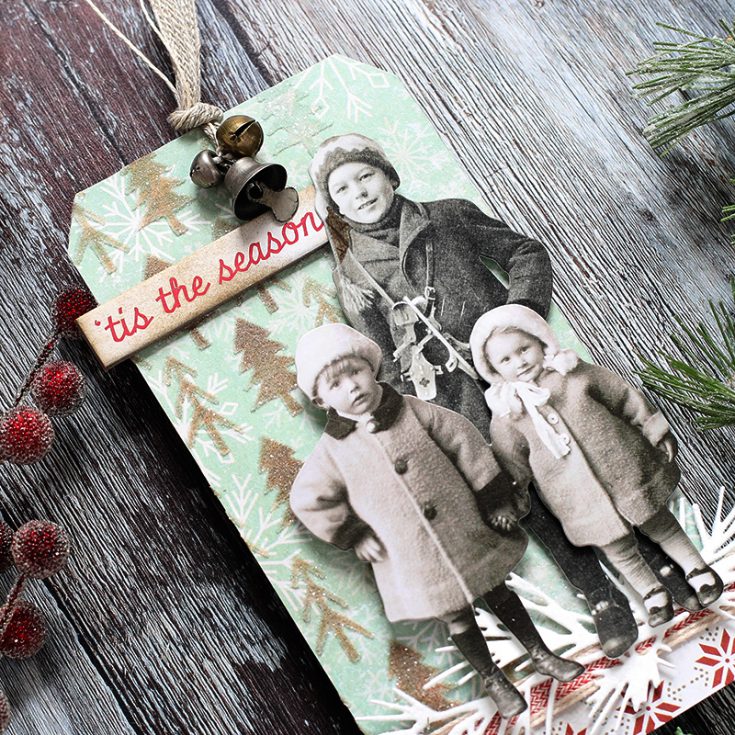
These adorable Christmas Paper Dolls are the focus of this tag and I’ve put together 3 children dressed ready for the winter holiday!
I’ve filmed a video of the complete process which you can view below or on our YouTube channel HERE.

Blog Candy Alert!! Follow our blog via email and comment on this post for a chance to win a special blog candy!
Thanks for stopping by, I hope you’re having a great week!
|


