Studio Monday with Nina-Marie: Stenciling 5 Ways

Hello crafters! I am super-excited to be bringing you a new Studio Monday tutorial featuring one of my favorite techniques; stenciling! In the video for today, I will share 5 different ways you can use stencils to make some fun effects on your cards. Let’s quickly highlight a of them before watching the video!
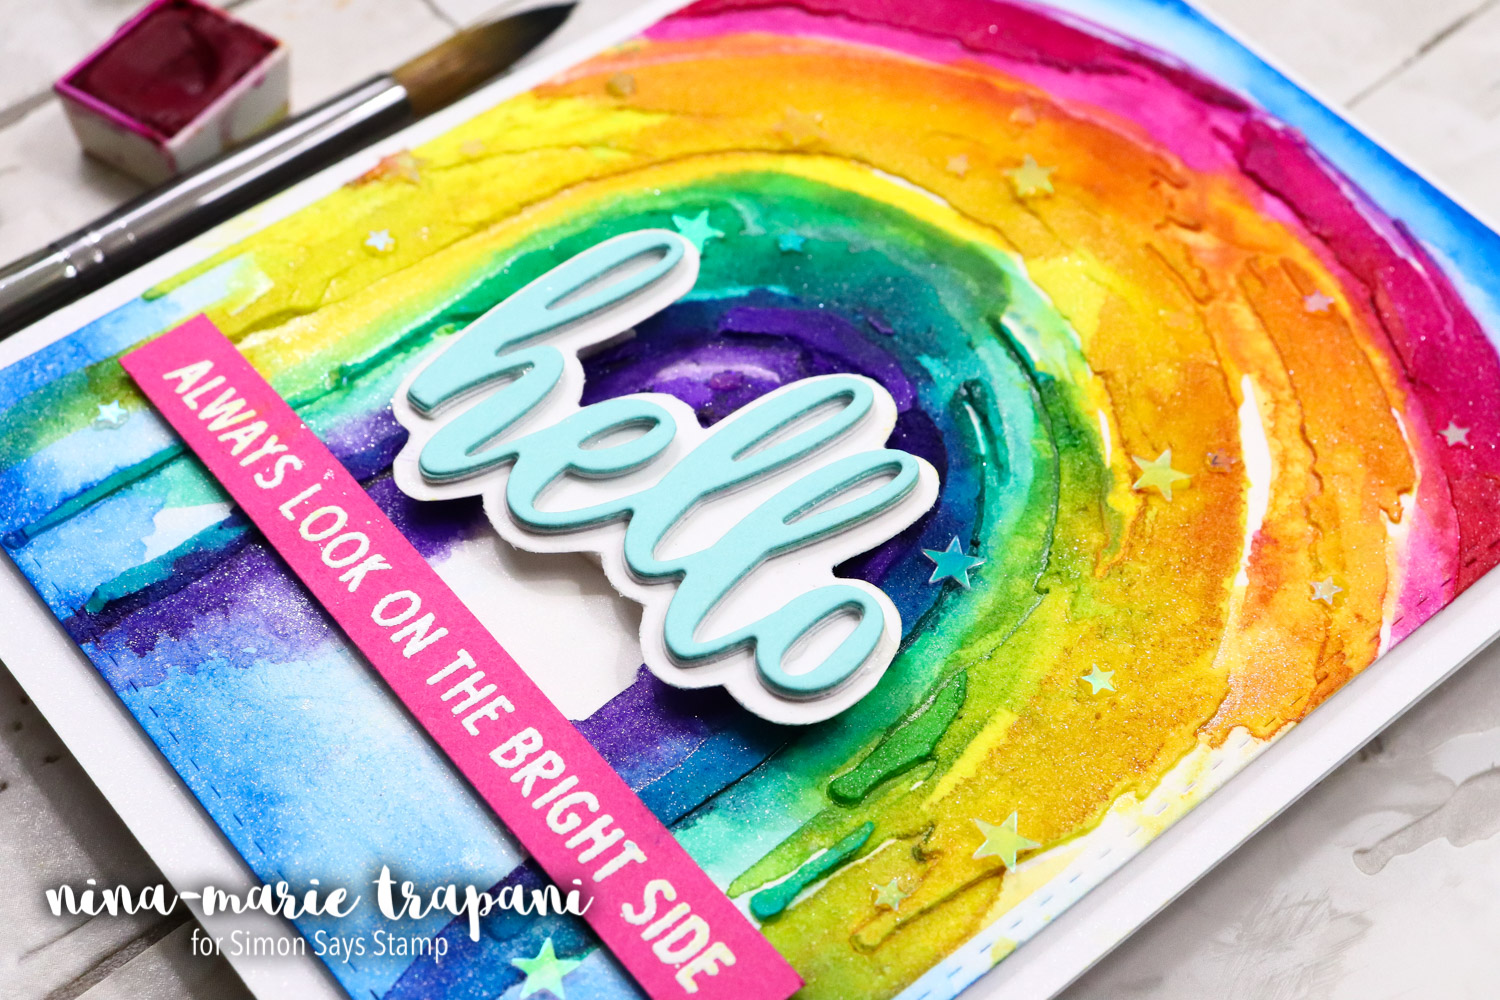
First up, we have stenciling with embossing paste; and to step it up a notch, I’ll show you how you can COLOR that embossing paste to get this stunning rainbow! The rainbow is a stencil from Stencil Girl called Little Painted Rainbow. Don’t you just love it? After applying my embossing paste through the stencil, I was really inspired to enhance the brushstroke effect with a bit of watercoloring!
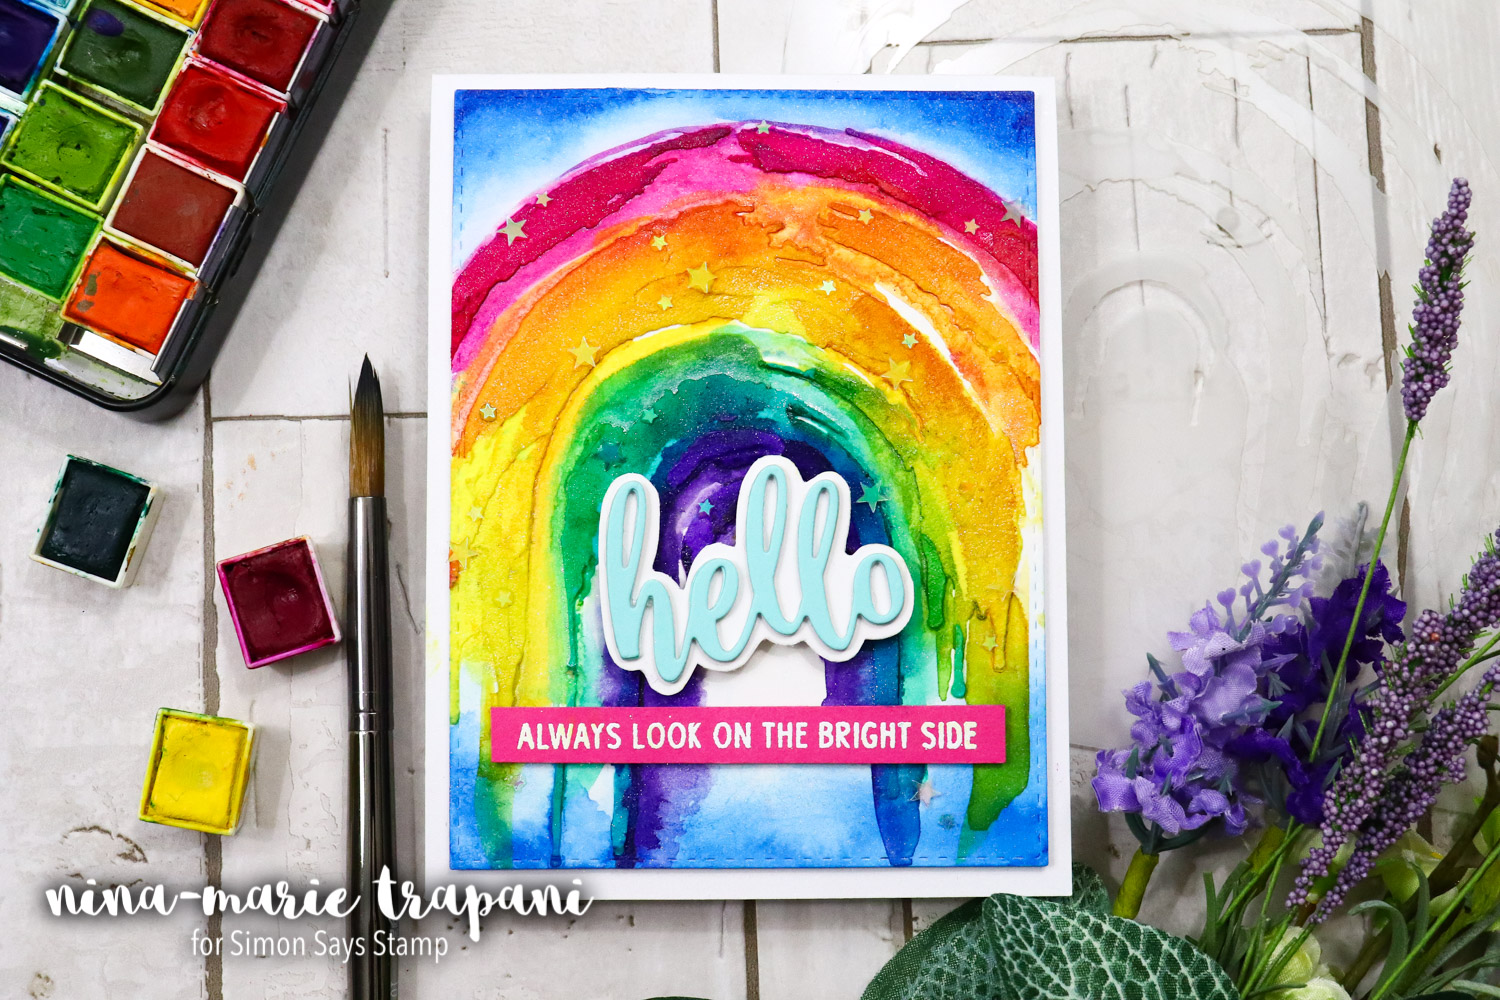
The sentiments I added are from My Favorite Things’ Hello and Thanks die set and Neat & Tangled’s So Many Sentiments stamp set. One of my favorite parts of this card are the tiny Iridescent Stars that “twinkle” on the rainbow!
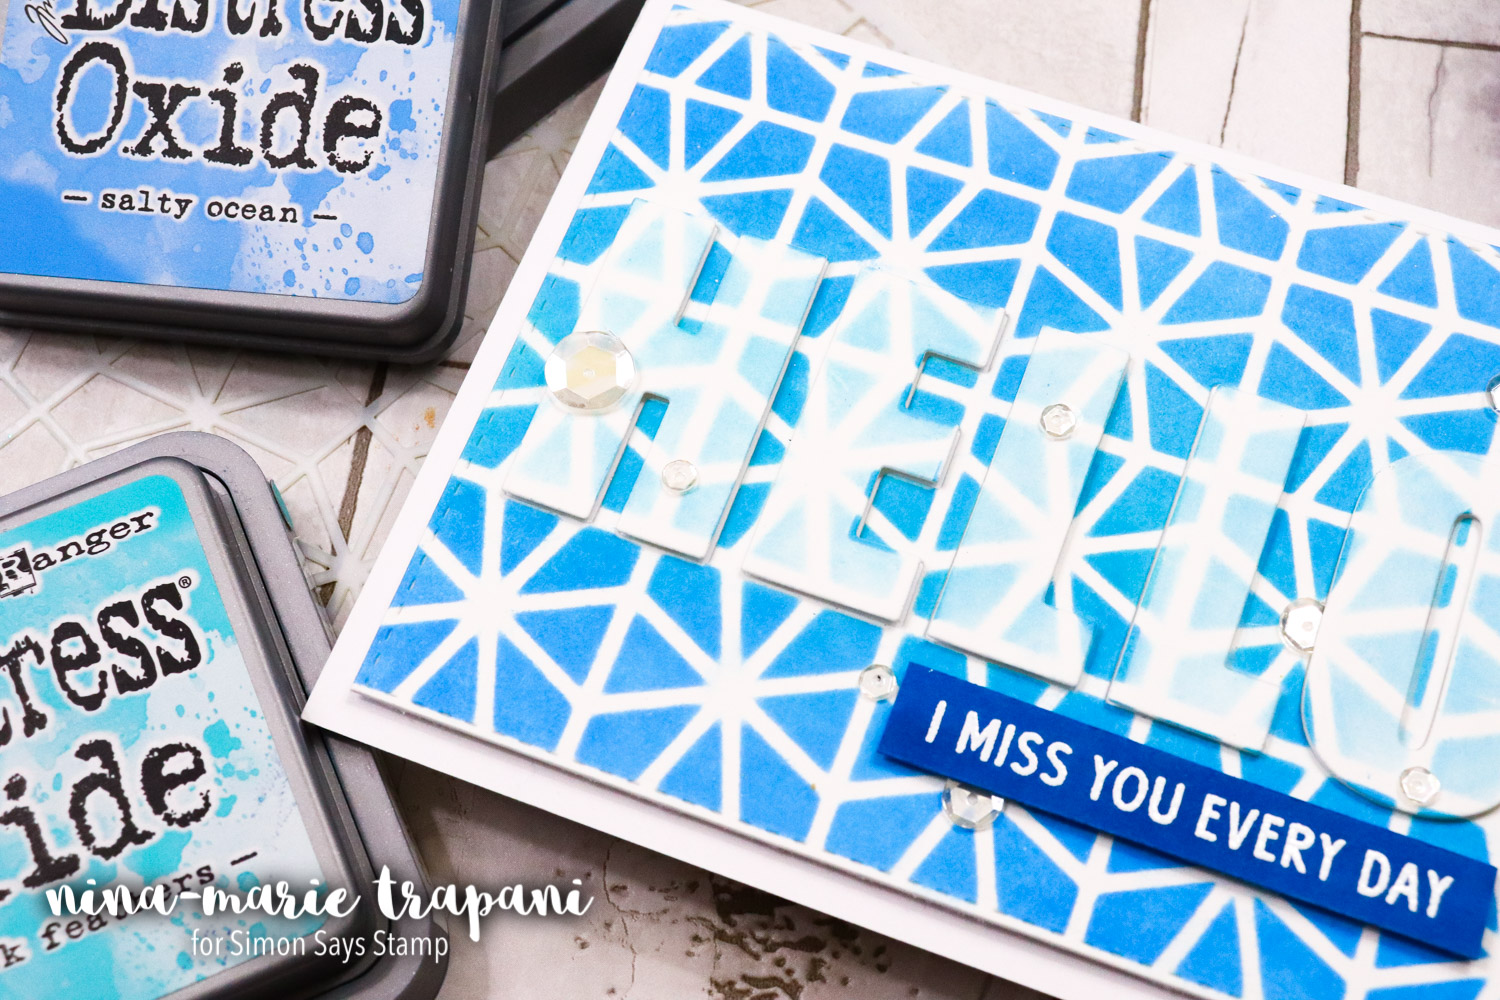
Next in the video, I’ll show you how to create a ghosted sentiment with stenciling. Can you see the “hidden” greeting in the stenciled pattern??
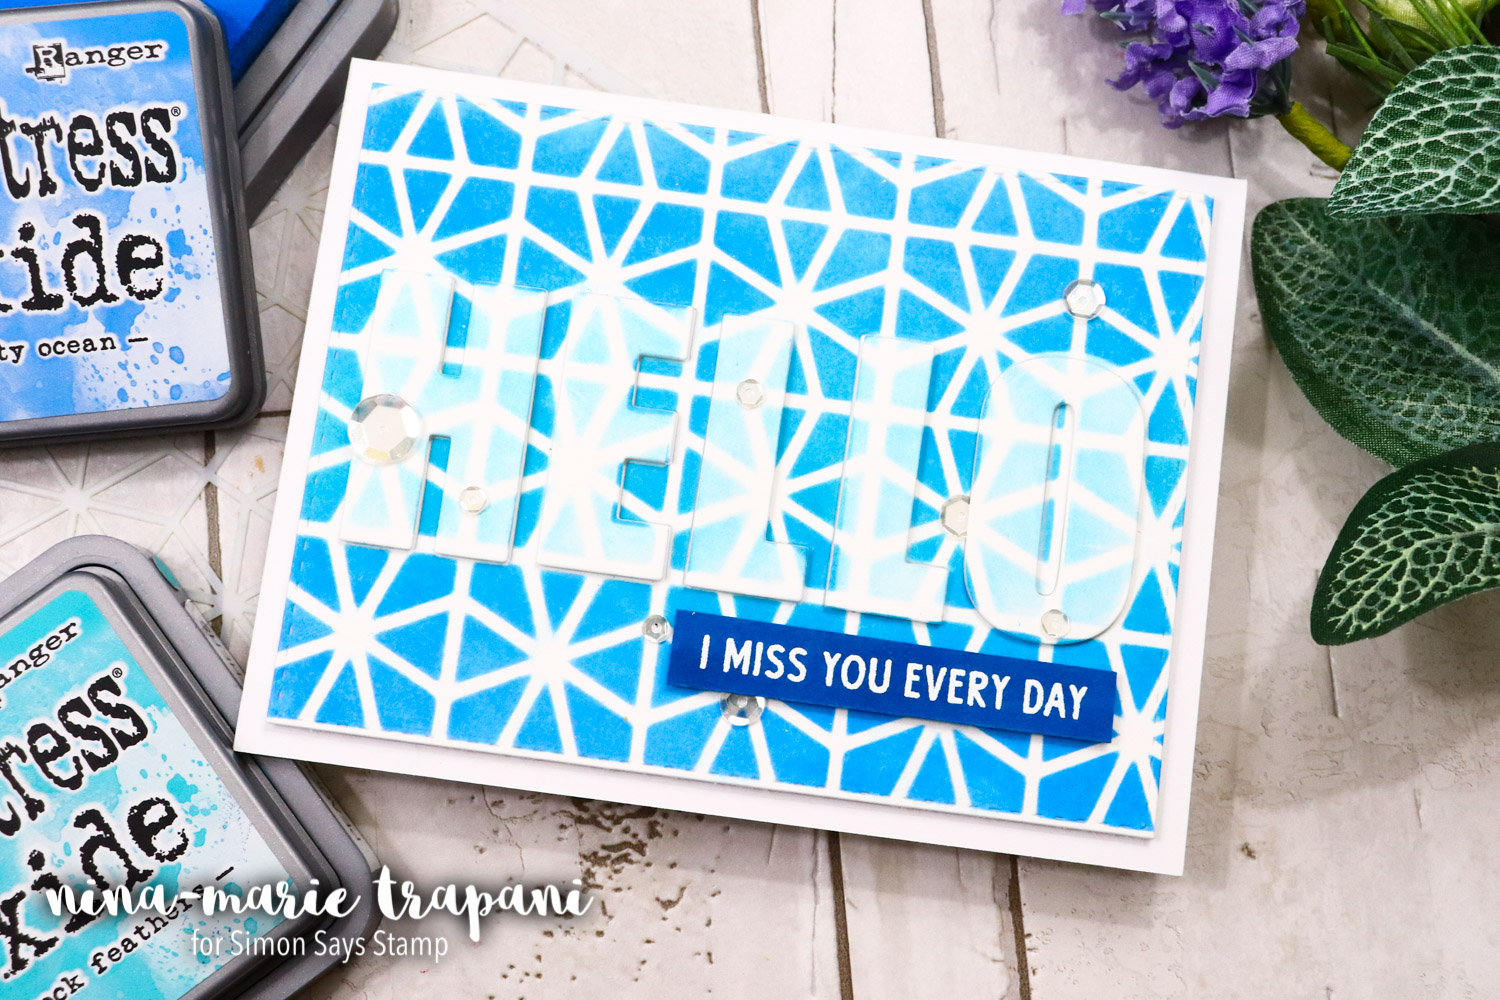
The letters that create the ghosted effect are from Altenew’s Bold Alphabet die set; the stencil design was Neat and Tangled’s Geometric Circles.
In the video I also shared a look at doing some ink spray stenciling – 2 ways! A clean and simple style like the background behind my shaker…
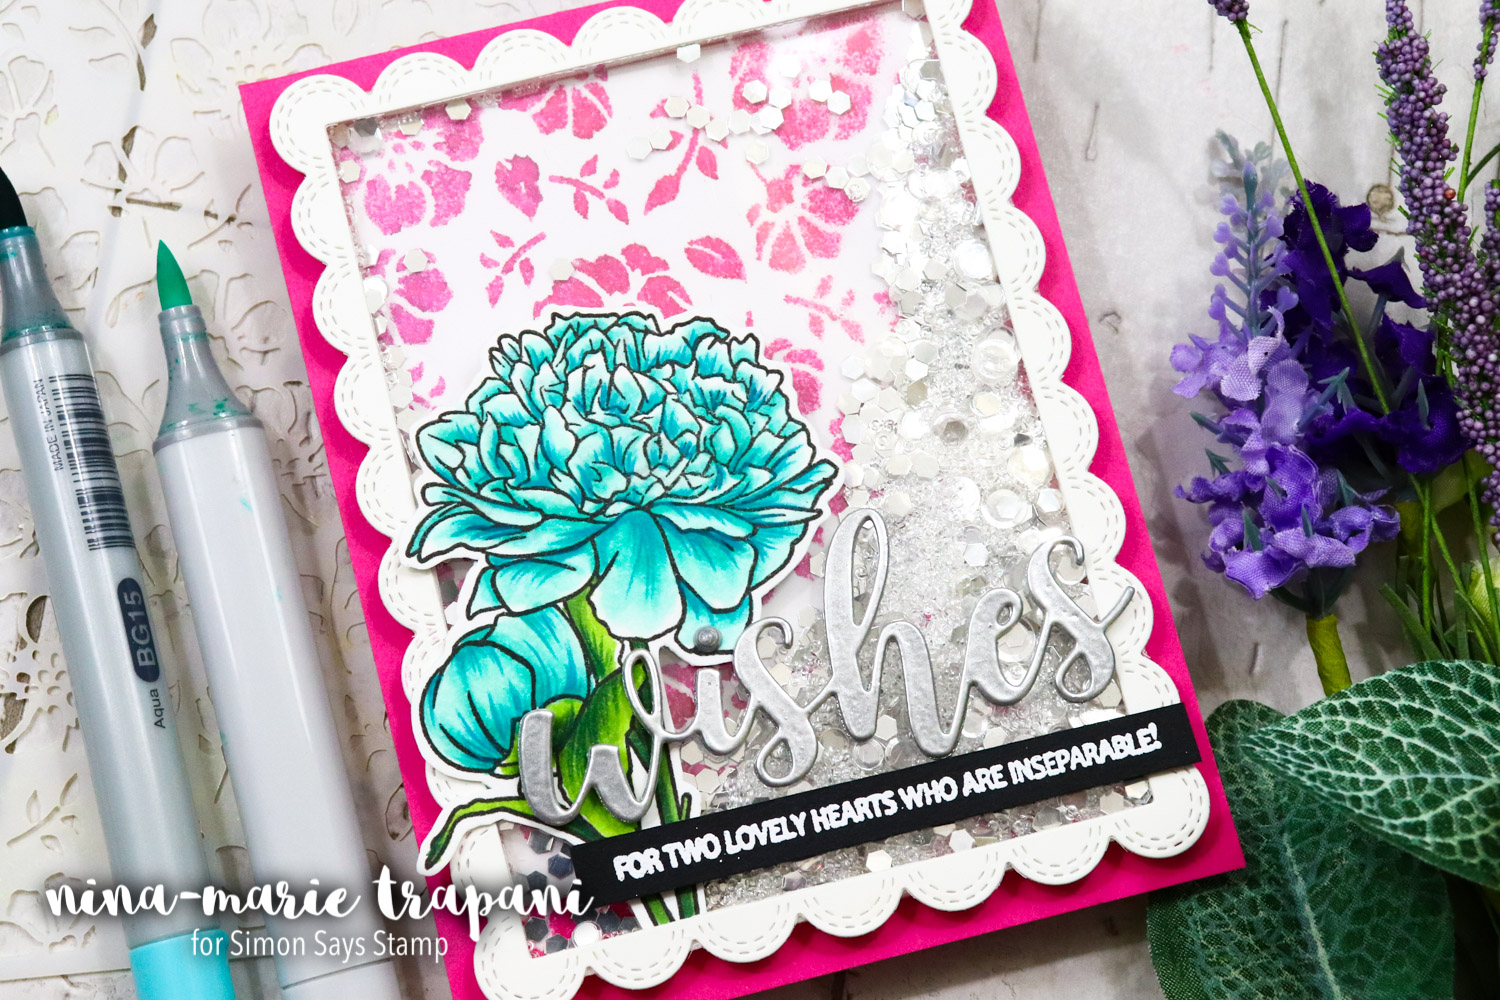
Or you can go wild and create something with a lot of interest and texture like this one!
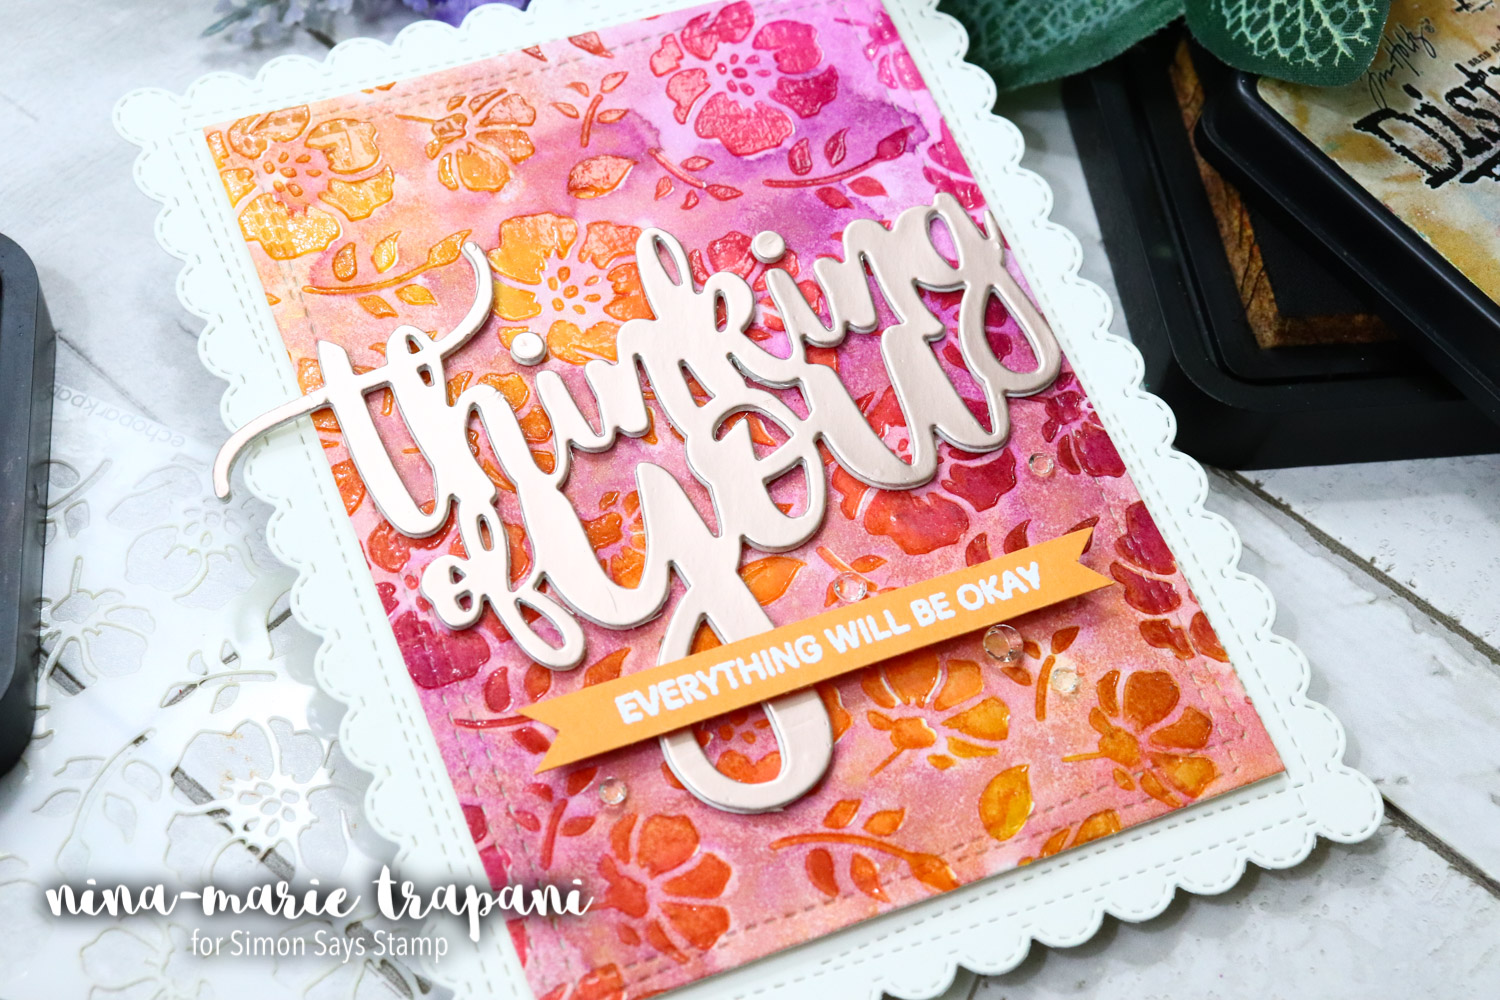
Both have an awesome look and use Ranger Dylusionals ink spray. I enhanced the second card with Translucent embossing paste for extra dimension and texture.
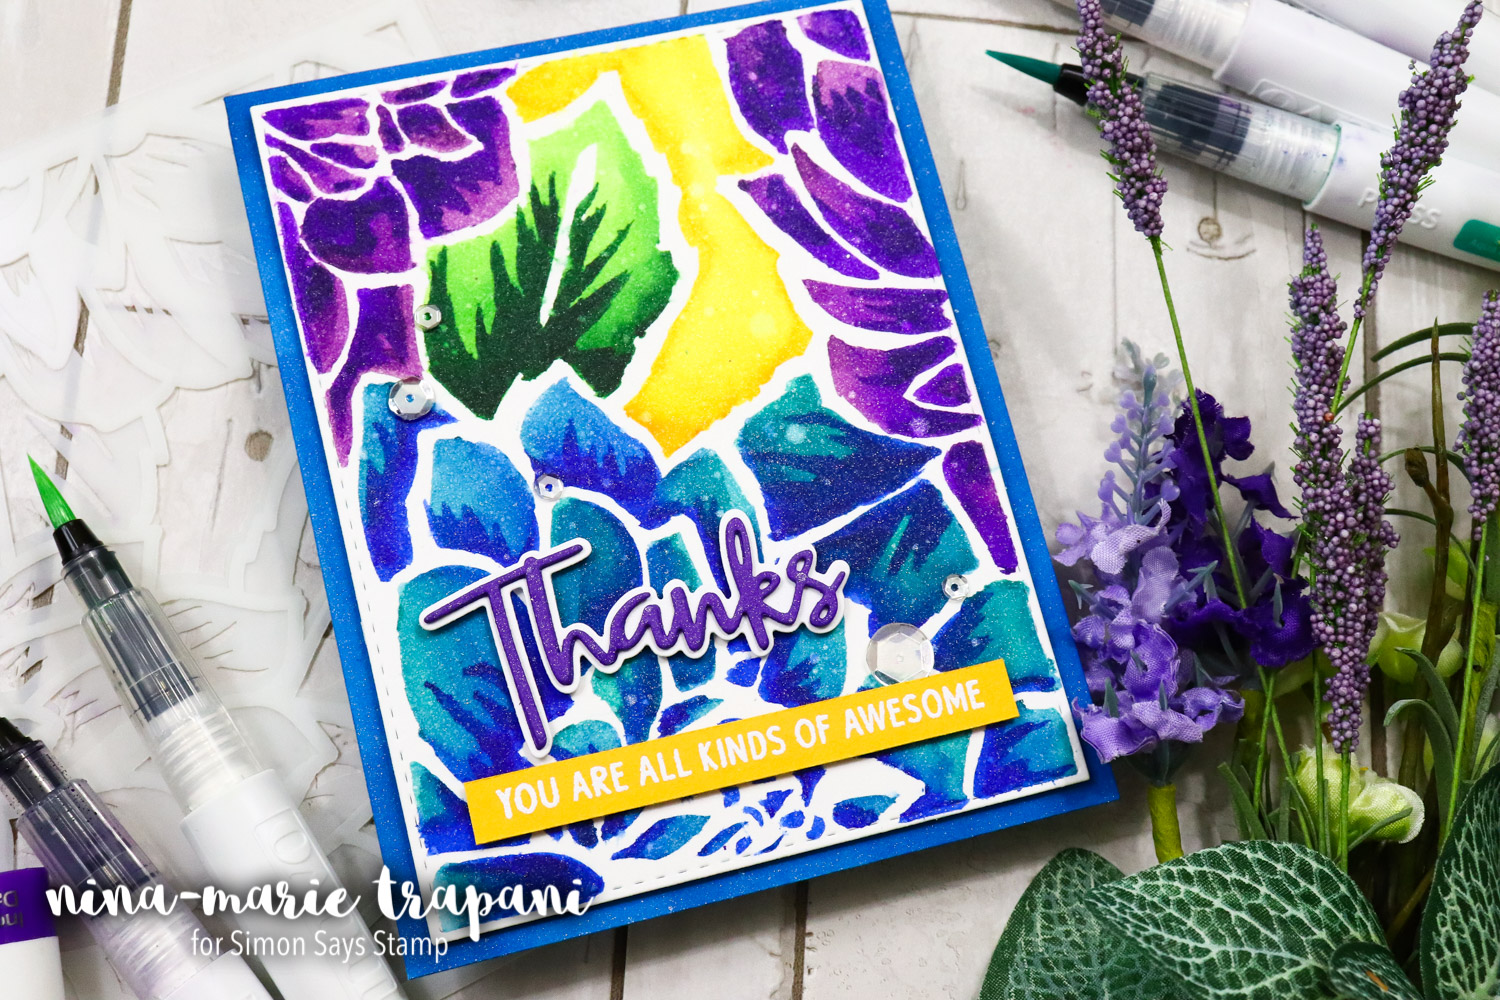
Have you ever tried coloring with a stencil? It is another fabulous way to create a unique, stenciled effect! I recommend either tracing your stencil and coloring inside the traced lines, or use a medium that is not super-saturating. The trick is to not let a wet medium seep underneath the stencil and make a mess of your crisp lines. I’ll touch on this more in the video. For my card I used Tonic Studios Aqua Flow pens and colored directly through the Altenew Layered Dahlia stencils (there are two layering stencils).
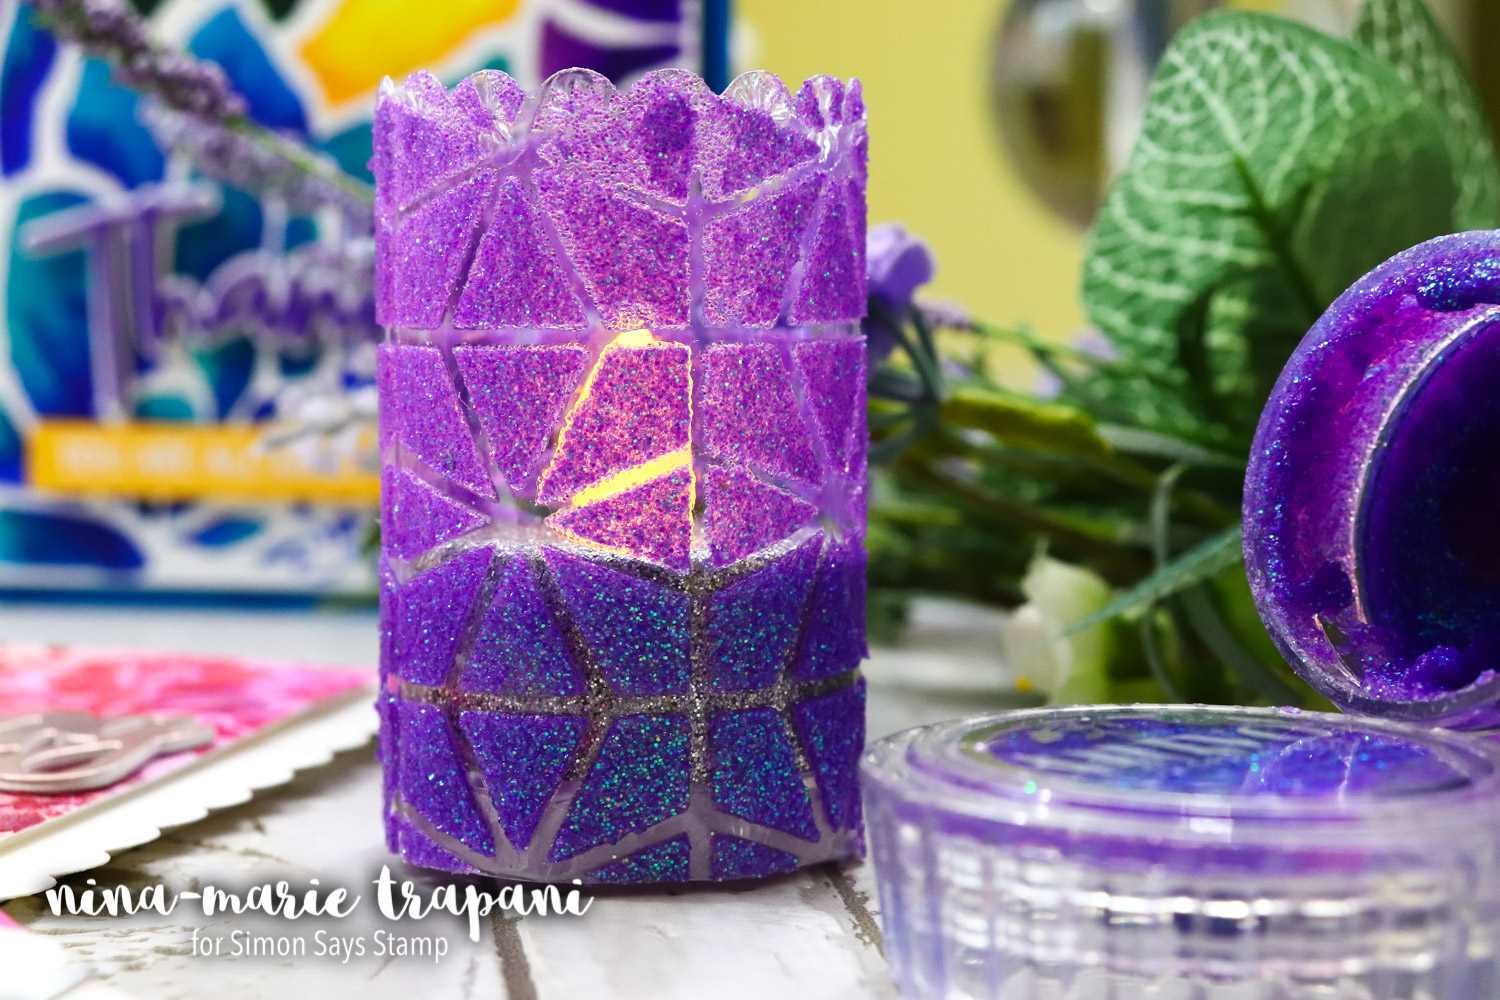
Finally, the last technique I will be sharing in the video is how to make a cute stenciled candle holder! With a bit of acetate and a translucent paste (I prefer glitter pastes for the translucency and shimmer!), you can make a stunning candle holder for a tea light very quickly. The hardest part is waiting for everything to dry!
Be sure to watch the video below to see all these techniques in action! :) I hope you enjoy and are inspired to do some stenciling on of your own! Thanks for stopping by, I’ll see you next week with a brand new Studio Monday!
WATCH THE VIDEO
SUPPLIES
|


Blog Candy Alert!! Follow our blog via email and comment on this post for a chance to win grab bags and blog candy! Remember to tag your awesome projects with #simonsaysstamp on social media so we can see what you are creating! 
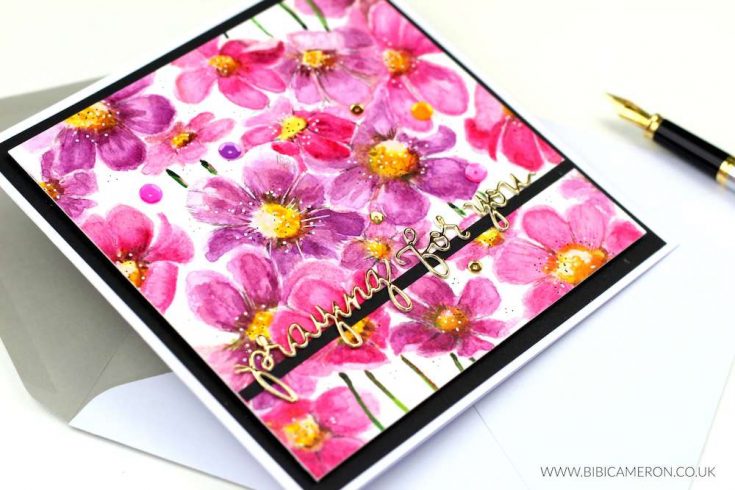
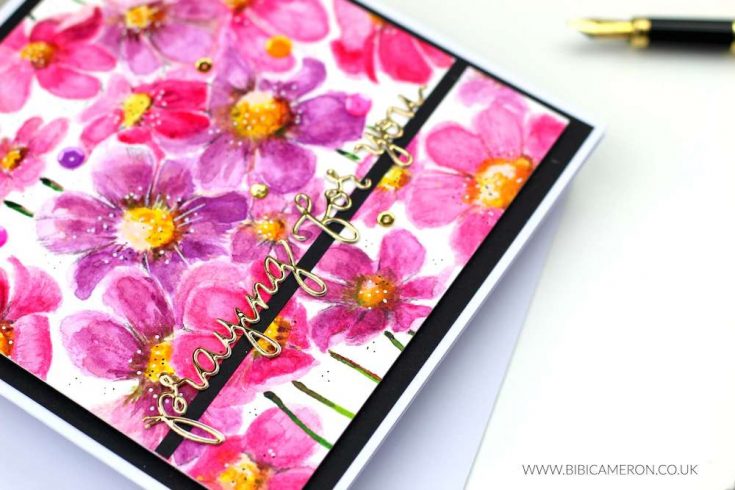
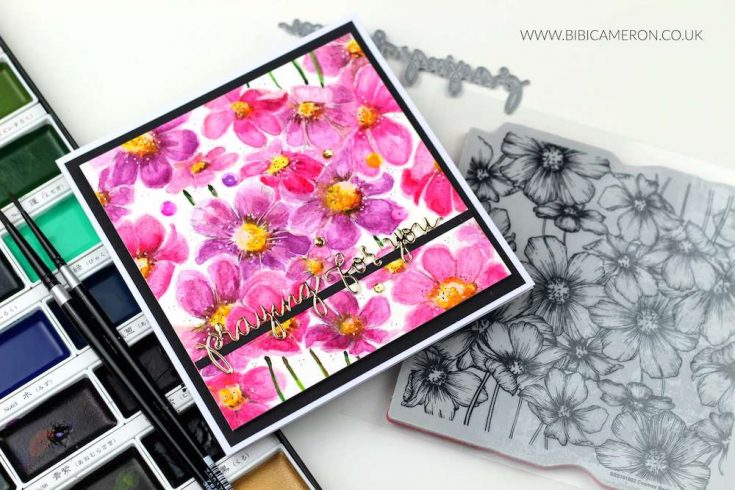
Watercolor Cosmos Background with Bibi Cameron
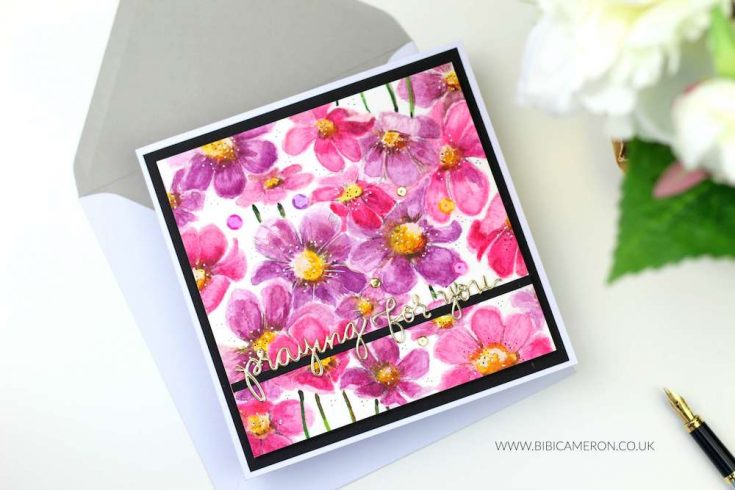

So all this started with uncertainty… I didn’t know what the outcome might be so I grabbed my Tim Holtz Platform and I stamped the Cosmos image several times on different cardstock colors (even on Vellum). However, the one stamped on watercolor paper caught my attention after seeing how pretty the stamped image looked when I tried to stamp with a contaminated Versafine clear ink pad… It did look clear but also a bit grey… gorgeous!
I also used my 36 color set Kuretake Gansai Tambi watercolors. Incredibly affordable and versatile. I like to dilute these paints with water, mixing and blending them with other colors to get new shades.
To apply them I used a rounded Silver Velvet brush # 4, and a super fine brush to add details ( lines – dots) as well…
So I put Spanish guitar music on and I enjoyed applying many washes of color to get a highly pigmented tone.Last but not least I added details…. the sentiment, a couple of sequins and using markers I added black and white dots over the flowers.
 Have you tried watercolors yet? I would really encourage you to give it a try.
 I hope you like my card and a big thanks to Simon Says Stamp Team for having me today.
Happy crafting
x
Bibi
SUPPLIES:
|


Thanks for reading, and thanks to Bibi for being our guest!
Blog Candy Alert!! Follow our blog via email and comment on this post for a chance to win special blog candy!
Dreamer of Dreams: Mixed Media with Shari Carroll

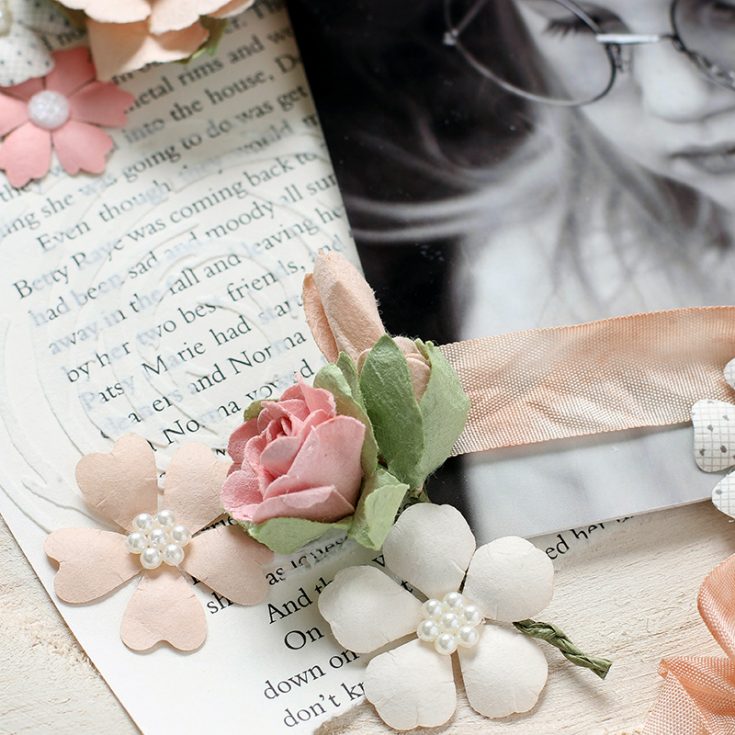
Welcome everyone and happy Saturday! I hope you’re having a crafty weekend! I’ve created a simple mixed medium project starting with a wood Prima plate, a photos and beautiful colored flowers. This is one of those simple to do projects but it looks like it took hours.
I am so fortunate to have my little Melody in my life, but also her mom Jasmine who takes the most amazing photos. I’m always inspired to use them in my projects. This photo is one of recent favorites where Melody is looking down while wearing light colored sunglasses. I had it printed in black and white and then surround it with colors of Spring.
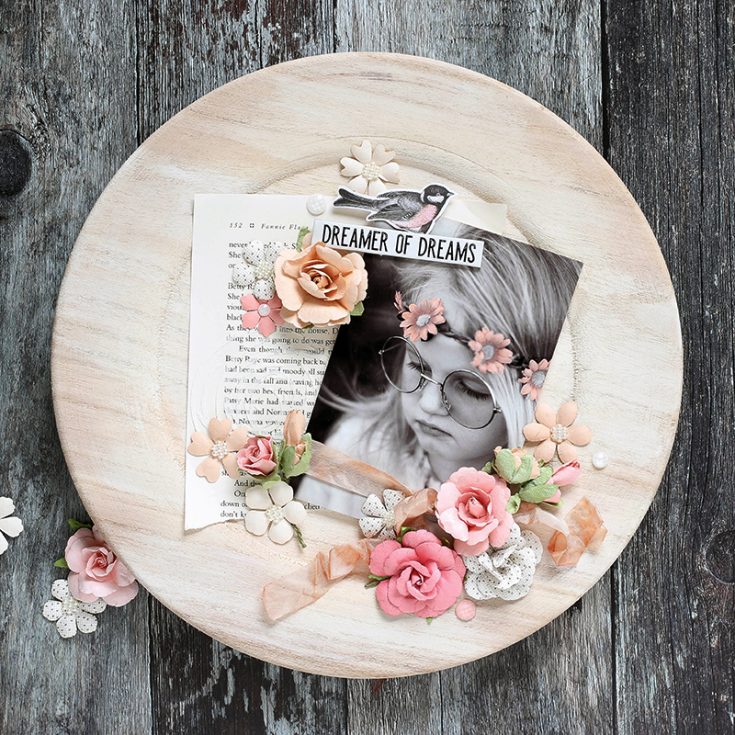
I used a Copic marker to color in just the flowers of her headband. The Prima flowers come in a mixture of colors so it was easy to find a coordinating pink.
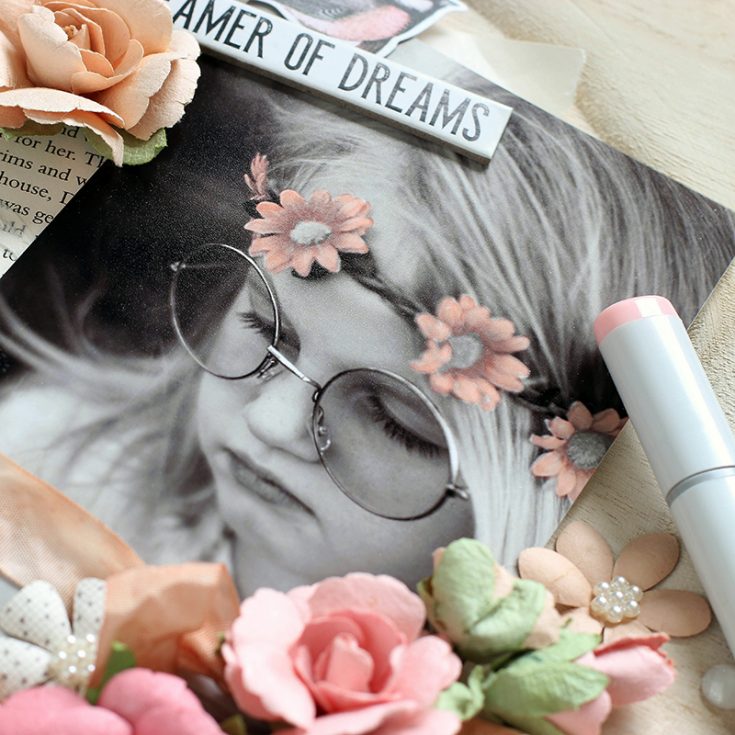
I love creating small clusters of items to balance my designs. This Prima Ephemera bird and Quote Chip work together with the few flowers to create that balance.
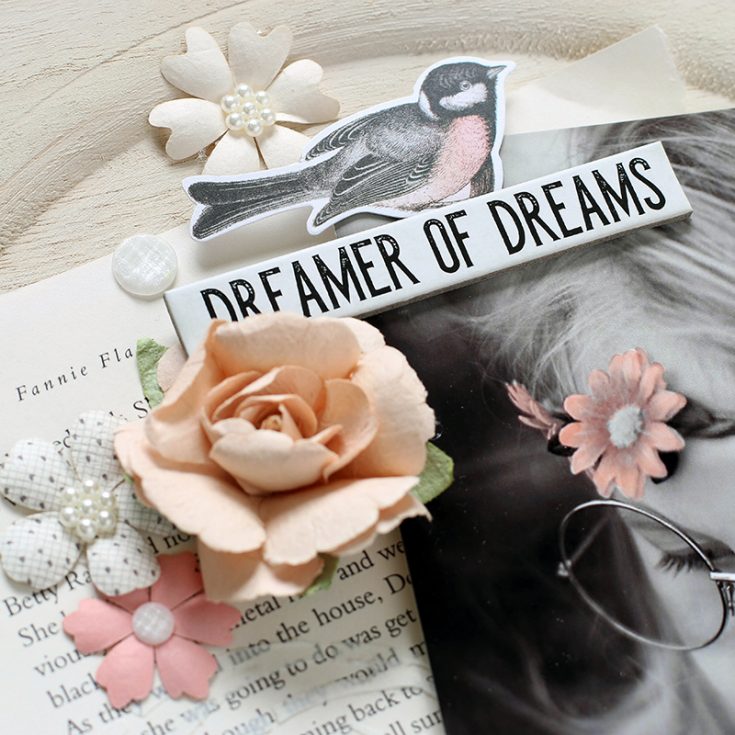
If you know me, you know that I love texture. I’ve used a StencilGirl swirl stencil with white paste on the book text to obscure it a bit and add a raised area.
I think this will make an excellent Mothers Day gift for Jasmine. Don’t you?
I’ve filmed a video of the whole process which you can view below or on our YouTube channel HERE.
Blog Candy Alert!! Follow our blog via email and comment on this post for a chance to win special blog candy!
I hope you have a delightful weekend filled with time to make something special too!!
|


