Tree Art Journal Page
Happy Sunday, friends! I’m so delighted to welcome the always lovely Anna-Karin Evaldsson back as a special guest on our blog to share some gorgeous art journaling. Please read on and enjoy!
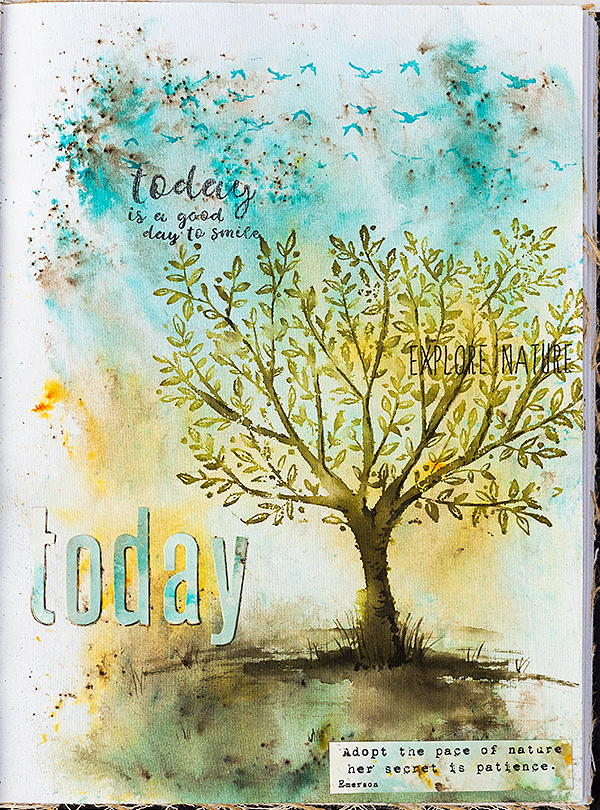
Hello everyone! I am so happy to be here today, and I am going to share an art journal page with you, which I really enjoyed doing. The techniques can be used for other types of projects too, such as cards or scrapbooking layouts.
I love trees and when I saw the SSS Brushed Branches stamp, from the Friends Collection, I knew I had to have it. It is a big stamp and the tree works perfectly for the focal point of a project. The page was done in my Dina Wakley Media Journal, working on a cotton rag watercolor paper page. There are also craft, canvas and burlap pages in the journal. I used Paper Arty’s Infusions Colored Stains for the background and Distress Ink for the watercolor stamping. Let’s start.
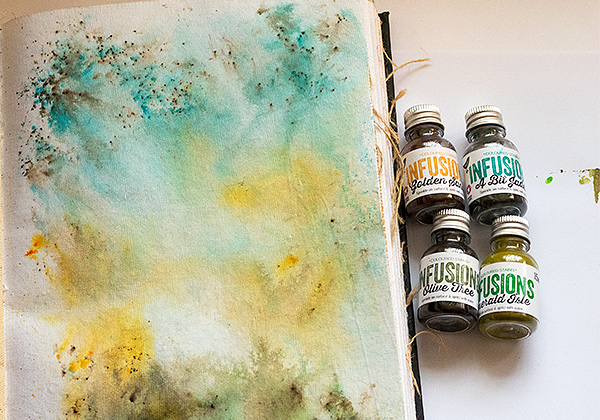 Start by misting the paper quite heavily with water. Sprinkle a very small amount of Infusions Colored Stains into the water. I have pricked a hole in the lid of the bottles so that they work like a salt shaker. Mist more water on the page to help the powders blend. The walnut crystals in the Infusions powders take longer to dissolve and if you want less brown you can dab them off with a paper towel, which I did particularly where I planned to stamp the tree.
You can also do the background with watercolor paint.
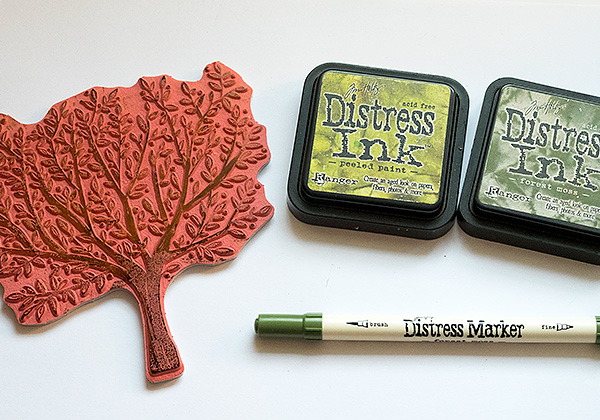 When the background is dry, ink the stamp with Peeled Paint and Forest Moss. I used a Forest Moss marker to color the branches in the areas inked with the lighter green ink.
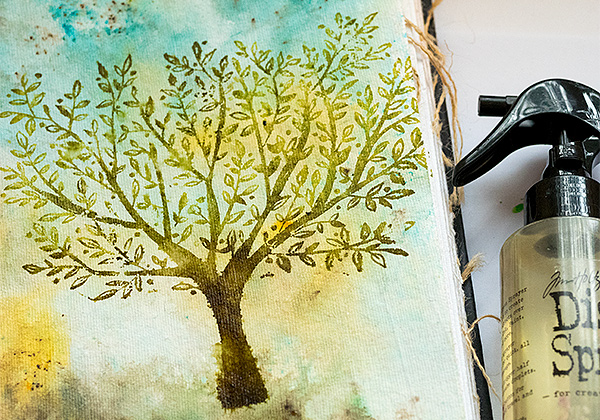 Mist the stamp quite heavily with water (at least five mists) and press onto the background. Leave the stamp in place for a few seconds to give the ink time to transfer.
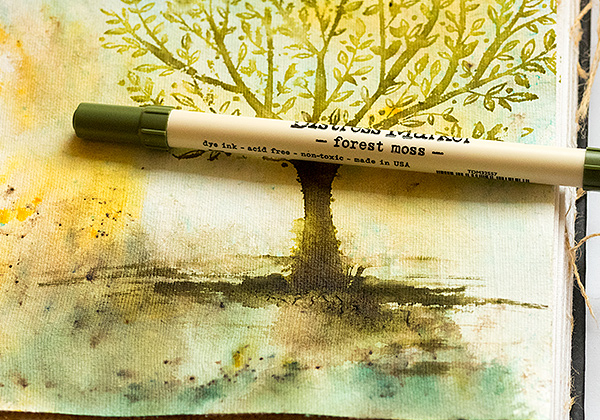 I used the Forest Moss marker to ground the tree to the page and dissolve most of it with water and a paint brush. Leave to dry.
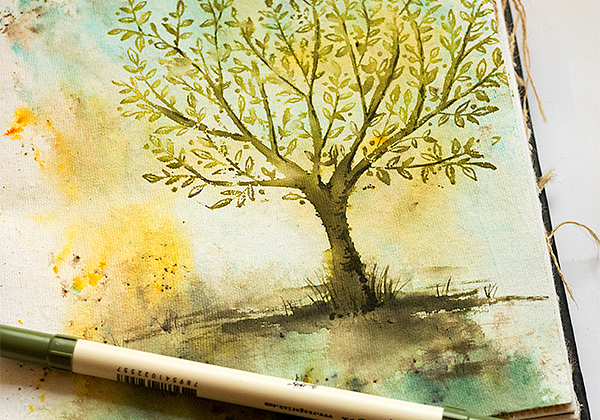 Use the marker to add grass here and there. I also added shadows on the tree and made some of the small branches and twigs darker.
 Color a piece of watercolor paper with A Bit Jaded Infusions and die cut a title from it, using Tim Holtz’s Sizzix Block Talk die. I was planning to have used the Deco Alphabet, but couldn’t find it. Of course, I found it right after I finished the page.
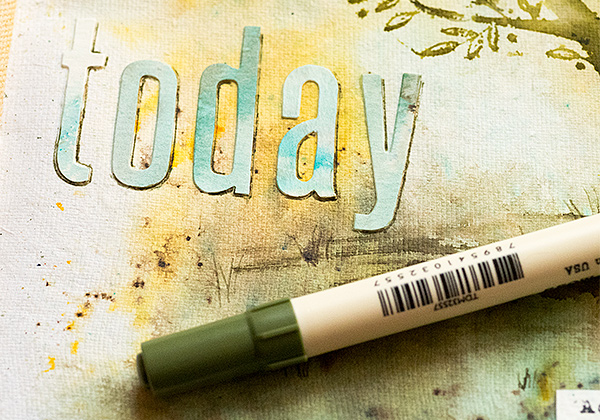 Glue the title to the background and add a shadow with the Forest Moss marker.
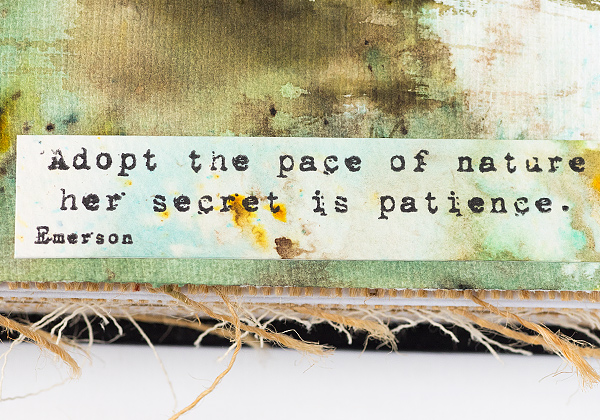 Stamp a quote from the Simon Says Stamp One With Nature set, on another piece of Infusions colored watercolor paper.
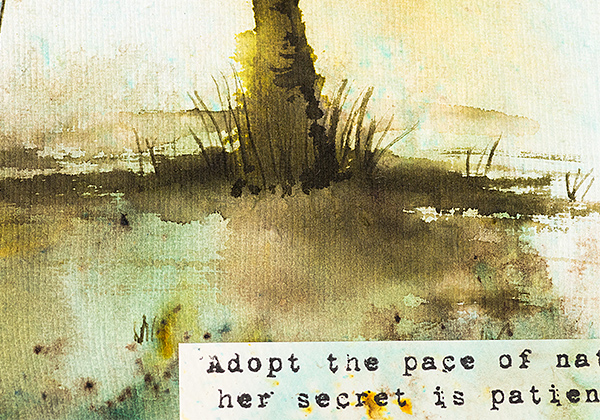 Grounding the tree to the ground makes a big difference and prevents it from looking like it is floating on the page.
 The title letters were quite light and the shadow makes them stand out better.
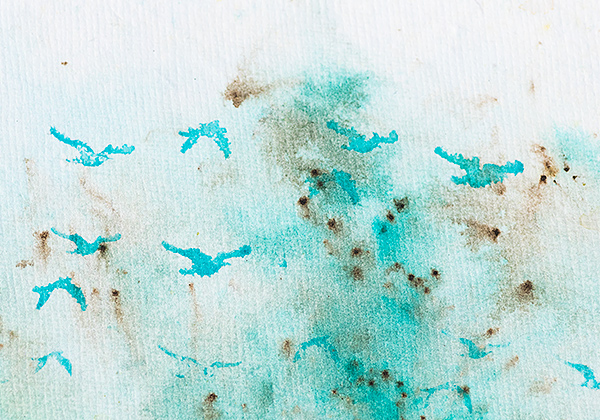 Ink the birds from the Darkroom Door African Trees set with Mermaid Lagoon, mist with water and stamp in the sky.
 I also stamped a sentiment from the SSS Uplifting Thoughts set.
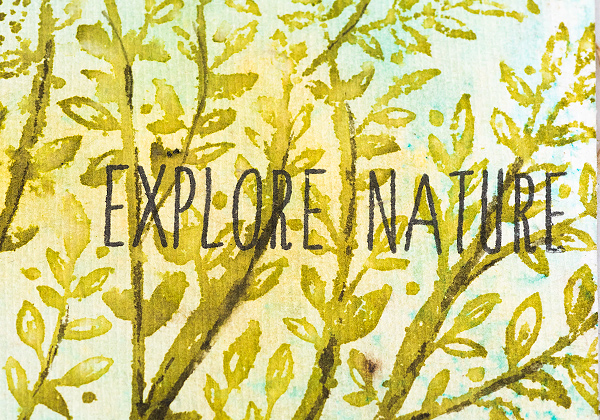 Another sentiment was stamped among the branches of trees, this one is from One With Nature.
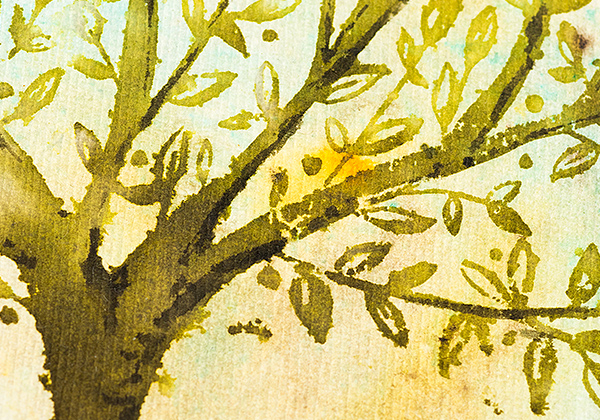 Here’s a close up of the Distress Marker shadows added to the tree after it was dry. It is easy to do and makes a big difference.
Thank you so much for looking at this tutorial! I hope it inspired you to try out watercolor stamping and Infusions Colored Stains.
Happy crafting!
Anna-Karin
SUPPLIES:
|


Thanks so much for reading and thanks to Anna-Karin for being our guest!

Blog Candy Alert!! Follow our blog via email and comment on this post for a chance to win special blog candy!
Monthly Mail Art with Kristina Werner – March 2018
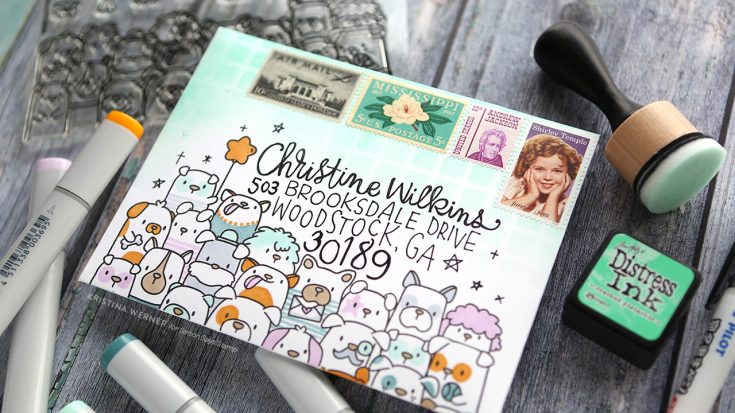
Hello, all! Kristina Werner here with another Monthly Mail Art! For this month’s envelope, I thought I would create a scene using the cute dogs from Mama Elephant’s The Dog’s Woof stamp set.
Because I wanted to color the scene using Copic Markers, I opted to create my own custom envelope out of Neenah Classic Crest Solar White cardstock (I know this paper works well with Copics). I used the We R Memory Keepers 123 Punch Board to create the envelope.
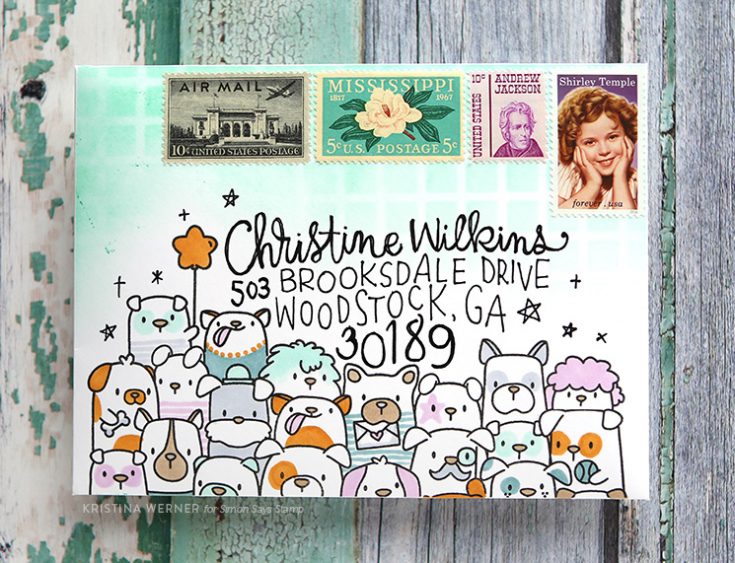
I kept the coloring very simple by only doing flat, solid areas of color. Super easy and quick! And with such a large scene to color, fast coloring is appreciated. :)
I finished off the envelope with a bit of ink blending using the Grid stencil from Simon and Cracked Pistachio Distress Ink. Christine’s mailing address was added using an extra fine Pilot Envelope Addressing Pen.
NOTE: Address used with permission.
Thanks for stopping by! I hope you enjoy the envelope.
Supplies
|


Happy National Craft Month!

Did you know that March is National Craft Month? As your one-stop shop for all things creative, you can imagine that we are seriously STOKED to celebrate! ??????
It’s safe to assume that you love paper crafting if you read this blog, but what other fun and creative things do you do? Do you knit, embroider, paint, draw, letter, or whittle? Have you ever made a quilt, jewelry, a wreath, or tried paint pouring? We know that our community is filled with creative souls, and we are truly inspired by seeing all of the fabulous creations made by YOU!
To celebrate National Craft Month, we would LOVE to see what you are working on—no matter what kind of craft it might be!
What’s in it for you? Loads of inspiration from fellow crafters and the chance to win a $100 gift card to the Simon Says Stamp store to buy more fun things to fuel your artistic soul. And you can’t beat that!
Add your project(s) to the InLinkz below so that we can see what you are working on. We’ll choose one random winner who will receive a $100 gift card to the Simon Says Stamp store!!! ? Deadline is 11:59 pm on March 31, 2018.
Want another chance to win? Head to our Facebook page to get in the game!
We can’t wait to be inspired by you!


