Studio Monday with Nina-Marie: Puperoni Gift Cards

Hello creative friends, it’s Nina-Marie here with you today and I am thrilled to be back with a brand new, Studio Monday video!
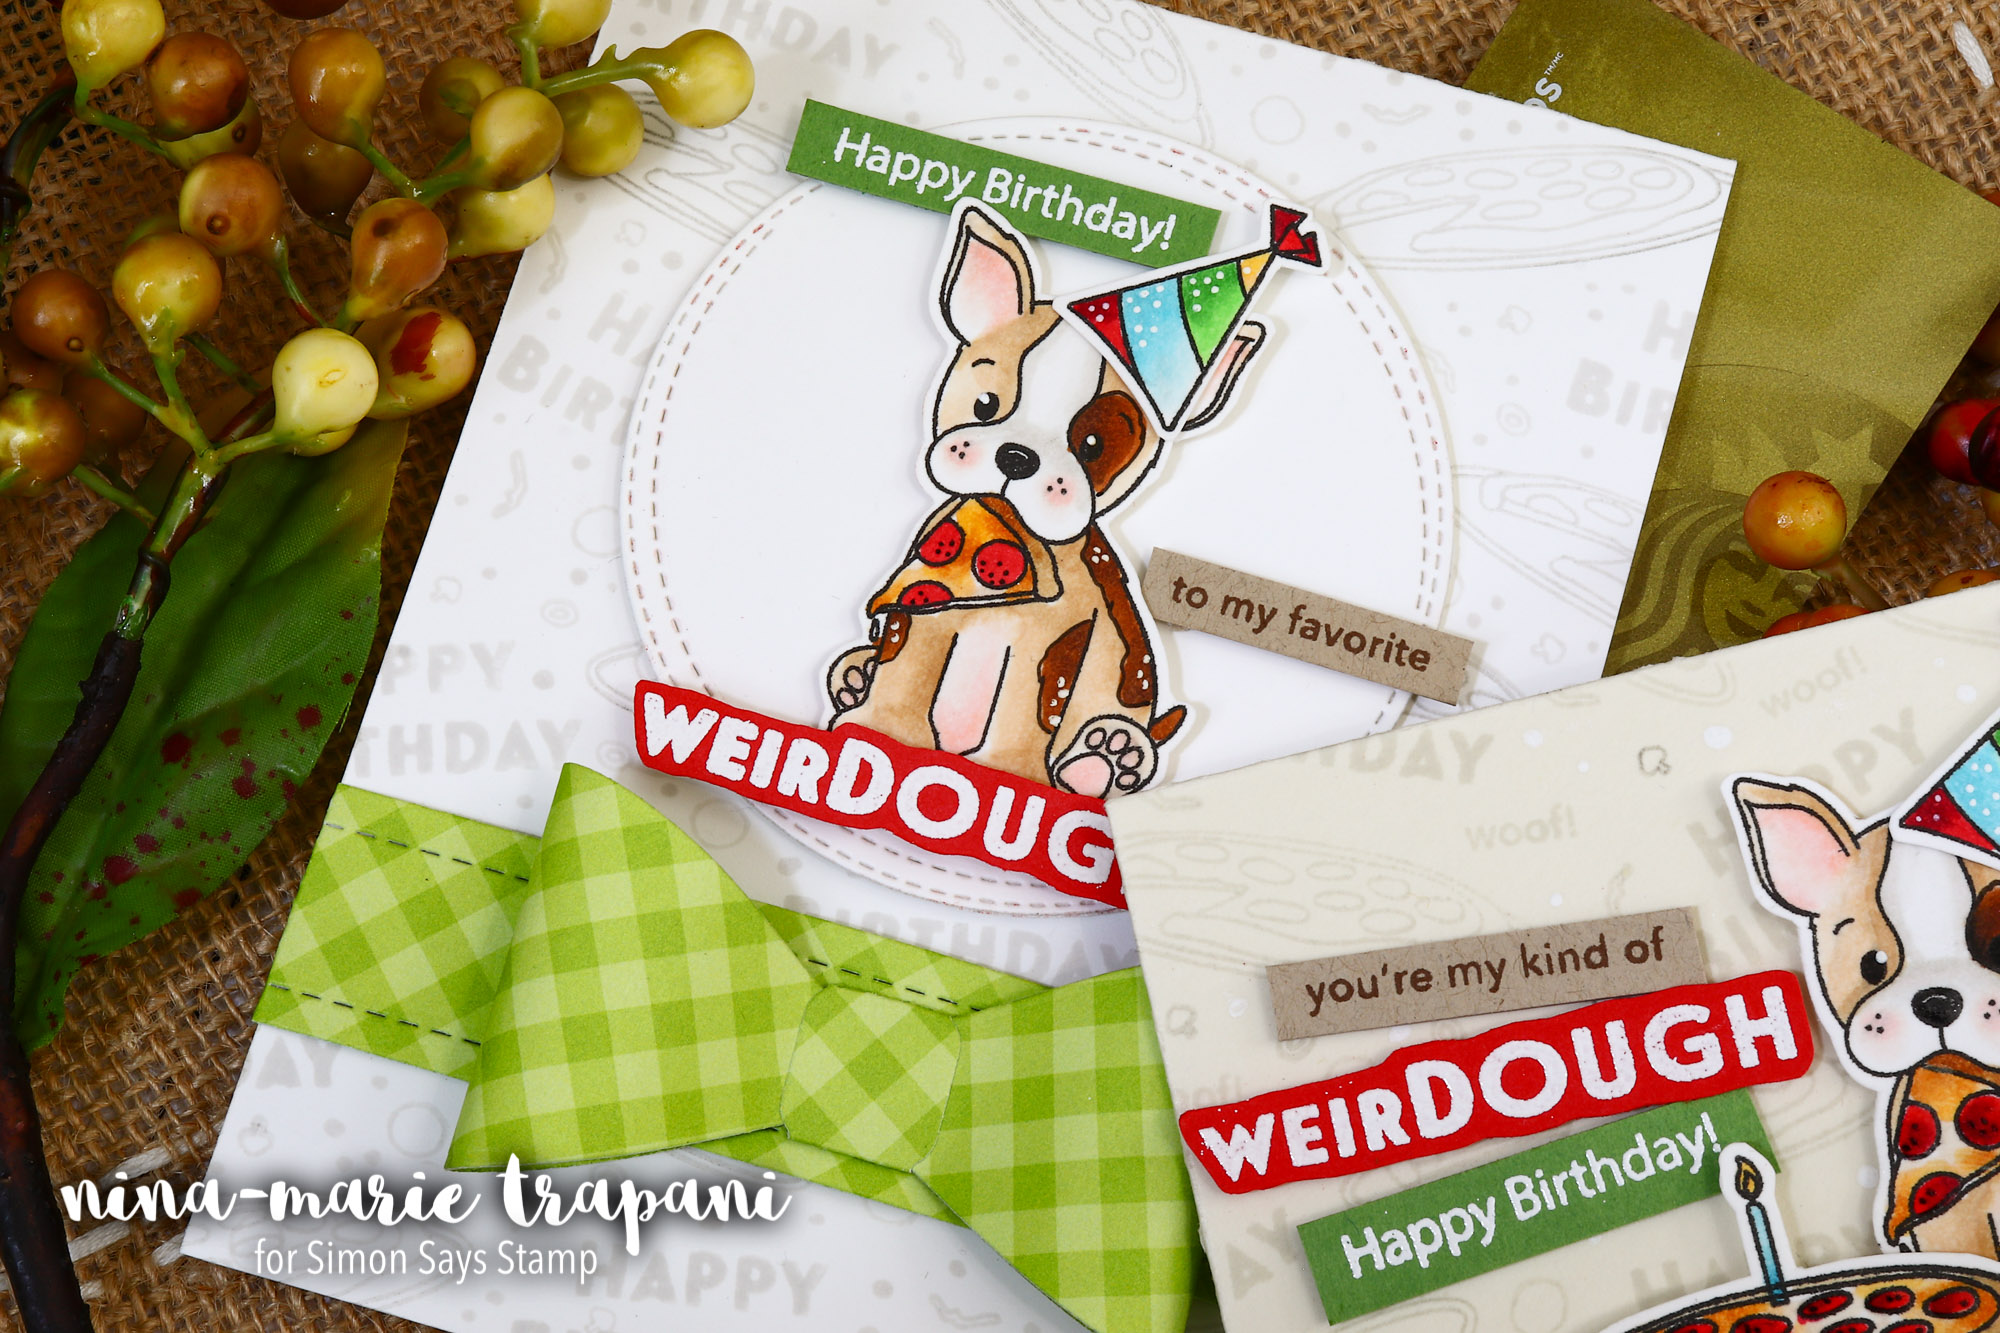
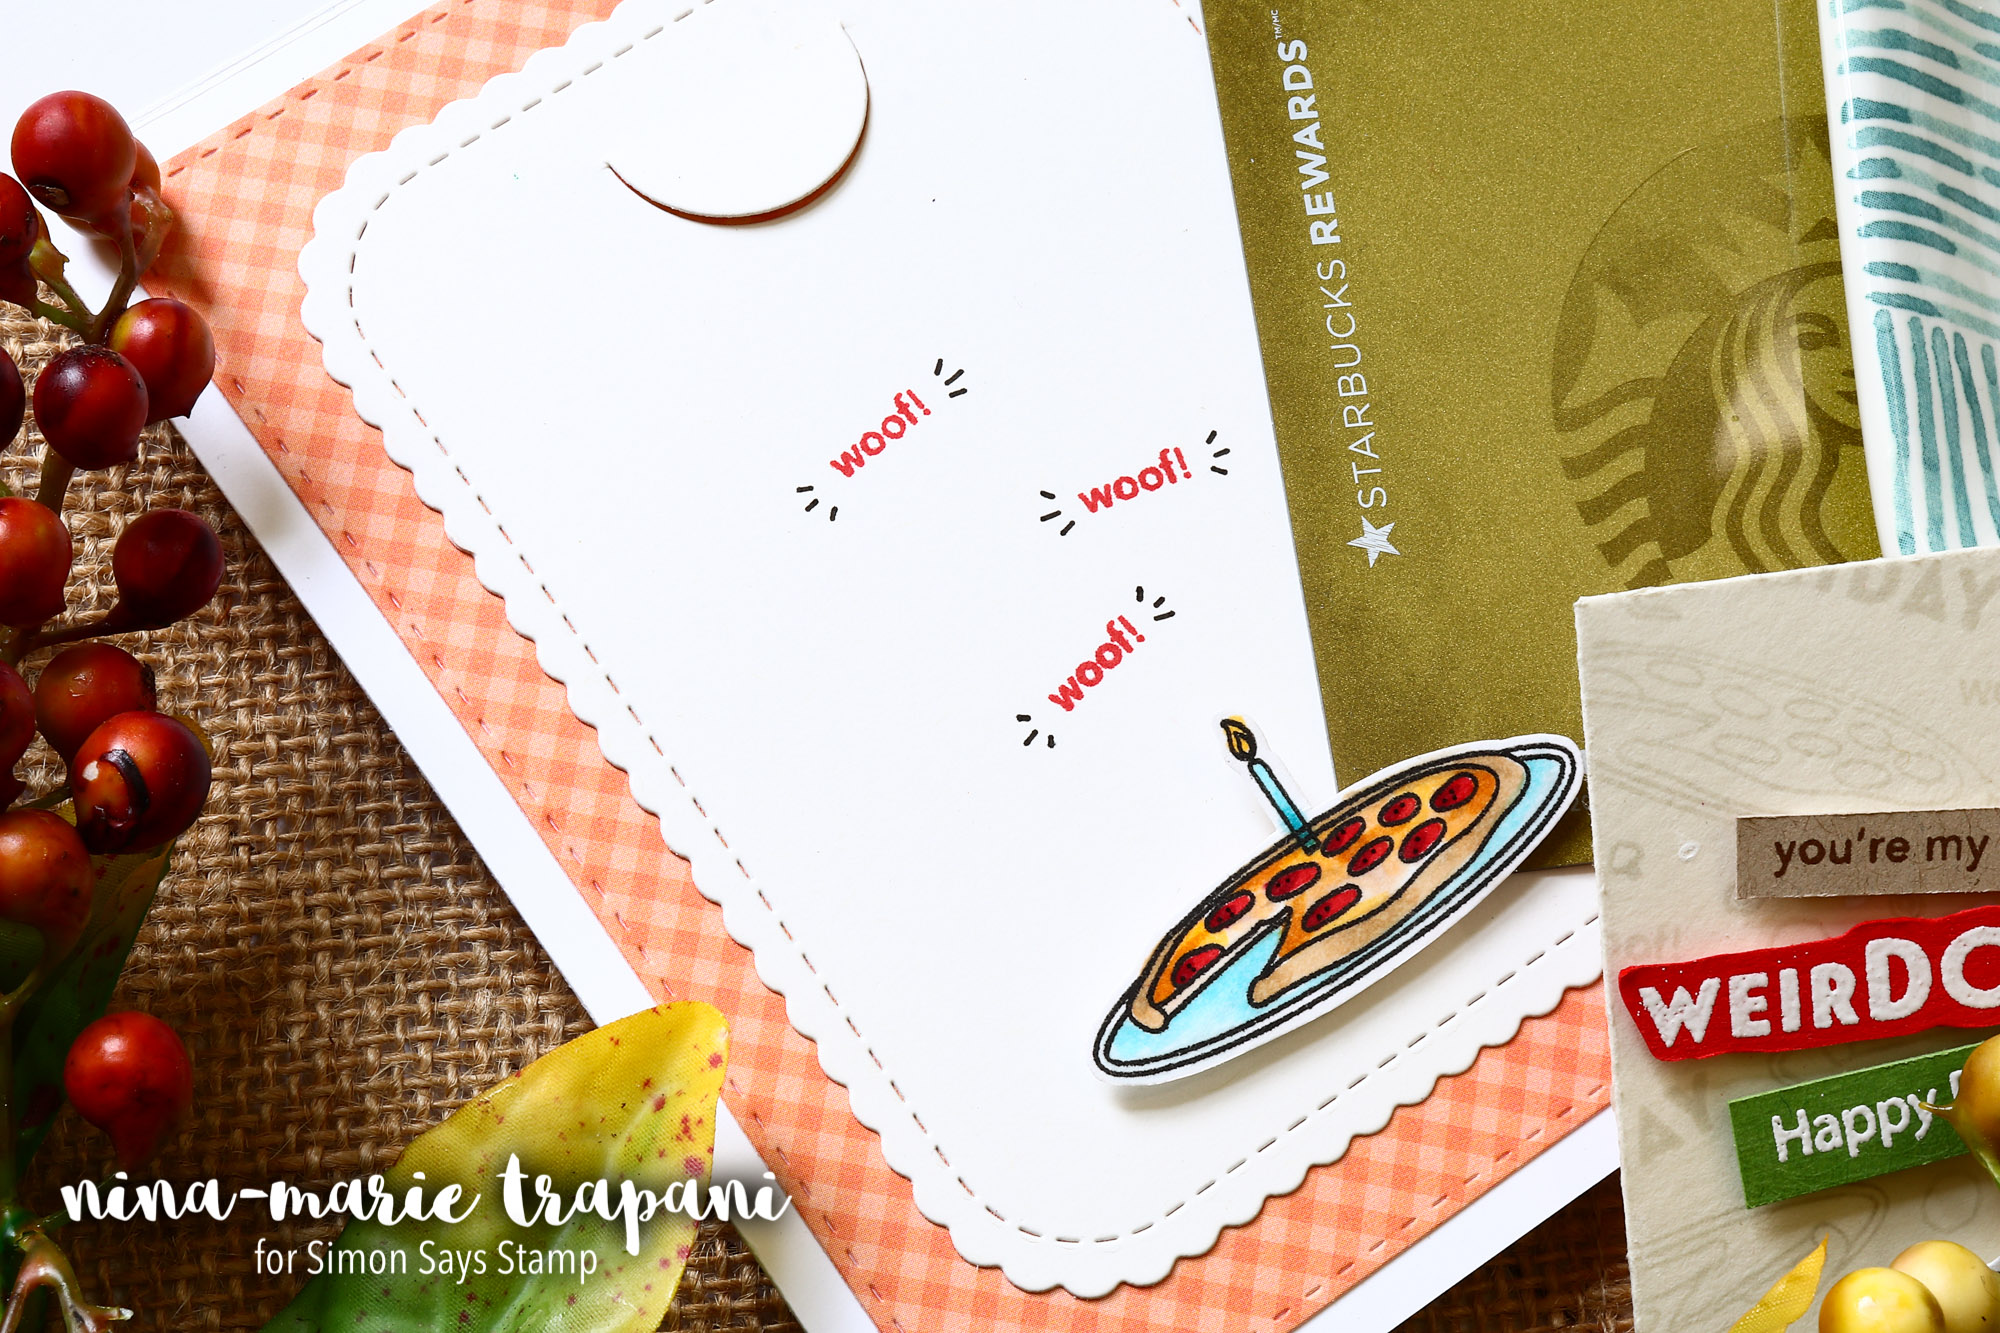
This week I am featuring our playful Favorite Puperoni birthday stamp set, and two ways to make gift card holders! Many of you probably received this Favorite Puperoni set last year when it was our birthday gift to you, but now it is available for individual purchase!
One of the gift card holders I made utilizes the cute, Petal Envelope die! Look how sweet this perfectly-sized, gift card envelope looks decorated with the images and sentiments from Favorite Puperoni!
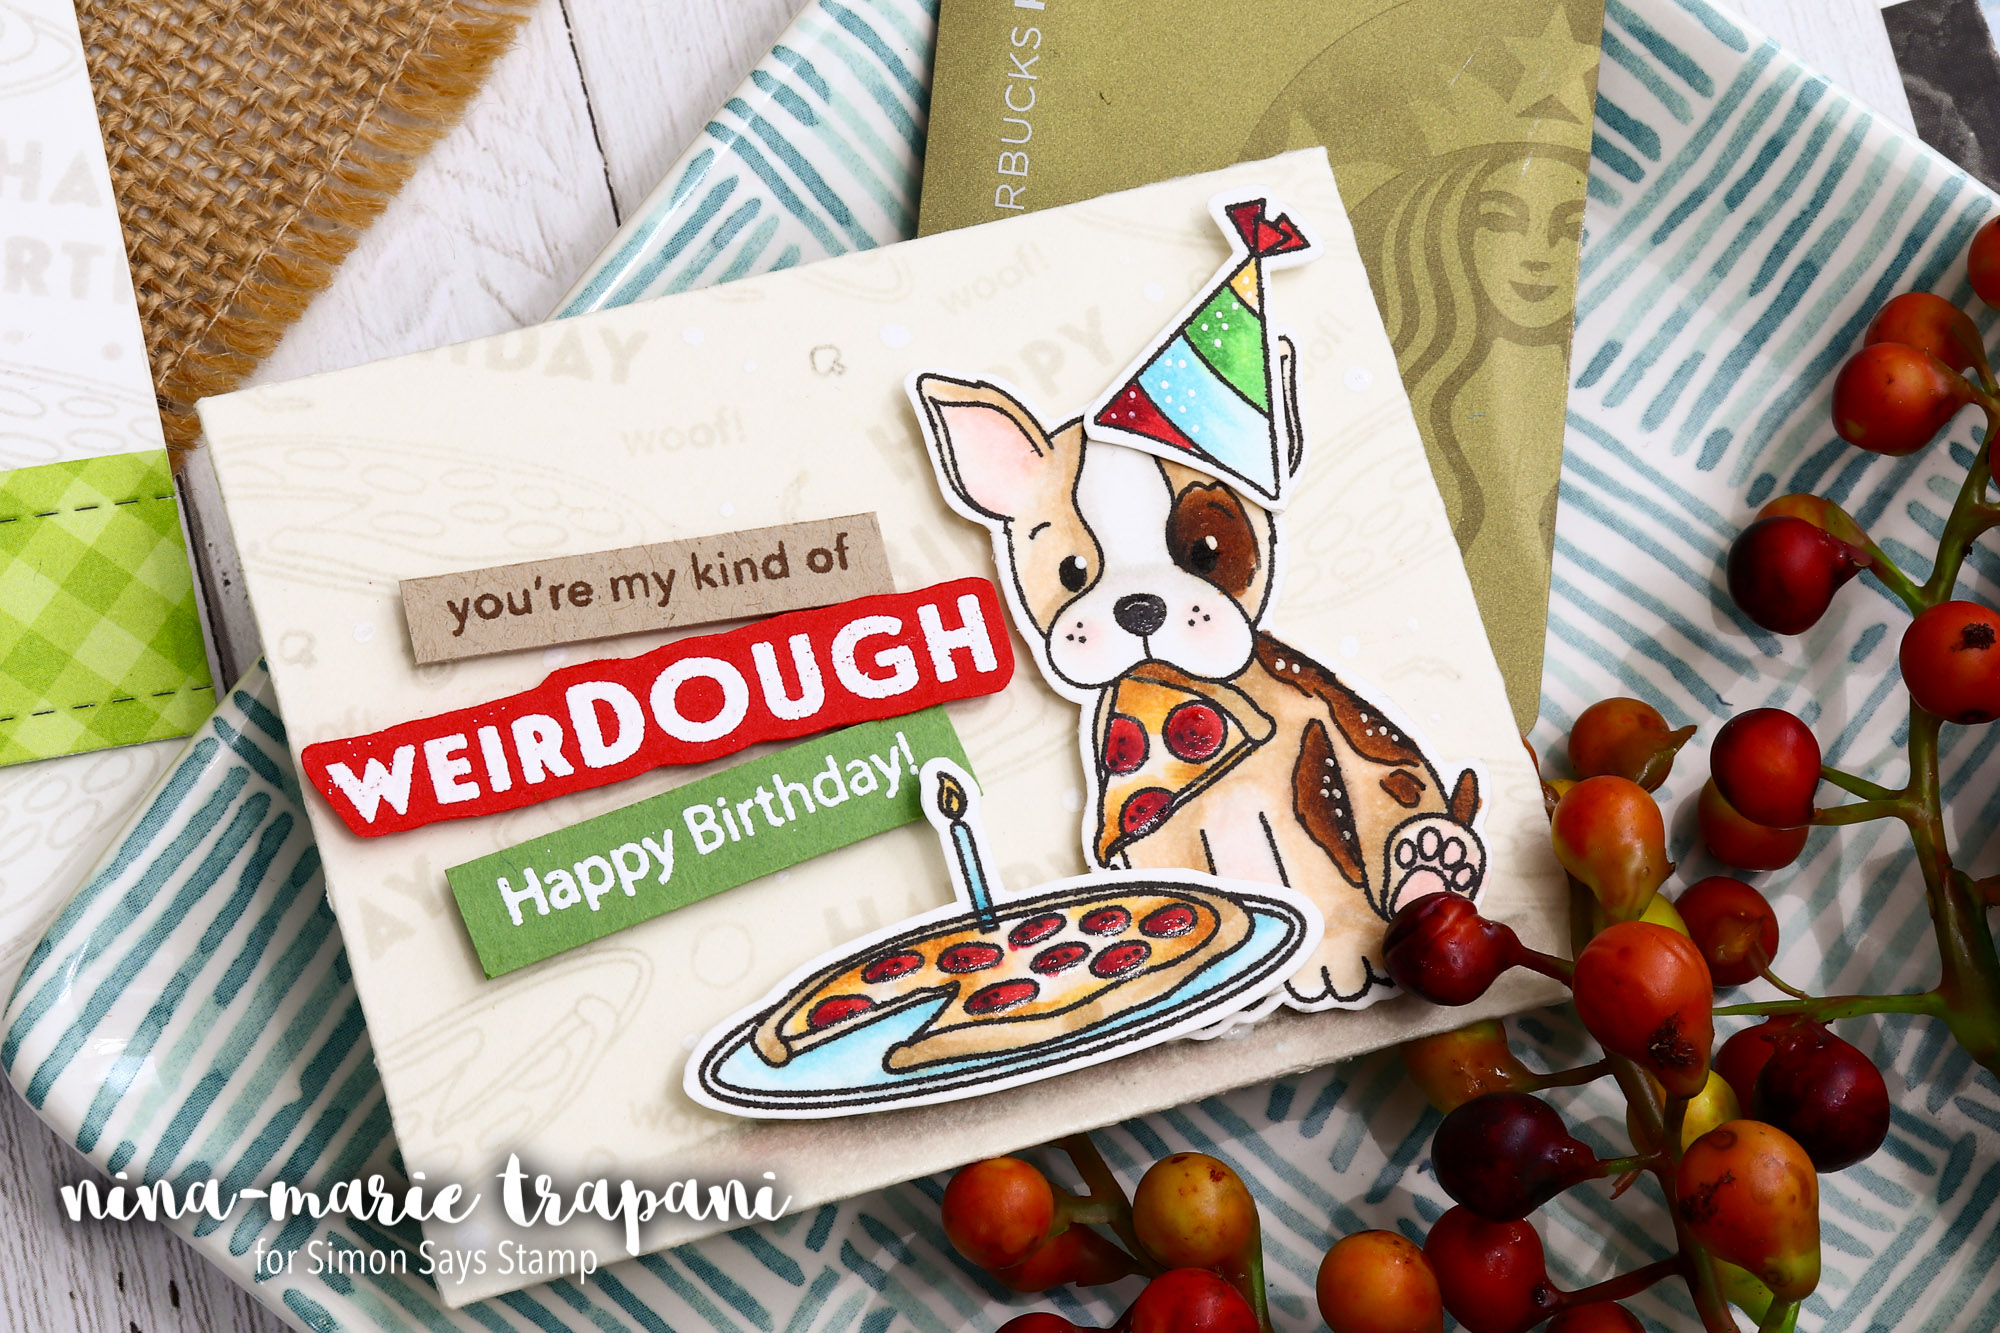
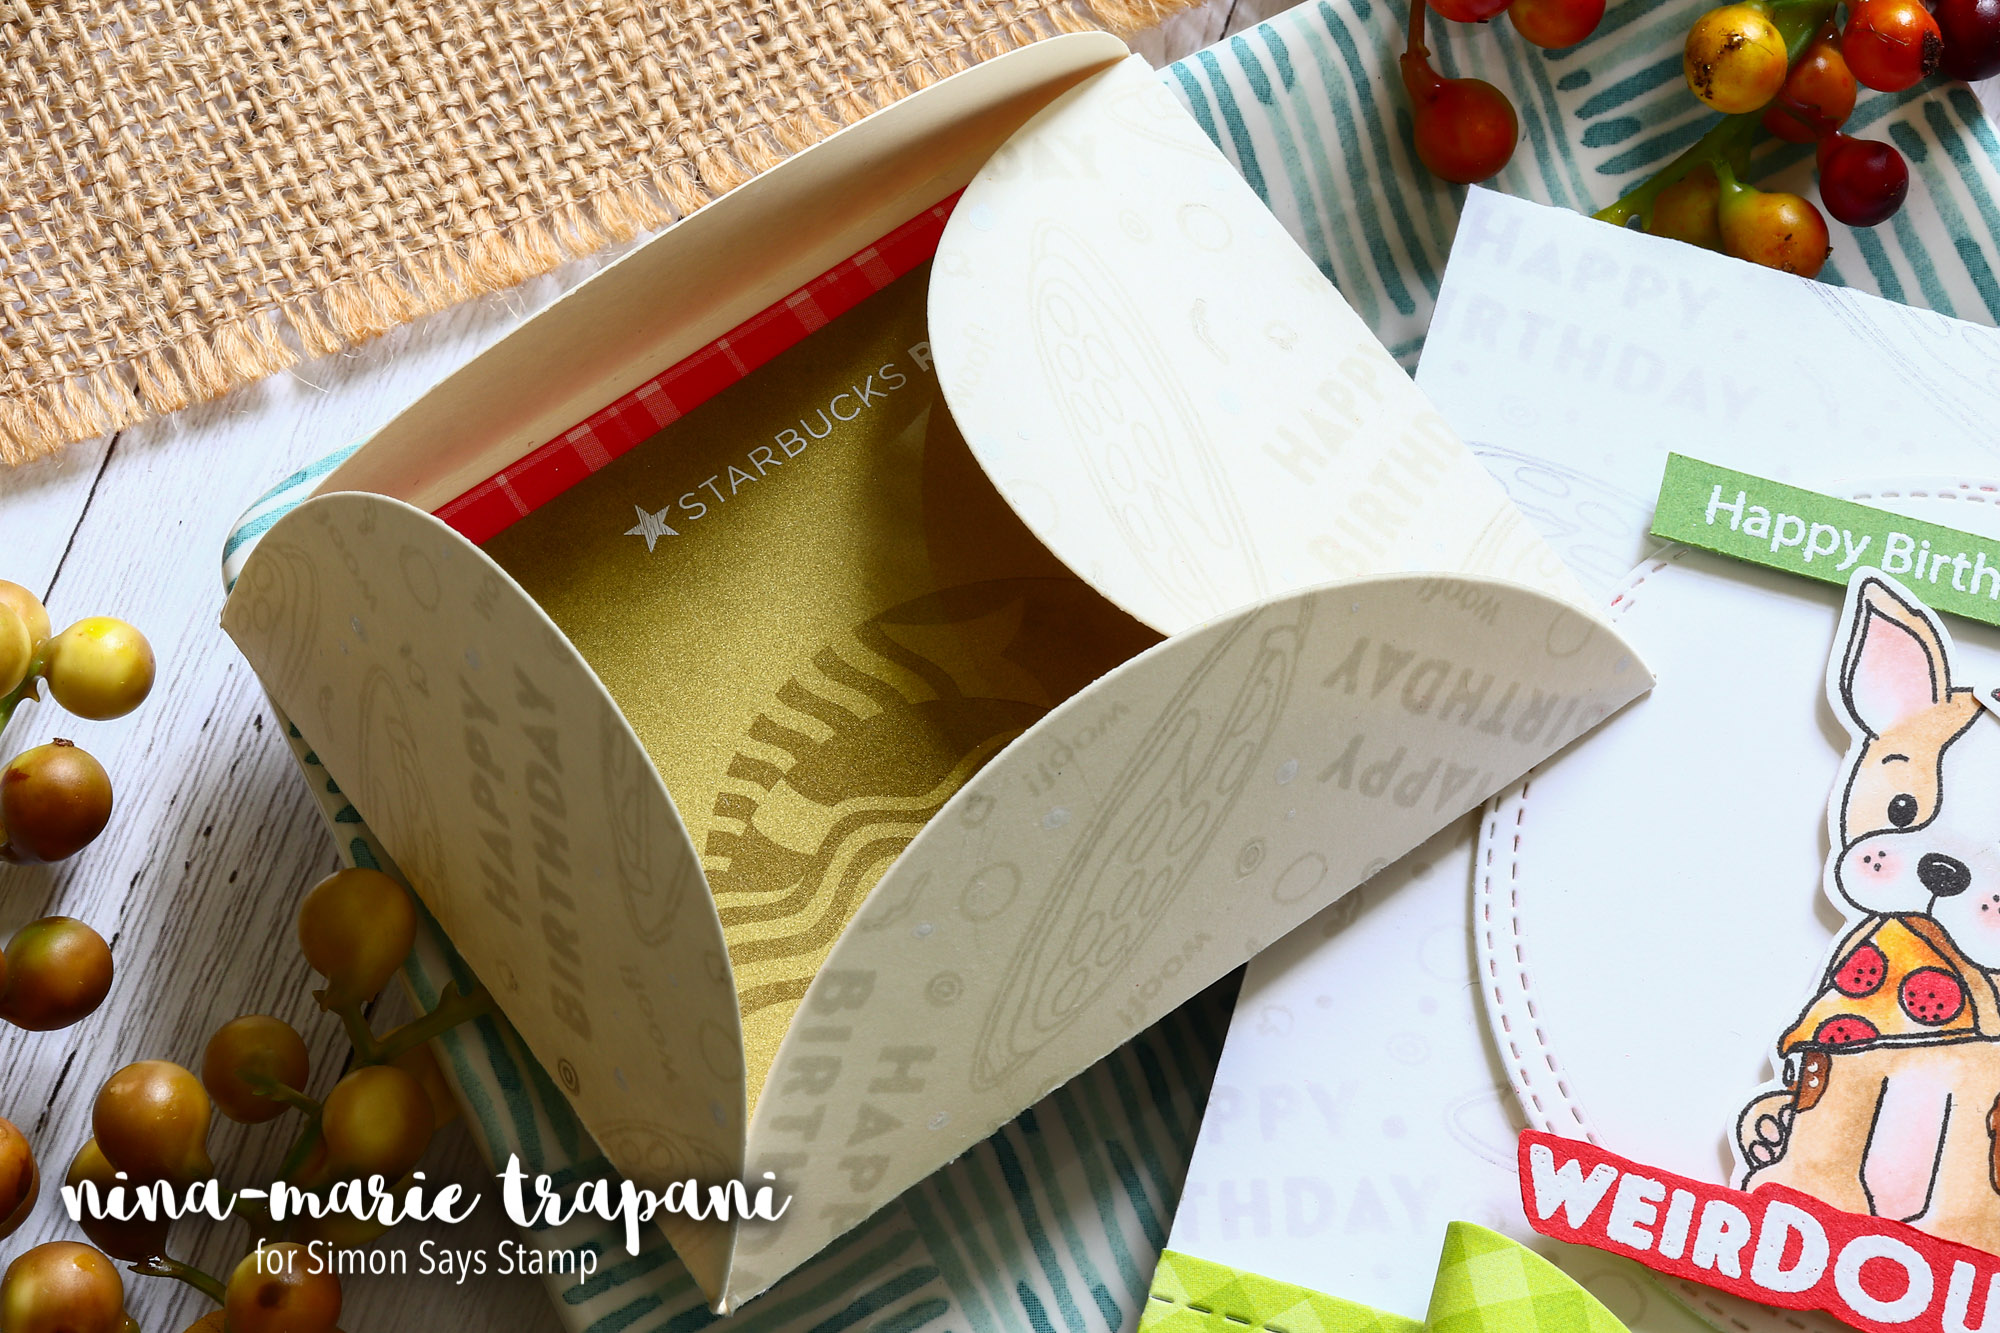
And have you tried out our Prettied Up Gift Card die set? This set can be used in so many different ways, making it a versatile gift card packaging option. I used all the components of the die set in my other gift card holder that I created today!
I hope you will watch the video below to see how I created both of these fun, birthday gift card holders! Thanks so much for stopping by; I will see you next week with brand new inspiration to share!
WATCH THE VIDEO
SUPPLIES
|


Blog Candy Alert!! Follow our blog via email and comment on this post for a chance to win special blog candy!
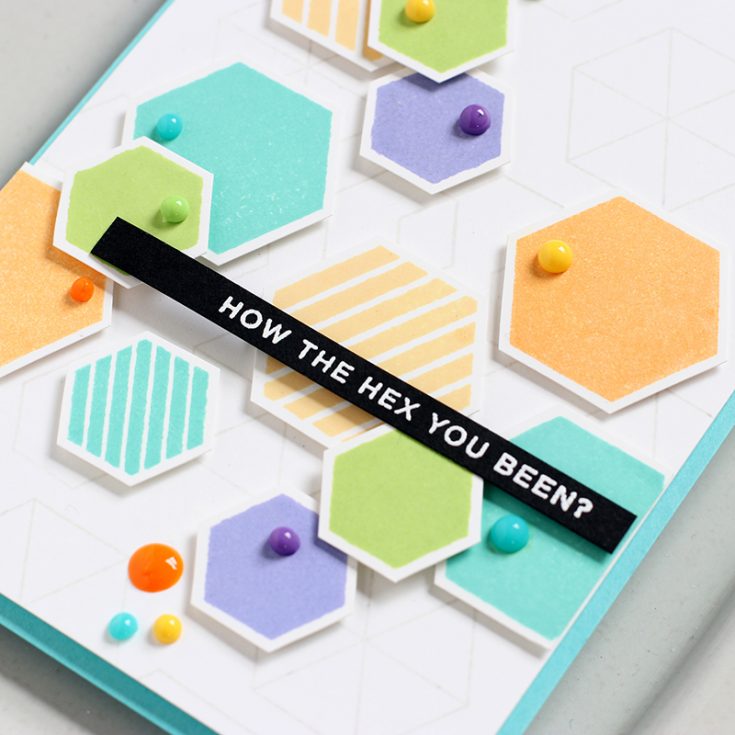
Color Coordinates with Shari Carroll

Are you ready for some fun Summer color? It’s Shari here with a delightful combination for my Summer Mix Color Coordinates!!
I’ve chosen cool colors with purple, blue and green hues and paired them with warm tones of orange and yellow.
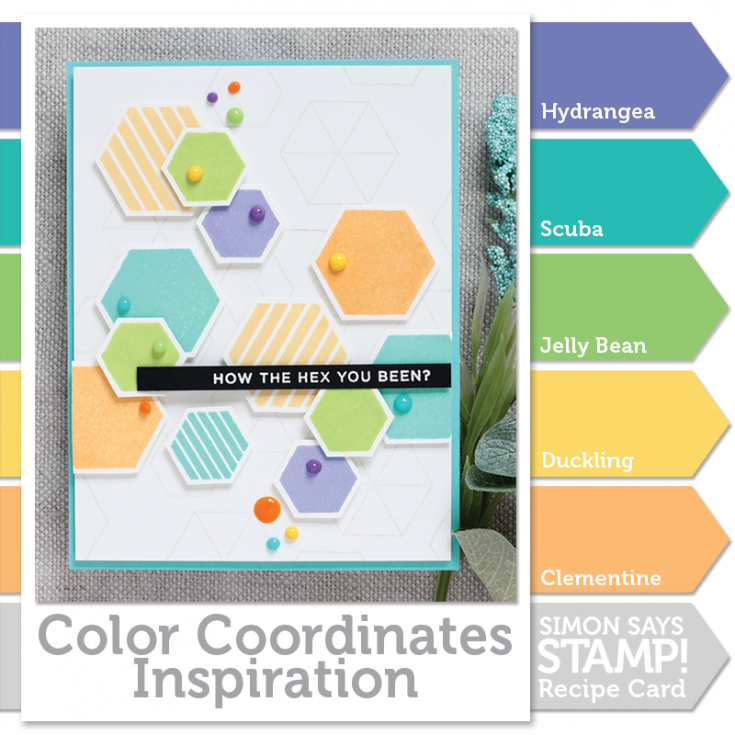
I’ve used the Simon Says Stamp inks in Hydrangea, Scuba, Jelly Bean, Duckling and Clementine. I also snuck in a little Fog to stamp my backgound.
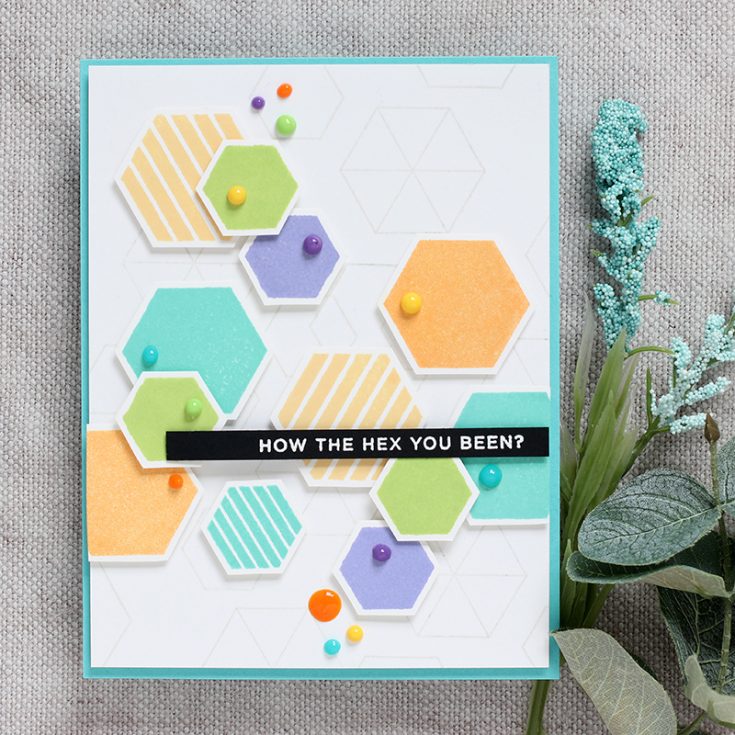
I stamped several Hex images from Cath Z’s Hex Yeah stamp set using both sizes of patterned and solids. I also stamped the outline images from the set to create a subtle background.
I have filmed a video which you can view below or on our YouTube channel HERE.
In March, I created a PDF of our past recipes that you can print out HERE. I’ve also created an add on page of todays recipe HERE. I hope you’ve enjoyed this fresh color combination and card inspiration. Enjoy!!
Blog Candy Alert!! Follow our blog via email and comment on this post for a chance to win special blog candy!
|


Doodling with Debby: Spotlight Ink Blended Background
Hi friends! Happy Saturday!! Welcome to the latest edition of Doodling with Debby with the always fabulous Debby Hughes! Debby is utilizing some brand new goodies from our Sending Sunshine release! Be sure to watch the video and enjoy!

Hi, it’s Debby here for my monthly Doodling With Debby video feature on the Simon Says Stamp blog.
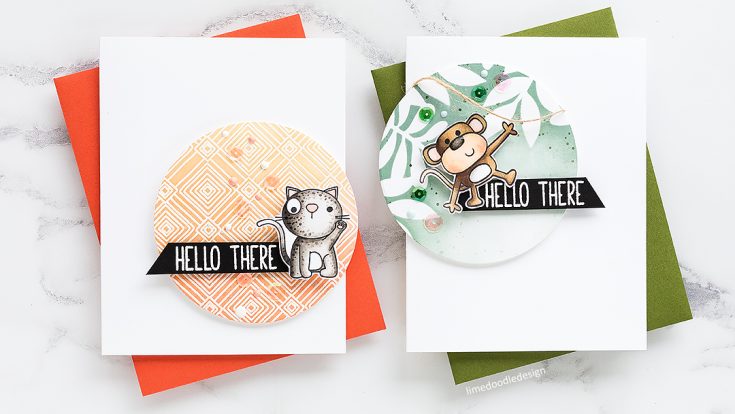
I have had a lot of requests for quick and easy cards, and I hope today’s two cards, which use a spotlight of ink blended background to draw the eye to the cute critter focal point, fit the bill. I’m going to be using three main products for these cards – the cute critters from the Hello There set, the large cling mounted background Deco Diamonds and the Leafy Frame stencil. All three products have just been released today as part of the Sending Sunshine release from Simon Says Stamp.
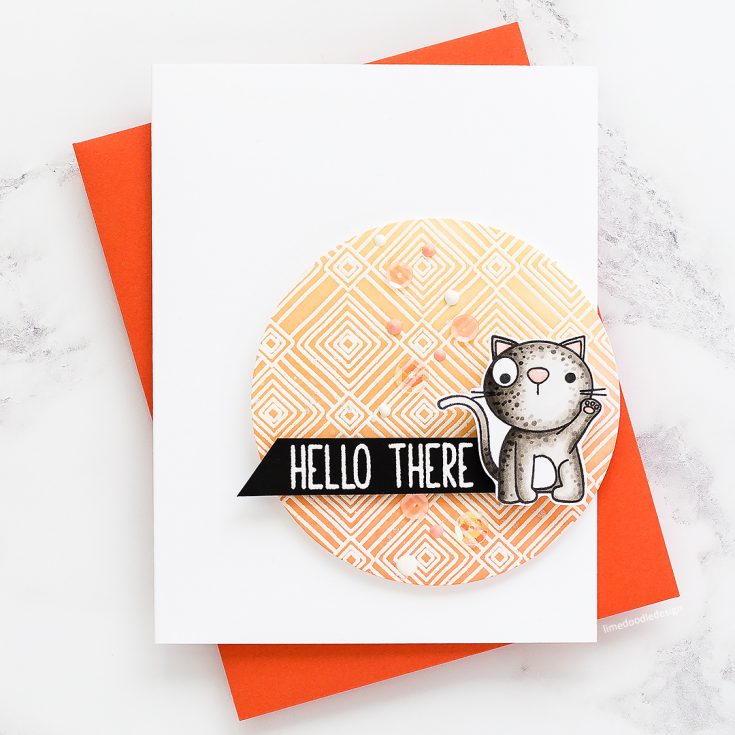
For my first card, I stamped the large background Deco Diamonds set in Clear Embossing Ink on Neenah Solar White 80lb card, sprinkled with White Heat Embossing Powder and heat set. I blended a combination of Rosie Cheeks, Melon and Duckling inks and the heat embossed lines resisted the ink to reveal a beautiful pattern. I splattered the panel with a solution of Perfect Pearls to give sparkly droplets along the lines of the pattern.
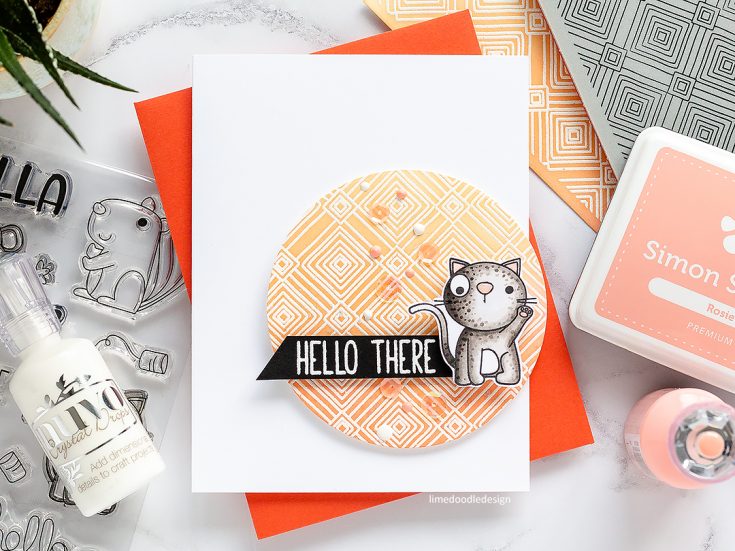
I die cut the panel with a Nested Circle die and then set that aside while I worked on the rest of the card. The new Hello There set has a bunch of cute critters with the original theme of the tin can and string telephone system that I had fun playing with as a child. However, I decided to keep these cards simple and so used just one cute critter on each card. I thought the cat looked like he was waving and would be the perfect companion to the Hello There sentiment. I stamped the cat in Intense Black Ink and colored with Copic markers before fussy cutting.
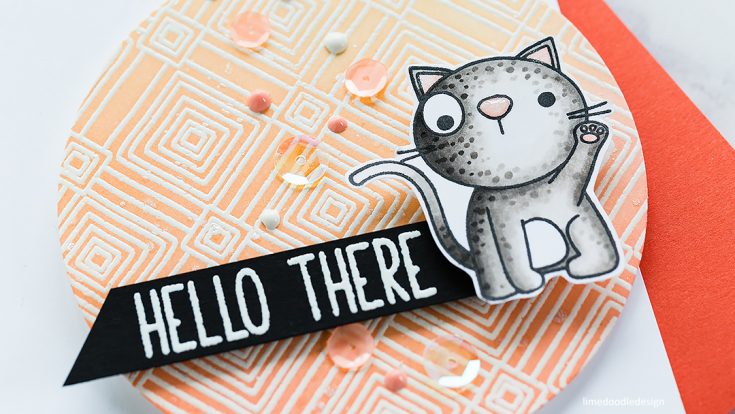
For the sentiment, I stamped the Hello There in Clear Embossing Ink on Black card, sprinkled with White Embossing Powder and heat set before trimming to a banner and cutting one edge at an angle.
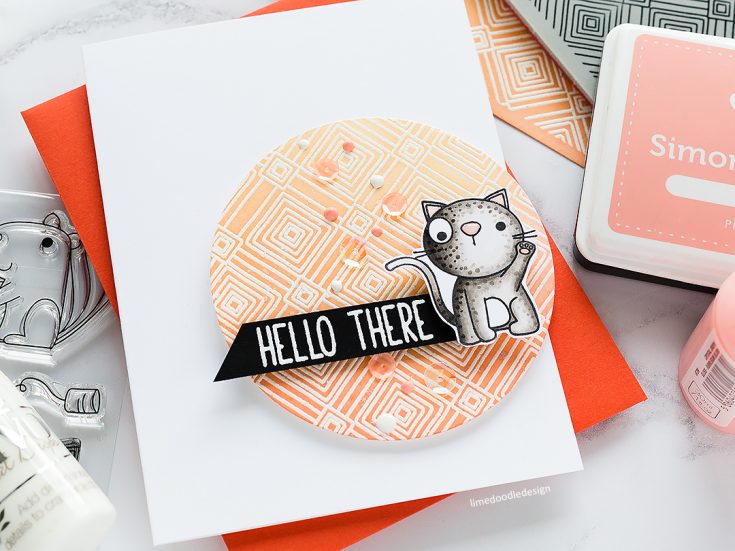
I compiled the card using foam adhesive to attach the elements to a Neenah Solar White 110lb card base. I added Spectrum Noir Sparkle Pen to the cat’s ears and nose and coated the nose with Nuvo Crystal Glaze. Finally, I added Neat & Tangled Sherbet and Darice sequins followed by Nuvo drops in Bubblegum Blush and Simply White. I paired the card with a Gina K Coral Reef envelope which pulled out the tones of the card perfectly.
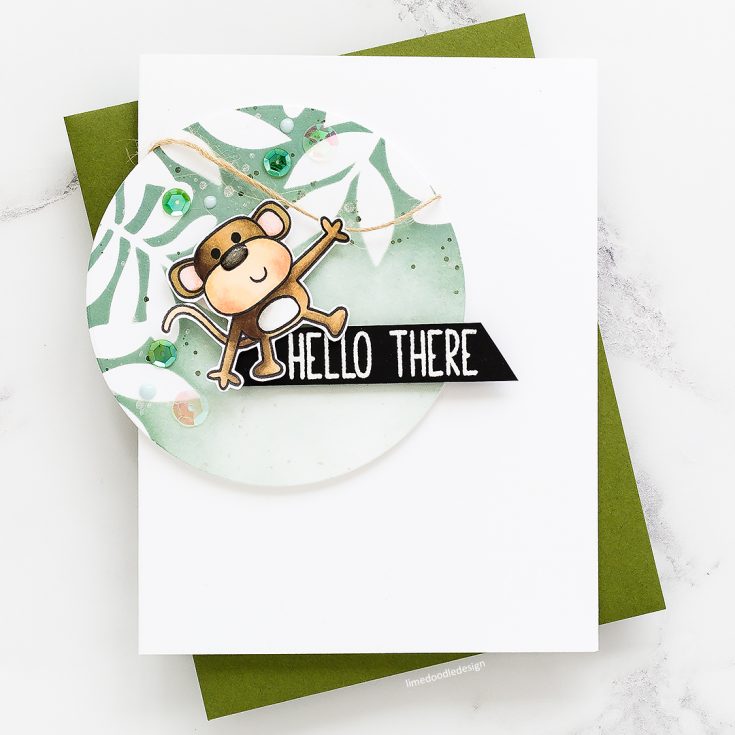
For my second card, I worked on the same design elements as my first card, but this time I used the Leafy Frame stencil for the ink blended spotlight circle. I blended Seafoam and Laurel Green inks over the stencil on a panel of Neenah Solar White 80lb Card. I splattered the panel with a solution of Perfect Pearls and also added a few paint splatters. I then die cut a piece from the panel with a Nested Circle.
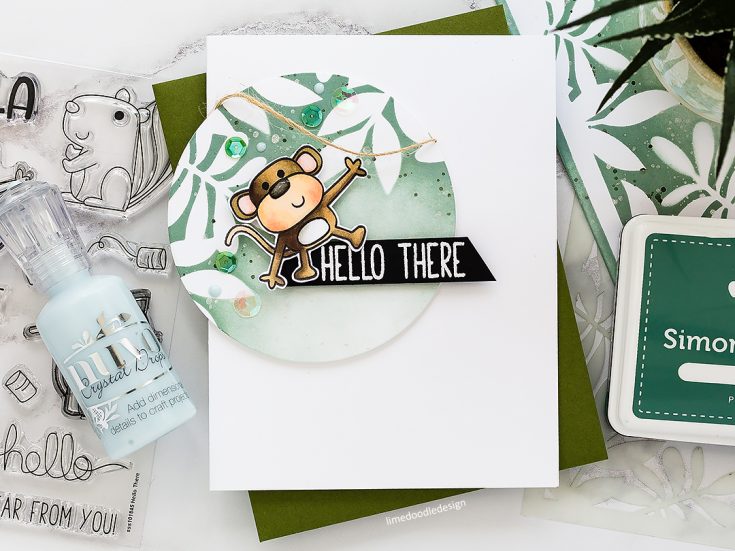
For this card, I used the cheeky monkey from the Hello There set and stamped him in Intense Black Ink on Neenah Solar White 80lb Card before coloring with Copic Markers and then fussy cut-out.
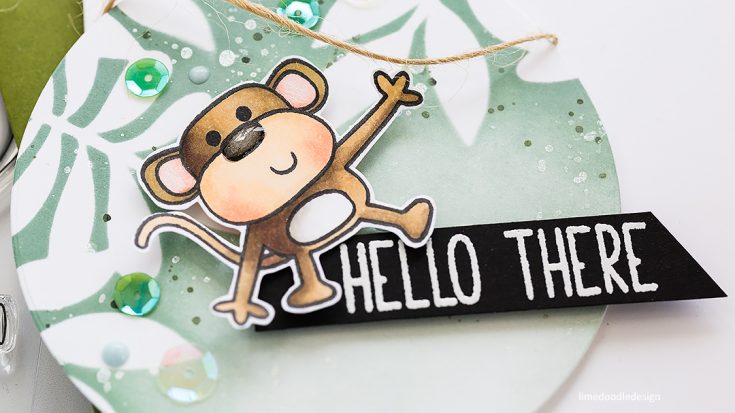
For the sentiment, I again stamped the Hello There greeting in Clear Embossing Ink on Black card, sprinkled with White Embossing Powder and trimmed to a banner with an angled end.
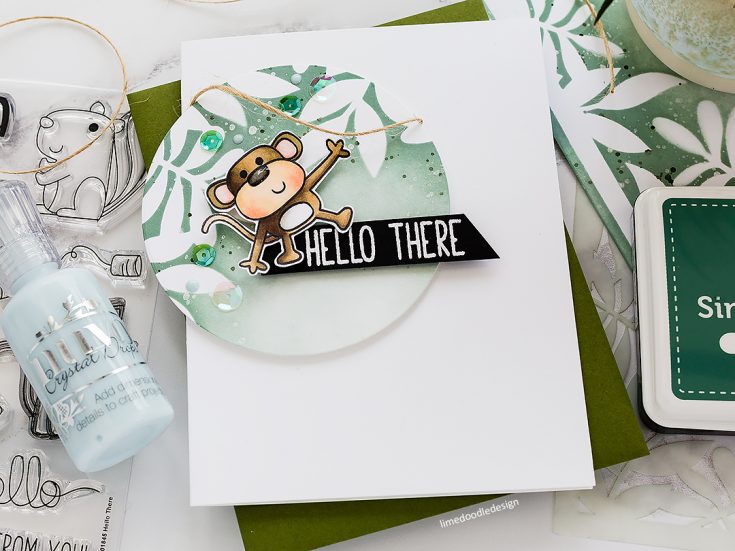
I compiled the card as before, only this time I added May Arts Twine for the monkey to hang on to. I adhered the twine to the back of the circle with tape and then used a glue dot on the back of the monkey’s paw to hold so he would hold on to the twine. I accented this card with sequins from Little Things From Lucy’s Cards and Darice along with Nuvo Duck Egg Blue droplets and paired the card with a Gina K Fresh Asparagus envelope.
Thanks for joining me today, and I’ll see you next time for Doodling With Debby.
WATCH THE VIDEO:
Watch below or in HD on YouTube.
SUPPLIES:
|


Thanks so much for reading and thanks to Debby for being our guest!


