Yippee for Yana: Spring Bunnies
Hi friends! Happy Wednesday! Welcome to the latest edition of Yippee for Yana with the immensely talented Yana Smakula! It was purely coincidence that Yana also chose to make a cute card with our Showers & Flowers stamp set! That bunny is just too cute and the cottontail makes it over the top! Be sure to watch the video for the full tutorial and enjoy!

Hi everyone, this is Yana Smakula and I’m excited to bring you another episode from my bi-monthly “Yippee For Yana” video series! In today’s episode, I’m making a bunch of Spring cards featuring an adorable bunny from the new Showers & Flowers stamp set from Simon.
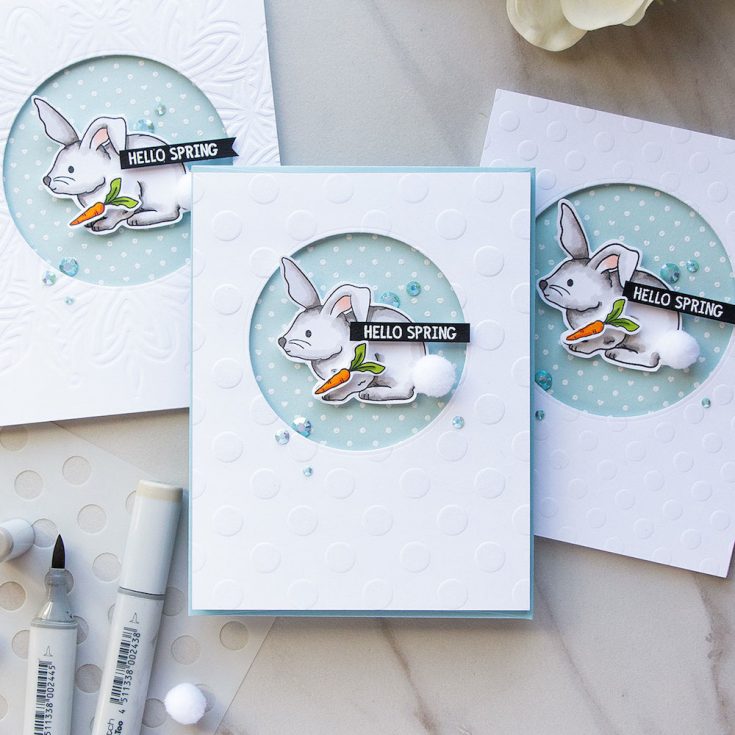
Often times when I want to make several identical cards I usually make one and, if I’m happy with the one I made, I make the rest. This is exactly the case with the card idea I am sharing today. I love to create in this way because it allows me to be sure the cards I’m making will turn out the way I like, this also allows me to step up the design if I want to and make slight changes to it if needed.
I started working on my cards by creating 4 ¼ x 5 ½” white cardstock panels out of Neenah 110 LB Solar White cardstock. I used my Spellbinders circle dies and die-cut openings in each. Next, I used stencils from Simon Says Stamp and added embossed details to each of my panels.
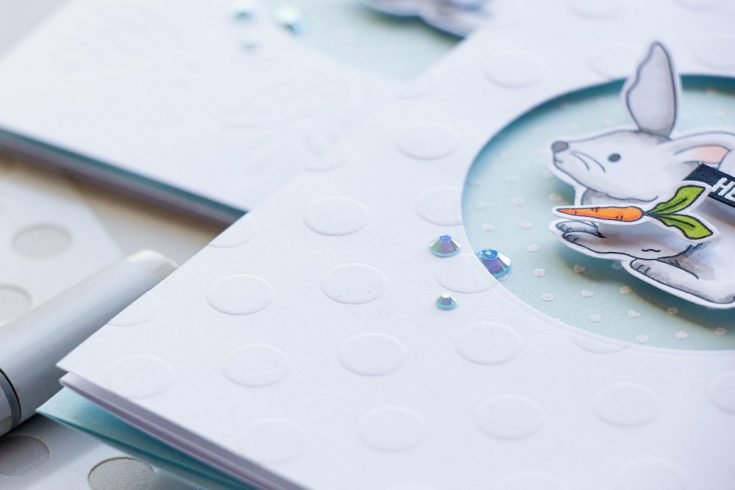
Not a lot of people know this, but you can easily emboss with any stencil. The Simon Says Stamp stencils work great for dry embossing because they are nice and thick; the tricker the stencil is, the deeper and more visible the embossed impression is going to be.
To dry emboss with a stencil you’ll need to have a die cutting machine, any die cutting machine will do, and you’ll also need to use a tan embossing mat from Spellbinders. If you have a die cutting machine from another manufacturer you can get this mat separately and dry emboss in your machine, just make sure to check the machine instructions manual to know what sandwich you need to use so that you don’t break it.
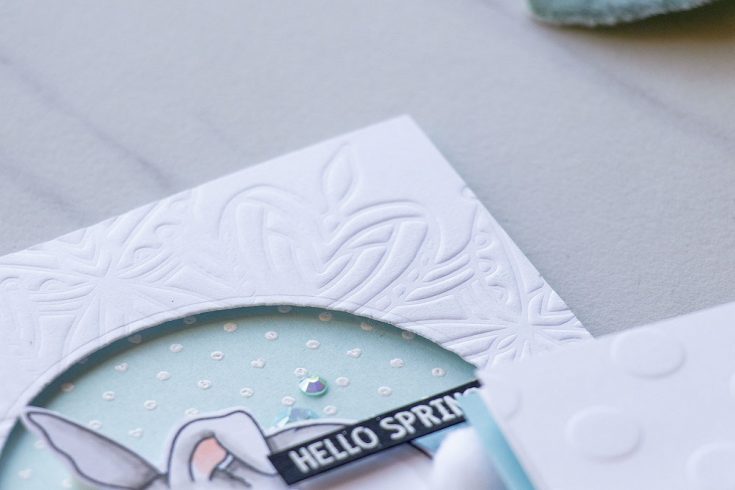
I used Medium Dots, Large Dots as well as the Heart Mandala stencils (watch my video to see other dry embossed stencil designs). Next, I stamped and colored the bunny and carrot using Copic markers. I used W5, W3 and W1 markers to add shading and used YR00 to color the inside of the bunny’s ear. For my carrot, I used YR04 and YR07 as well as YG03 and YG17 markers. I cut images out using scissors; they weren’t hard to cut out at all.

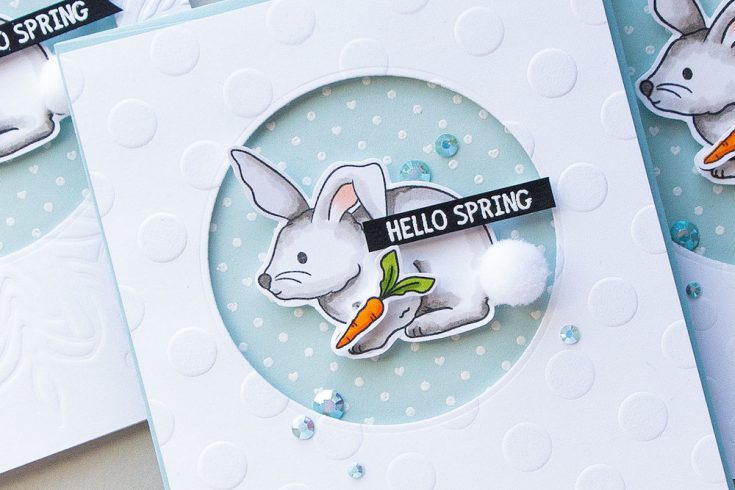
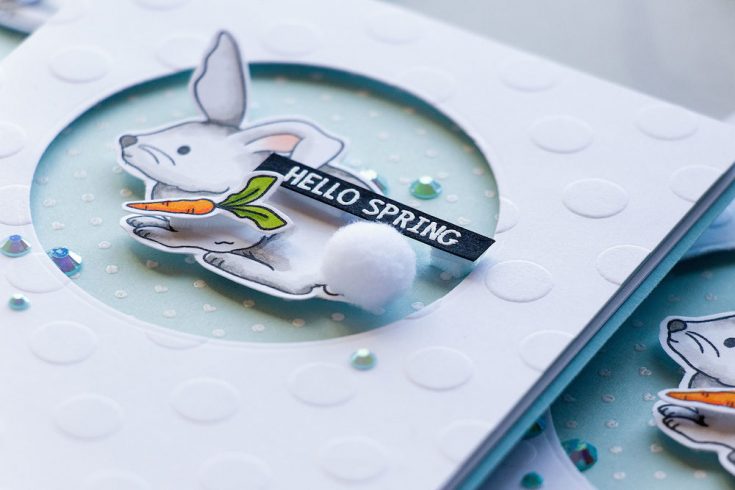
Next, I heat embossed a Tiny Dots & Hearts background in white embossing powder onto Simon’s Sea Glass cardstock. I adhered this panel onto an A2 card base and foam mounted my dry embossed panel on top. I foam mounted the bunny and added a Hello Spring sentiment. It comes from the Spring Seeds stamp set.
For the tail of my bunny, I used little pom pom that came with the March 2018 kit from Simon – the kit is sold out, but you can get those pom poms separately, these are from Darice and they come in different sizes, too. I cut about a third of the pom pom off to make it less dimensional and adhered to my bunny using glue.
Finally, I embellished my card using new Jewel embellishments from Pretty Pink Posh in color Aquamarine.
Have fun stamping!
WATCH THE VIDEO:
SUPPLIES:
|


Thanks so much for stopping by, and thanks to Yana for being our guest!

Blog Candy Alert!! Follow our blog via email and comment on this post for a chance to win special blog candy!
Doodling with Debby: Spring Pencil Coloring on Kraft
Hi friends! Happy Tuesday! I hope your week is starting out well so far! As always, I’m delighted to welcome back the forever fabulous Debby Hughes back for her latest installment of Doodling with Debby on our blog! Be sure to watch the video and enjoy!

Hello, it’s Debby here for my monthly Doodling With Debby video feature here on the Simon Says Stamp blog. Today I’m coloring with pencils a sweet springtime scene using the Showers & Flowers stamp set.
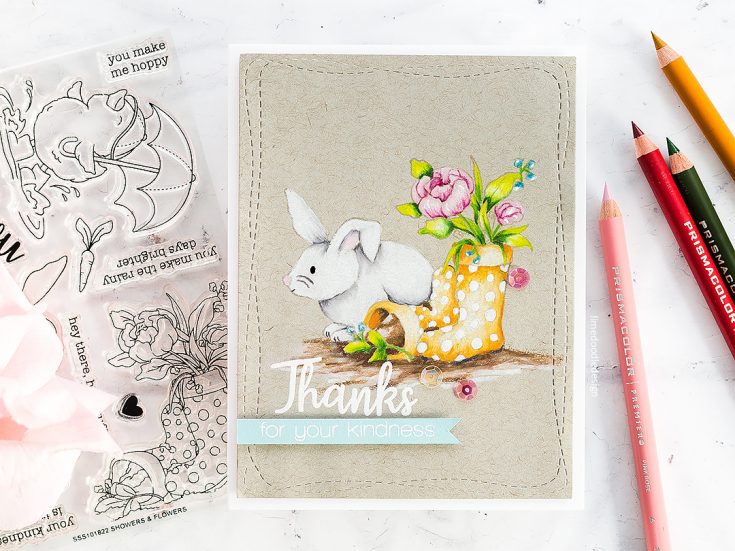
I love the look of pencils on kraft card, and I think the kraft card on this occasion adds a lovely homely feeling to this springtime scene. I stamped the welly boots image from the Showers & Flowers set in clear embossing ink, then cut a mask from Inkadinkadoo Stamping Mask paper and then stamped the rabbit as if he’s sitting behind the boots. We have two white rabbits, and I can fully believe that this cutie has been up to mischief and knocked over the flower-filled welly boot!
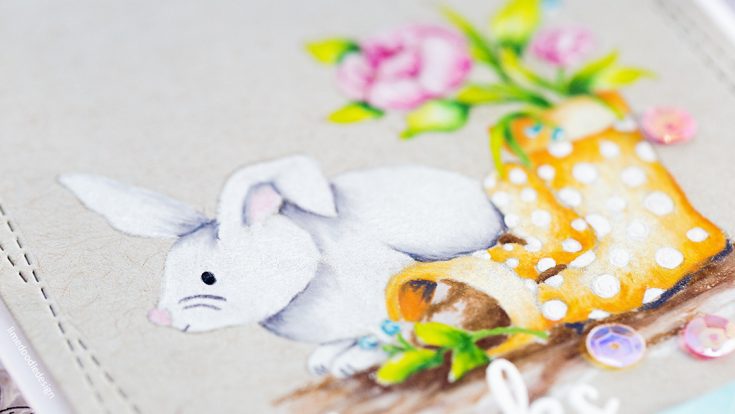
I colored the scene with Prismacolor pencils. I mainly used three shades of pencil for each color along with a white pencil for highlights.
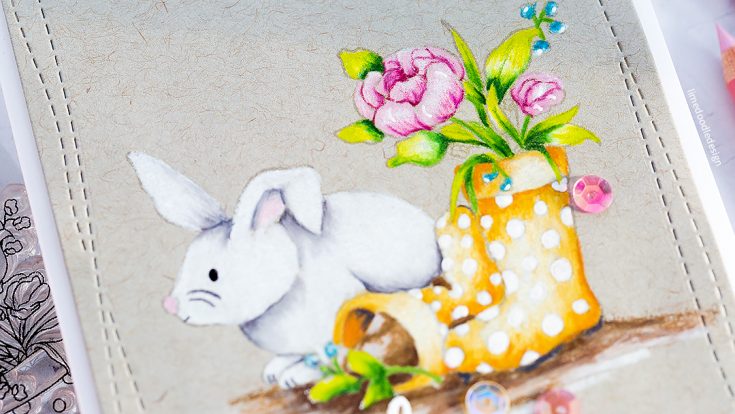
When the coloring was finished, I added white gel pen details for the polka dots on the boots and also to add a few highlights to the flowers. I also darkened the eye of the rabbit with a black glaze pen.
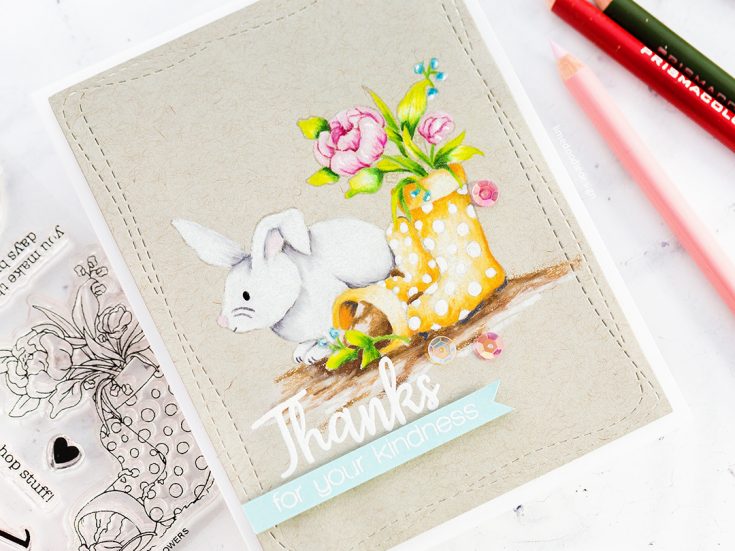
For the sentiment, I stamped the ‘Thanks’ from the Showers & Flowers set in clear embossing ink, sprinkled with white embossing powder and then heat set. I also stamped a coordinating sentiment from the Thanks stamp set on Surf Blue card and white heat embossed before trimming to a banner.
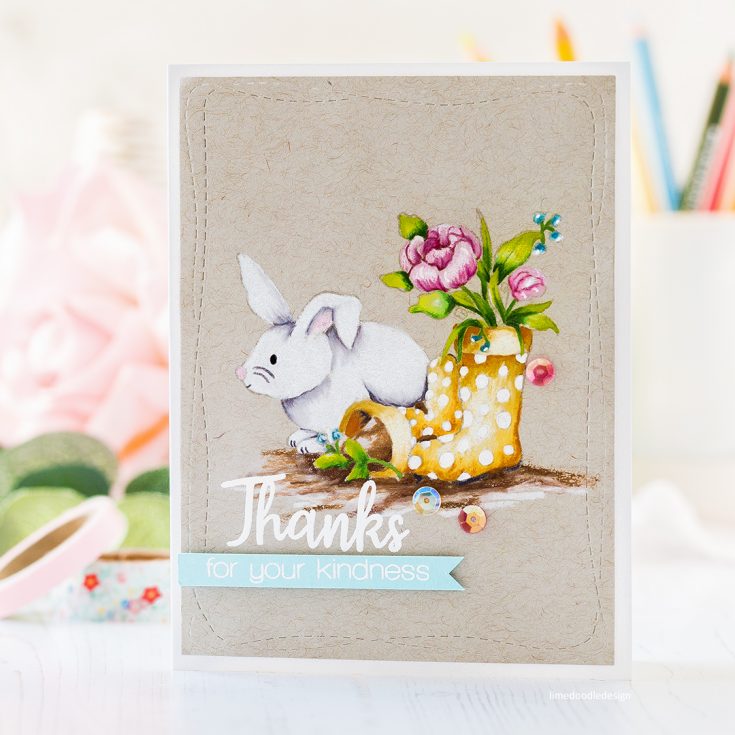
I cut the kraft panel with a Wonky Rectangle die and foam mounted on a Neenah Solar White card base. I also foam mounted the Surf Blue sentiment and then finally added a trio of Sweet Shop sequins to finish.
Thanks for joining me today and I’ll see you next time for Doodling With Debby.
WATCH THE VIDEO:
Watch below or in HD on YouTube.
SUPPLIES:
|


Thanks for reading today, and thanks to Debby for being our guest!
Blog Candy Alert!! Follow our blog via email and comment on this post for a chance to win special blog candy!
Congrats! Blog Candy Winners!
From: Studio Monday with Nina-Marie: Easter Treat Bags with Lawn Fawn: Donna Rinckel!
From: Tree Art Journal Page: Berina Febin!
From: Art Journaling: BE KIND with Shari Carroll: Janice Carl!
From: What Would Kelly Make: February 2018: Iris Soscia!
From: Home is Where the Heart is by Channin: Marie-Christine Denis!
From: New Neat & Tangled Inspiration!: Carol McGregor!
Studio Monday with Nina-Marie: Easter Treat Bags with Lawn Fawn
 Hello crafters! Welcome to a brand new Studio Monday tutorial! Did you know that March is National Craft Month? As a special treat, all this month during my Studio Monday series I will be sharing fun ideas for creating unique projects with paper crafting supplies! Today we are making treat bags using some new Lawn Fawn goodies that are simply adorable! The main elements in these projects are the darling Tote Bag Lawn Fawn die and the super-cute Some Bunny stamp and die sets. Here’s a look at how these treat bags look when they are completed!
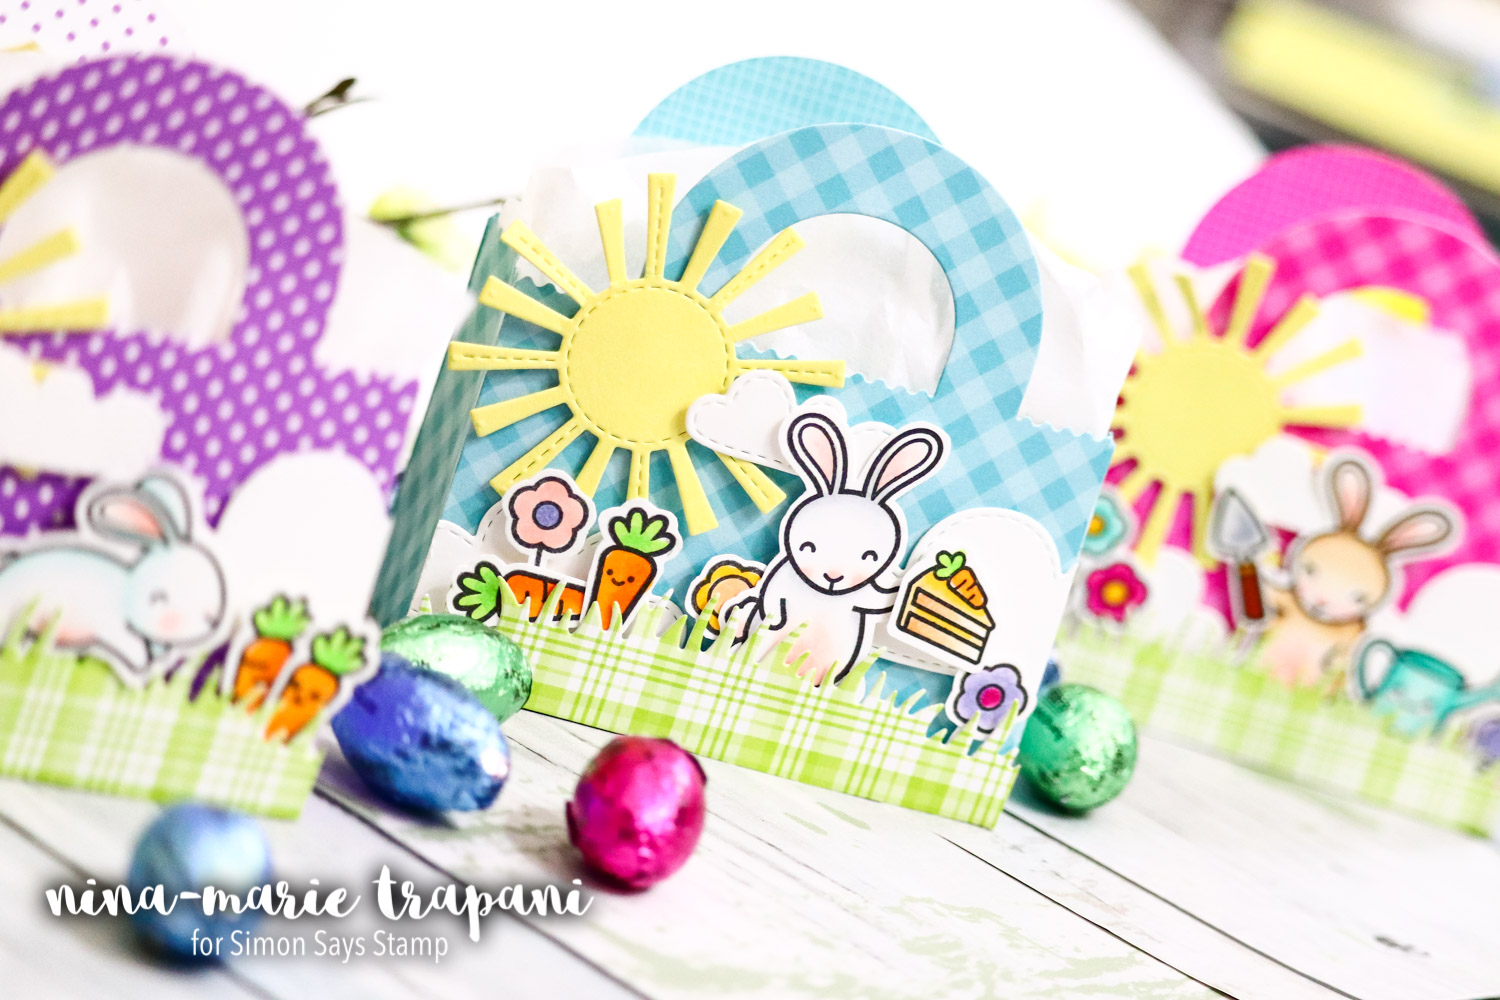
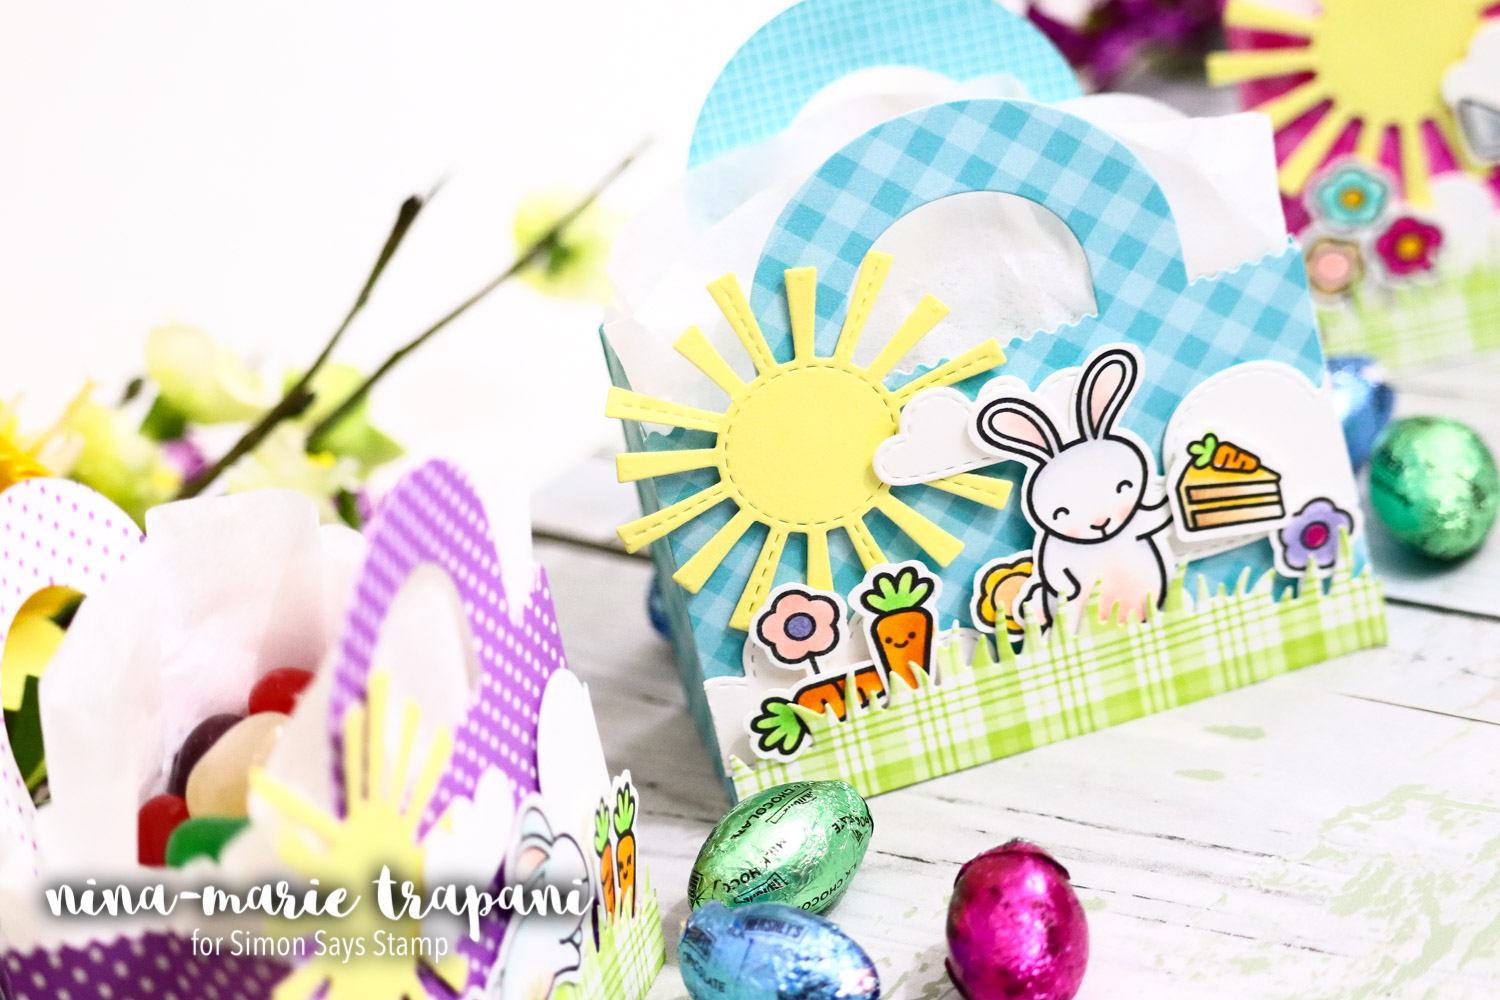
 These little bags are perfect for decorating and then filling with little treats! I placed candy in mine, as the theme of this project is an Easter treat bag (and candy is always a big deal during this holiday!). You could also fill these totes with small goodies, such as a woodblock stamp, a small toy for a kid, a piece of jewelry, even a gift card!
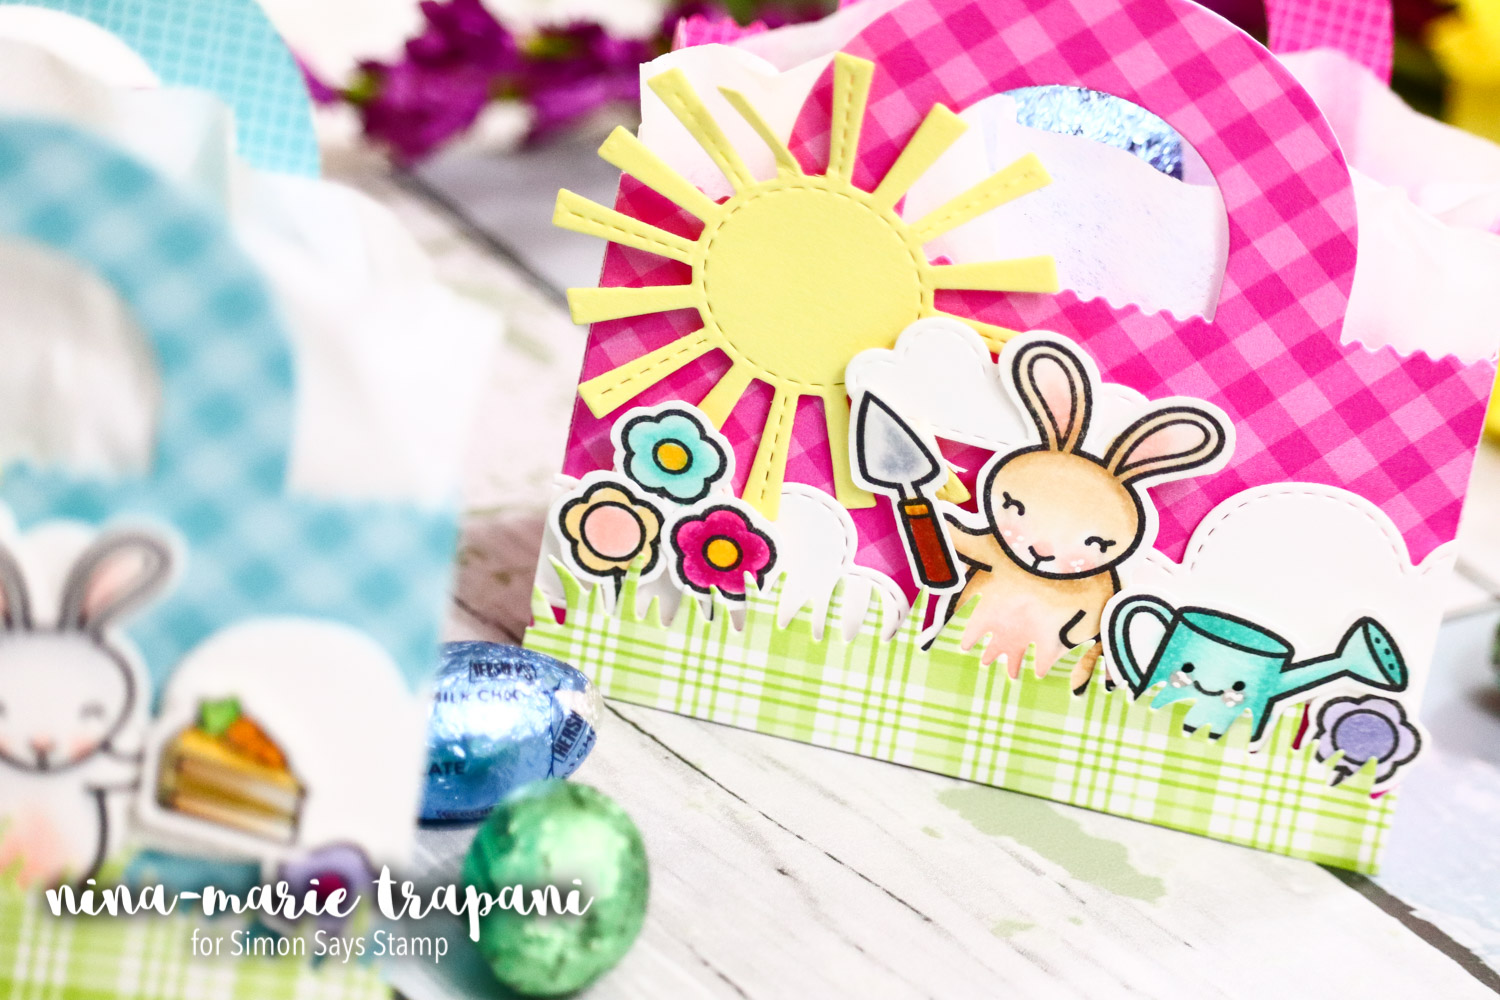
 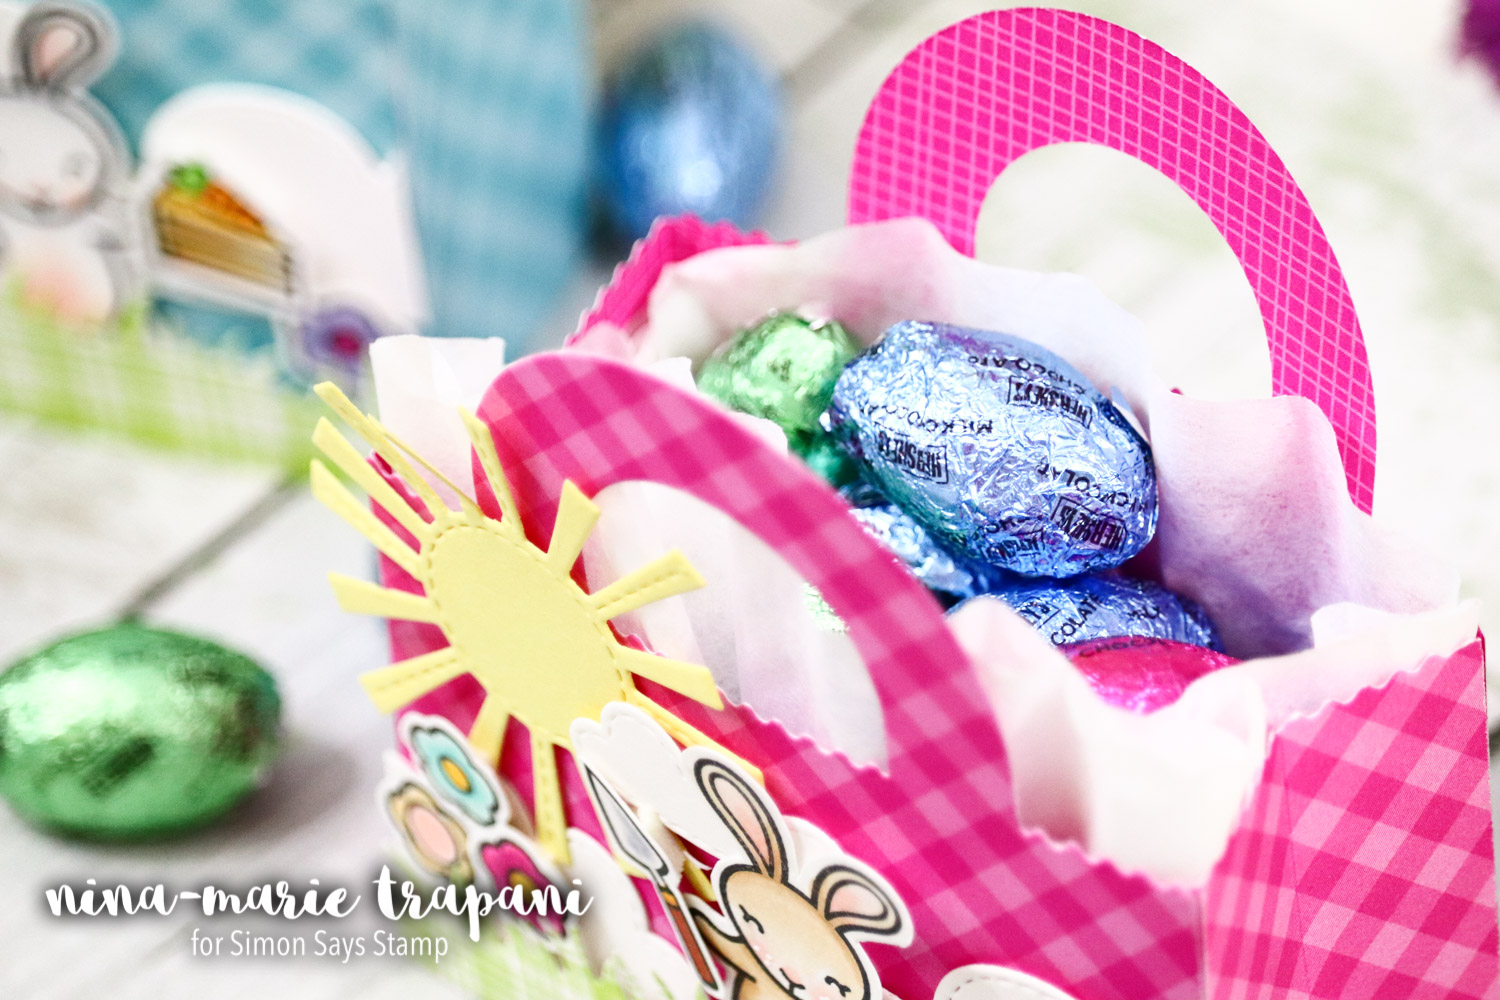 As for decorating, you can go super-simple and leave the tote plain (maybe cut from kraft cardstock for a natural feel or some bright patterned papers for quick and easy fun!). Another option is to break out your favorite stamps and dies and make cute scenes! I love building scenes, so this is what I did to decorate my little treat bags. With a Grassy Hillsides die, I cute a piece of Lawn Fawn Spring Perfectly Plaid paper for the ground in my scene. The sky features the adorable Spring Showers die set (that is an oldie but goodie that I have used for forever and still love)!
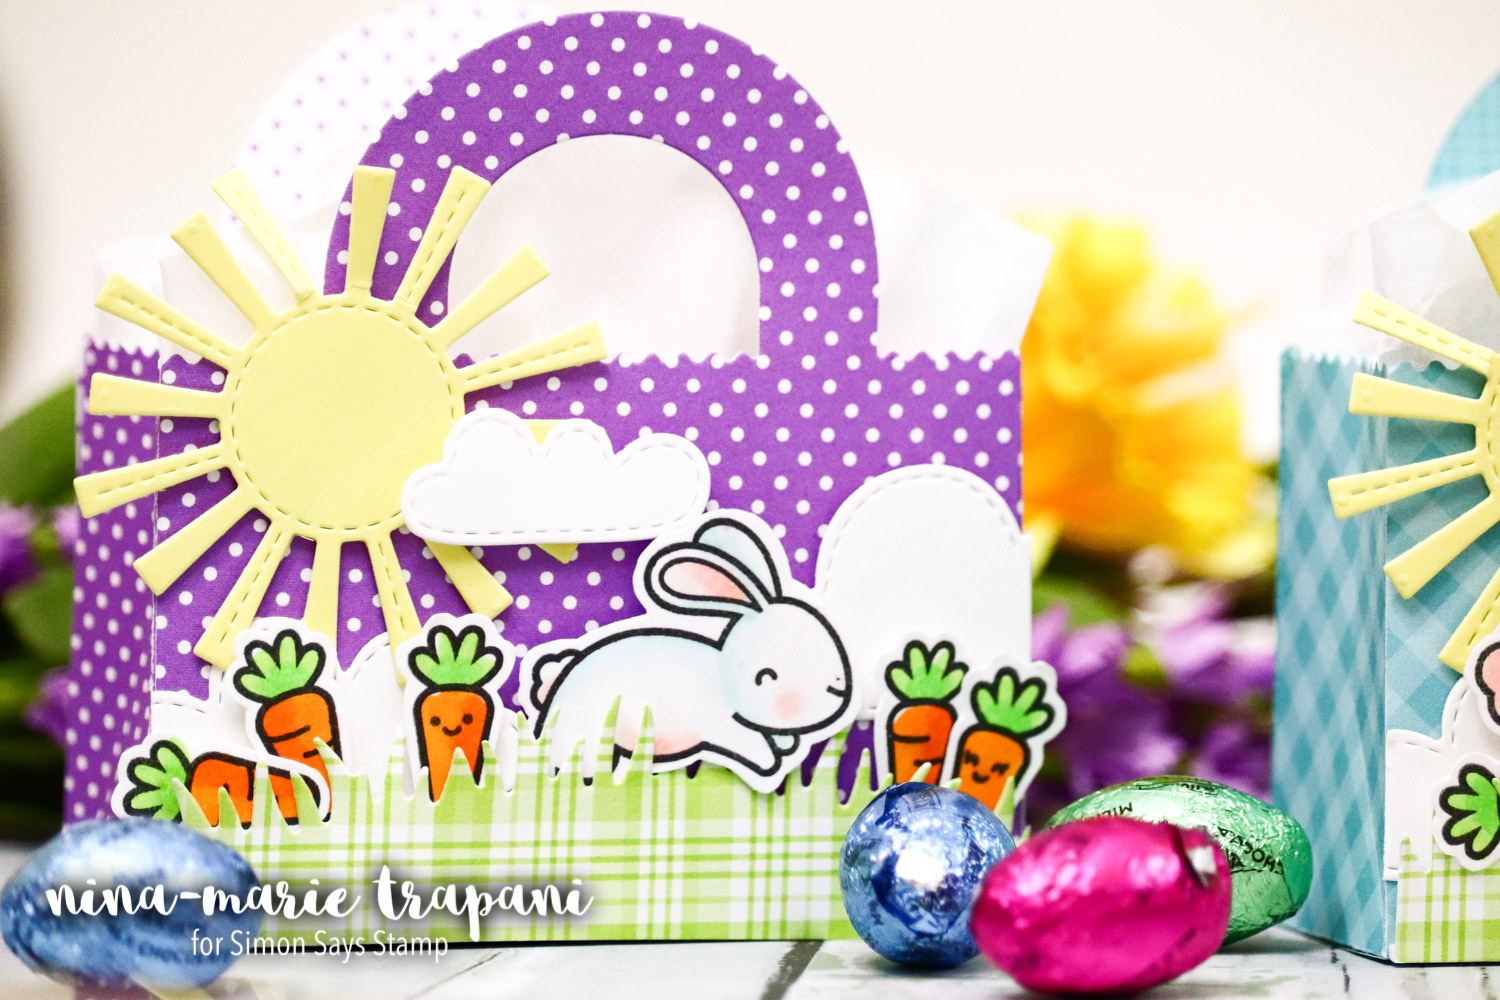
 If you would like to see how these little cuties come together, be sure to watch the video below! I hope you will be stopping back each Monday during March for these extra-special National Craft Month tutorials because I have some fun things in store for you!
WATCH THE VIDEO
SUPPLIES USED
|


Blog Candy Alert!! Follow our blog via email and comment on this post for a chance to win grab bags and blog candy! Remember to tag your awesome projects with #simonsaysstamp on social media so we can see what you are creating!


