Especially for You by Jill Foster
Hi Friends! Happy Monday! Please join me in a warm welcome back to the fantastic Jill Foster as a guest on our blog today! She has made this bright and beautiful floral card using stamps and dies from Penny Black! For more details read on and enjoy!
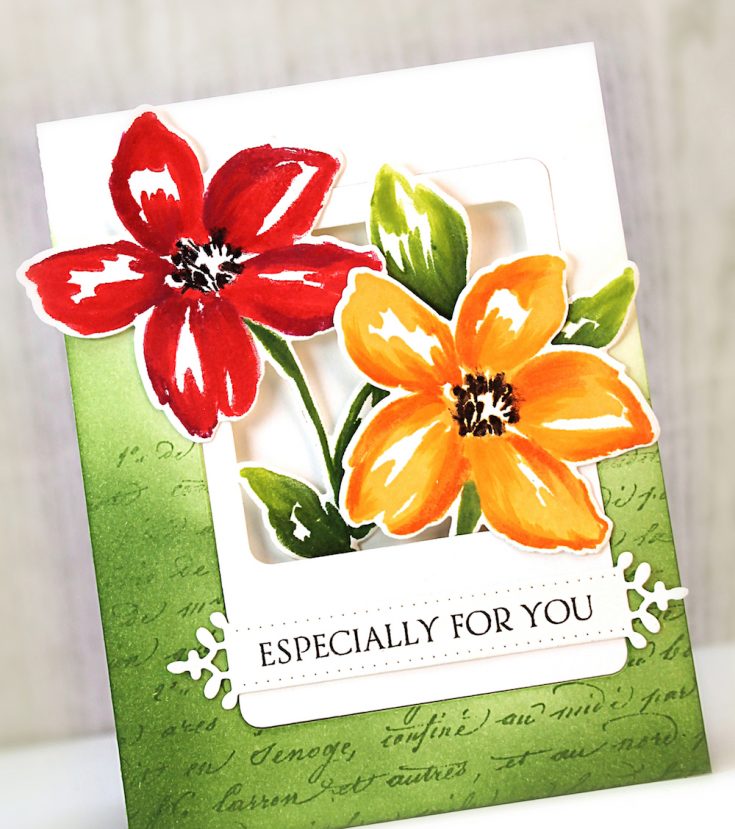
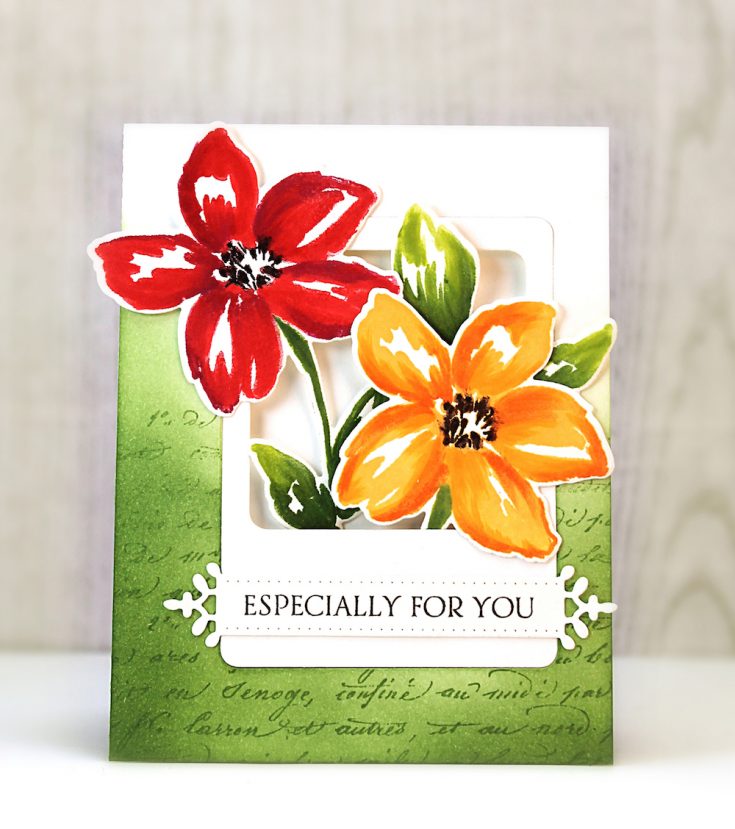
Ink the bottom portion of a 4.25 inch by 5.5-inch panel cut from Neenah smooth white cardstock with Bamboo Leaves ink using a Jumbo Sponge Dauber. Stamp with Penny Black 40-470 Script using Bamboo Leaves ink. Position 51-057 Polaroid die onto inked and stamped panel and run through die cutting machine. Die cut 51-057 Polaroid again from white cardstock. Mount green script panel and white Polaroid piece onto white notecard using dimensional adhesive, creating the polaroid pocket/window.
Using a stamp positioning tool, stamp 40-595 Belle onto hot press watercolor paper using mini Archival inks. Stamp multiple times until desired details are captured on the stamped impression. Remove from stamp positioning tool and paint additional shading and details using Distress Reinkers used as watercolors. Add details to the center of flowers using a very sharp colored pencil. Die cut with coordinating die (51-415 Belle Cut Out) and position flowers inside polaroid pocket/window.
Stamp sentiment (30-423 Banner Sentiments) onto banner die (Birds and Banners) using Potting Soil ink and adhere to card.
SUPPLIES:
|


Thanks for reading today, and thanks to Jill for being our guest!

Blog Candy Alert!! Follow our blog via email and comment on this post for a chance to win special blog candy!
Creativity Takes Courage Tag by Emma Williams
Hi friends! Happy Sunday! Welcome to another gorgeous Tim Holtz tag tutorial by the super talented Emma Williams! Be sure to stop by her blog for even more inspiration, and weekly new projects on our Monday Challenge! Read on for more information and enjoy!
Hi everyone, it’s Emma here and I’m so happy to be back on the Simon Says Stamp blog to share this fun project that I’ve created using products from Tim Holtz’s Idea-ology range, together with a beautiful new stamp set from Tim and Stampers Anonymous.
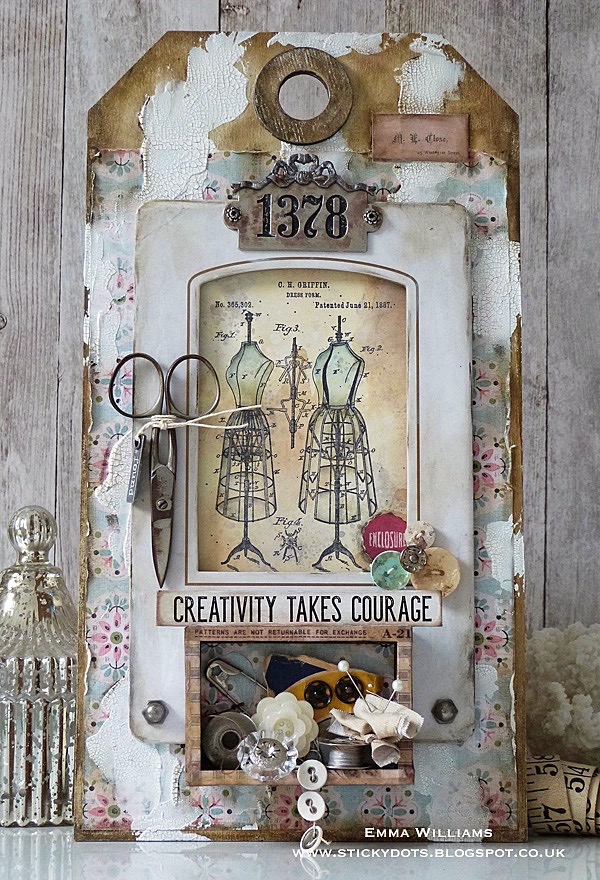
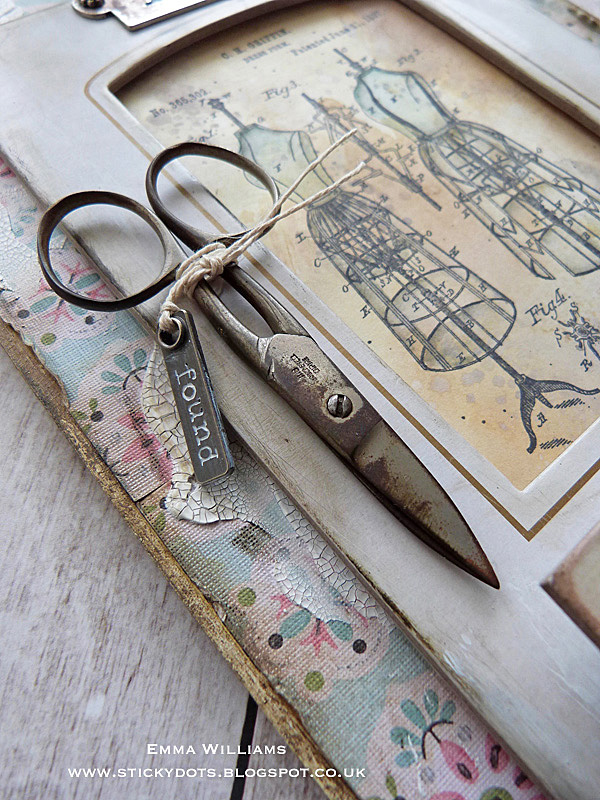
The inspiration behind this decorative home decor project came from two things, Tim Holtz’s Worn Wallpaper and some treasures that I found in my Grandmother’s sewing box ~ and once that gorgeous new textured paper was combined with the crackle paste to create the look of distressed, old worn wallpaper it became the perfect background to my haberdashery themed tag.
1. Using a medium-sized Etcetera Tag and began by priming the tag for the mediums I’ll be using and applied a coat of gesso over the entire surface.
2. Once the gesso is thoroughly dry, I painted the surface with a layer of Antique Linen Distress Paint, heat dried the paint and then scribbled Ground Espresso and Walnut Stain Distress Crayons onto the surface. I then used a semi-dry baby wipe to blend the colors and create the background. To add more depth of color and to make it richer in appearance, I just kept on reapplying the crayons until I was happy. I also colored the hole reinforcer piece in exactly the same way.
3. Using the Black Soot Crayon, apply this around the edges of the tag and again blend out the color and any harsh lines using your fingers.
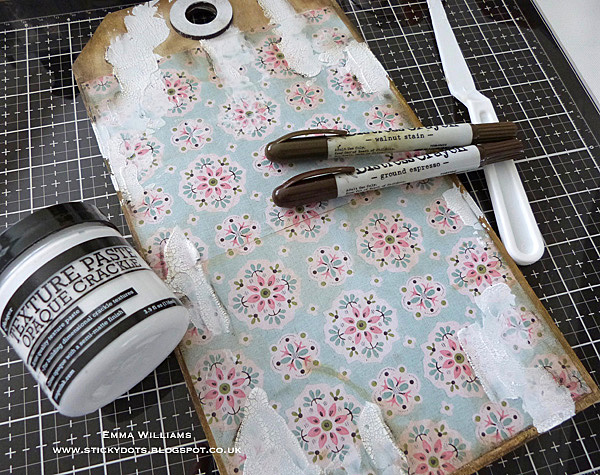
4. Apply Frayed Burlap Distress Oxide Ink Pad directly to your craft mat, I used the Tim Holtz Glass Mat which is perfect for all your blending and crafting needs that are used in this project. Spritz the ink lightly with water and then drag two pieces of the Worn Wallpaper through the inks, picking up a small amount of color to create a more vintage look to the paper. I heat dried the inked paper before cutting the paper to size, piecing the two panels together to create one continuous pattern. Distress the edges of the paper and adhere each section to the tag using Matte Collage Medium, applying the adhesive with a Collage Brush.
5. Ensuring the paper is dry, I then used a palette knife to apply some crackle paste (you can use also use Wendy Vecchi’s Crackle Texture Paste which will work equally as well) onto the covered surface to create the look of ‘worn wallpaper’. The size of crackles will always depend on the thickness of the paste you apply, so if you need smaller cracks, apply a thin layer but for larger crackles, slap it on!
6. Allow the paste to dry thoroughly and allow the crackles to appear.
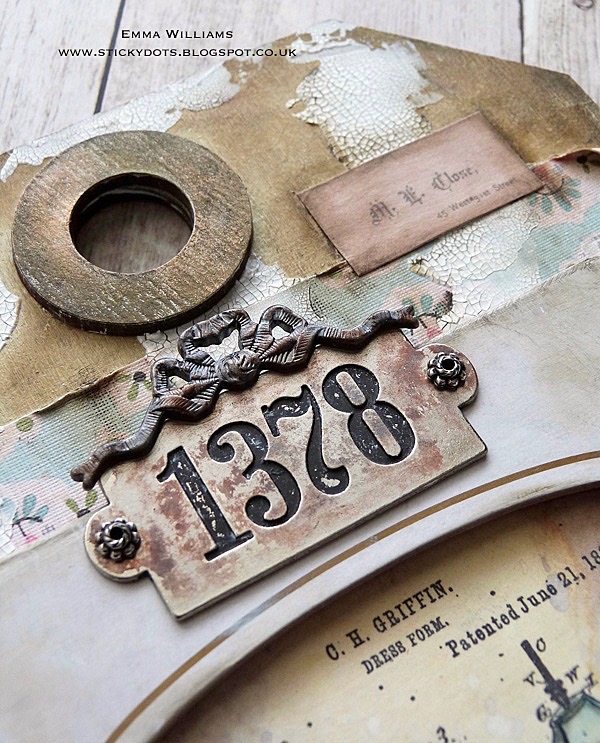
7. Adhere a Snippets Ephemera piece to the top right-hand corner of the tag with Matte Collage Medium and attach the hole reinforcer piece over the hole at the top of the tag.
8. For the next step, I cut a panel of Mixed Media heavyweight card and cut this to approx 10 x 14cm.
9. Apply Walnut Stain Distress Ink and Hickory Smoke and Frayed Burlap Distress Oxide Inks to the Glass Mat and spritz with water. Drag the card through the ink, picking up the color and then heat dry. Keep dipping the card back into any excess ink to create more layers and depth of color.
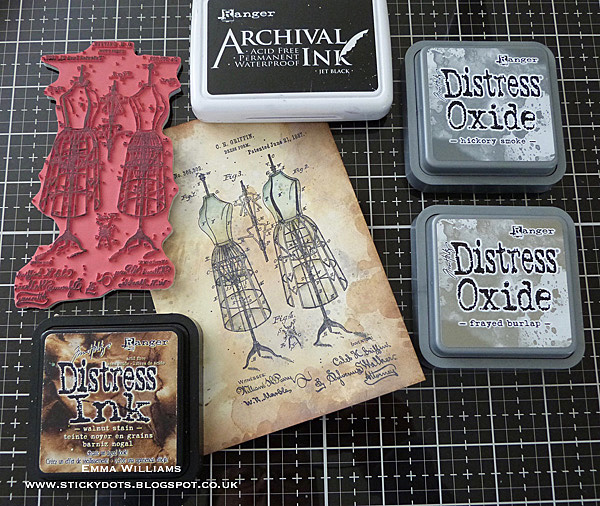
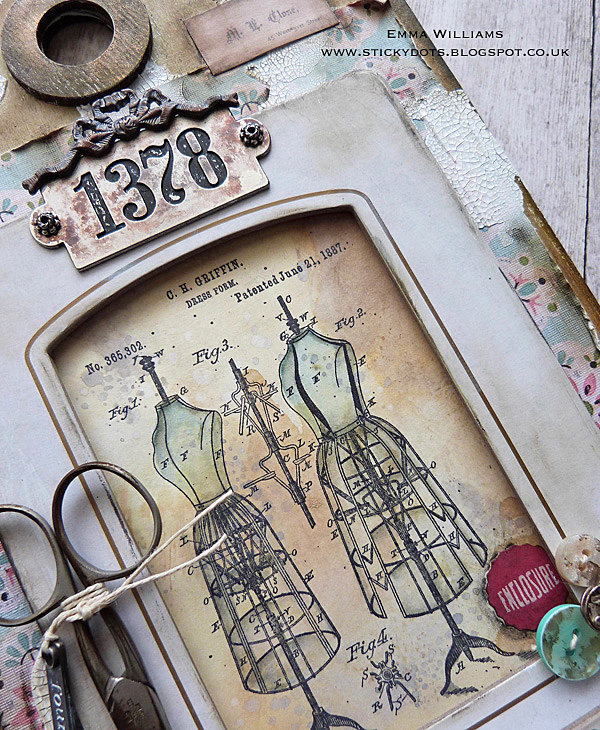
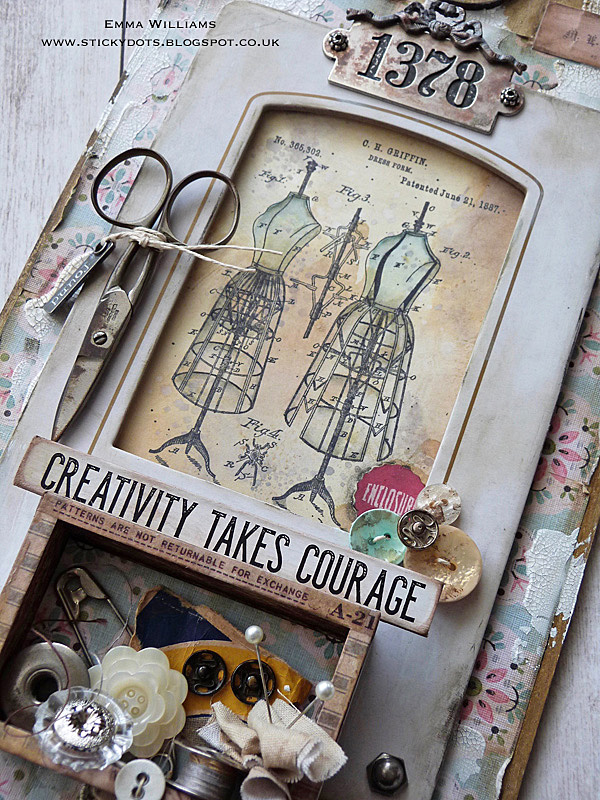
10. Once the card is dry, I inked up the dress forms stamp from the Inventor 3 Stampers Anonymous stamp set from Tim Holtz using Jet Black Archival Ink and stamped the image directly onto the inked card. Lightly watercolor the image with Pumice Stone and Tumbled Glass Distress Marker Pens, giving just the slightest hint of color. Ink the edges of the card with Walnut Stain Distress Ink.
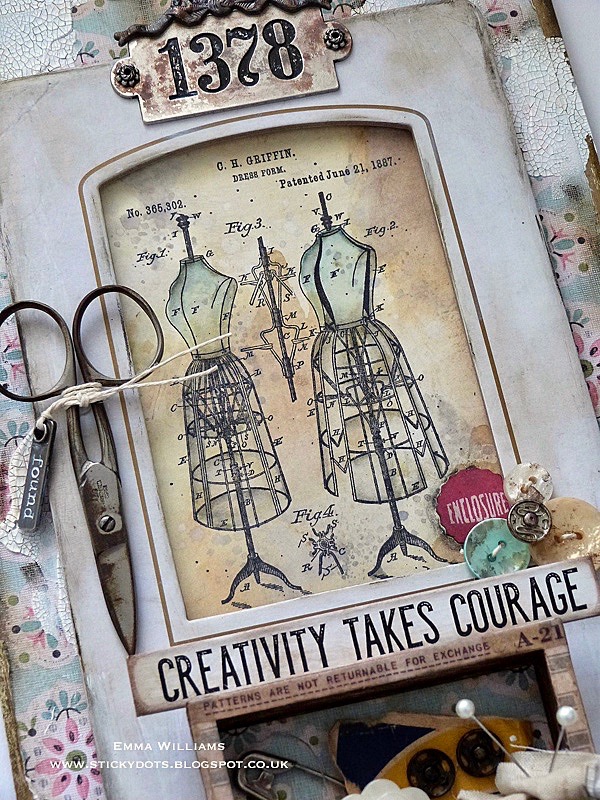
11. Place the stamped image behind the Frame and then attach the frame to the covered tag using foam pads to create dimension.
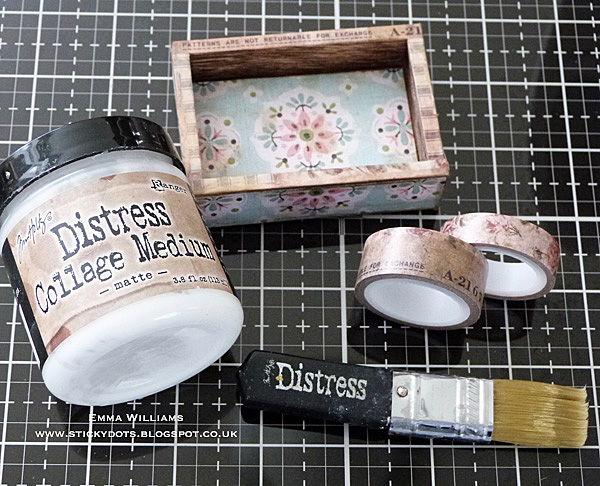
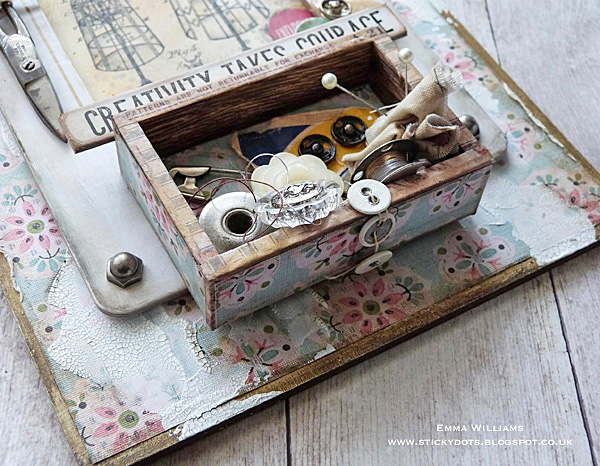
12. Taking the smallest of the Vignette Boxes, cover the box on the inside and outside with the remaining Worn Wallpaper that was used on the background and attaching each piece with Matte Collage Medium. Apply Design Tape from the Remnants set to cover the raw edges of the box.
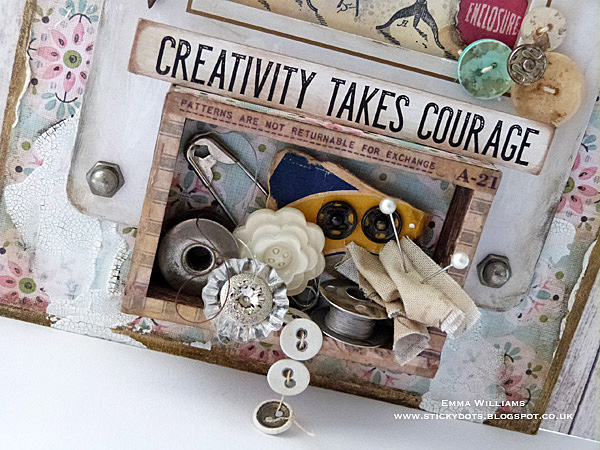
13. I then filled my box with some vintage sewing pieces that my grandmother gave me and this included bobbins, old buttons and a safety pin. I also added some Fanciful Buttons together with a piece of ripped material and pins. At this stage, you can fill the box with anything that you choose, it’s all about making this project personal.
14. Attach the box to the frame with Matte Collage Medium, placing it so that it slightly overlaps the bottom edge of the frame.
15. I then lightly sanded the edges of a Quote Chip, ‘Creativity Takes Courage’, inked the edges with Walnut Stain Distress Ink and attached this to the top of the vignette box, using a thin line of Collage Medium along the bottom edge of the chip. Allow for the quote chip to dry and the adhesive to take hold.
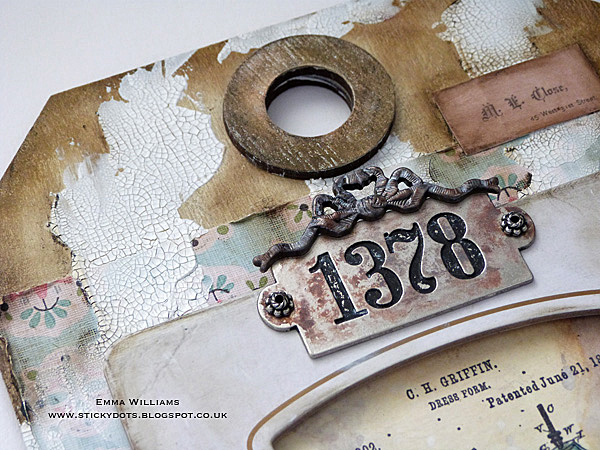
16. At the top of my frame, I added one of the new Foundry pieces, which I inked with Mushroom and Pewter Alcohol Ink, applying the ink with an Alcohol Ink Applicator Tool.
17. I attached the piece to the collage frame and added an Idea-ology ribbon piece from the Ribbons and Bows set.To complete the metal plaque, I attached two small decorative metal beads from my stash but you can also use Hex Fasteners.
18. To complete the tag, I added some 28 Lilac Lane Buttons, aged with a little Mushroom Alcohol Ink and attached these with Collage Medium, placing them in the bottom right-hand corner of the frame aperture. I also added a small ephemera piece, “Enclosure” from the Snippets set, attaching this to the stamped panel.
19. I completed the tag with two Mini Hardware pieces, in the bottom left and right-hand corners of the Collage Frame and a pair of old scissors, again something from my grandmother’s sewing box and added a Story tag, tied to the scissors with twine.
Thank you so much for stopping by today ~ it’s been fun to take you through the creative process of this piece and a project that I hope will inspire you.
See you again soon…
Emma
SUPPLIES:
|


Thanks so much for reading today, and thanks to Emma for being our guest!
Blog Candy Alert!! Follow our blog via email and comment on this post for a chance to win special blog candy!
Tone on Tone Die-Cutting by Dawn Woleslagle
Hi friends! Happy Saturday! Please welcome very special guest Dawn Woleslagle, owner of WPlus9, here to provide us some gorgeous floral inspiration! Read on and enjoy!
Hello! I’m excited to be here today to share a couple of cards with you featuring some of the newest Wplus9 products.
I also wanted to highlight a couple of my favorite – and most used – Simon Says Stamp products as well.
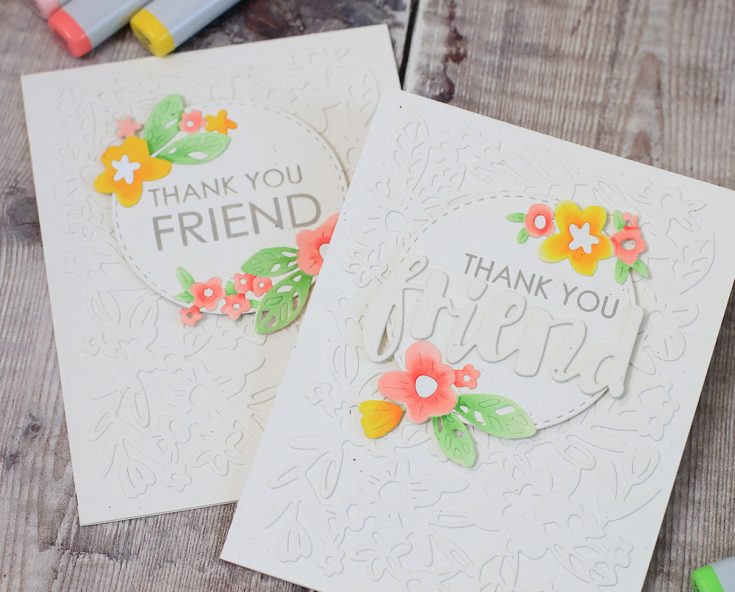
I used the new Wplus9 Tossed Florals Background Die to create a subtle tone-on-tone textured background. This intricate die creates a tossed pattern of florals with a lace-like appearance. When used tone-on-tone like this, it gives almost a faux letterpressed look.
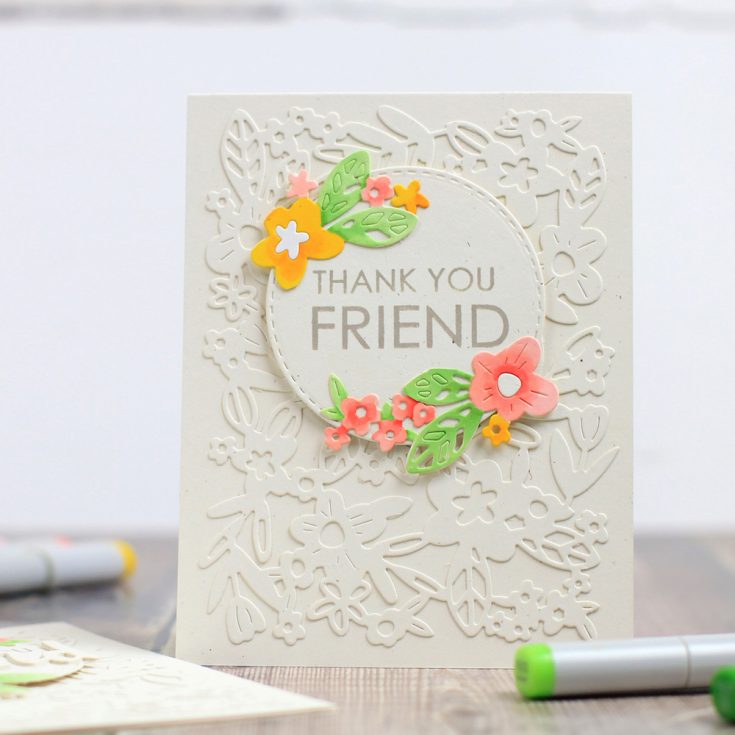
I started by die cutting three panels of the floral background. I used one for the background of each card, and the third to cut little floral clusters from and color with Copic Markers.
For both cards, I used the Wplus9 No One Else stamp set for the sentiments stamped in Wplus9 Warm Wool ink onto a circle die cut using the Simon Says Stamp Stitched Circles Die.
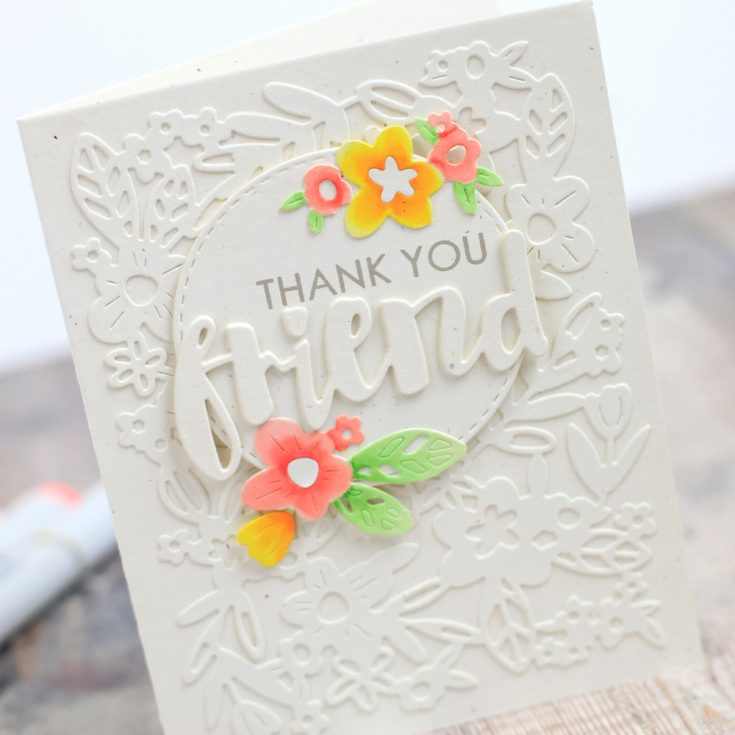
For the second version, I replaced the stamped “friend” with the Simon Says Stamp Painted Friend Die. By cutting three of these and stacking them one on top of the other, I was able to keep the monochromatic feel and create enough dimension and shadow to make it stand out from the rest of the card.
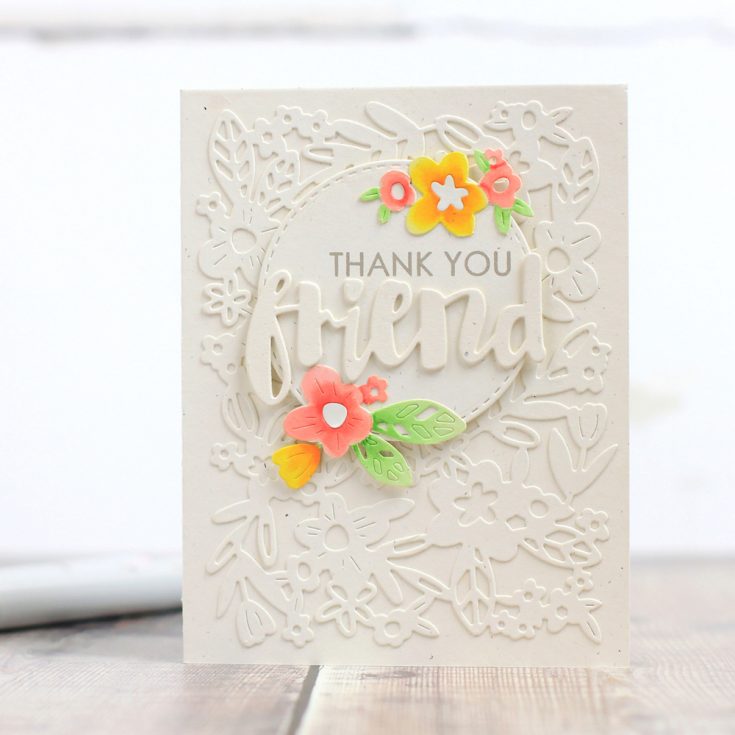
I embellished each with the floral clusters that I cut and colored from the extra Tossed Florals Background panel.
I hope you enjoyed these projects and are inspired to try it yourself!
Dawn
SUPPLIES:
|


Thanks so much for stopping by, and thanks to Dawn for being our guest!
Blog Candy Alert!! Follow our blog via email and comment on this post for a chance to win special blog candy!


