Lawn Fawn Die Cut Easter Card
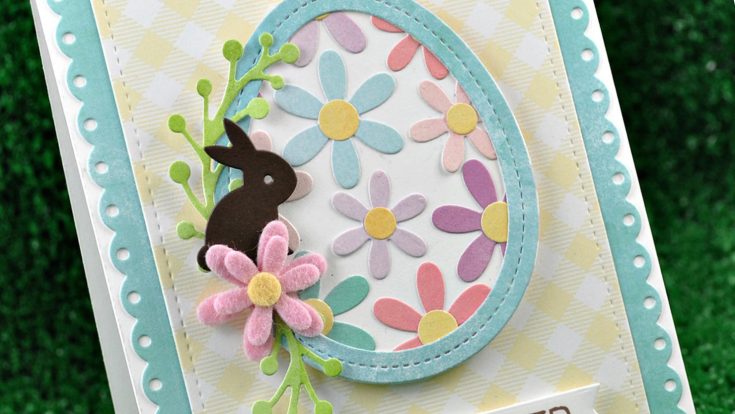
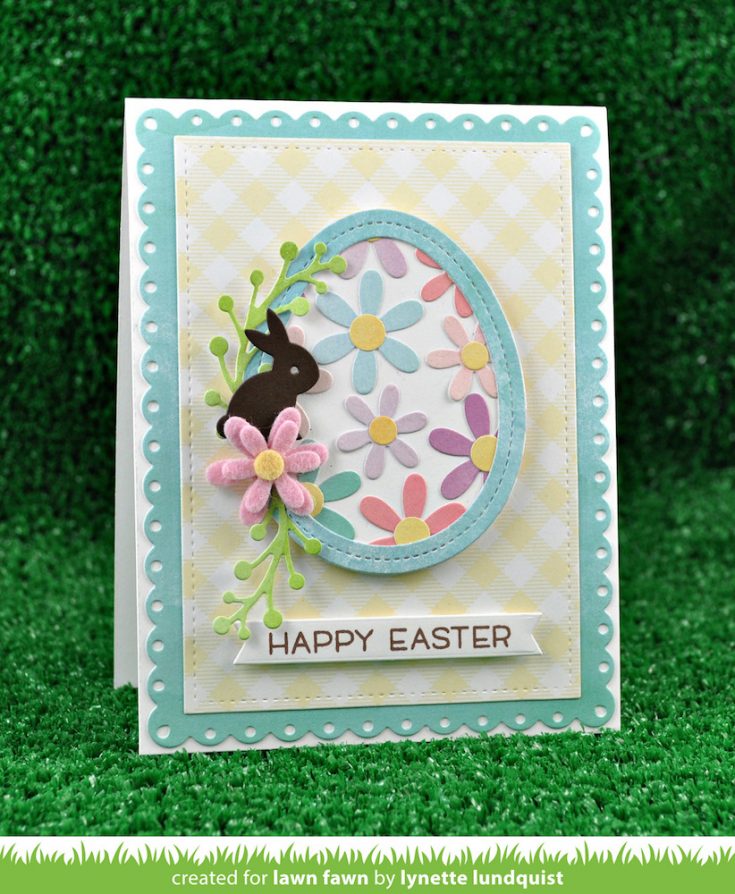
Hi friends, thanks for stopping by again today. The always amazing Kelly Marie Alvarez made this gorgeous card for us to share and we couldn’t wait to show you! Can you believe that Easter is only a little more than 2 weeks away? It seems so hard to believe! I just love this sweet Easter card design. Kelly recreated it after being inspired by a similar card by Lynette Lundquist. She used some brand new for 2018 supplies such as the Some Bunny stamps, Spring Sprig dies, Outside-In Easter Egg Stackables, Little Flowers, and Easter Egg Frames to name a few.
Please watch the video to get all the details and enjoy!
WATCH THE VIDEO:
SUPPLIES:
|


Big thanks again to Kelly for this inspiration!

Blog Candy Alert!! Follow our blog via email and comment on this post for a chance to win special blog candy!
Semicircle Turnabout Stamps & Yay Dies
Hi friends! Happy Tuesday! Have you seen Concord & 9th’s latest release? We’re excited to have these gorgeous goods IN STOCK NOW! Be sure to check out all of the new designs! Please welcome special guest Greg Cottrell, who has made 3 beautiful samples to inspire you! Read on and enjoy!
Hey everybody, Greg here! Angie made me craft against my will. Kidding! Sort of…for those of you who don’t know, I don’t do the cardmaking at Concord & 9th. (You can thank Robyn for that…our talented Creative Director!) I stepped out of my comfort zone to work with two of the products I designed for our March 9th product release – Semicircle Turnabout stamp set (if you’re not familiar with Turnabout stamps yet, check out our videos on our YouTube channel) and Yay dies. I hope you enjoy!
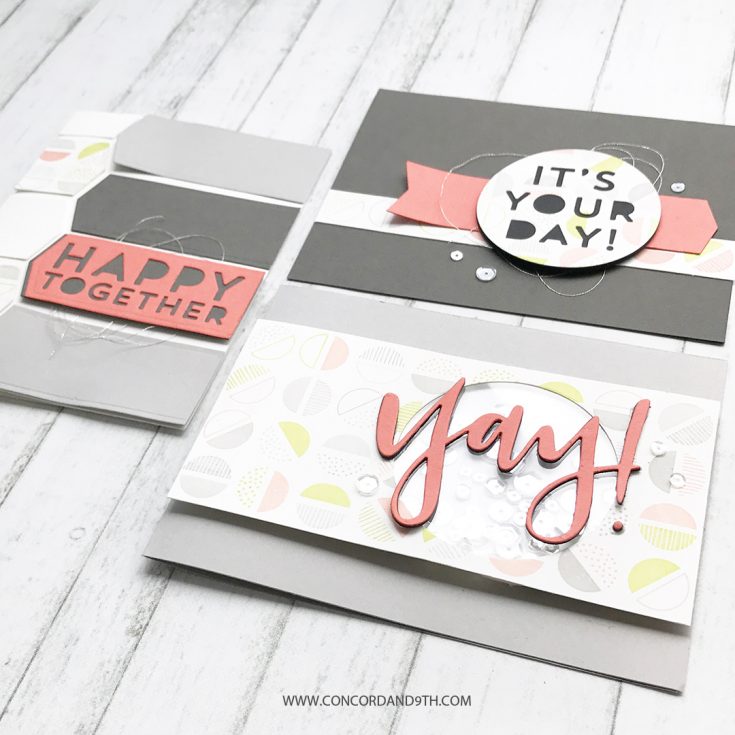
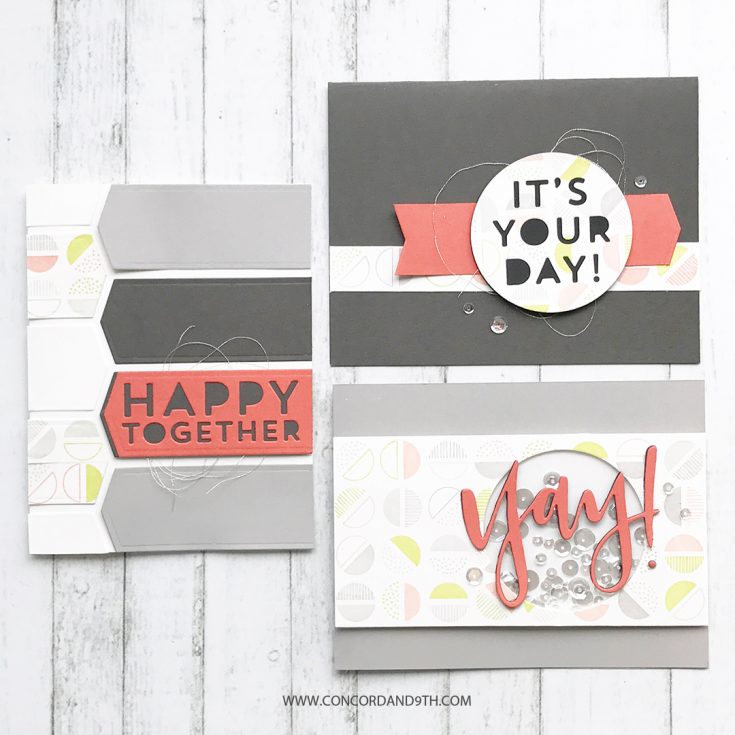
With my background in product development, I’m always looking for creative ways to solve problems and unique ways to design products. For these cards, I challenged myself to make three cards using one stamped 4.25” x 5.5” panel. That one panel would be all the stamping I would need, then I would create the rest of the cards with card stock and a few embellishments. I thought through how I would break up the panel, and this is what I came up with:
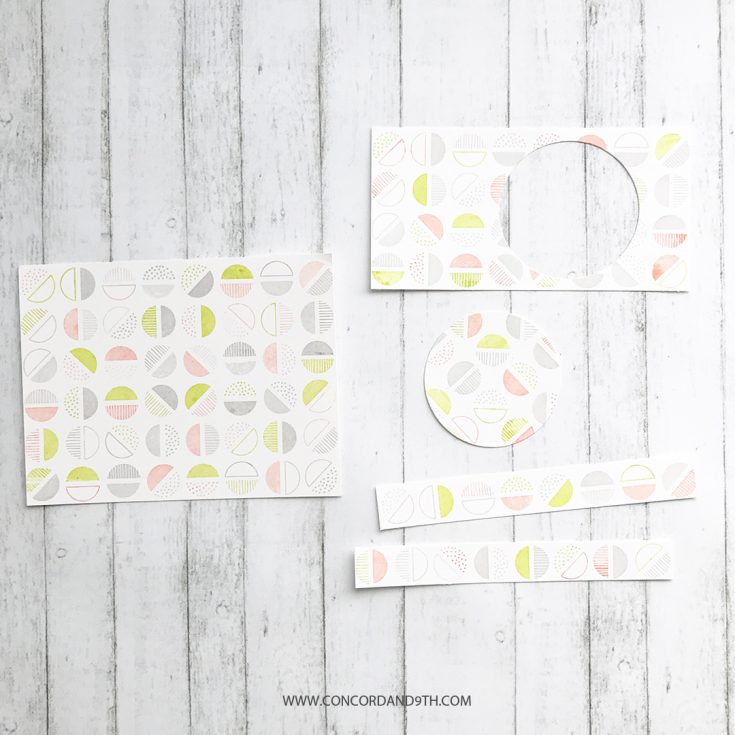
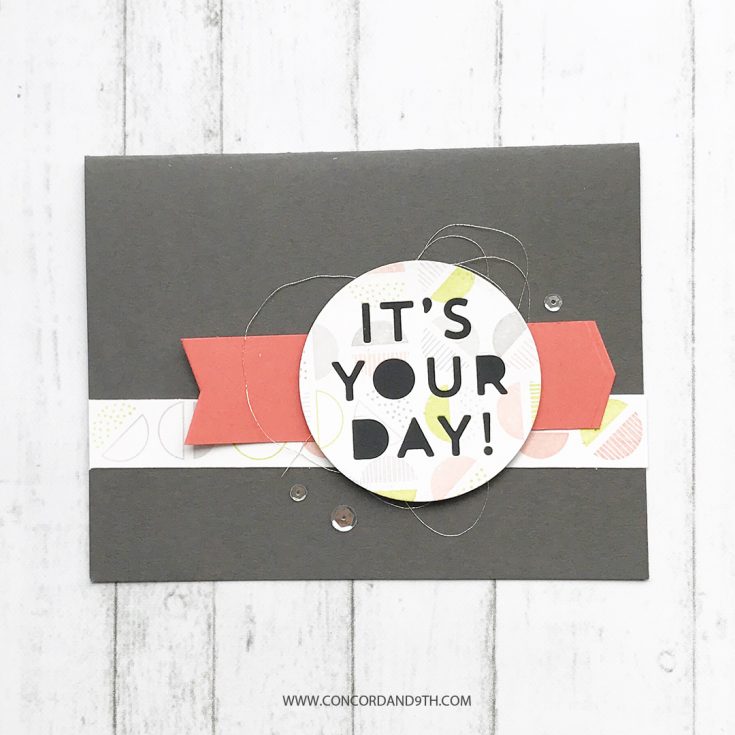
The first card became a shaker card, using the negative space of the circle cutout to fill with sequins. I just layered the “Yay!” die-cut over the shaker element, then adhered the whole panel to a gray card base. This came together extremely fast for a shaker card!

For the second card, I took the fallout of the circle die-cut and cut the “It’s your day!” sentiment out of the circle. Then I used the strip of stamped semicircles to accent the card. Something that may not be as obvious about this card…the coral cardstock was cut out using the label die in Yay dies. I used both sides of the cut to get the arrow shape. Some silver thread, sequins, and charcoal cardstock finished off this card nicely!
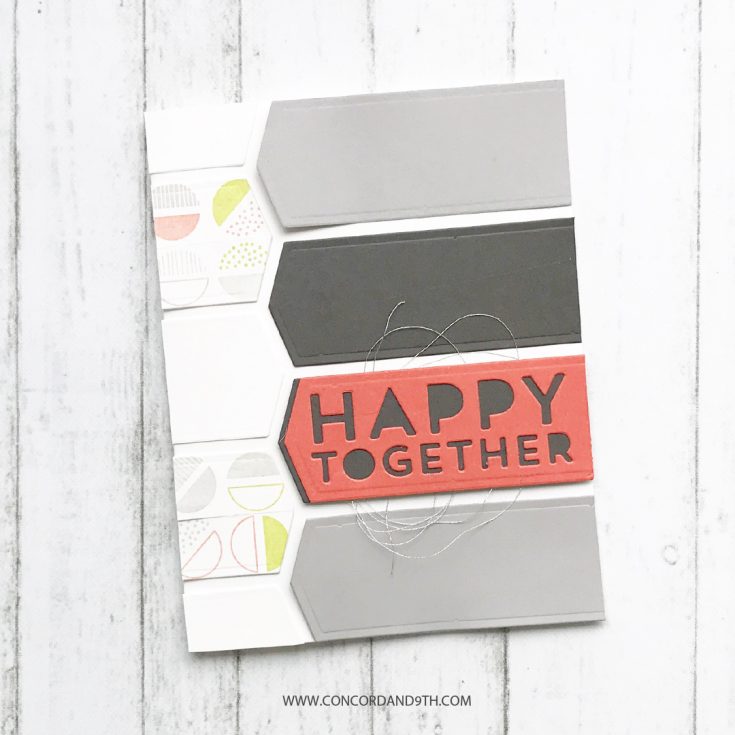
The third and final card I created was pieced together with the label die in the set! I cut “Happy together” out of the coral cardstock to create the focal point. Using the last strip of stamped semicircles, I cut it into 4 pieces and layered over some white cardstock and ran it through the Big Shot with the label die. The label shape ended up being the perfect size to piece 4 together up the card front. I like how different this card turned out next to the others!
So, there you have it! Three cards from one 4.25” x 5.5” stamped panel. I’ll admit, it was fun stepping out of my normal role and making some cards. I hope this inspired you and gave you even more ideas for Semicircle Turnabout stamps and Yay dies!
We love seeing what you create so be sure to #concordand9th. We also love working with Simon Says Stamp and really appreciate being highlighted on their blog today!
Take care!
Greg Cottrell
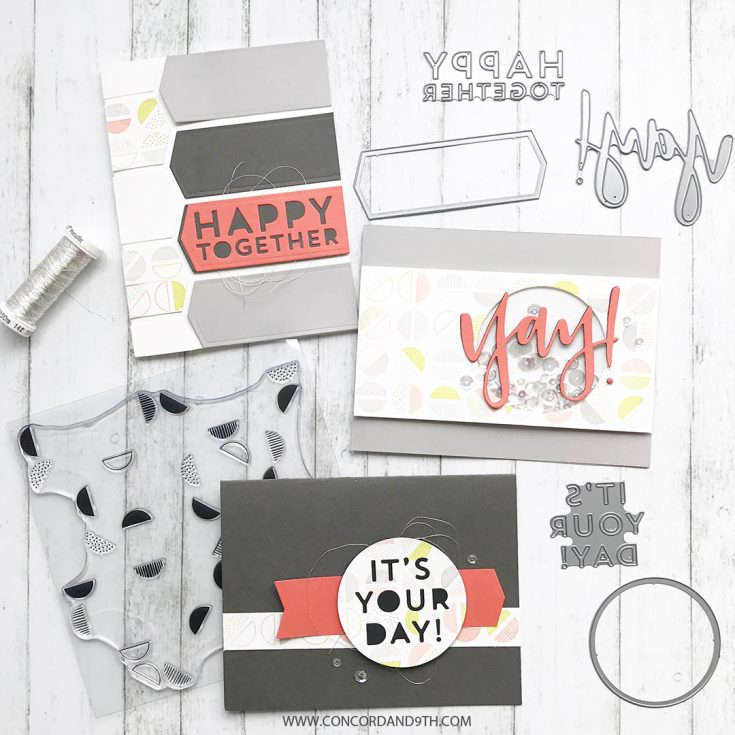
SUPPLIES:
|


Thanks for reading, and thanks to Greg for being our guest!
Blog Candy Alert!! Follow our blog via email and comment on this post for a chance to win special blog candy!
Studio Monday with Nina-Marie: Repurposing with Alcohol Inks

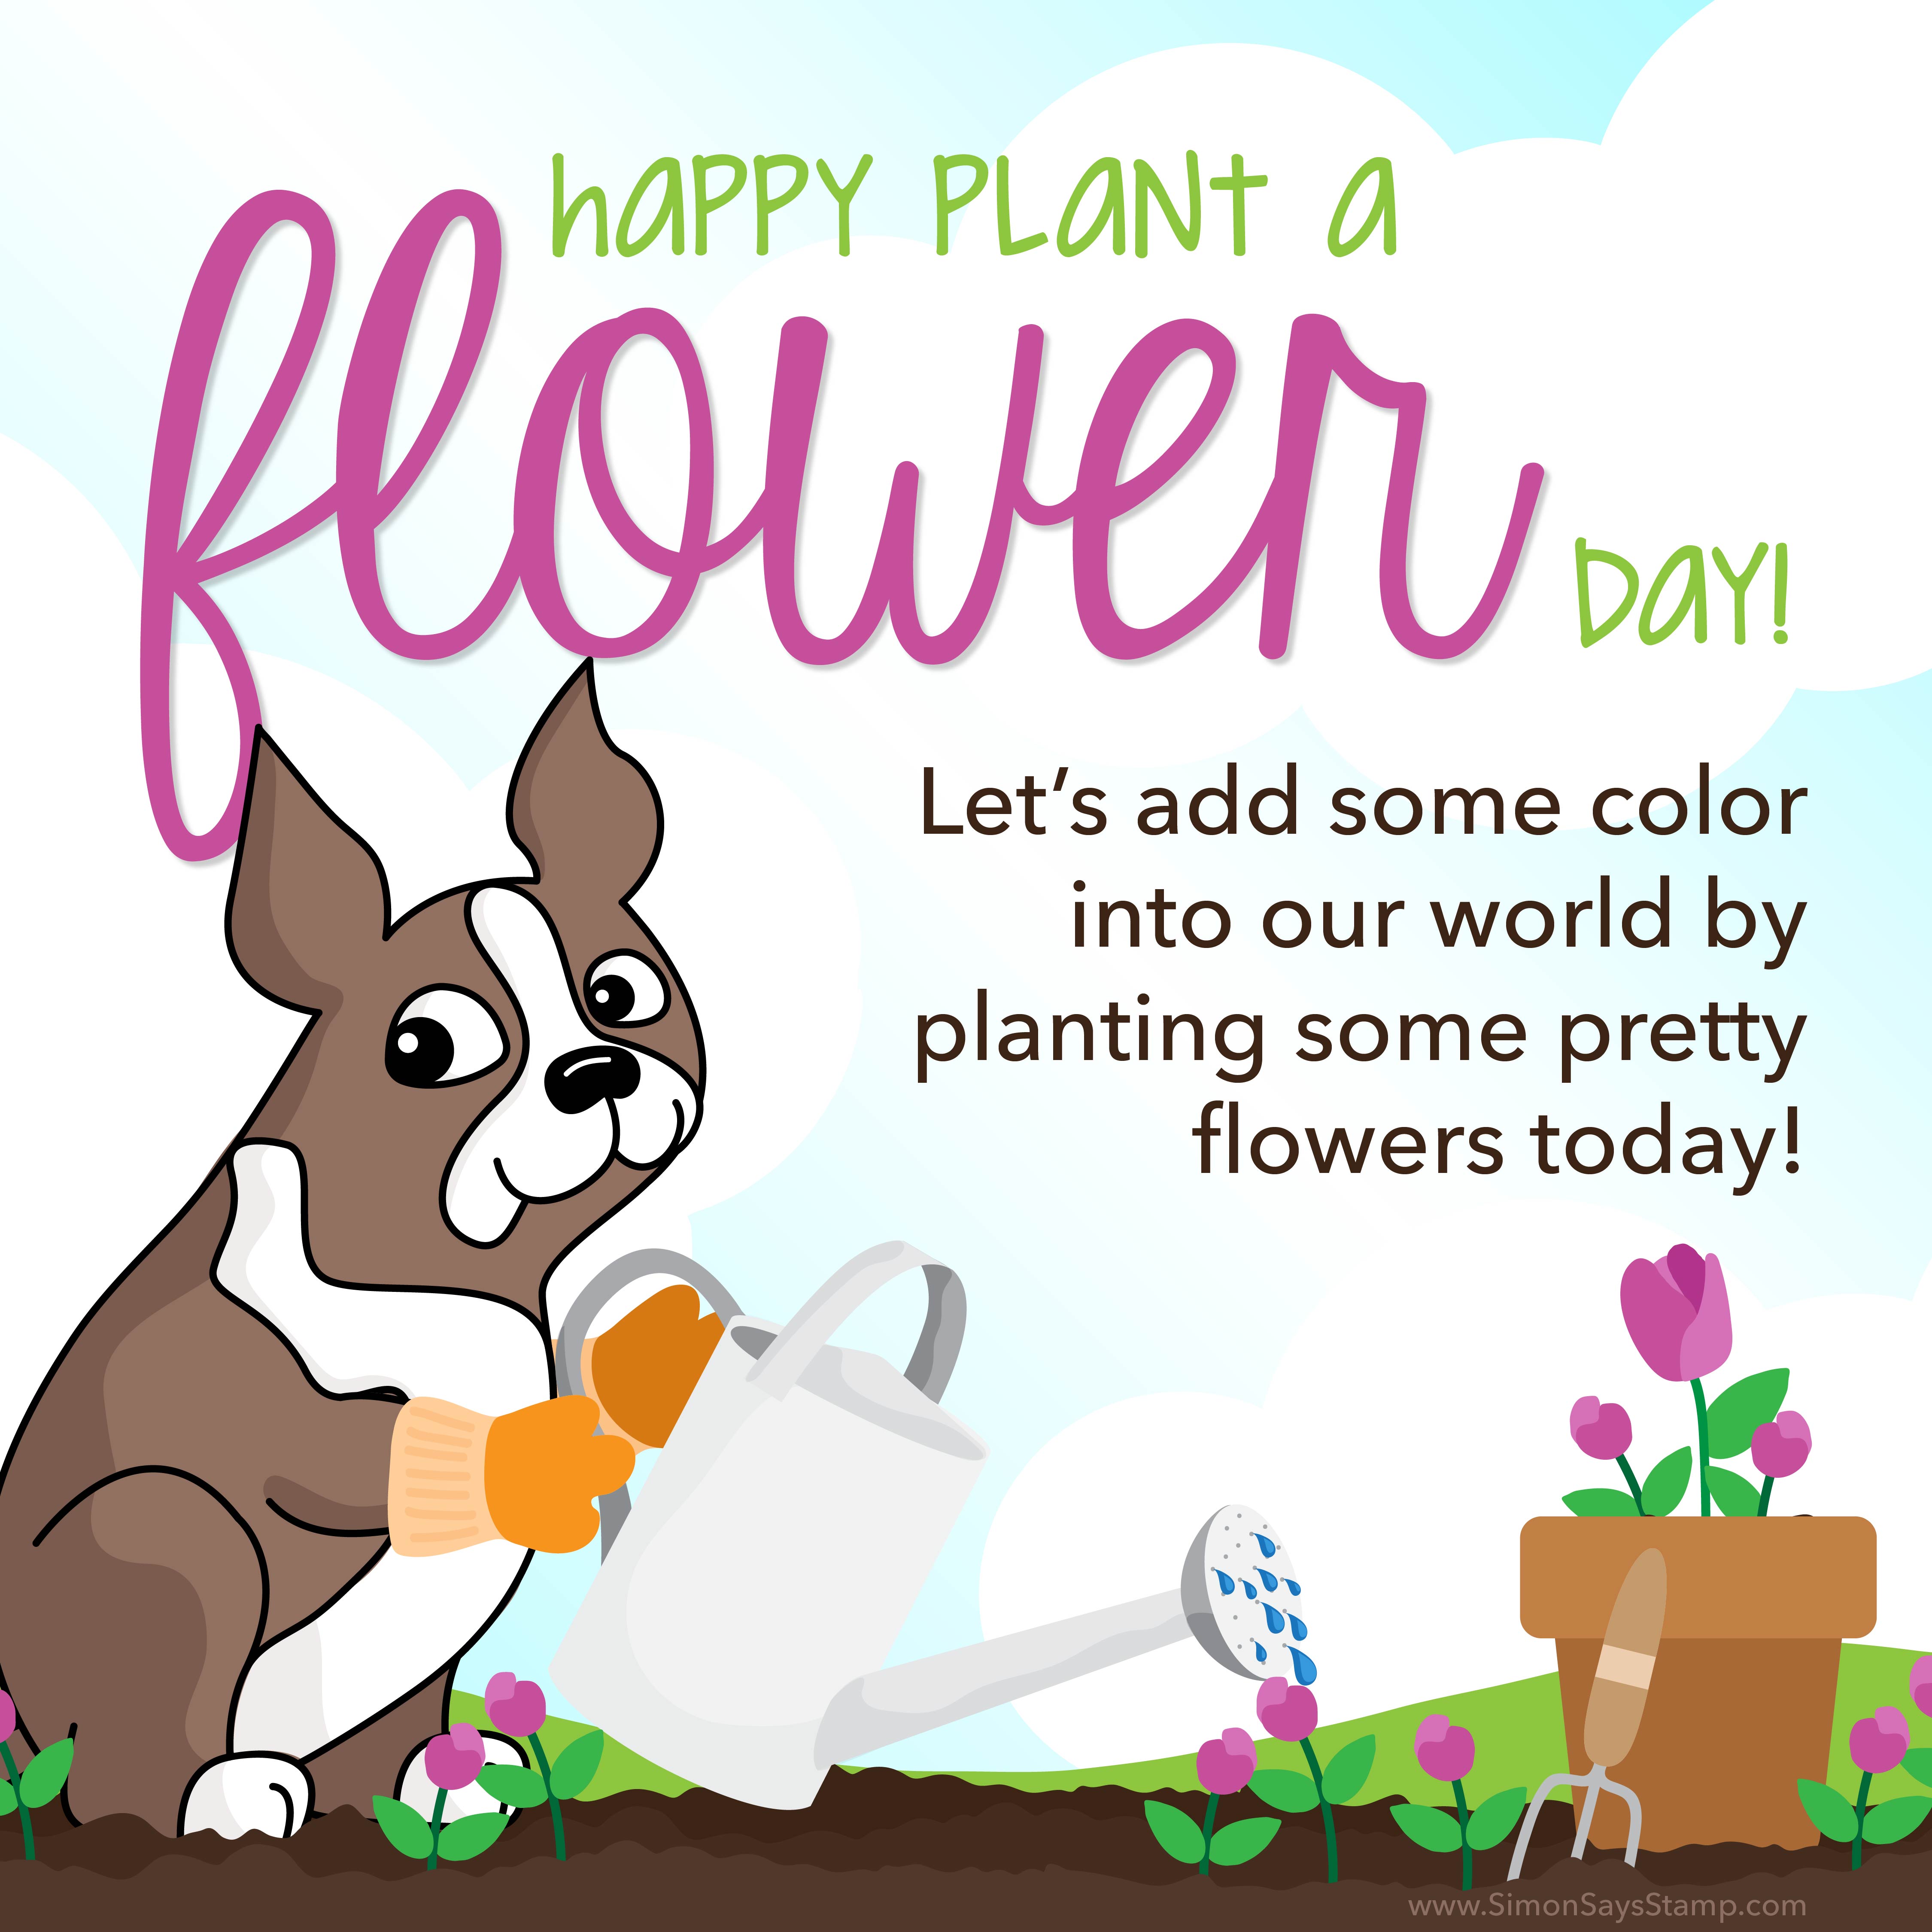
Hello crafters and Happy Plant a Flower Day! Did you know that today’s “fun” holiday is a celebration of all things blooming and beautiful!? That’s why I thought today’s video would be perfect for not only Plant a Flower Day, but also for Spring and organization! I’ll be showing you how I repurposed some mugs I had and gave them a fresh, new look with the help of alcohol inks!
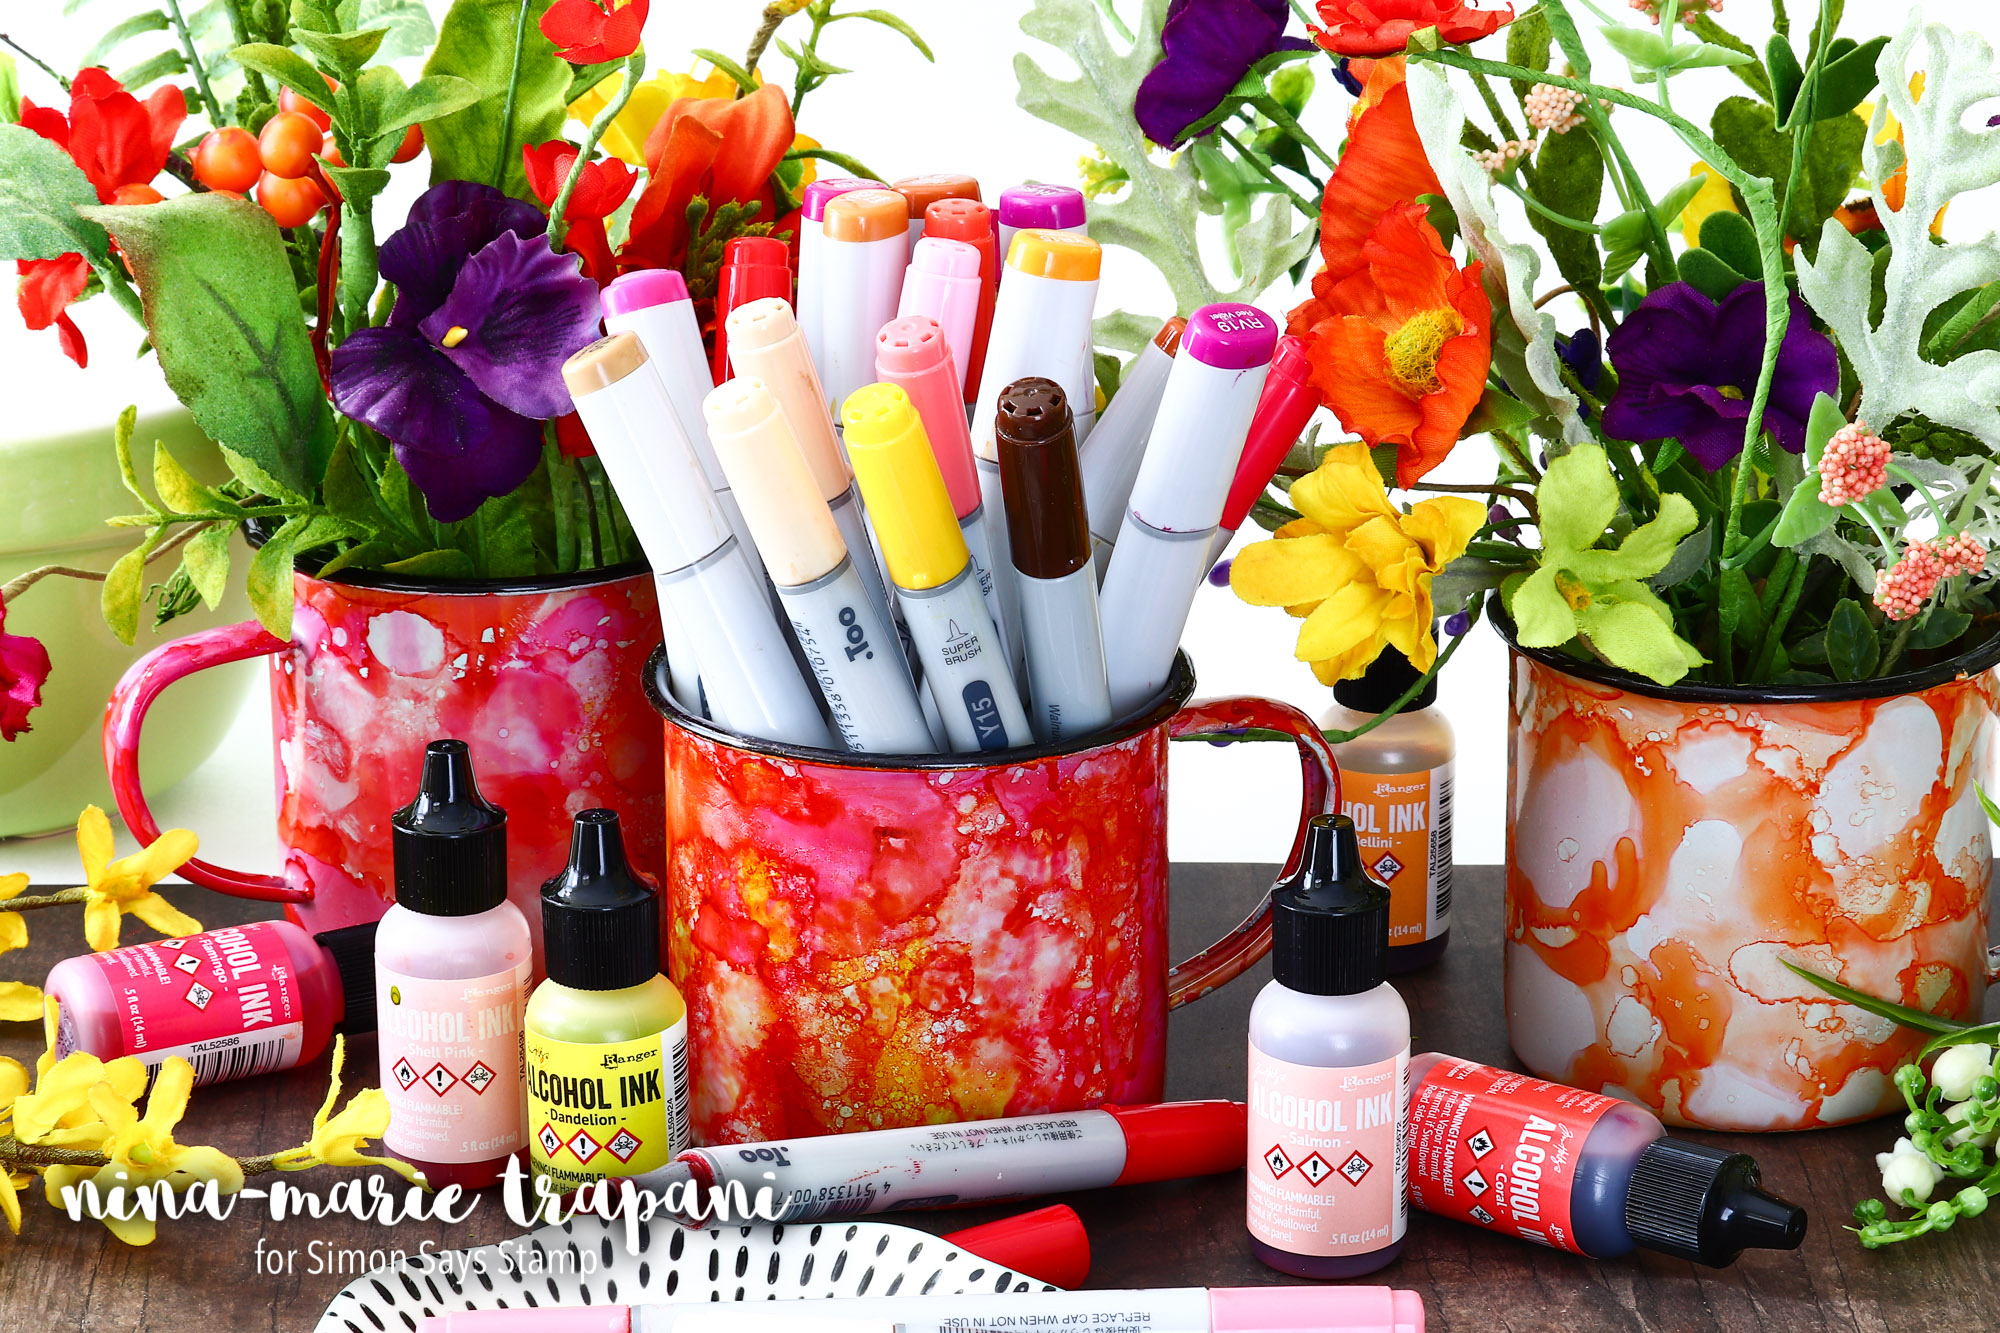
You can apply alcohol inks to just about any surface; I’ve done this on glass before too and it works beautifully! The bold-colored mugs on the left use Flamingo, Coral, Salmon, Dandelion and Peach Bellini.
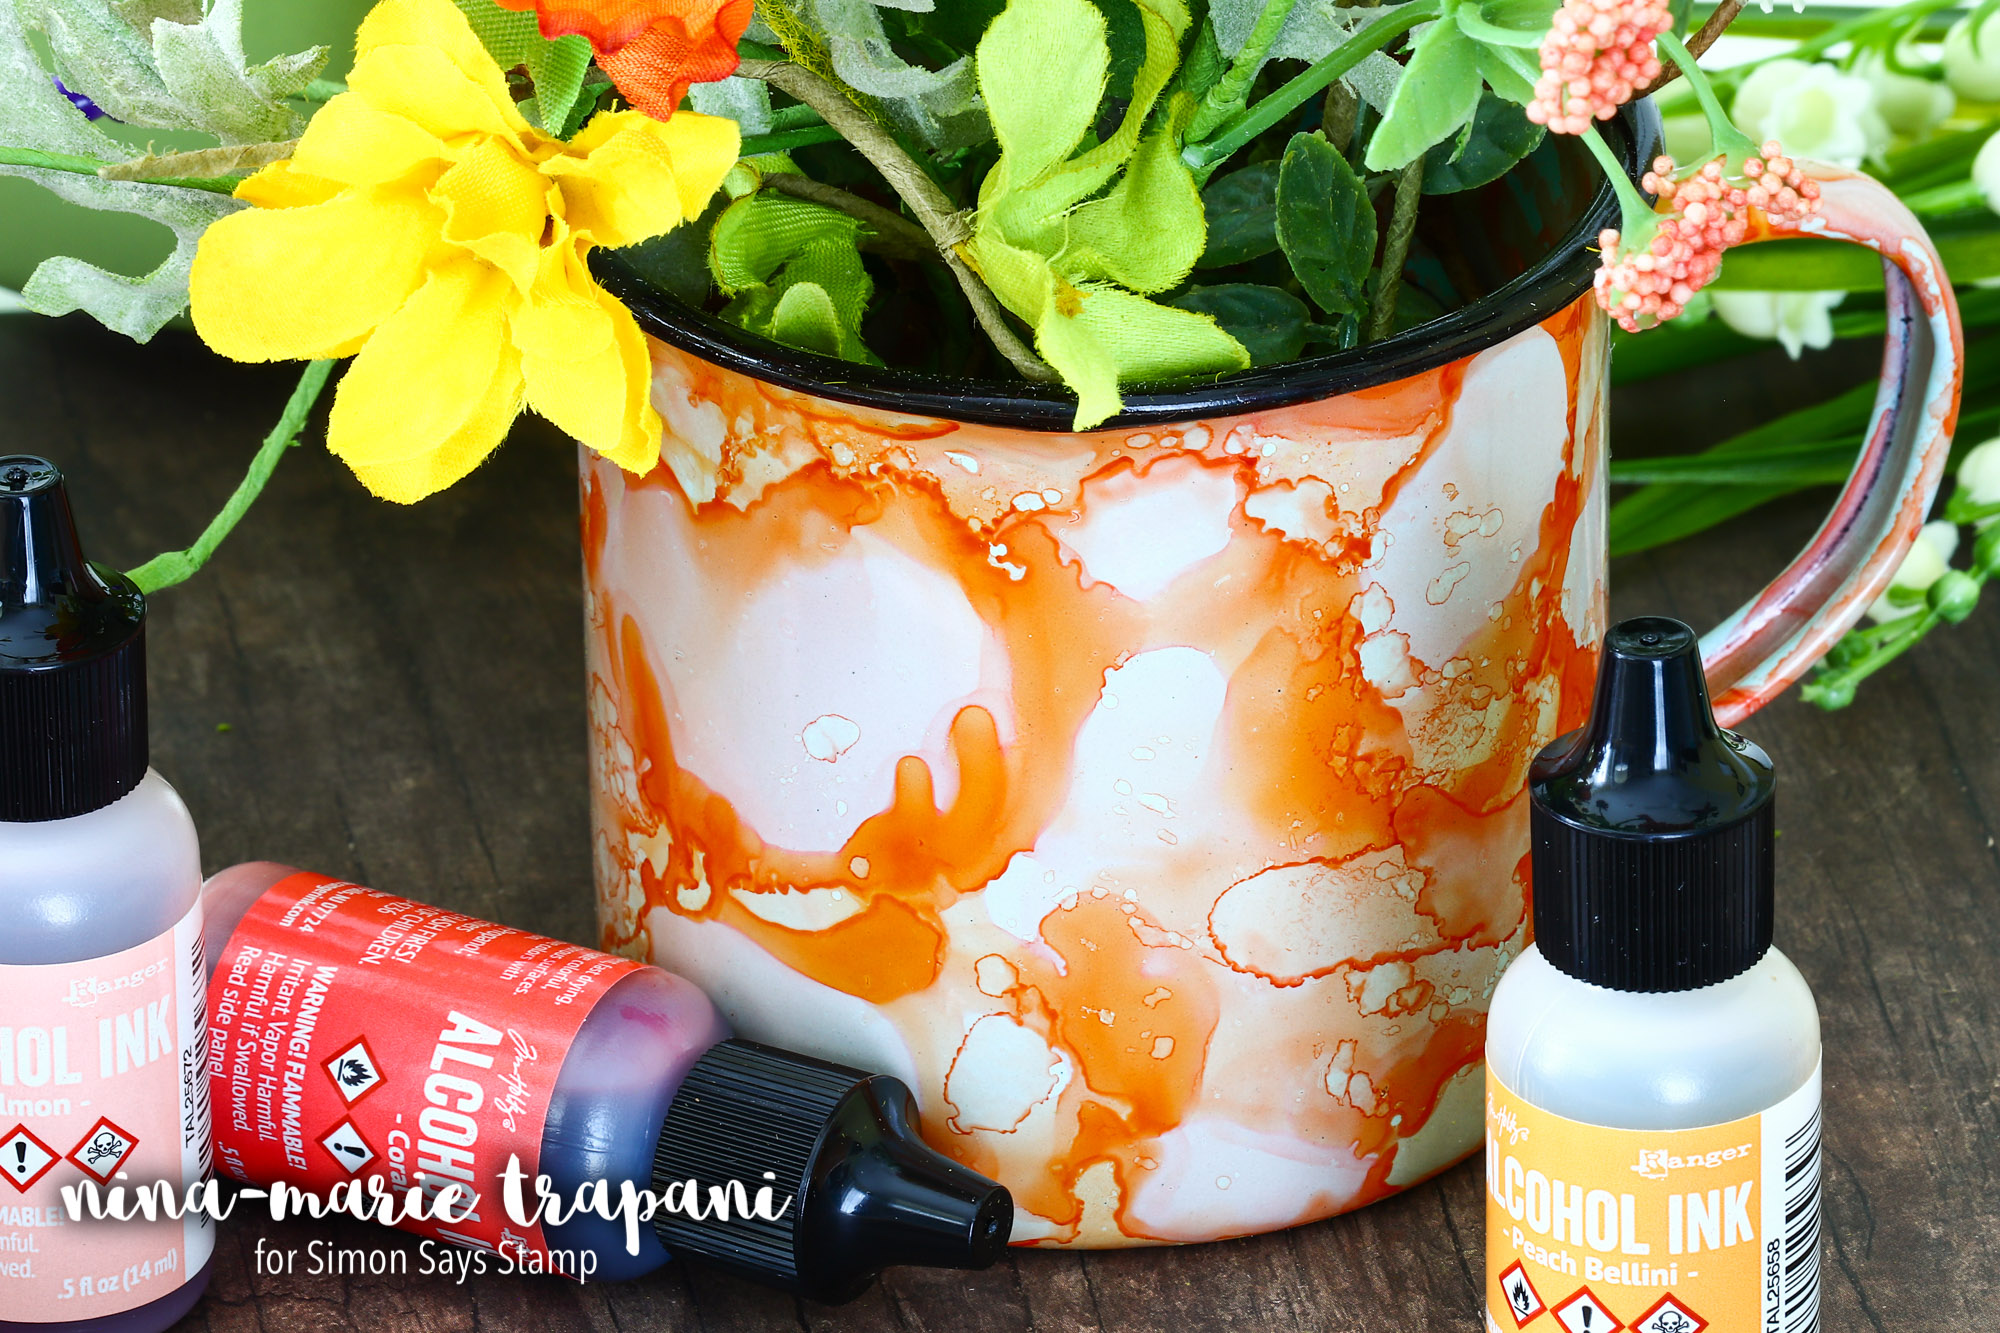
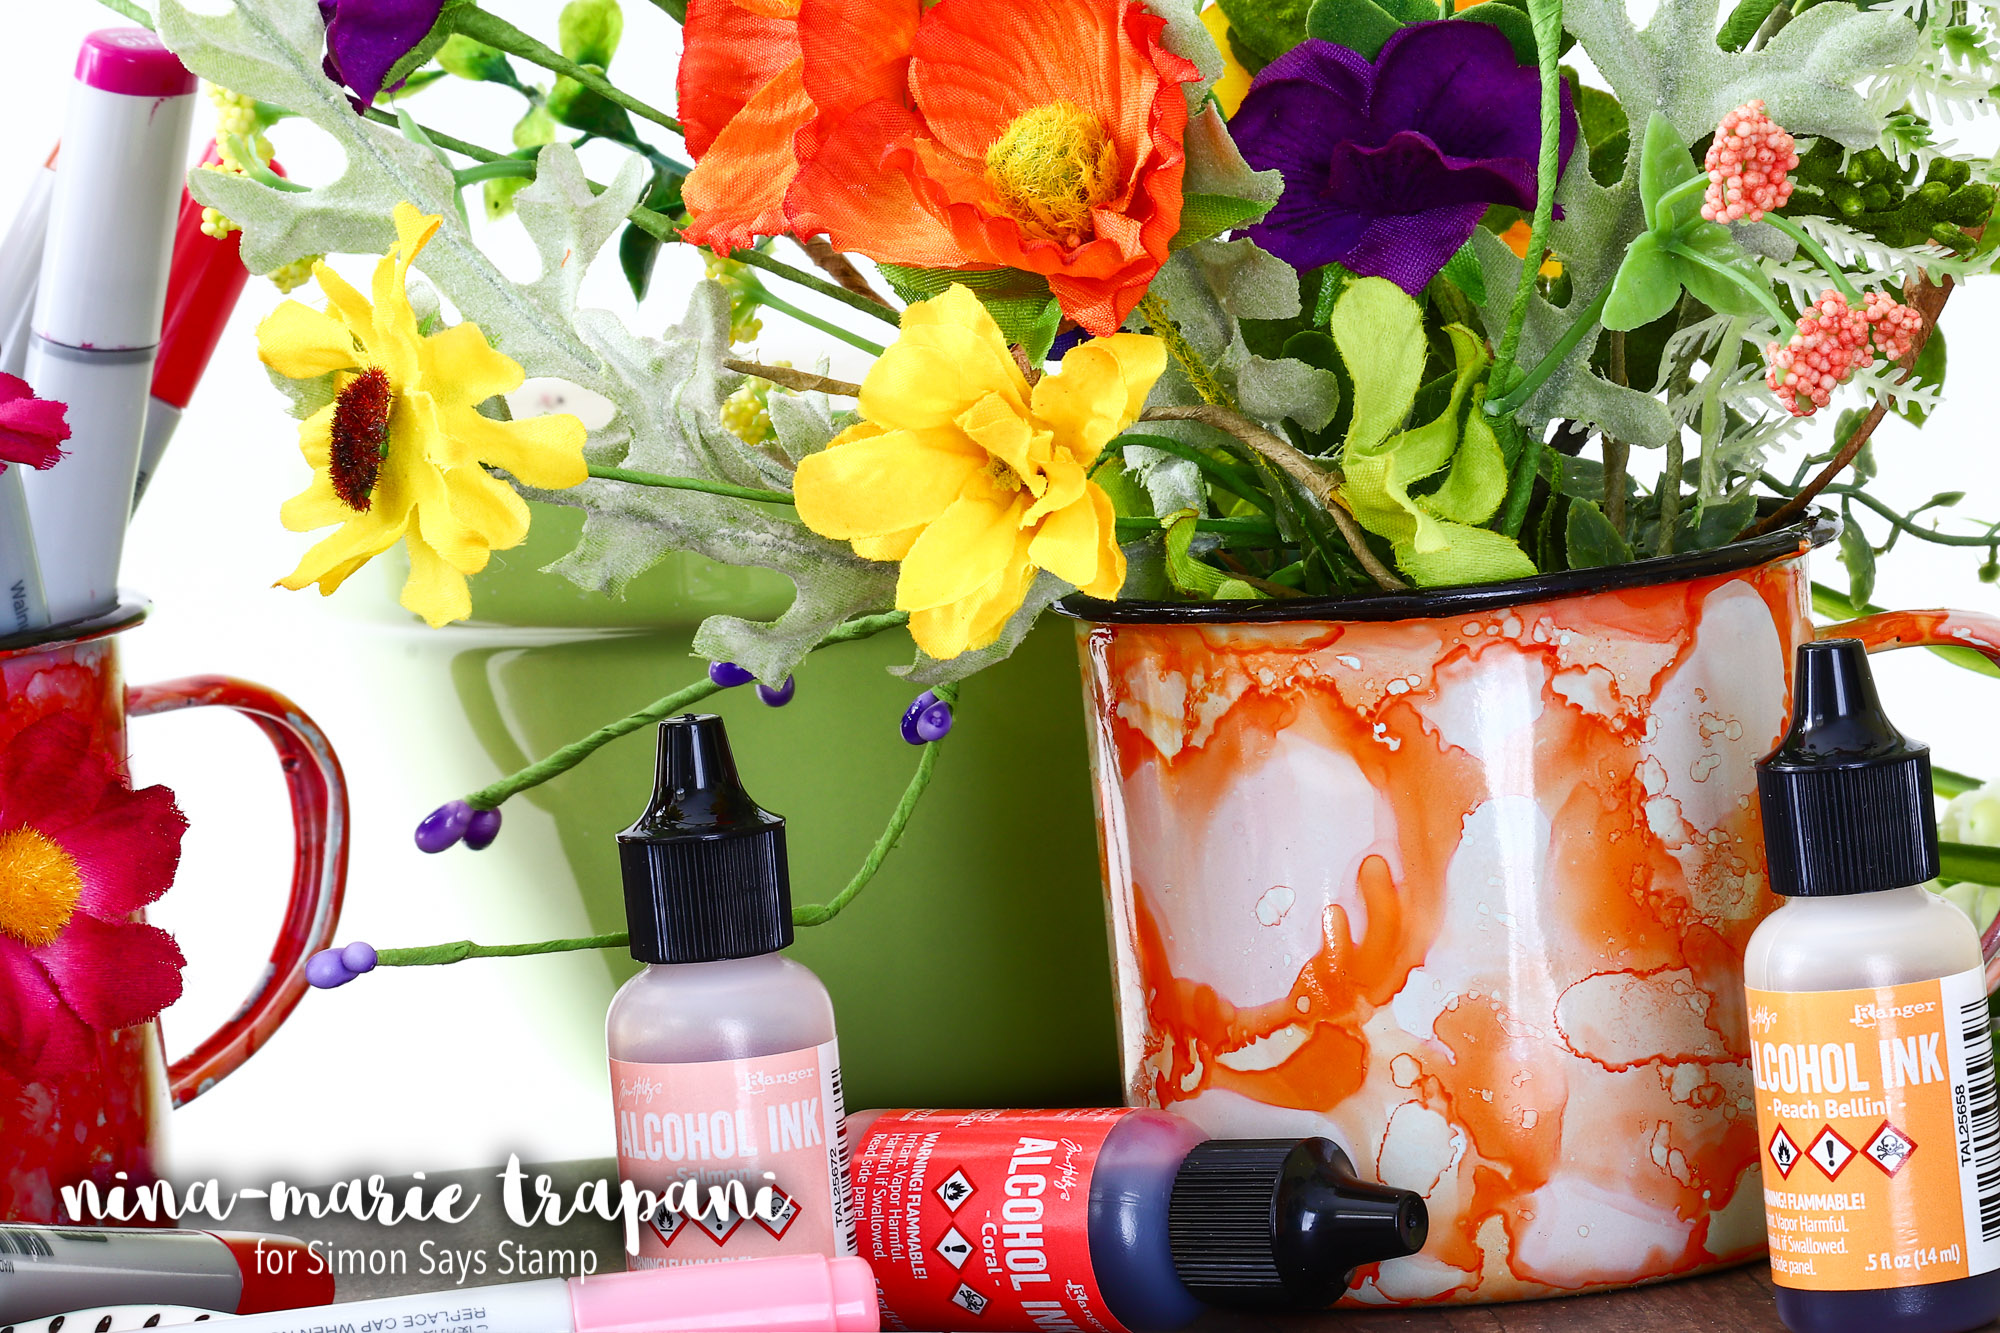
Like I had mentioned, these mugs would make great planters for the Spring flowers that will soon be blooming! Check out the cute mug above with the pretty orange and soft pink colors; I filled this with some Spring silk flowers to brighten my studio! I used Peach Bellini, Salmon, Shell Pink and a VERY tiny amount of Coral.

Or you can use them for supplies and crafting! Here’s the turquoise, green and purple mug I made, which I often use as a water cup for painting. I used Sail Boat Blue, Turquoise, Citrus (very sparingly) and Amethyst.

You can seal these mugs if you’d like to make sure they are waterproof. I chose not to, as I have not had any issue with the mugs getting chipped and the alcohol ink wearing off (a couple of my mugs that I’ve done like this get handled frequently and hold supplies). If you do choose to seal the mugs, Ranger suggests using a water based sealant.
I hope you will check out the video below to see how I made these cute little mugs! I have a blast working with alcohol inks, as they can be used on so many surfaces other than paper!
Thanks for visiting with me today; I’ll be back soon with a brand new Studio Monday video!
WATCH THE VIDEO
SUPPLIES USED
|


Blog Candy Alert!! Follow our blog via email and comment on this post for a chance to win grab bags and blog candy! Remember to tag your awesome projects with #simonsaysstamp on social media so we can see what you are creating!


