One Stamp, Five Ways – Even More Spring Flowers!
Hi friends! Happy Friday!! Please welcome special guest Suzy Plantamura with her fun feature of “One Stamp, Five Ways”. This time around she’s featuring our gorgeous Even More Spring Flowers stamp set! Read on and enjoy!
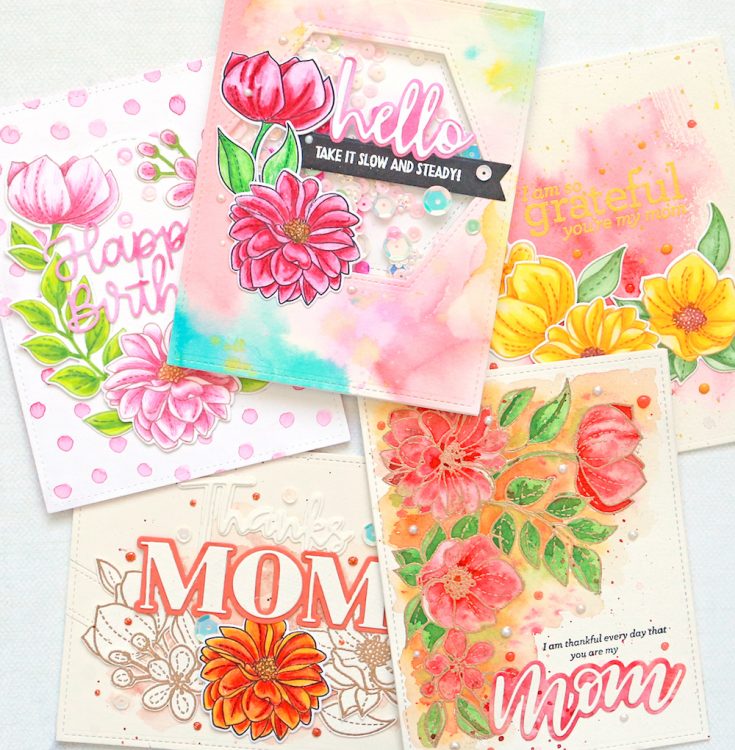
Hi, Simon Says Stamp crafty friends! I’m back again today with a “One Stamp, Five Ways” post using the Simon Says Stamp “Even More Spring Flowers” stamp and die set. I love flower stamps as they are so fun to color and make such beautiful heartfelt cards for any occasion. I’ve created five cards to share with you with tips I used to create each one.
I always have a stack of card size watercolor papers that I have painted to use on a future card. When I am in the mood to paint, I just make a bunch of backgrounds including stripes, dots, and washes of multiple colors. This makes the actual card making the process go way faster when these backgrounds are pre-done.
Here are some tips for creating this card:
• Use a natural color ink such as SSS Barely Beige to stamp your images so you can color them with a no-line look
• Use colored pencils over Copic Markers to add shading and details to your colored images
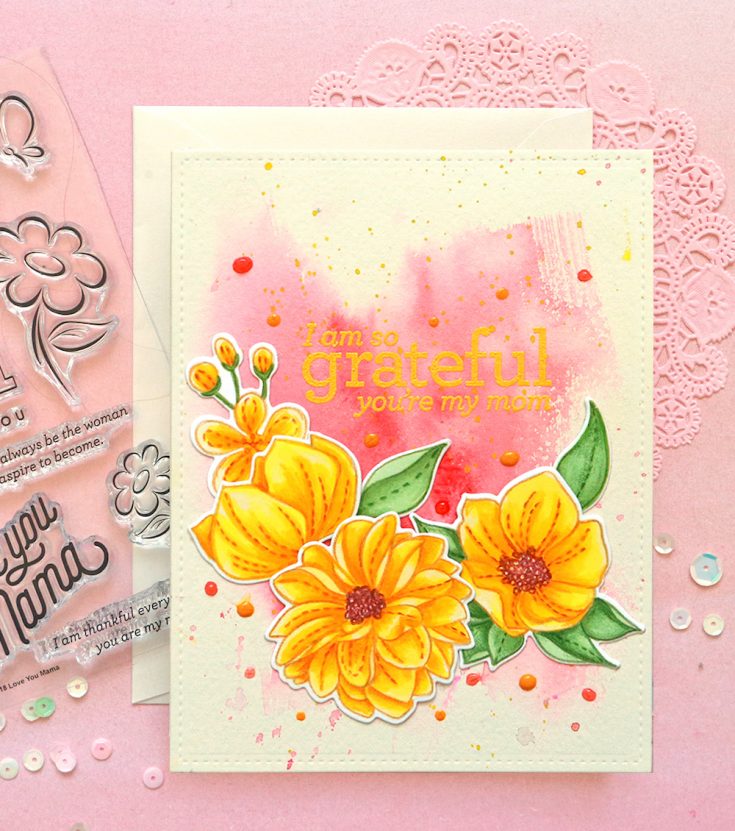
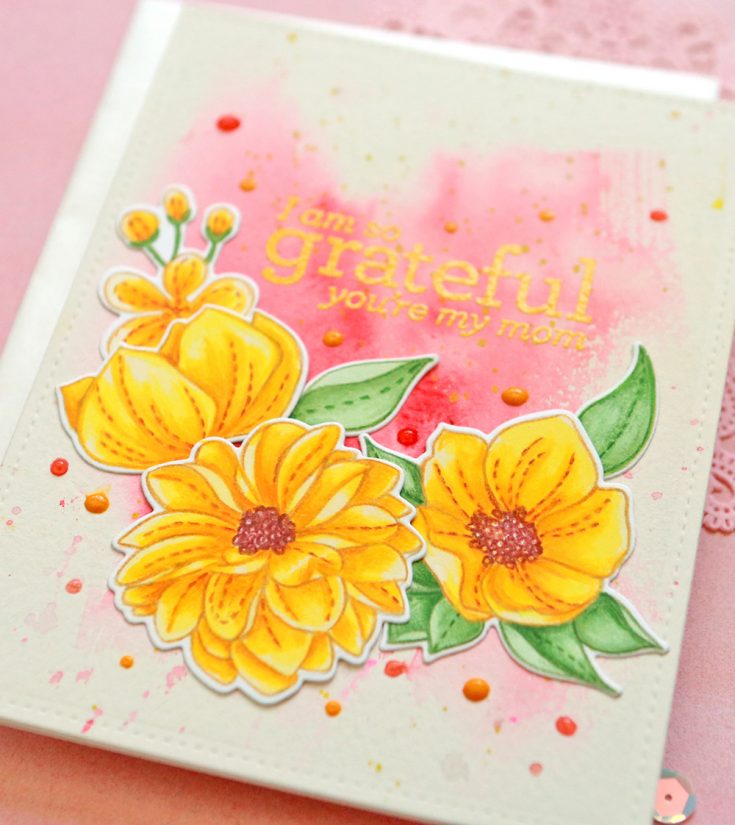
• Watercolor a “canvas” for your images or a portion of your background to frame your images; on this background, I painted the center of the card size piece with red watercolor and then I flicked both red and yellow watercolor over it once it was dry; I used a flat brush and left some brush marks for more interest and texture
• Use multiple colors of Tonic Nuvo Drops in both small and larger spots to add to the messy look of the paint flecks on the background
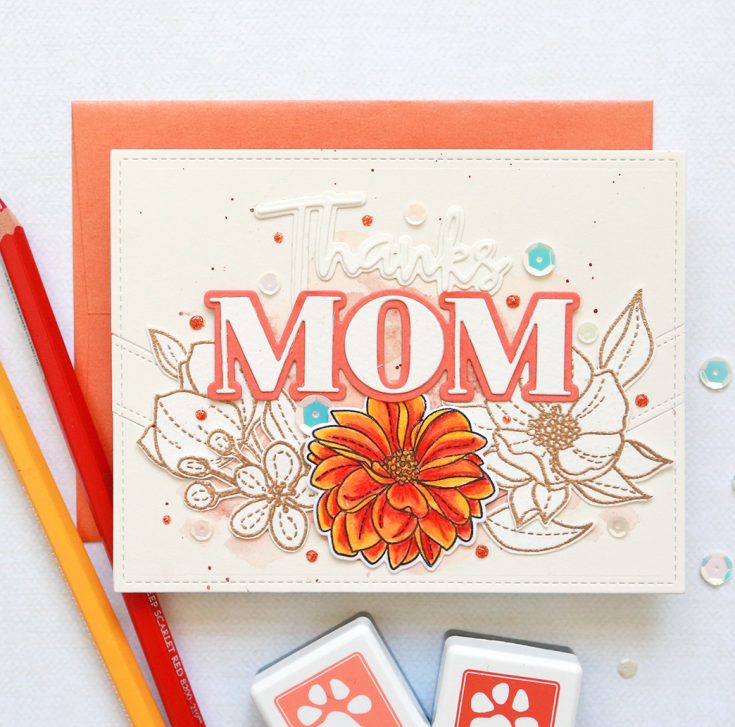
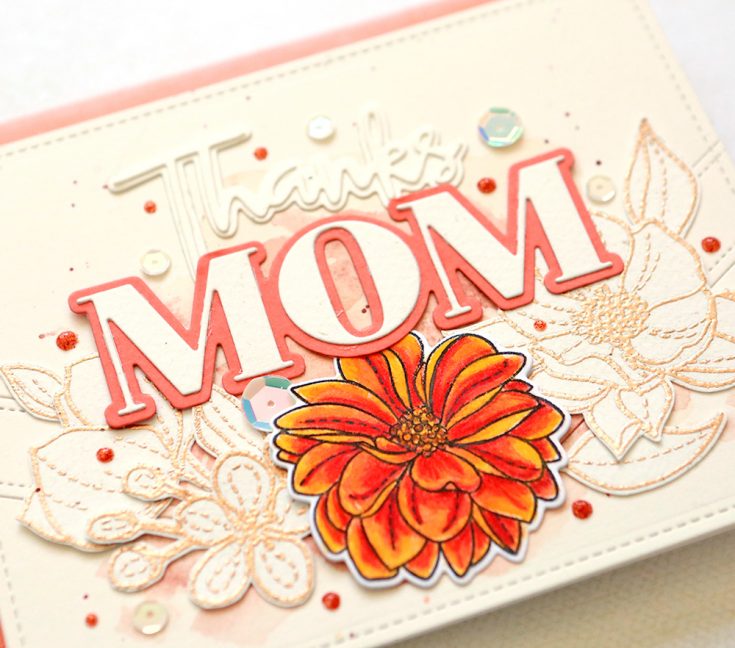
On this card, I used embossed images without any color added for a simple, more muted look. I embossed the images with SSS Antique Gold embossing powder on watercolor paper. I mixed in a watercolored flower image in the center of these non-painted ones. I kept the large sentiment as the star of the show (or the focal point of the card) by keeping the flowers more plain and simple.
Here are some tips for creating this card:
• Use watercolor paper to emboss images (even when you don’t plan on watercoloring them) for the nice texture and more cream color; also this way the flowers match the watercolor paper background on this card
• Keep the sub-title of the card (thanks in this case) the same color as the background so it is more subtle than the main title (mom)
• Lightly watercolor behind your images in the same coral color so you have a frame for the flowers and salutation; fleck some paint on the background as well
• Add sequins AND Nuvo Drops (in Orange Soda glitter here) to backgrounds
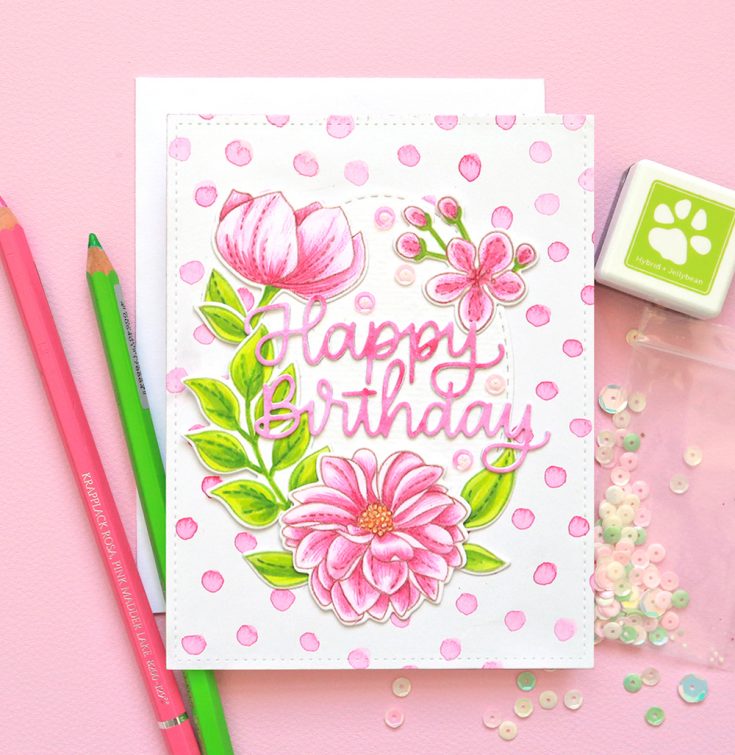
I love the colors on this card – pink is my favorite! I used an SSS stitched rectangle die over a polka dot watercolored background I have made previously. The oval gives me a canvas for my flowers and sentiment.

Helpful Tips:
• When using a stand-alone salutation die, die-cut it twice (or more) and glue one on top of the other to make it thicker and stand out more
• Die-cut words out of watercolor paper that you have painted to match your card instead of cardstock for more color variation and texture
• Use colored pencils on flower images to make them look more realistic by adding lines and shading
• Use white Tonic Nuvo Drops in the center of sequins
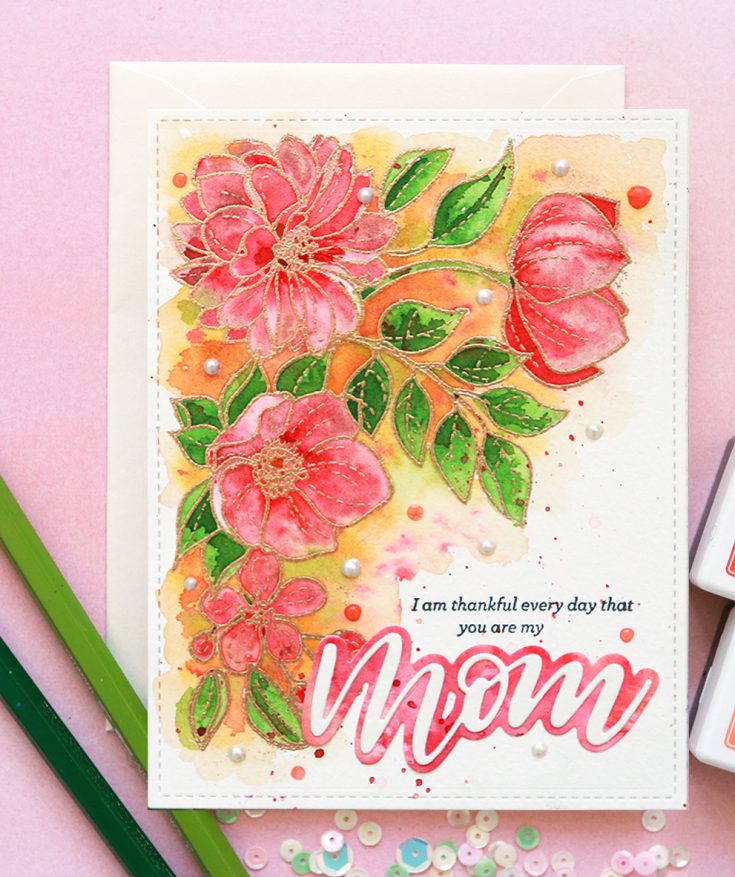
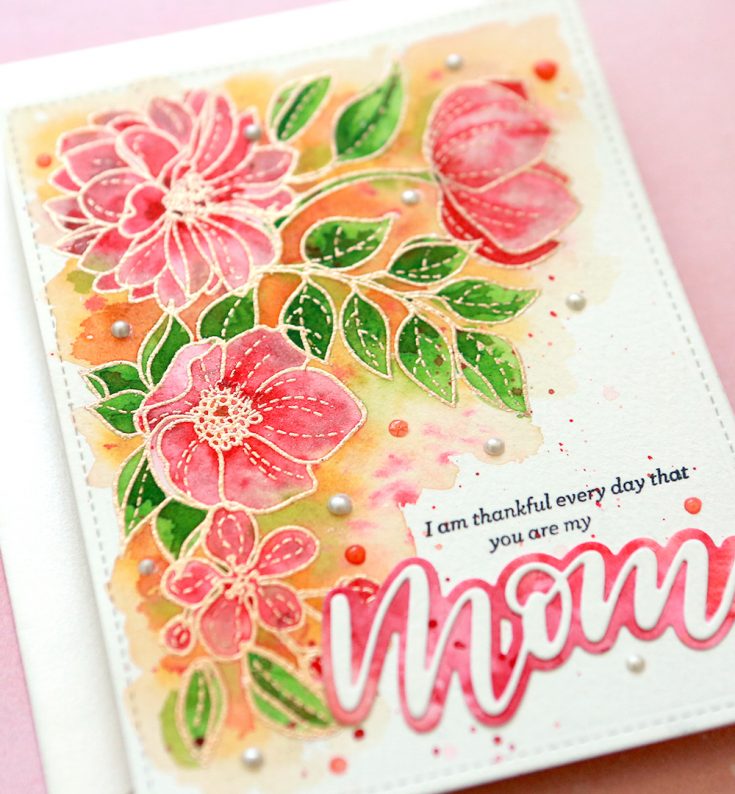
For this card, I arranged all of the stamps on a piece of watercolor paper (card size) and then used my MISTI to stamp them all at one time. Unfortunately, this was a (happy) mistake as the stamped images were not close enough together. So I started over and only stamped one at a time so the stamps could be lined up really close to each other. I embossed all of these images with Antique Gold Embossing Powder. I used my “mistake” set of embossed images to cut apart for my card above (Thanks Mom). I always find a way to use my mistakes later so I don’t waste them!
Here are some tips:
• Watercolor some pieces with a solid color of watercolor wash to use on cards instead of cardstock as I did here for the background of the word “mom”
• Add several layers of watercolor to get this built up very saturated look in the flowers and leaves
• Use lots of water as you add additional color to the background so the colors swirl together and create
• Flick your brush with several of the colors you used in the images to add flecks of paint over the background
• Use watercolor pencils (shown in the photo) to add shading to your images after they are dry – you don’t need to wet the pencil marks.
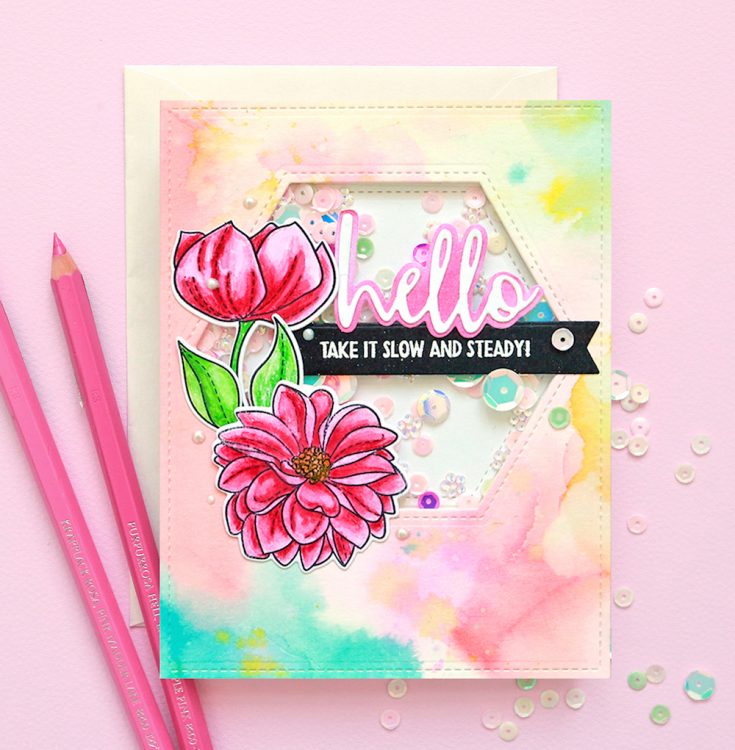
I always like to include a shaker card when I make five cards with one stamp set. They are so fun to make and so festive to give away! For the opening on this one, I used a Hexagon die by Pretty Pink Posh. It creates a nice frame to put my images around and my sentiment on.
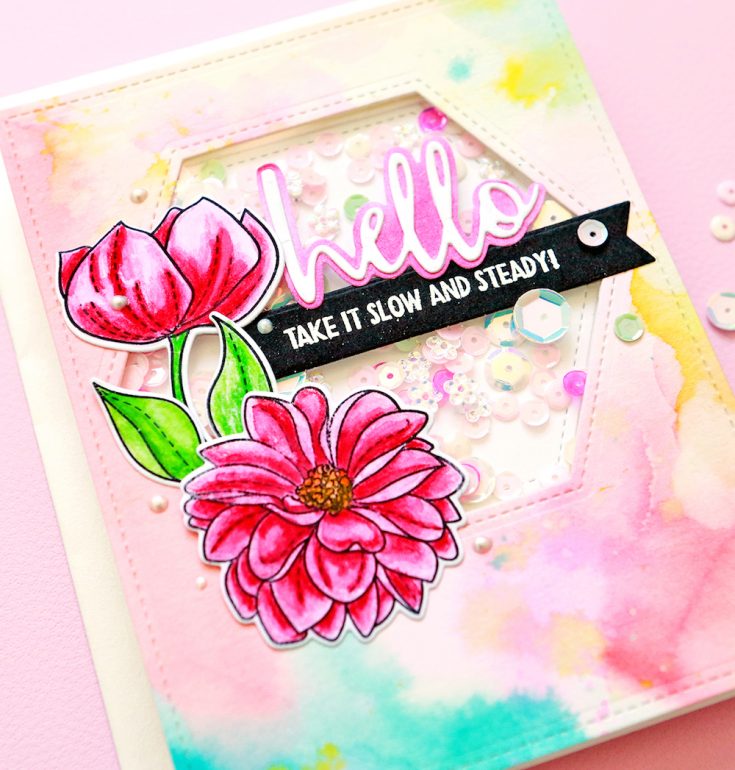
Here are some tips for this card:
• The background for this card was another one I had made previously and was waiting to use; add multiple colors to wet cardstock so they all blend together; add some water droplets and paint flecks while still wet so the colors mix and run
• Use black cardstock with white embossing powder for a real pop in your title
• Attach some sequins over the transparency on your shaker window that matches the sequins on the inside of the shaker
I could have easily make another five cards with this stamp set as it is so pretty and can be used in so many ways. I also love that you can use it with many of your stand-alone sentiment dies or stamps. Come visit my blog to see more of my “One Stamp, Five Ways” series and thanks so much for visiting the SSS blog today! Suzy
SUPPLIES:
|


Thanks so much for reading today, and thanks to Suzy for being our guest!

Copic Fans!! Time to save 25%!
Hi friends! Happy Friday! We have a very BERRY ;) special treat for you going on NOW! All in stock Copic Marker branded items are 25% off with code MARKER at checkout. This code is not valid on prior orders and cannot be combined with other promotional codes. Shop early for the best selection and enjoy!
Monthly Mail Art with Kristina Werner – May 2018
Hello, all! Kristina Werner here again with more mail art! Last month’s Mail Art video (you can see it HERE) was a bit intense, so at the request of some of you, this month I created something more clean and minimal. This is a super easy (and yet striking) design.
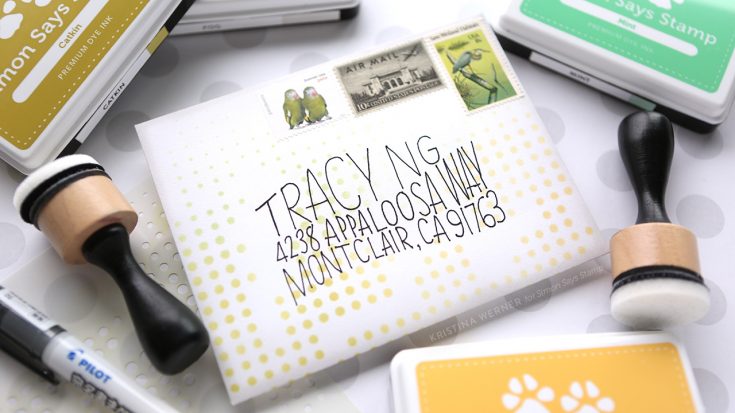
The envelope I decorated is one of Simon’s envelopes and it was perfect for ink blending. I used the new Tap Dance stencil and ink blending to create a soft, quiet background for the envelope. The four colors of Simon ink that I used are Fog, Duckling, Catkin, and Mint.
After ink blending the background, I drew “wonky” lines in pencil to serve as guides for writing Tracy’s address.
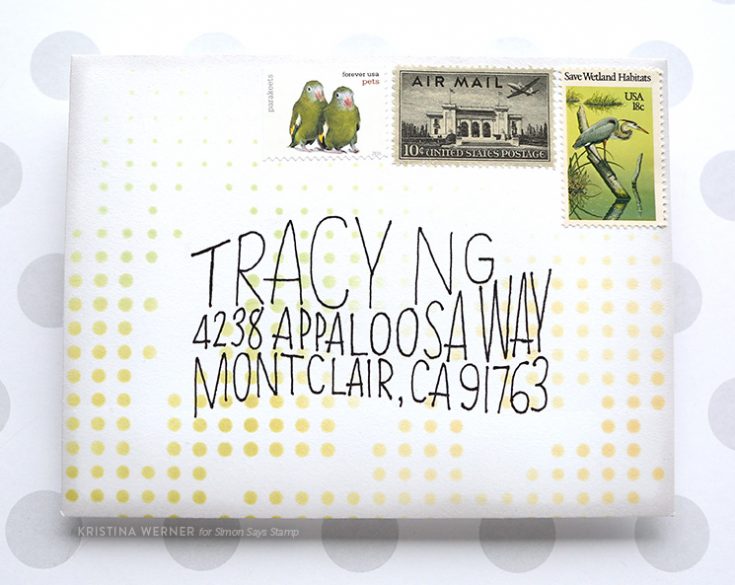
NOTE: Address used with permission. Thanks, Tracy!
I used the extra fine Pilot Envelope Address Pen to write the address. I LOVE this pen! Not only is it waterproof, but it seems to last forever. :)
Anyhow, I hope you enjoy this month’s Mail Art. Thanks for stopping by!
Supplies
|


