New Neat & Tangled Inspiration with Danielle Walls
Hello friends! Danielle from Neat and Tangled here with some cards using some of the latest products from our June release! This month we revealed the perfect mix of stamps, dies and stencils to spark your creativity – and I wanted to share a few with you!
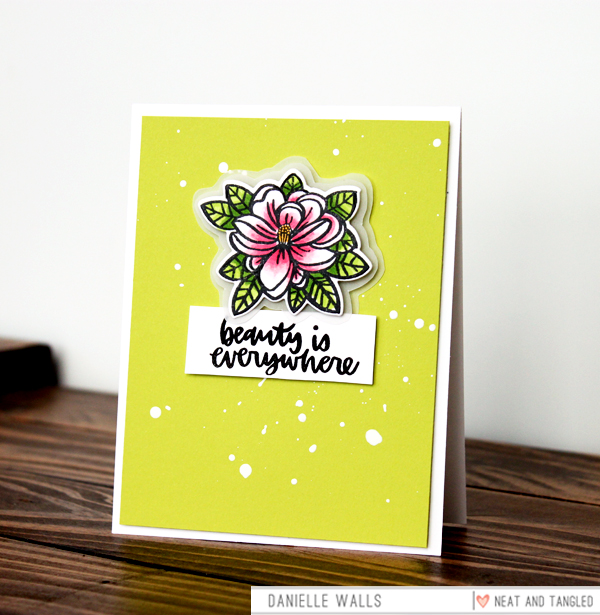
This first card I created using our new Magnolia stamp and die set. This stamp set is filled with bold and beautiful floral images in a variety of sizes and orientations so you can make any combination of arrangements! For my card I chose the larger floral image to make it the focus of the card. I stamped and die cut the flower, and colored using a variety of Copic markers. Next, I cut down a 4” x 5.25” mat using X cardstock. I then splattered it with some white paint, and set aside to dry.

While that was drying, I took my floral image and adhered it to clear vellum using foam adhesive. I then went and hand cut the vellum to follow the shape of the flower. Once complete, I repeated that again, so that underneath my magnolia flower I had 2 layers of vellum. It added so much dimension and interest to what could have been just a flat image!
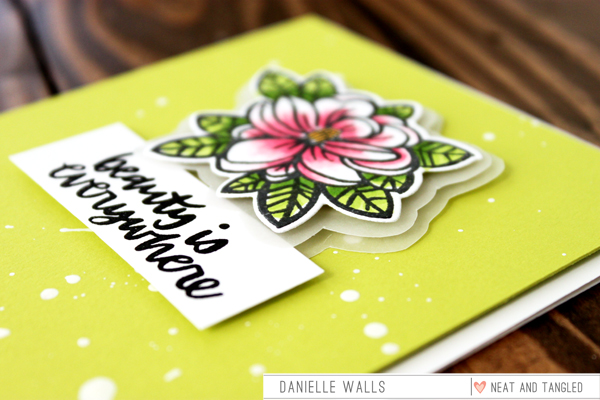
Once the paint was dry I adhered the flower to the mat panel, and then the panel to my card base. I finished it off by stamping the sentiment on some white cardstock and adhering that under the flower!
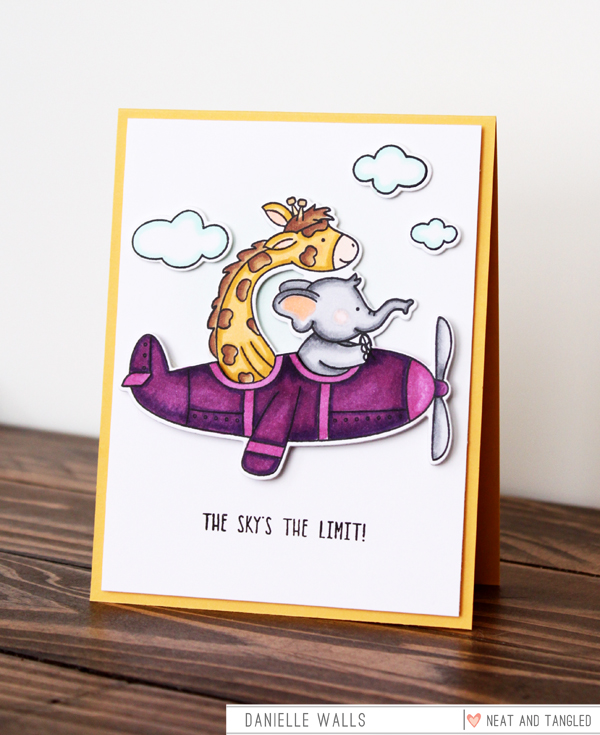
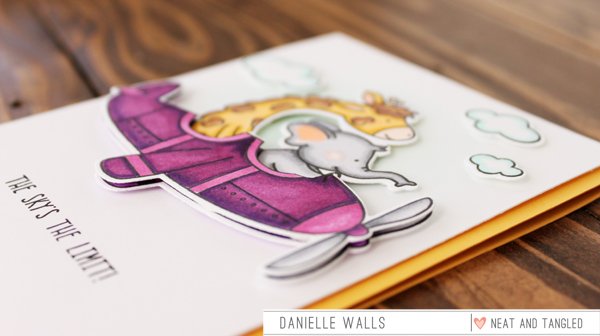
The next card I made to share is using our incredibly adorable new So Fly stamp set. I love that this set has a larger focal image that makes for easy card designs since it can take center stage! It’s also filled with perfectly punny sentiments to match!
To start this card I stamp and die cut 2 of the large images and used my Copics to color. On one I colored all the parts, but on the second I only colored the plane. Since I’m a clean and simple card maker I love to add more interest to my cards with lots of dimension. So, after I colored my second plane image, I cut out the giraffe and elephant very carefully, and then popped it up on top of my fully colored image. I think it makes it look like those animals are really riding inside the plane!
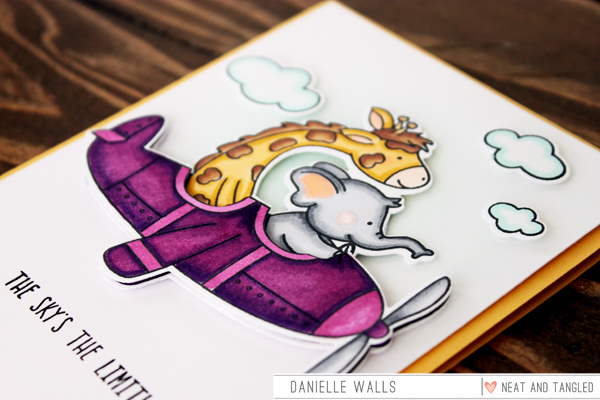
I set my colored images aside, and grabbed my Distress Ink and foam blending tool to just do some like ink blending on a 4”x 5.25” white cardstock mat. I placed the card mat on my Misti and just arranged the colored images without adhereing them down, so I could see where I wanted the sentiment to go. I removed the images and stamped my sentiment. To wrap it up, I adhered the mat panel to my cardbase, and then added by colored images with foam adhesive!
I hope you’ve enjoyed my cards today, and they leave you feeling inspired!
MAGNOLIA CARD SUPPLIES
|


SO FLY CARD SUPPLIES
|


Blog Candy Alert!! Follow our blog via email and comment on this post for a chance to win special blog candy!
New Waffle Flower: Gym Rat Slider Shaker Card
Hello everyone! I am so so excited to be here at Simon Says Stamp with a new video featuring some of the new products from Waffle Flower Craft’s June Release. In today’s video I demonstrate how to create a fun interactive card with the new Gym Rat Stamp Set and matching dies! I cannot get over the cuteness of this set! Plus the awesome 80’s vibe! I’m in love!! Let’s get started!
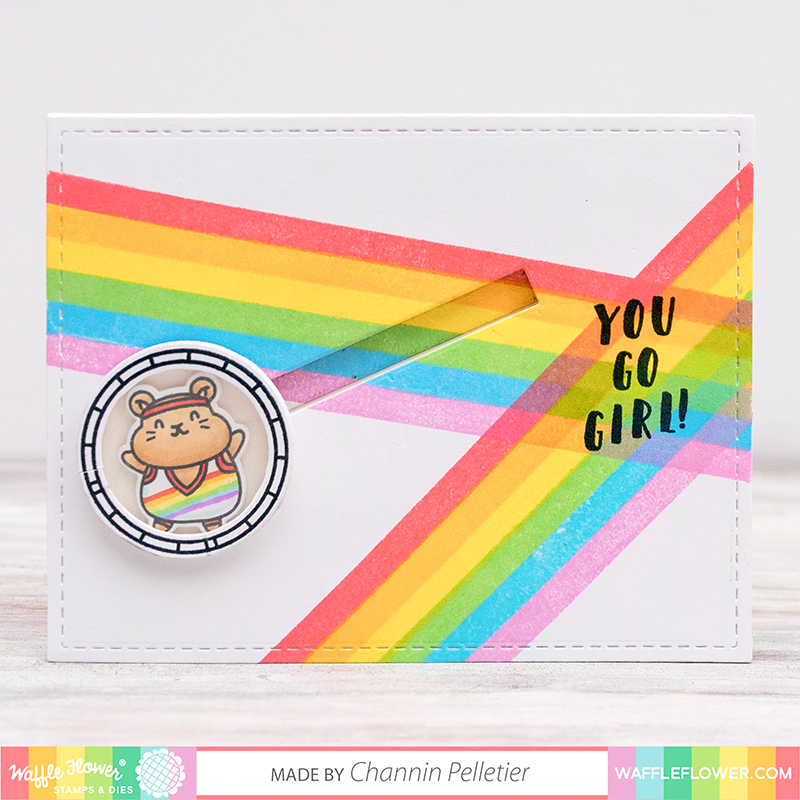
First, I stamped the rainbow background using the Plaid Play Stamp Set and Waffle Flower dye inks (My Pleasure, Oh Happy Day, You Said What, Chirp Chirp, Daydreaming, & Happy Go Lucky) onto an A2 panel (4.25” x 5.5”) of white cardstock. With the background complete, I moved onto creating my shaker hamster ball. First, I stamped a hamster and the wheel from the Gym Rat Stamp Set in Memento Tuxedo Black onto a scrap of white cardstock. I then created a quick mask by stamping the wheel onto a post-it note and then cutting the center out with scissors. I then nestled the mask into the center of the wheel stamp, inked up the stamp, removed the mask and then stamped it. This created a wheel with nothing in the center.
Next, I colored the hamster with copic markers and then die cut it and the wheels out with the Gym Rat Matching Dies. I also die cut a piece of acetate and craft foam with the wheel die as well. Next, I fussy cut the stand off of both the cardstock wheels and then cut the center out of the wheel I didn’t mask creating a ring. I then used the masked wheel as a guide and traced where to cut and then cut to remove the stand on the craft foam and acetate wheels as well. Next I adhered the cardstock wheel with the center removed onto the acetate. I then cut the center out of the craft foam wheel and then adhered that to the top of the remaining cardstock wheel. To finish off the shaker, I popped the hamster inside and then adhered the acetate wheel on top.
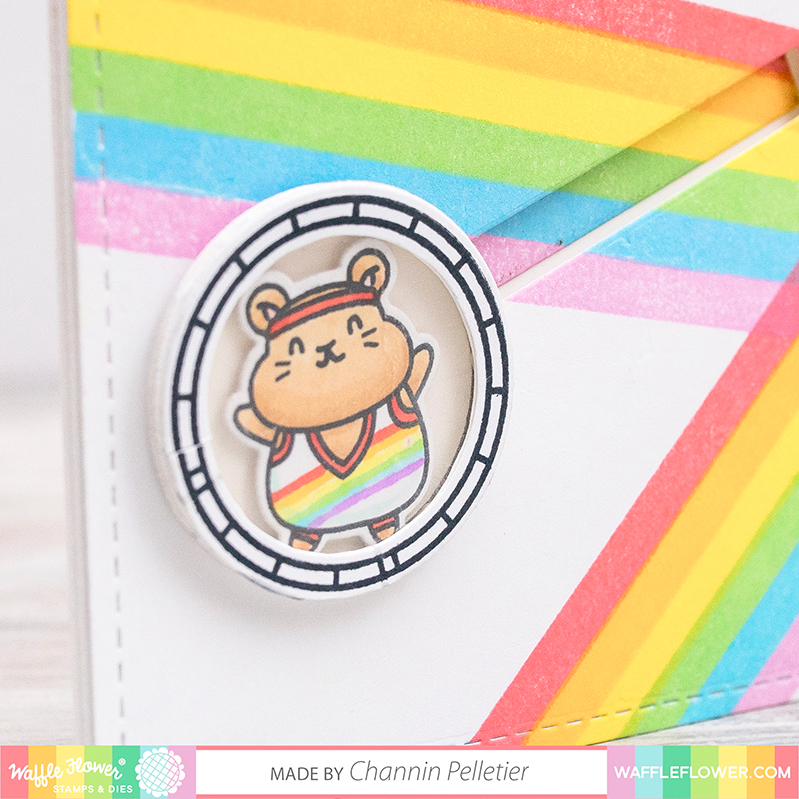
Next, stamped my sentiment onto my rainbow panel and then I created a channel for my hamster ball to slid in by die cutting the largest die from the Sentiments Die set into the panel. I then adhered the sentiment die cut to an A2 top-folding card base turned on its side and then added doubled up foam tape around it. Then, making sure I had a penny in place, I adhered the front panel onto the foam tape. Next, I doubled up a small amount of foam tape, rounded the edges, and then adhered it to the penny. Lastly, I adhered the shaker hamster ball to the foam tape on the penny.
WATCH THE VIDEO
I hope you enjoyed my card and video! Thanks so much for stopping by!
~Channin
SUPPLIES
|


Monthly Mail Art with Kristina Werner – June 2018
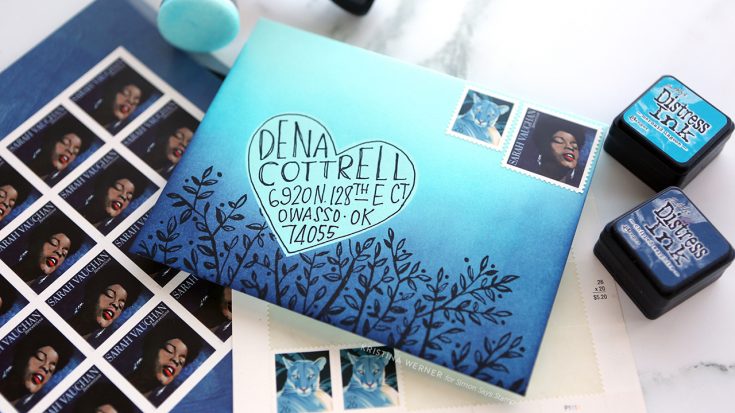
Hello, all! Kristina Werner here again with your monthly installment of Mail Art! This month I did some simple masking, blending, and stamping.
I started with an Audrey Blue envelope (still one of my favorite Simon colors), and created a heart mask by die cutting some masking paper with one of the Nested Hearts dies. I placed the heart mask on the envelope, making sure to leave room in the top right color for the postage stamps. I blended two Distress Ink colors onto the bottom edge of the envelope: Mermaid Lagoon and Chipped Sapphire.
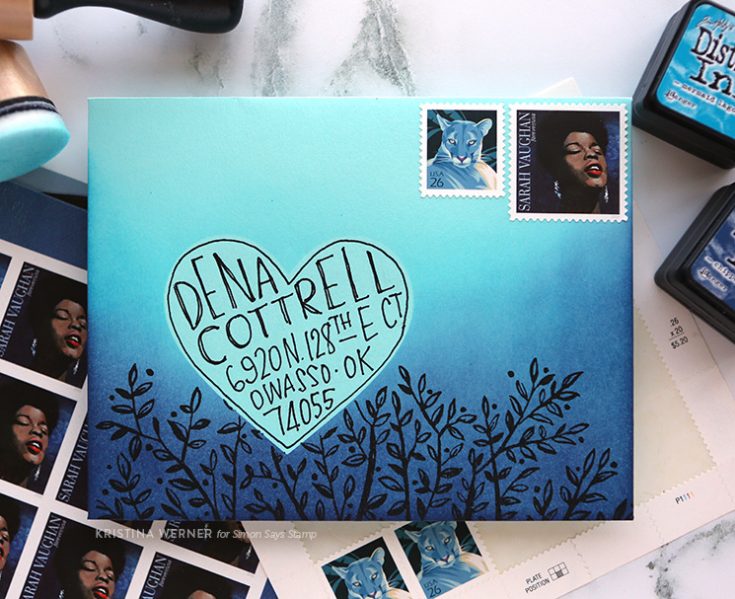
Before removing the heart mask, I stamped the top half of the large Brushed Branches stamp in Versafine Onyx Black ink on the bottom edge of the envelope.
Then I removed the mask and was left with a perfect space for the address. I penciled the address in first and then went over it with a black pen.
NOTE: Address used with permission. Thanks, Dena!
The last step was to adhere the postage stamps. If you want to, you can further protect your envelope by applying Distress Micro Glaze to the envelope (be sure to skip the postage stamps since the Postal Service will need to cancel the stamps when your envelope is processed), however I didn’t do this step and it is optional.
Thanks for stopping by today!
Supplies
|


