This Graduation Card OPENS Like a Real Book: Yippee for Yana

Hi friend! Please join me in welcoming back the oh-so-talented and amazing Yana Smakula! (Please note: our dear friend Yana is Ukrainian. To show support to our brothers and sisters in Ukraine, please see Yana’s post HERE.)

Hello, friends! Welcome to another Yippee for Yana video! Today I’m sharing a fun and easy interactive graduation card featuring a book that actually opens to reveal a hidden message inside.

I’ve really been enjoying interactive cards lately, especially the kind that don’t require any complicated mechanisms. This design is exactly that – simple, clever, and perfect for adding a little surprise to your project.
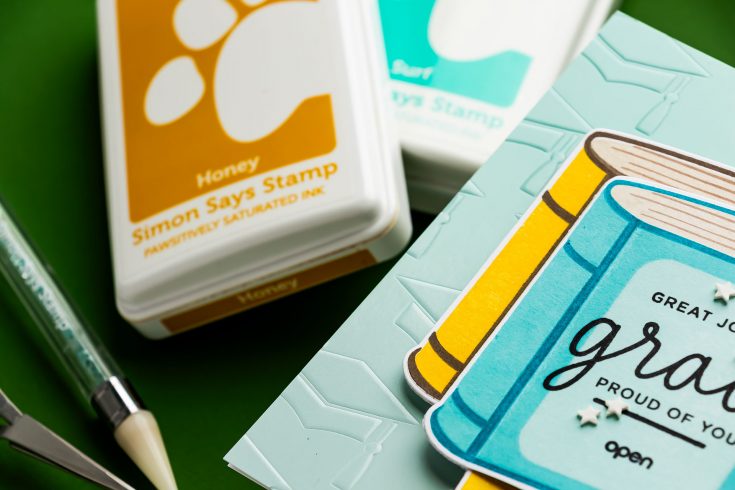
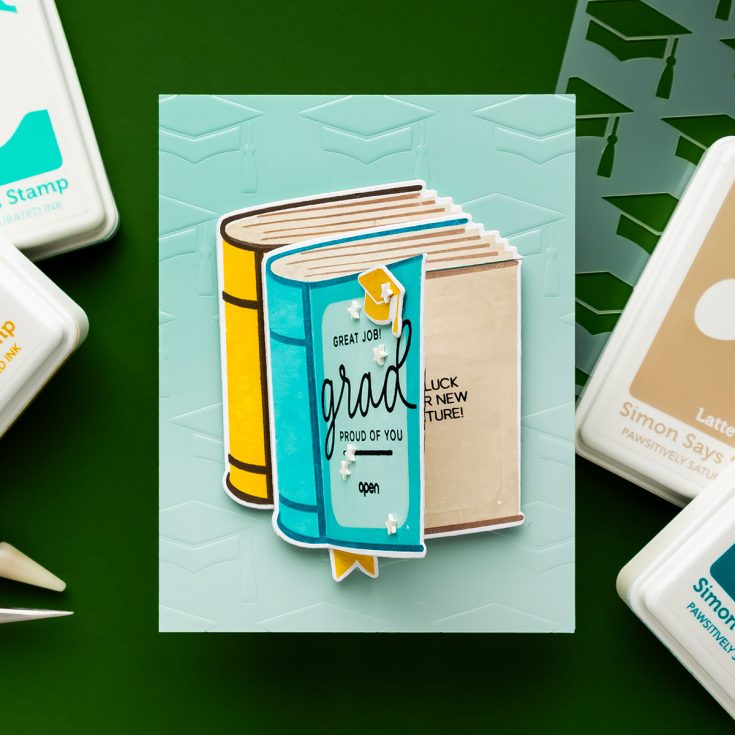
For this card, I used the One for the Books stamp set with coordinating dies to create a custom stamped book. I love how this set allows you to build the image in layers, stamping different parts in different colors for a beautiful, multi-tone look. For my color palette, I went with a fresh combination of teal and yellow – a combo that feels bright and summery.
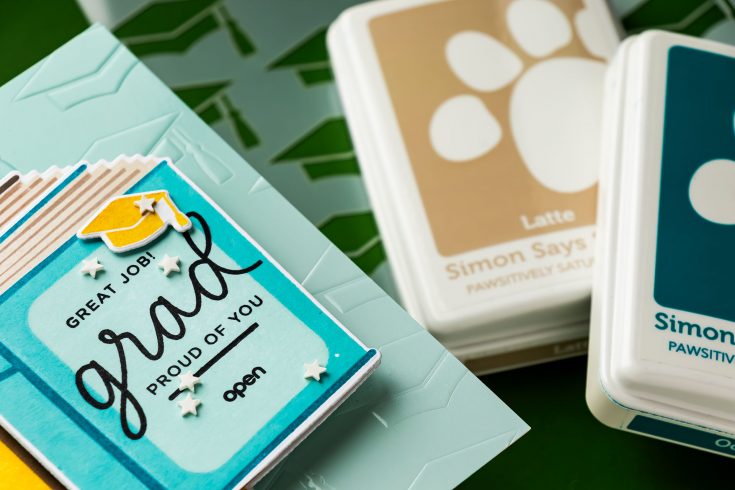
To turn this into a graduation card, I paired the book image with sentiments from the Grad Basics stamp set to create a custom greeting for the front cover. Since the book is the star of the design, it felt natural to make it interactive – after all, when you see a book, you want to open it!
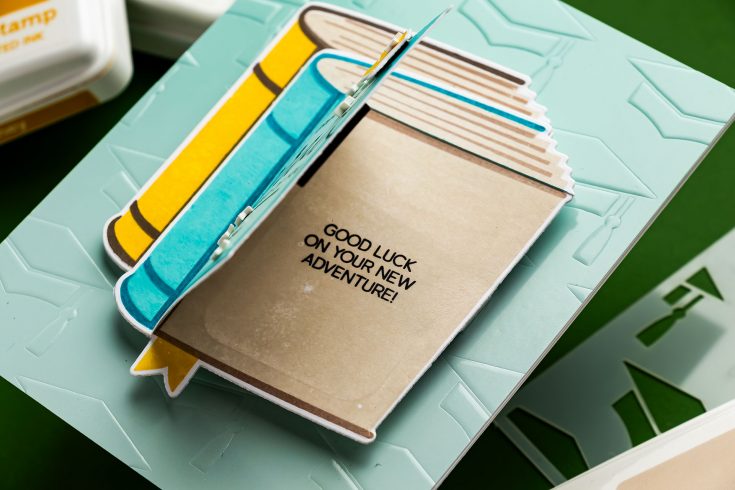
The interactive element is very easy to create. After die-cutting the stamped book, I added a score line along the spine and carefully cut along the top edge of the cover using scissors. This allows the front of the book to open. Inside, I adhered another stamped book layer to represent the pages and added an extra sentiment for a hidden message. You can easily personalize this area with a handwritten note or keep it stamped as I did.
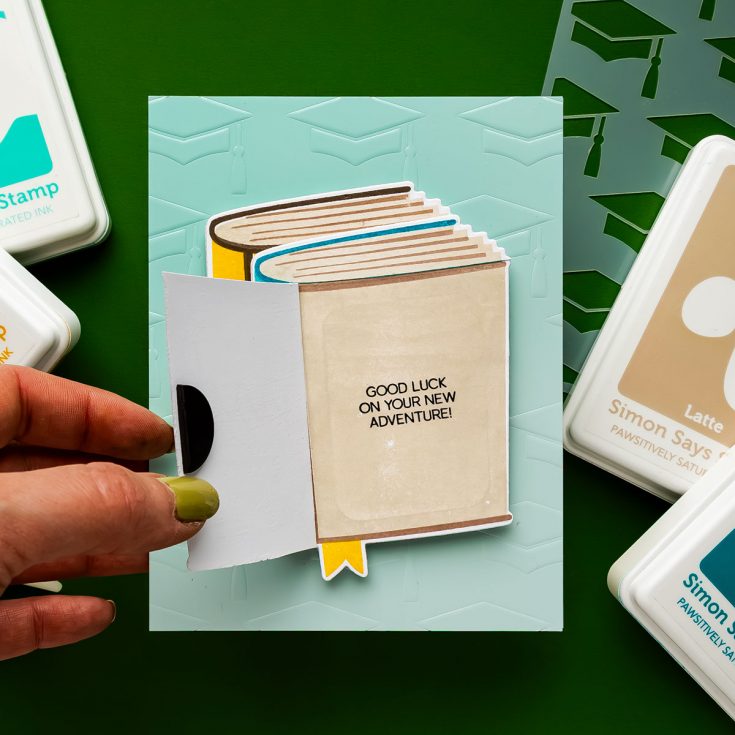
To keep the book closed but still easy to open, I added a small magnet closure. This helps the cover “snap” into place while still allowing the recipient to interact with the card.

For the background, I used a softly blended piece of cardstock from the Color Blend Sheets and added subtle texture using the Grad Caps stencil with an embossing technique. It creates just enough interest without overpowering the focal point.
To finish the design, I stacked an additional stamped book behind the main one for dimension and added a graduation cap for extra detail. A few white star embellishments complete the card.
This project is a great example of how you can turn a simple stamped image into something interactive without needing any specialty supplies or complex techniques.
I hope this inspires you to create your own interactive cards and maybe even look at your stamps in a new way. Thanks so much for joining me today!
WATCH THE VIDEO:

SUPPLIES:
|


Ways to support Ukraine:
If you are looking for ways to support Ukraine, we encourage you to visit this page on Yana’s blog:

A big thank you to YOU, our reader — and to Yana for being our guest!
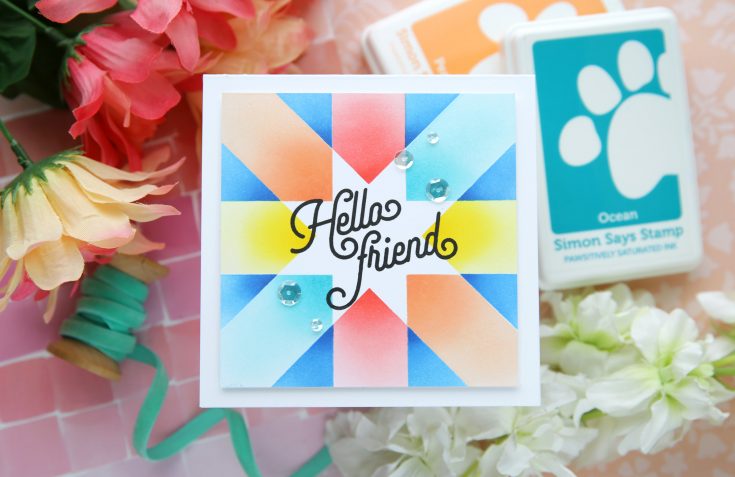
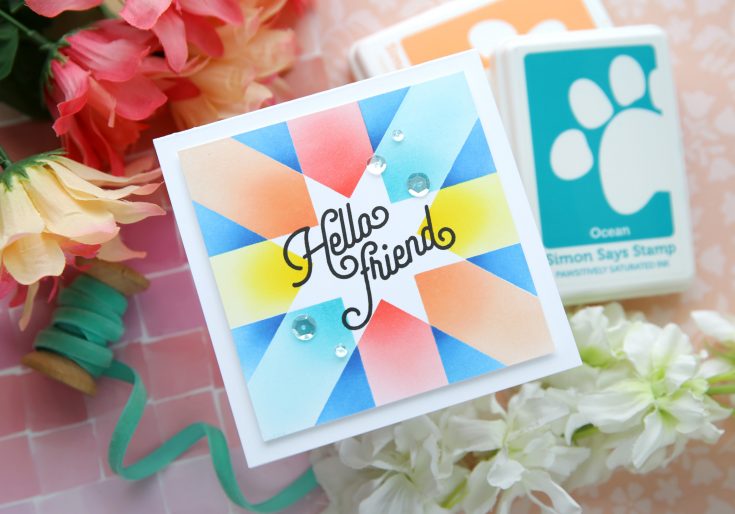
Quilt-Inspired Card Magic ✨ Easy Geometric Star Background Tutorial: Amore Laurafadora
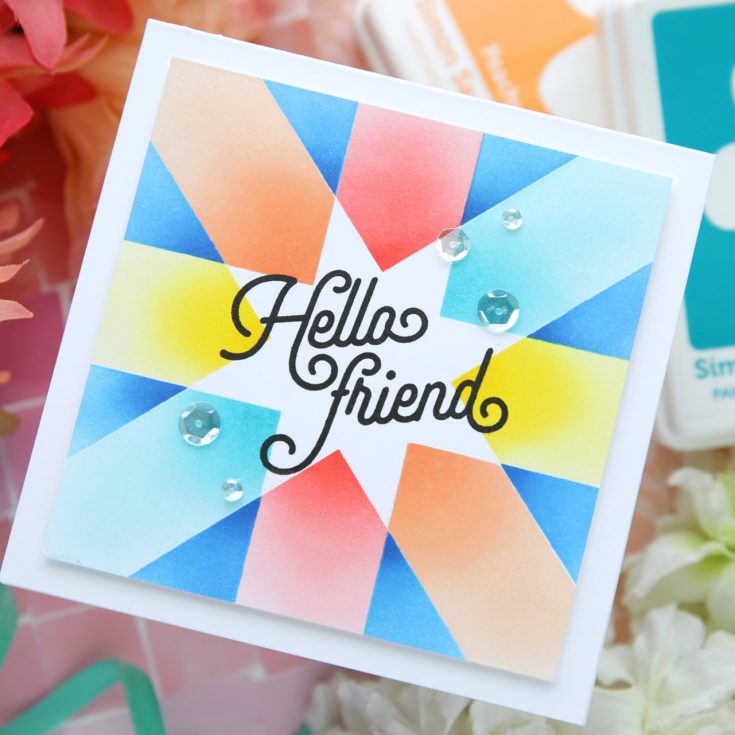
Hi friend! Happy Tuesday! Please join me in welcoming back special guest Laura Bassen to showcase this very fun card inspired by quilting showcasing the Good Greetings 1 stamp set by CZ Design, as well as a plethora of our exclusive ink colors! Be sure to watch the video for all the details and enjoy!

WATCH THE VIDEO:

SUPPLIES:
|


A big thank you to YOU, our reader — and to Laura Bassen for being our guest!
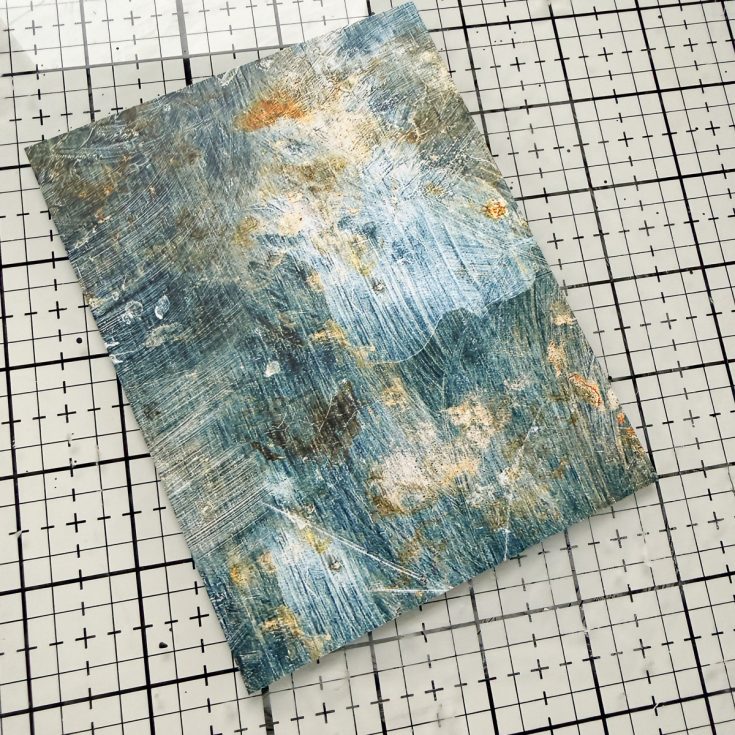
Pretty Mixed Media Card by Cheiron Brandon featuring NEW Tim Holtz idea-ology Blue Palette Paper!
Hi friend! Happy Monday! I’m delighted to welcome special guest Cheiron Brandon as our guest today showcasing the newly released Blue Palette Paper collection from Tim Holtz idea-ology! Read on and enjoy!

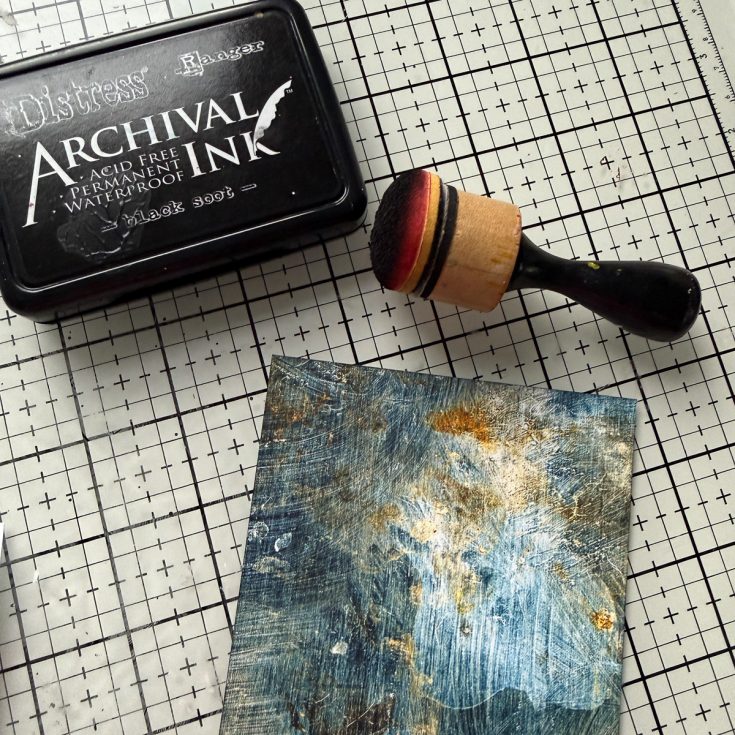
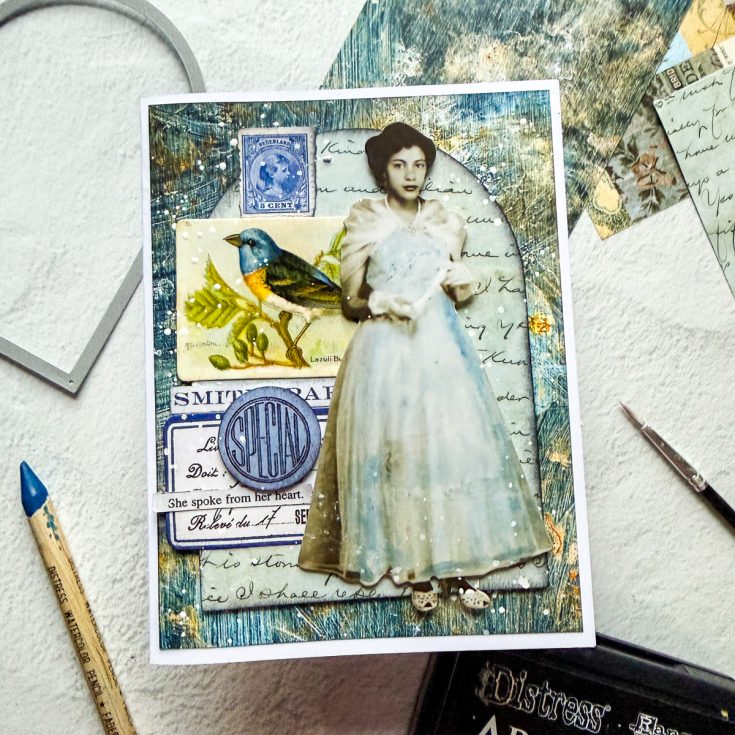
Hi there, it’s Cheiron Brandon with another fun card project for you using the Tim Holtz idea-ology Palette Paper Collection. Today I am using the new Blue collection to create my card. To create the foundation of my card, I selected 3 fun papers from the 8 x 8 size pack to work with. When selecting papers for a card, I like to choose a big bold print like this one with the brushstrokes for my base and then something in a different color with a much smaller print to coordinate with it. For this card, I picked a lighter blue with a script. I inked the edges of the large panel with Black Soot Distress Archival Ink, then adhered the panel to my card base.
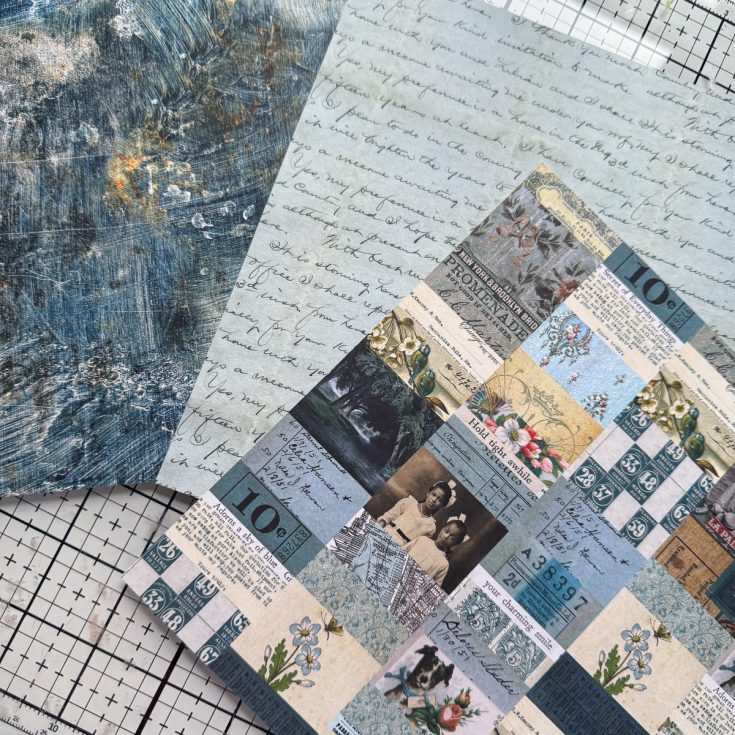
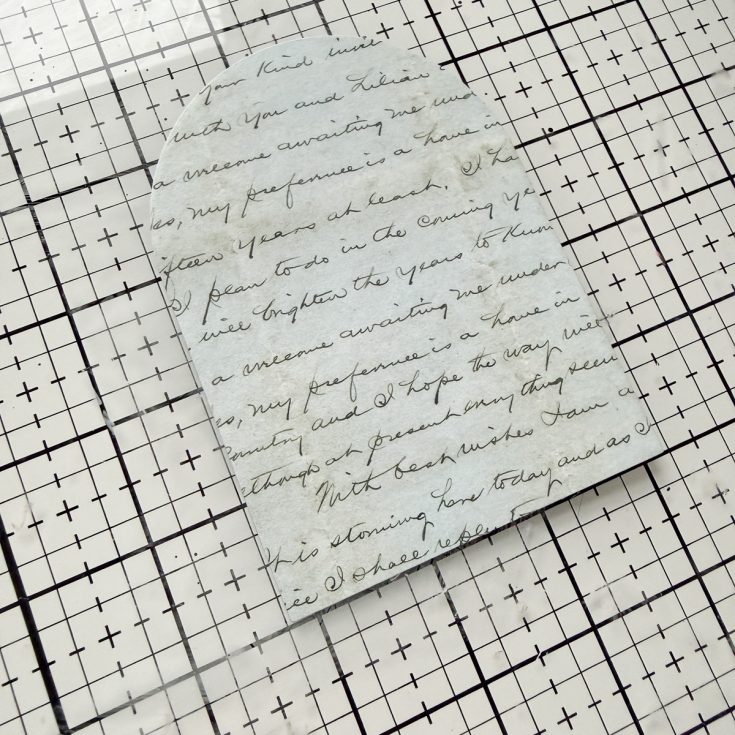
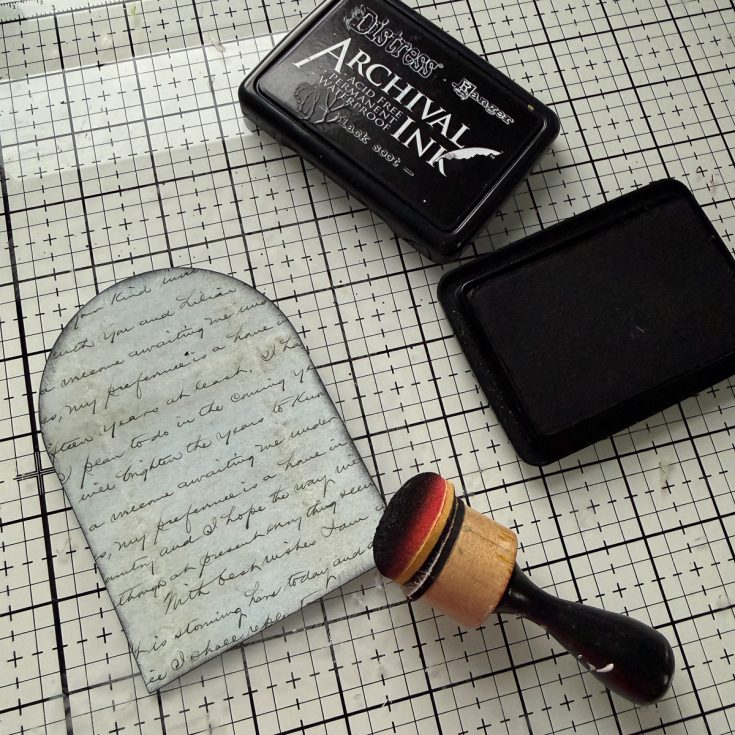

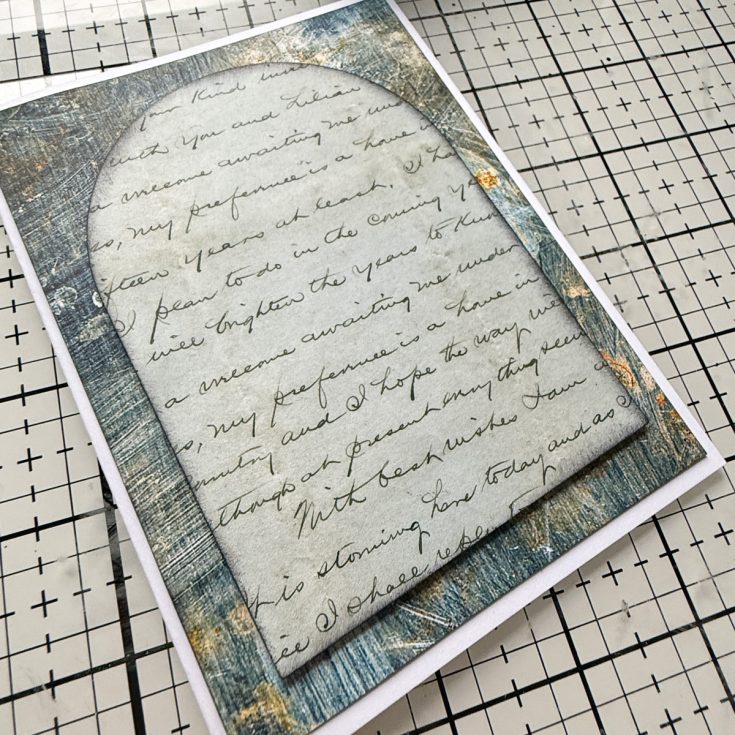
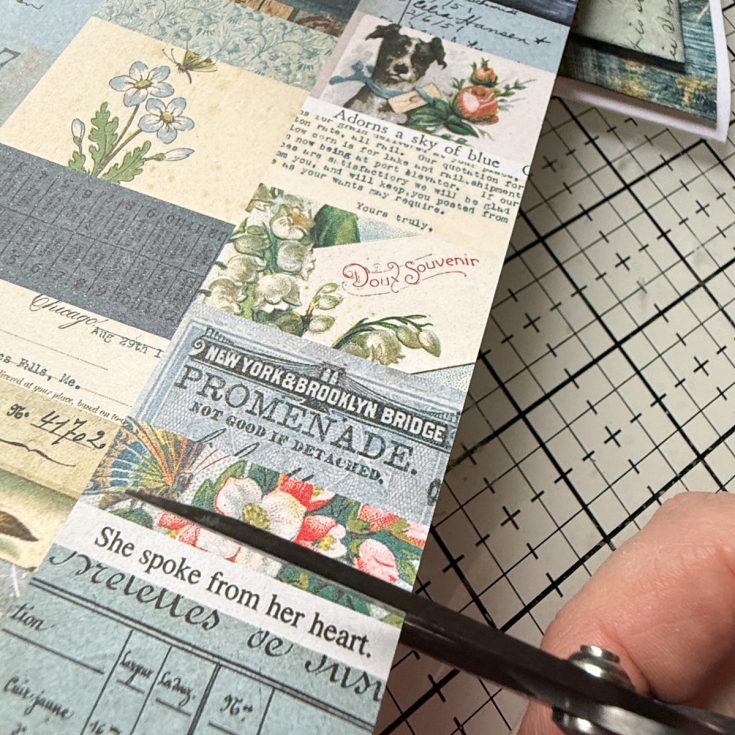

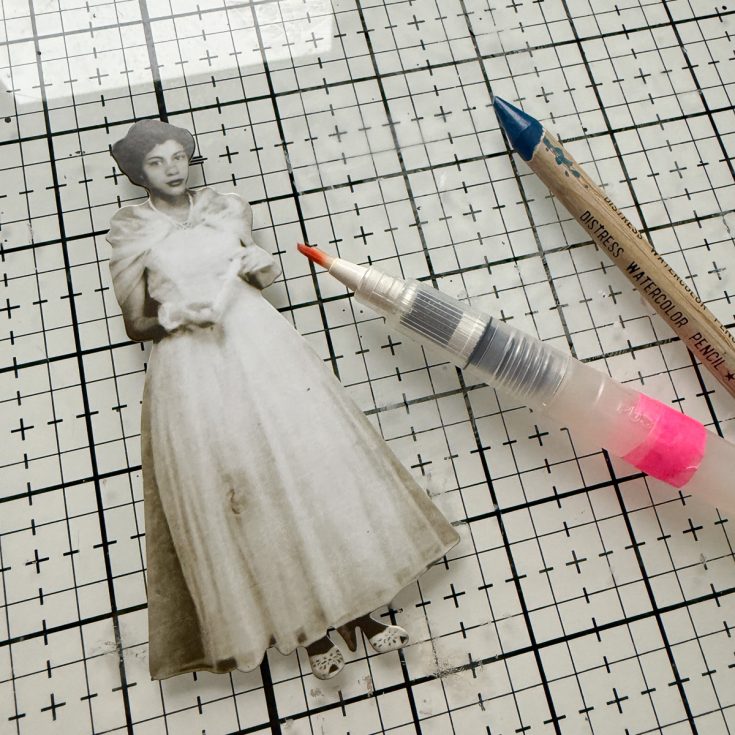
For the script panel, I cut it out with the Simon Says Stamp Nested Domed Arches. I inked the edges with Black Soot Distress Archival Ink and then adhered it to the card with foam tape to pop it up. Then I took out the Paper Doll and Palette Ephemera too look through it to pick some pieces that would coordinate with my card. I layered some of the Ephemera and then decided to add some color to the Paper Doll using Distress Watercolor Pencils and a Tim Holtz Detailer water brush. I picked up pigment from the Faded Jeans pencil with my water brush and colored in the dress of the Paper Doll. I added the Paper Doll to the card using some foam tape.
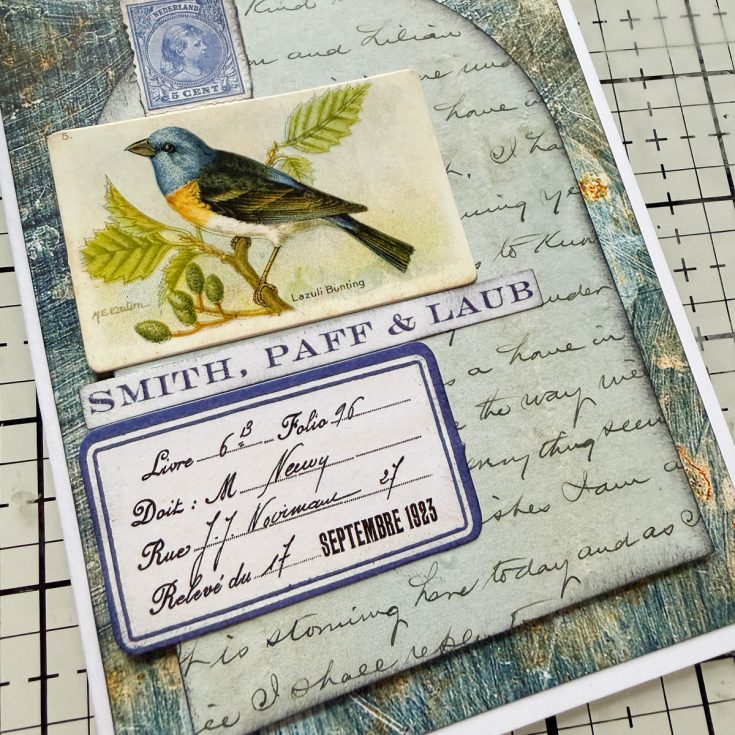

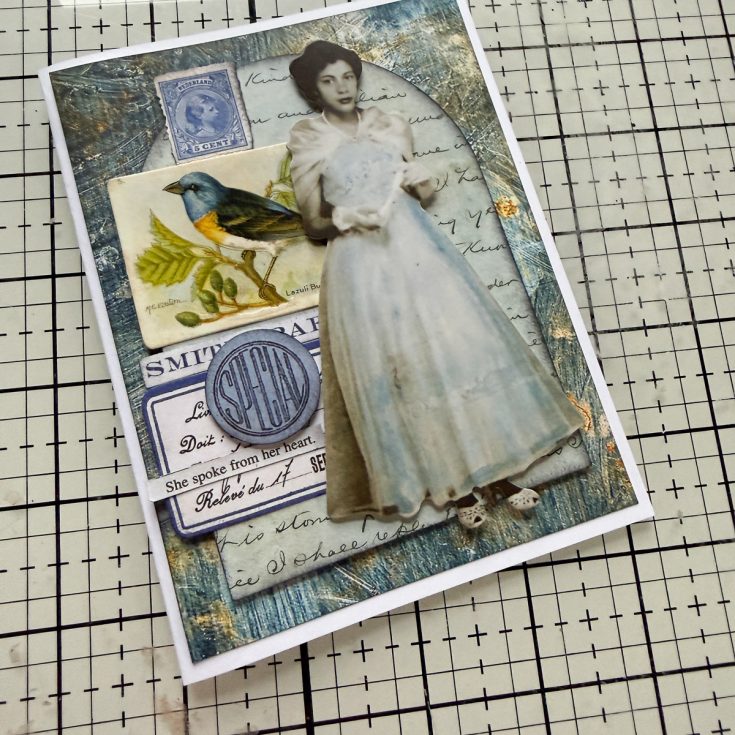
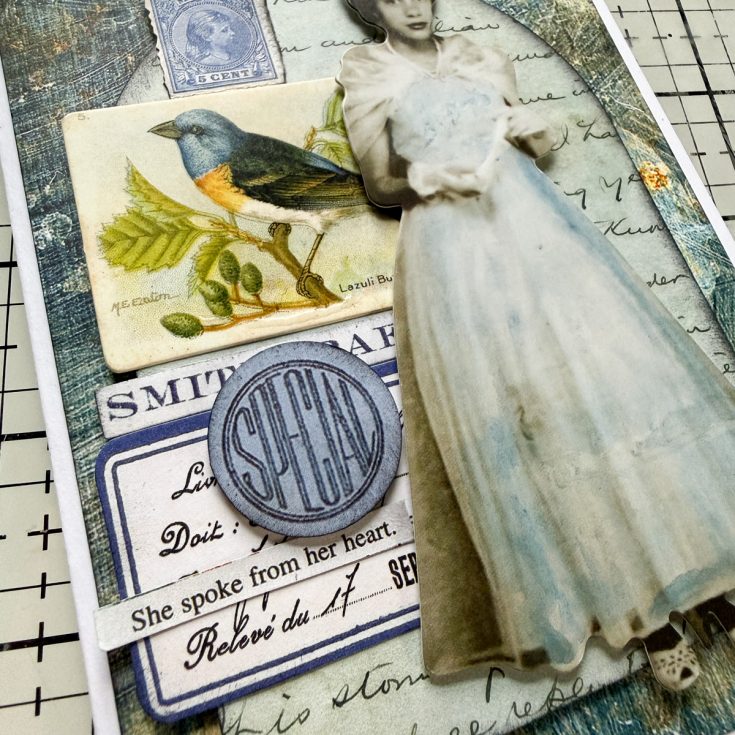
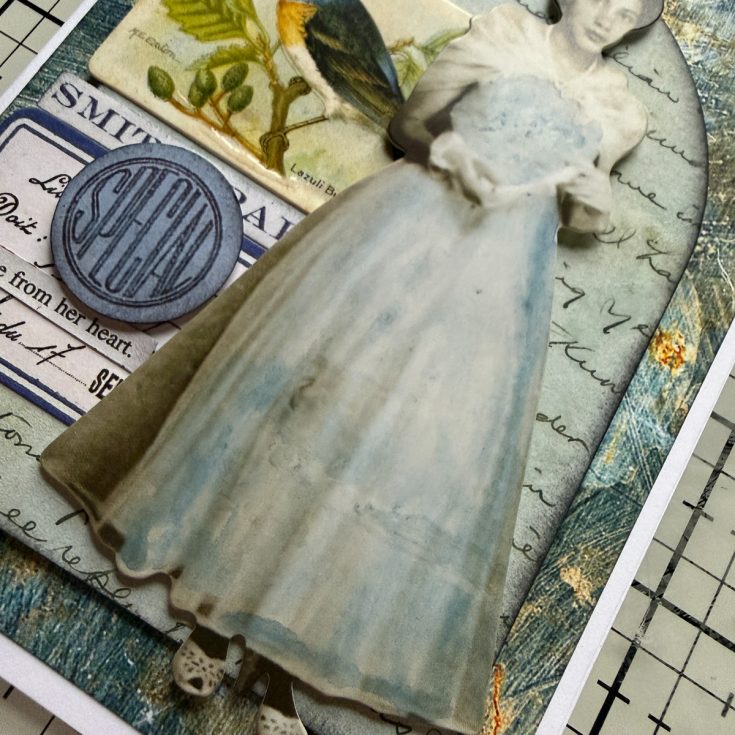
I placed the remaining ephemera onto my card, then I used Picket Fence Distress Paint and a paintbrush to add splatter to the entire card, being careful not to get it on the face of the Paper Doll or the sentiment. I hope you had fun creating this collage style card with me. These beautiful patterned papers make it so easy to add layers and texture!
SUPPLIES:
|


Thanks so much for stopping by, and thanks to Cheiron for being our guest!


