Amore Laura Fadora: Let’s Celebrate!
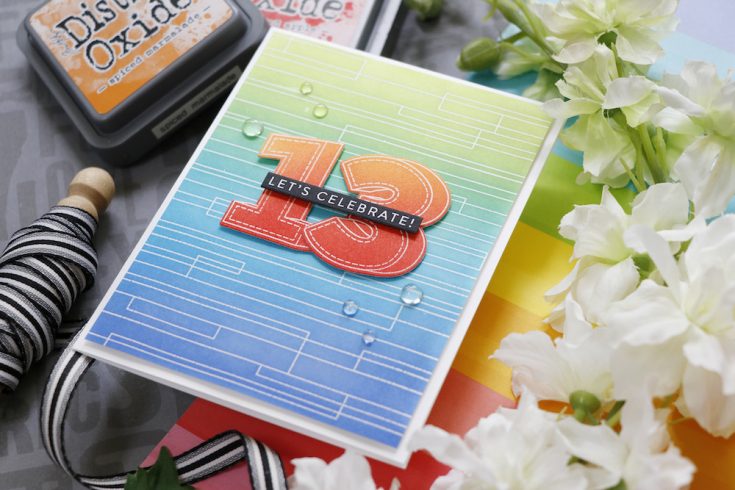
Hi friends! Happy Friday! I hope your first week in October has been FABULOUS! We’re back to our fan favorite features on the blog after STAMPtember®, and I’m so happy to welcome back the always delightful Laura Bassen as our special guest in her bi-monthly Amore Laura Fadora feature! She’s sharing a super bright and fun Birthday card you can easily customize for your recipient with our Birthday Numbers stamp and die set as well as the super cool Plank Background stamp!
Don’t miss the video and enjoy!
WATCH THE VIDEO:
SUPPLIES:
|


Thanks so much for stopping by and thanks to Laura for being our guest!

Emboss Resist with Blending – Monthly Mail Art with Kristina Werner, October 2018
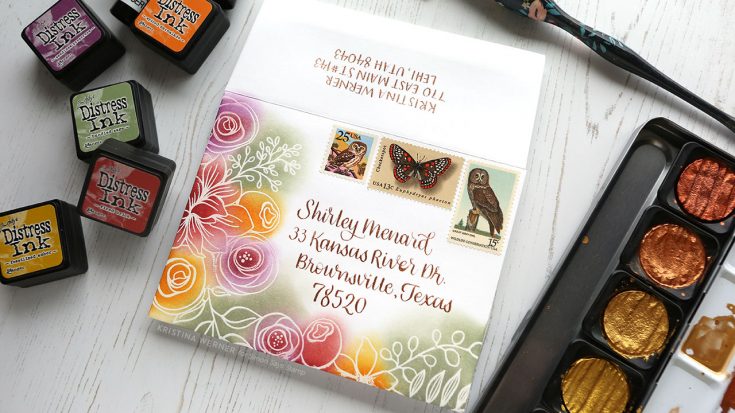
Hello, all! Kristina here with another Monthly Mail Art! For this envelope, I did some heat embossing and ink blending. :)
I started out by stamping the large floral image from the Sketched Flowers stamp set along the left and bottom edges of a white envelope in VersaMark ink. I applied white embossing powder to the stamped flowers and then heat set it.
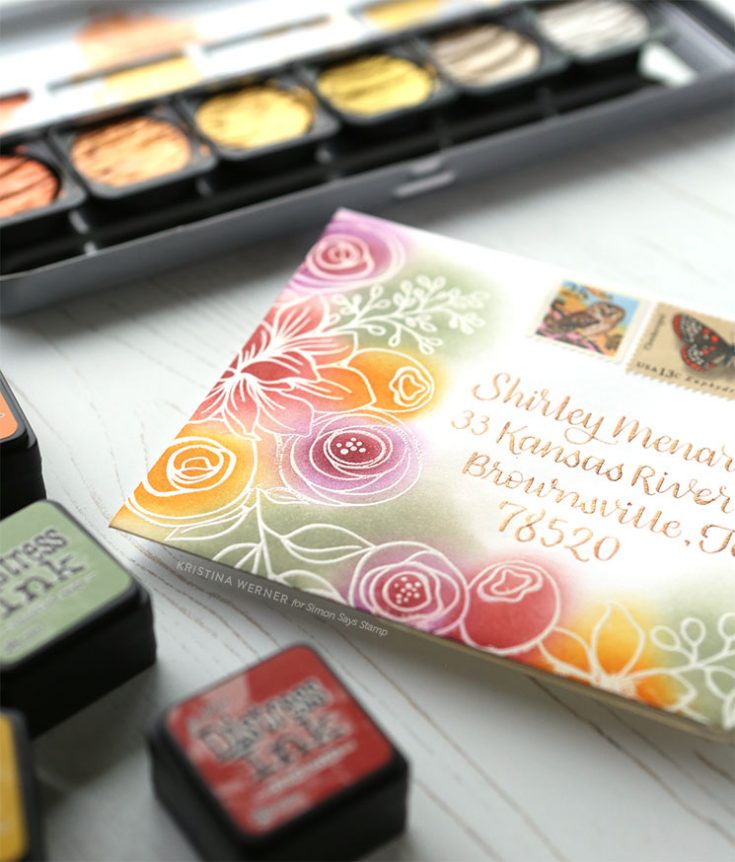
To add color to the envelope, I used sponge daubers and five colors of Distress Ink: Fired Brick, Seedless Preserves, Fossilized Amber, Spiced Marmalade, and Bundled Sage. The heat embossed lines resisted the ink and I was left with a pristine white lined image.
To finished off the envelope, I used one of the colors in the Finetec 6-color set for the address.
NOTE: Address used with permission. Thanks, Shirley!
Thanks for stopping by today! :)
Supplies
|


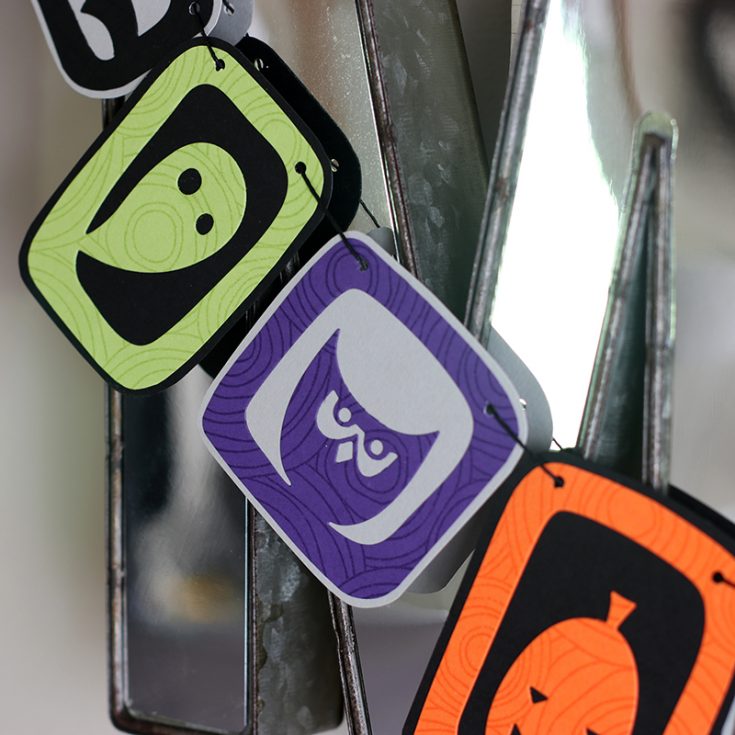
DIY: Halloween Garland with Shari Carroll

From the moment I saw these new Tim Holtz Halloween Hangout dies, I knew I wanted to create a Halloween garland decoration for the house. This project is easy, kid friendly and adorable for some not so scary frightful fun!
I started by die cutting 4 of each of the shapes in a different color cardstock. After I die cut all my pieces, I stamped them with the Circle Doodle and Spider Web background stamps using Simon Says Stamp Clear ink and then trimmed around the edges. The dies cut out the centers so they would also be really cute for shaker cards. Once everything was trimmed, I glued them onto additional cardstock and trimmed again around the edges leaving a little border.
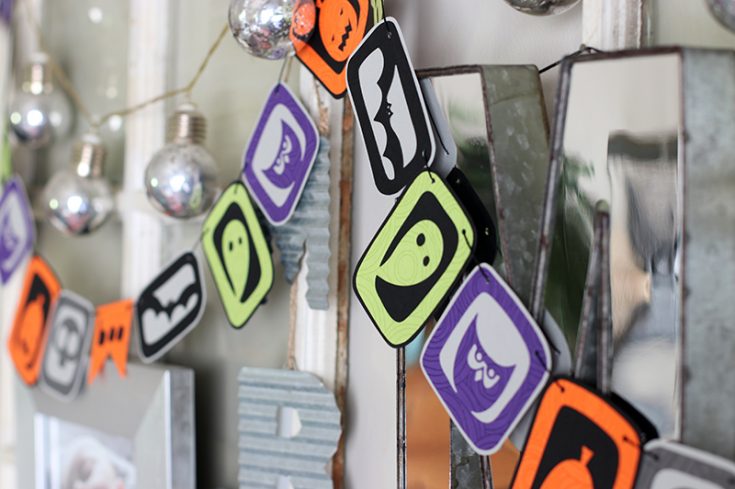
As a measurement guide, when I had the the piece placed on my work surface, one of each die cut spanned out to be about 16″. I added in some banners with the word BOO in between each set of dies which ended up measuring about 18″ per set. To finish this quick and easy project, I strung some twine through the holes I punched and hung it up right away! The finished garland measures about 7.5′ in length.
Thanks so much for stopping by, I hope you have a great day!!!

Blog Candy Alert!! Follow our blog via email and comment on this post for a chance to win special blog candy!
|


