What Would Kelly Make: Pattern Stamping
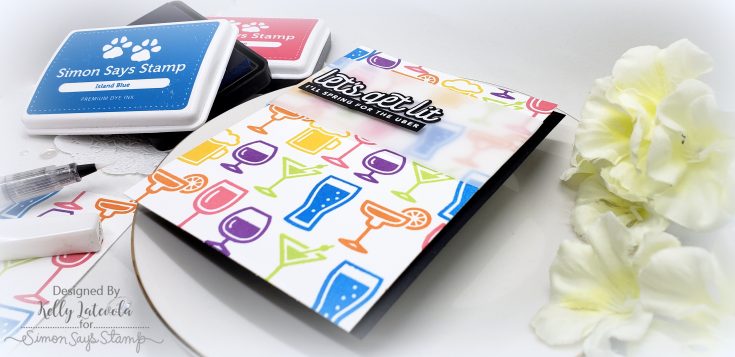
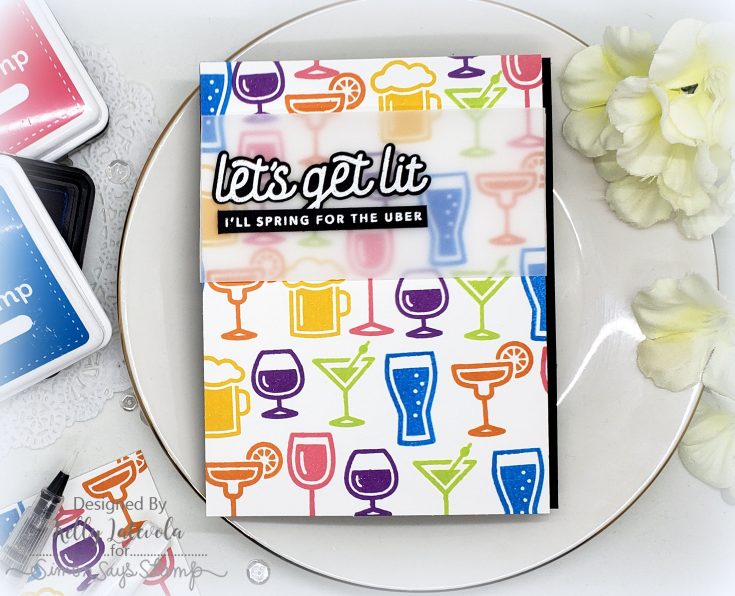
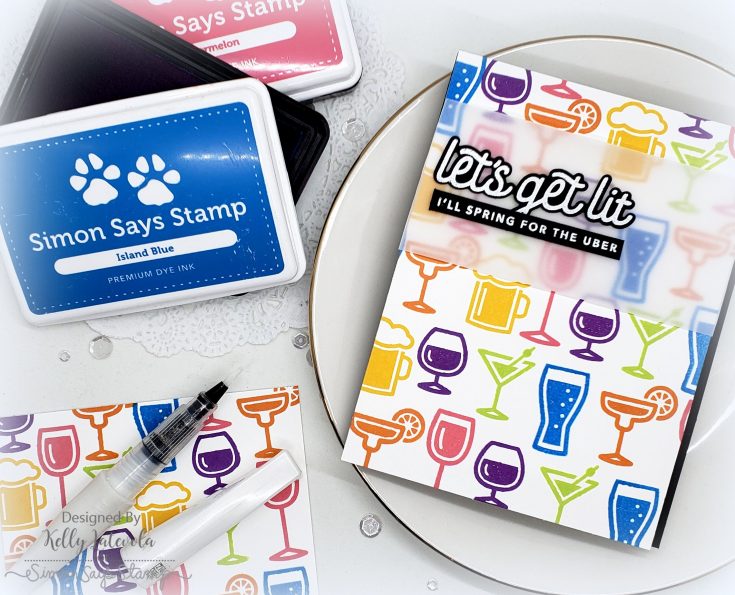
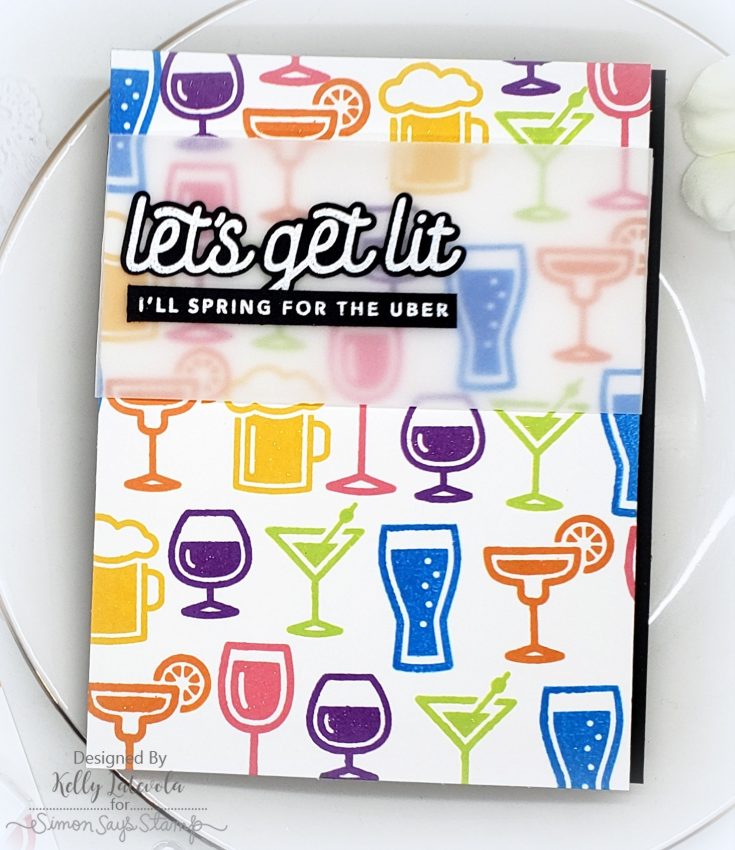
Hi friends! Welcome to the latest edition of What Would Kelly Make by Kelly Latevola where she is showcasing Pattern Stamping with this super fun Happy Hour stamp and die set from the one and only Cathy Zielske in our exclusive CZ Design collection! Be sure to watch the technique video for tips, tricks, and pitfalls to avoid when pattern stamping, and watch the full video to get the full picture of how to make this fun card! Enjoy!
WATCH THE TECHNIQUE:
WATCH THE FULL TUTORIAL:
SUPPLIES:
|


Thanks so much for stopping by today, and thanks to Kelly for being our guest!

Yippee for Yana: One Layer Floral Copic Colored Cards
Hi friends! Happy Tuesday! Please give a warm welcome back to the always super amazing Yana Smakula as a special guest in her second installment of Yippee for Yana for the month! Be sure to read on and watch the video for more information and enjoy!

Hello friends, this is Yana and welcome back for another Yippee For Yana video! By now, I’m sure, you’ve all seen the most gorgeous stamp set, Beautiful Flowers, that was included in Simon’s June Card kit. I couldn’t resist this set and used it to create several perfectly flat one layer cards.

One layer cards are not something that I do often because I always want to add something, but the floral image that I am using today is just so perfect, there really is no need to add anything else to it. I started to work on my card by stamping the floral cluster in Simon’s Intense Black ink onto white cardstock with the help of my Stamp Platform.
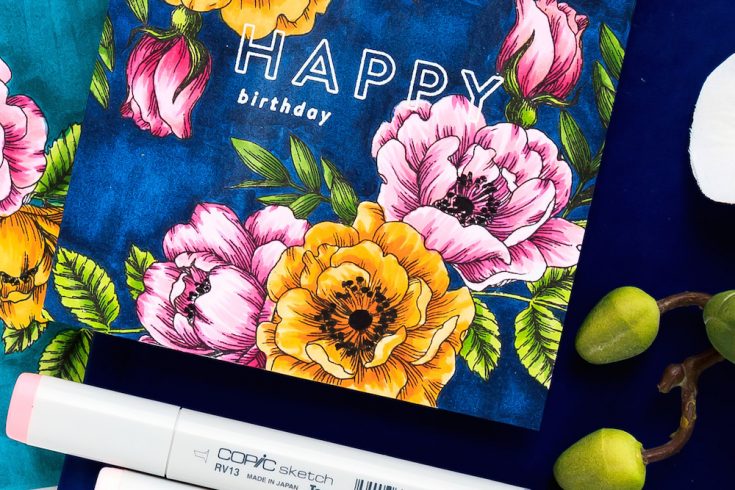
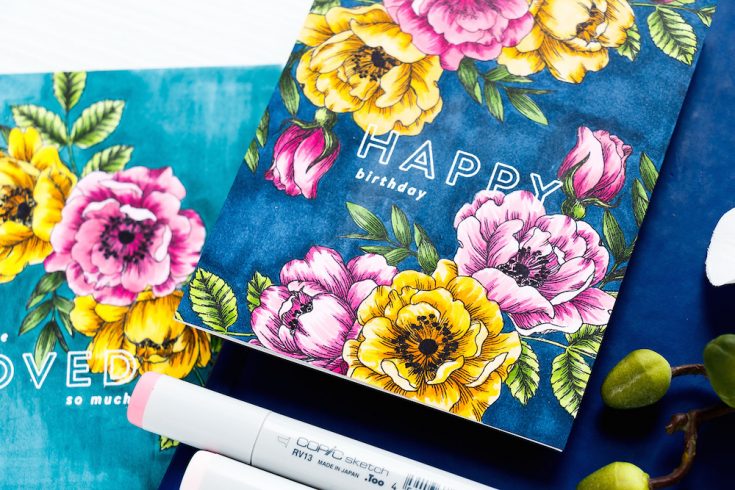
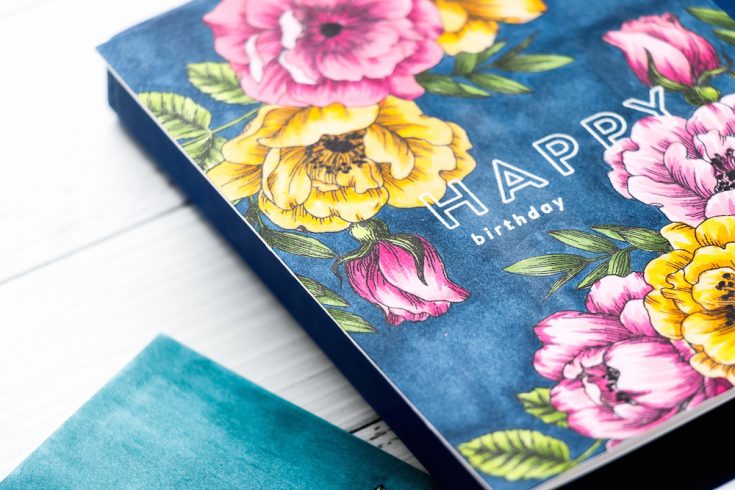
I like the look of bright vibrant flowers on dark backgrounds and I often color with colored pencils on dark papers. I wanted to have this floral cluster on a dark background as well and decided to use Copic markers and color not only the floral cluster but also the background the create the illusion that these flowers sit on a dark background.
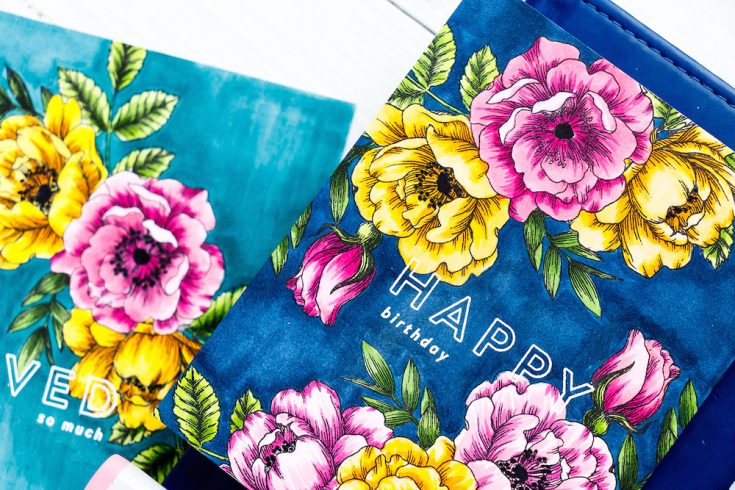
I used B99 to color the background on my original card and I just love that deep blue. For my 2nd card, I wanted to change things up and I used a BG18 color. You can go with any color you like, maybe you’d like to have a deep green or brown background or even black – you can add it to your image with the help of a marker. You just need to make sure to follow the lines of the stamped images and stay outside the lines.
If you look closely at the photos of my cards you’ll notice that my backgrounds aren’t evenly solid, the color isn’t even in all places. I didn’t spend a lot of time adding layer upon layer of the Copic coloring, so in some areas, my background color is darker and in some lighter. If you don’t like this look just make sure to go over your background a few times.
You can also color just the background and keep your flowers white if you want. I think this is also a fabulous look. Once my background was completely colored in I started coloring the cluster. I am far from being a Copic marker expert, I like to color just for the fun of it. What’s awesome about this stamp set though is that all the work has been done for you. You have areas that indicate where the shading has to be, you have the open areas that indicate where your lightest colors need to go. So it’s quite simple actually.
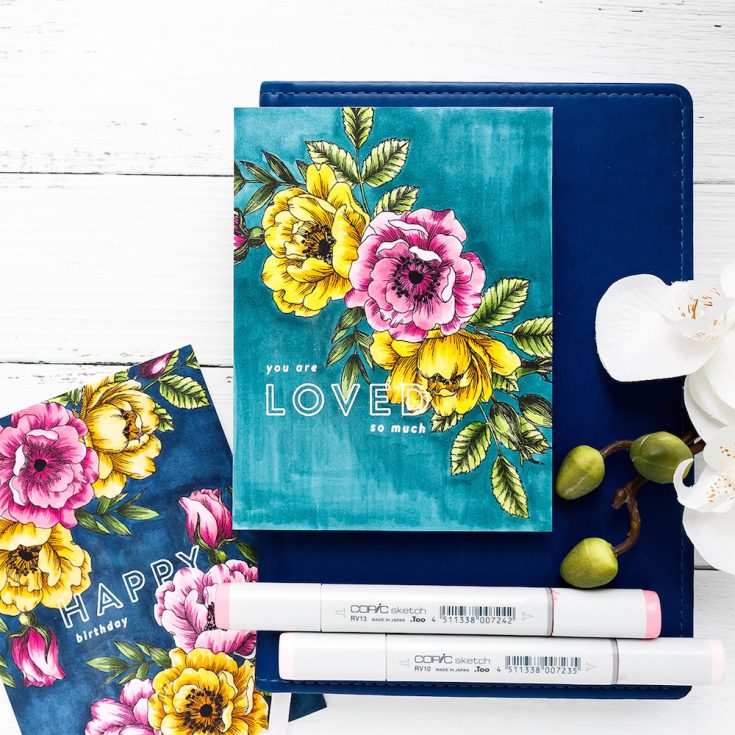
I used 3 colors to color leaves – YG03, YG17, and YG67. To color flowers, I went with yellows and pinks. I used Y15, Y17, and YR14 to color the yellow blooms and RV10, RV13 and RV17 for the pink flower.
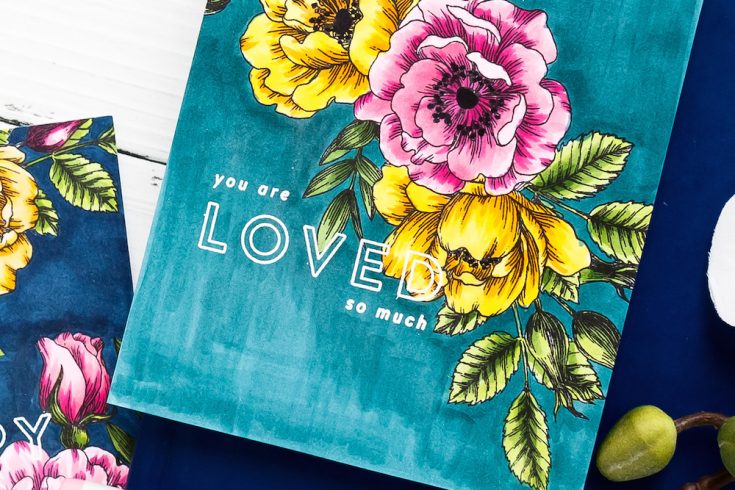
This entire coloring process – coloring the background and coloring of the floral cluster for me about 30 minutes. I think that’s awesome considering the end result. I can easily make a bunch of cards like this without having to spend too much time and effort. To add a sentiment on to my colored background I white heat embossed it slightly overlapping the florals. I did give my background a few minutes to dry, but this coloring does dry fairly quickly especially considering that I didn’t add too many layers of ink.
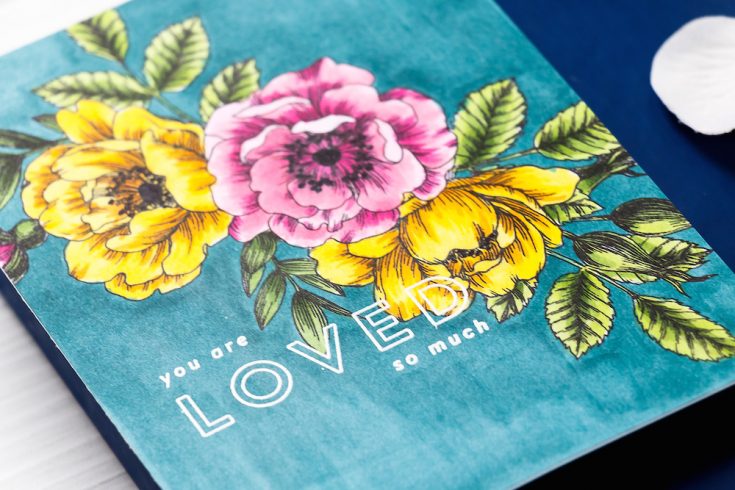
I stamped You Are Loved So Much, added white embossing powder and heat set it with my heat tool. Next, I adhered my background on an A2 white side folding card base and my card was done!
Have fun stamping!
WATCH THE VIDEO:
SUPPLIES:
|


Thanks so much for stopping by and thanks to Yana for being our guest!
From:
Lawn Fawn: Intro to Sweetest Flavor + Reveal Wheel Add On: Sharon Gullikson
Amore Laura Fadora, Hex Yeah: Amy Brown
Interactive Cards by Jess: Pivot Pop Up!!!!: Gail Scott
Studio Monday with Nina-Marie: Reveal Wheel Undersea Scene: Teresa Doyle
Please email [email protected] with the name of the blog you won from, the prize you won, and your address (if applicable) to redeem your prize(s)!
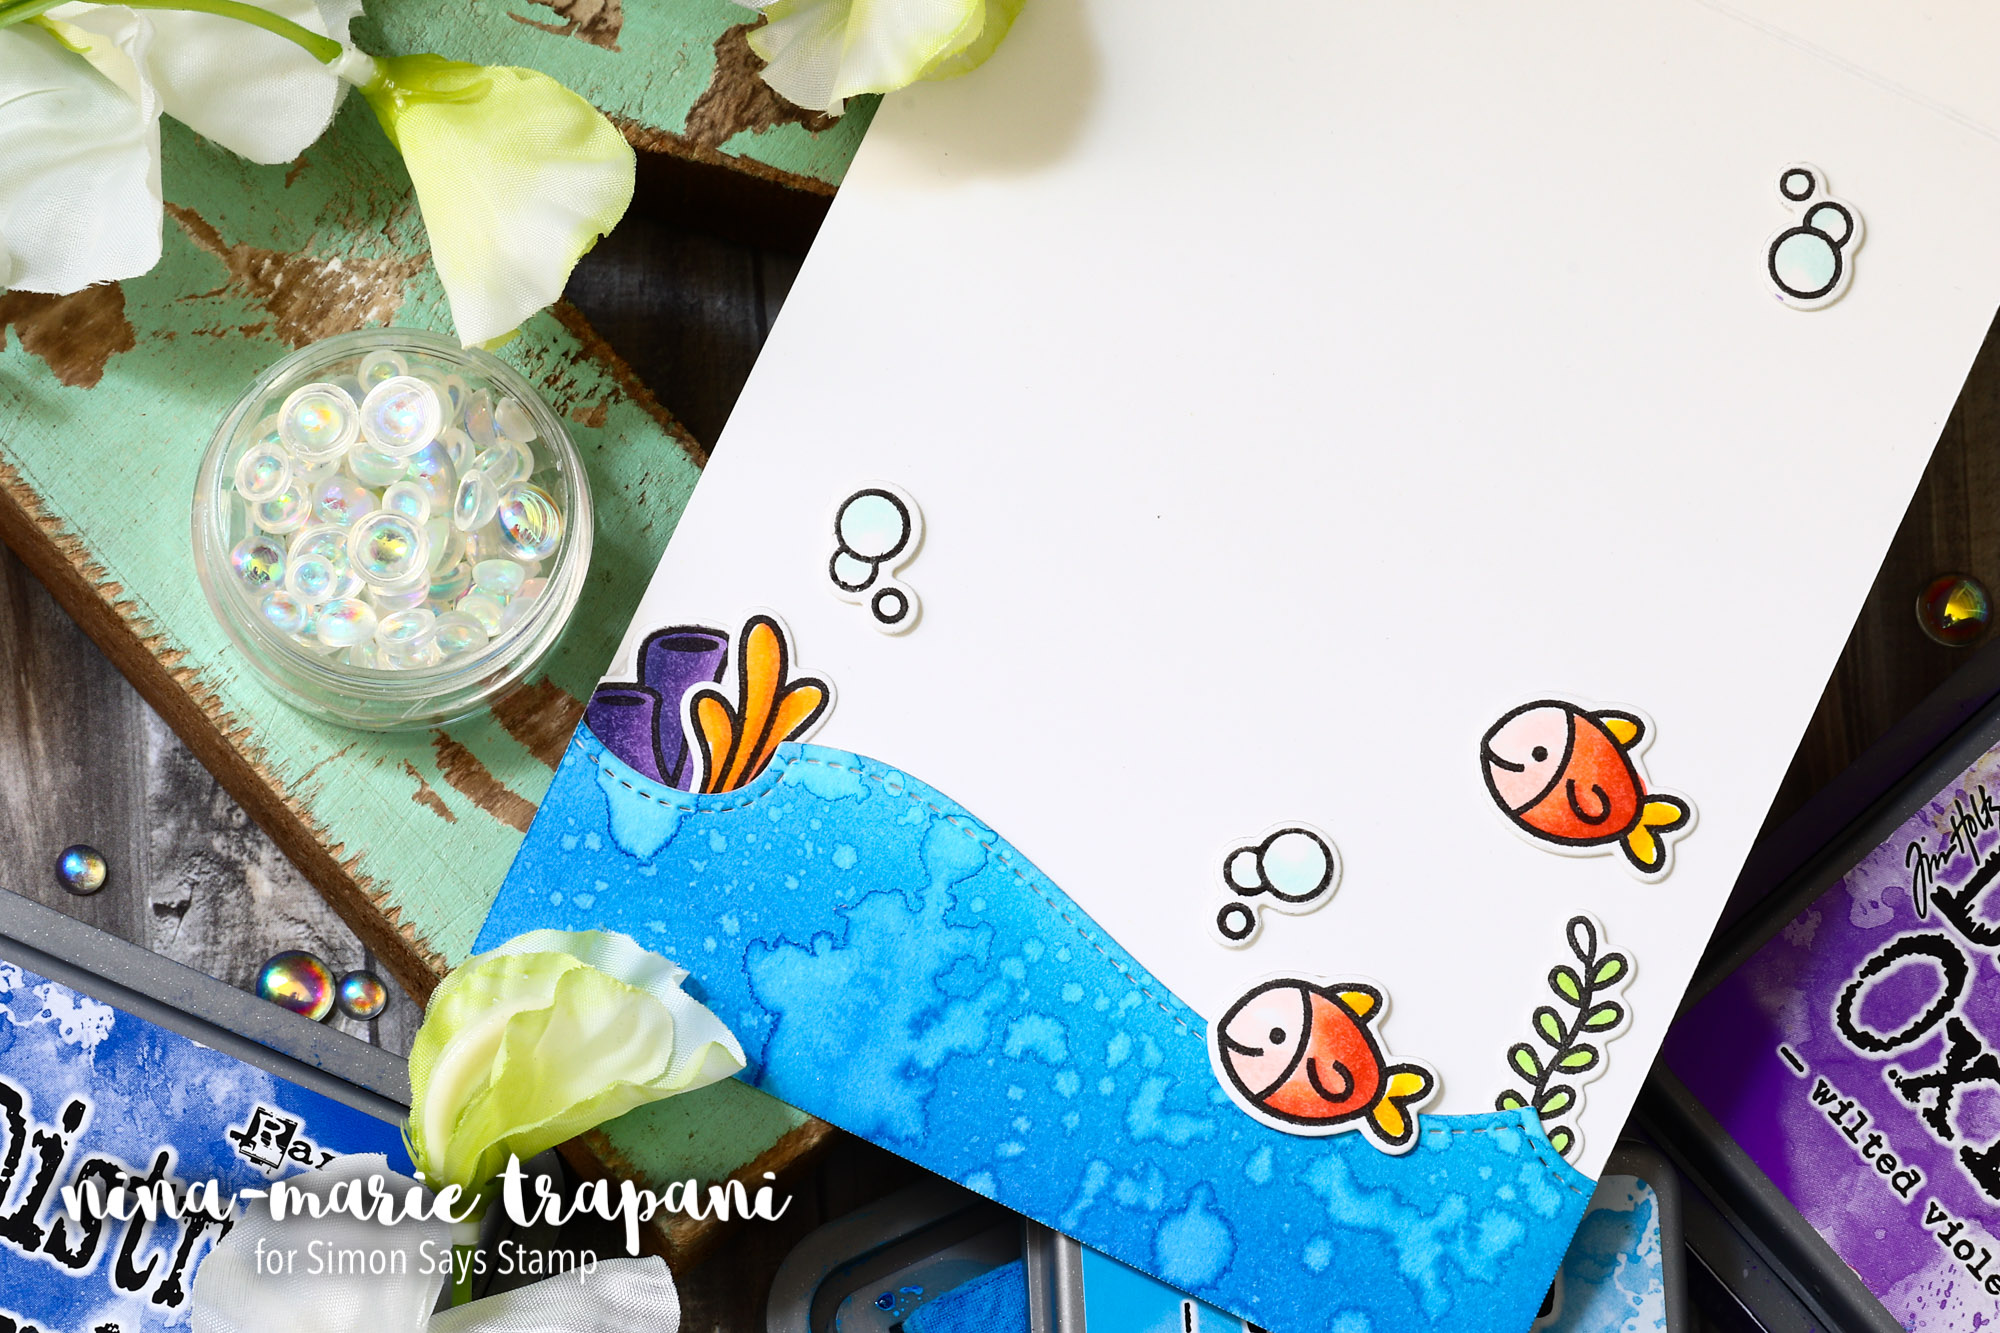
Studio Monday with Nina-Marie: Reveal Wheel Undersea Scene

Happy Monday, everyone! It’s Nina-Marie here with you today, and I am excited to share some inspiration with you, using new Lawn Fawn stamps and dies!
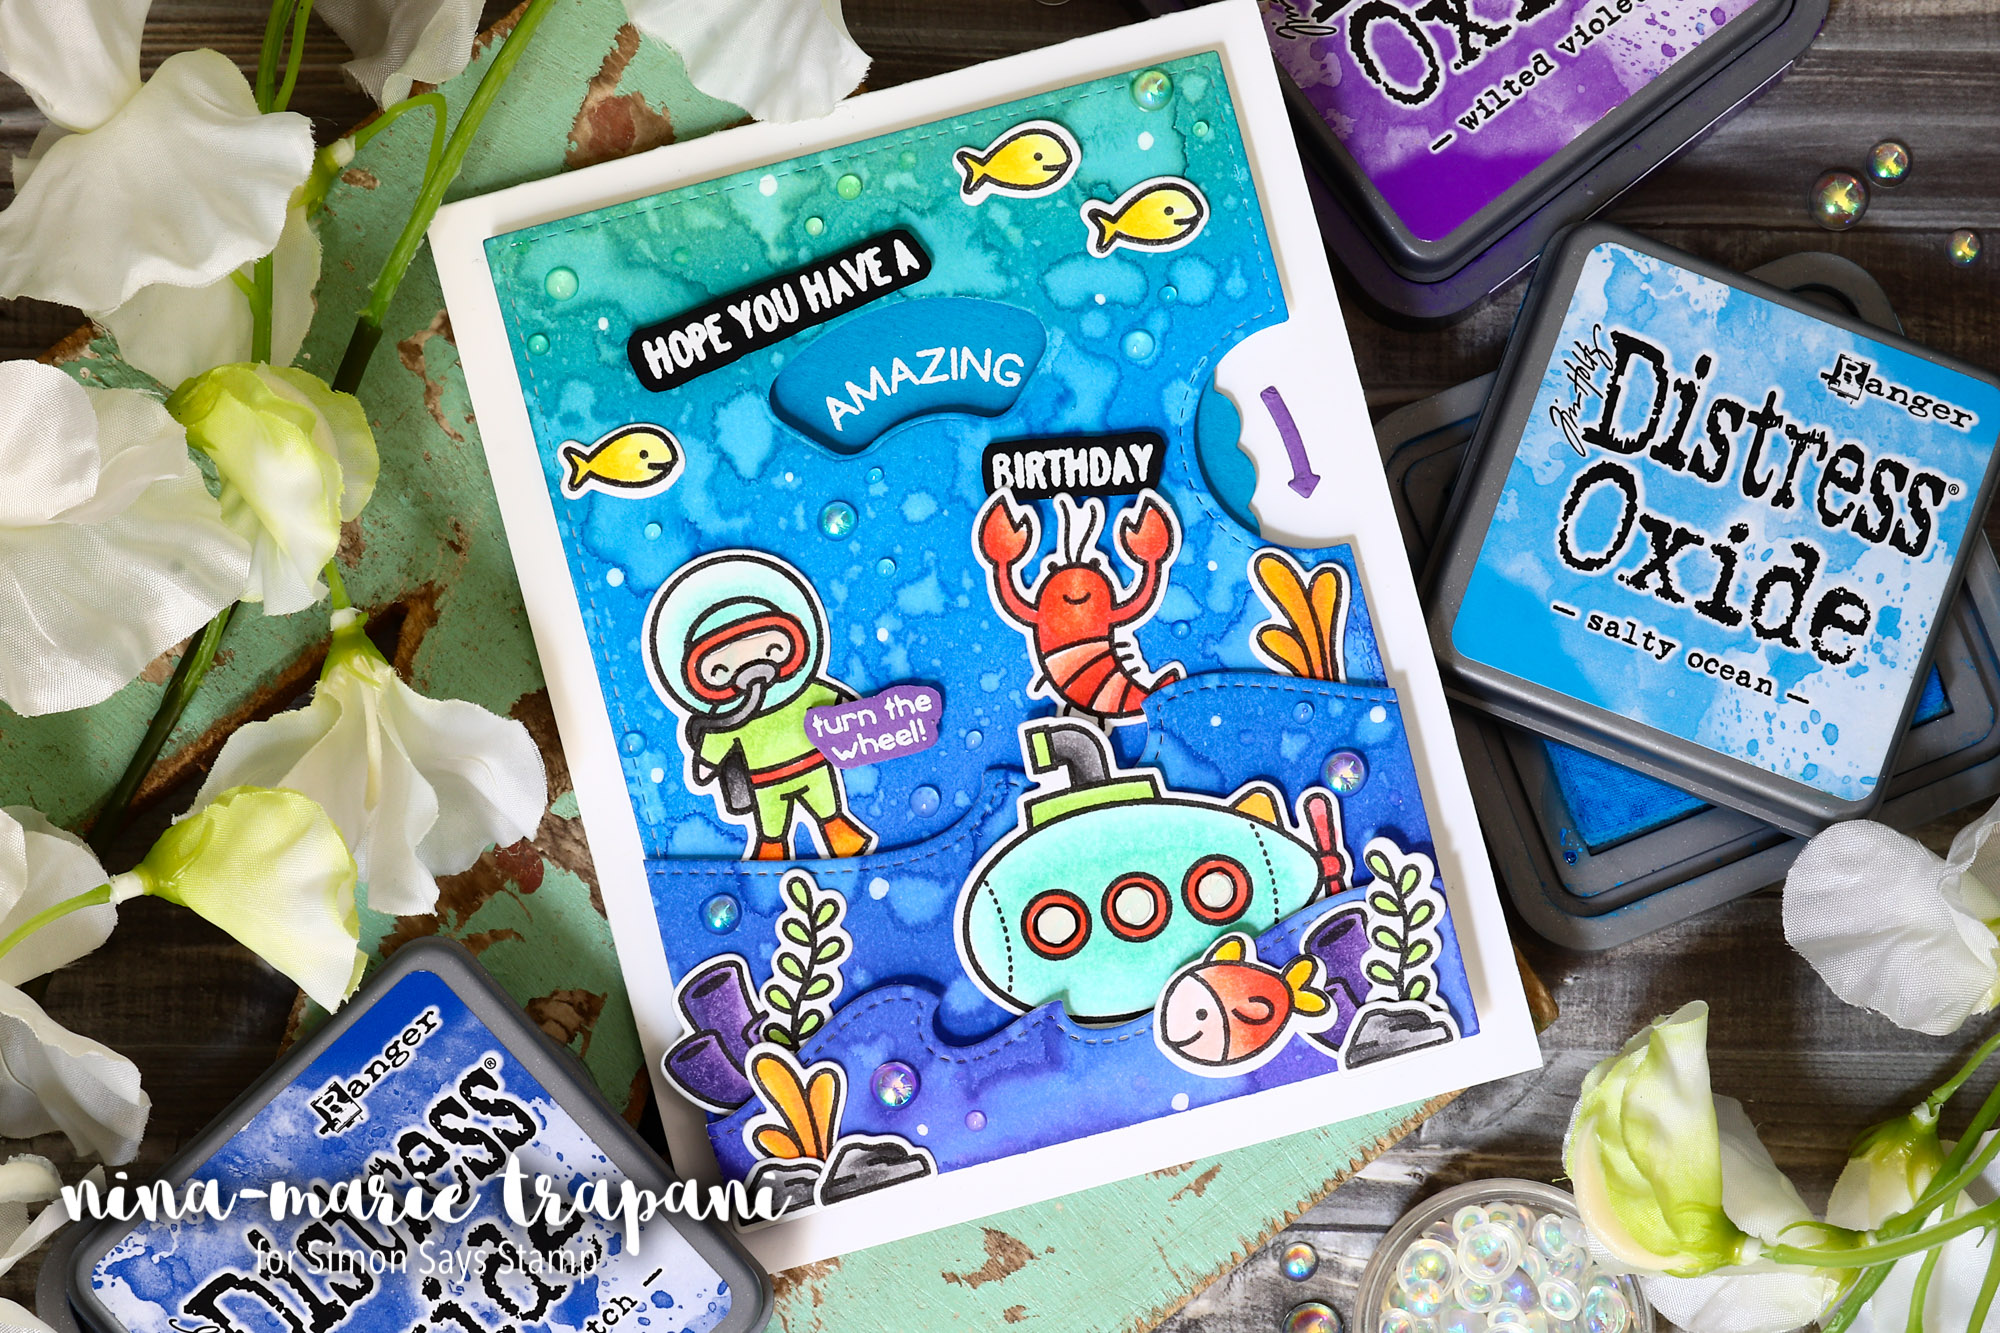
The Reveal Wheel die set is a fantastic way to add an interactive element into a card. I paired the wheel with greetings from the Reveal Wheel Sentiments set, and the You Are Sublime undersea stamp set. There are TONS of images in You Are Sublime that help you build cute underwater scenes.
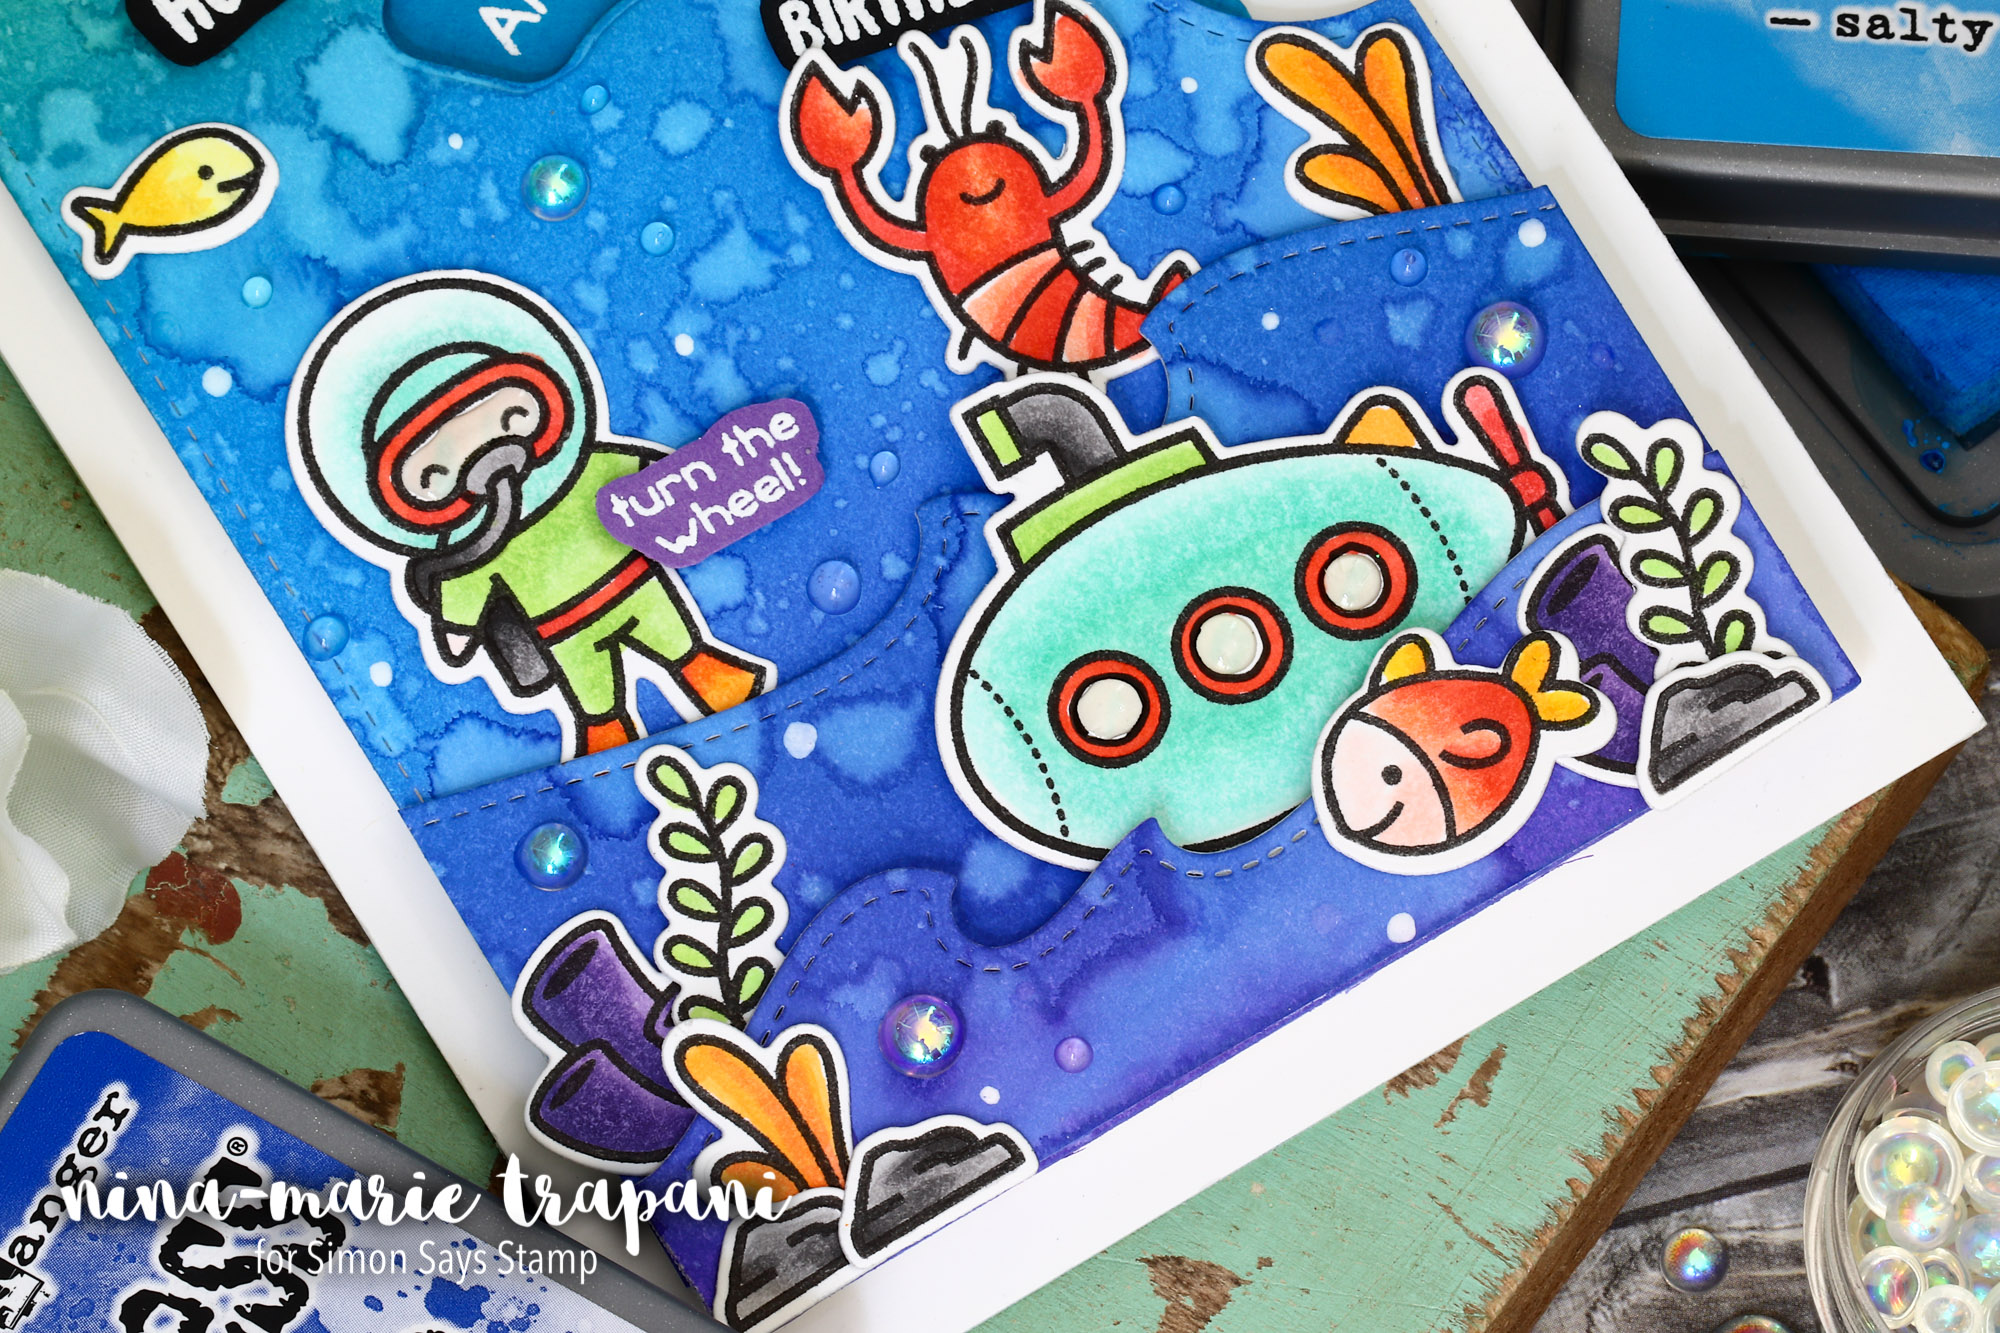
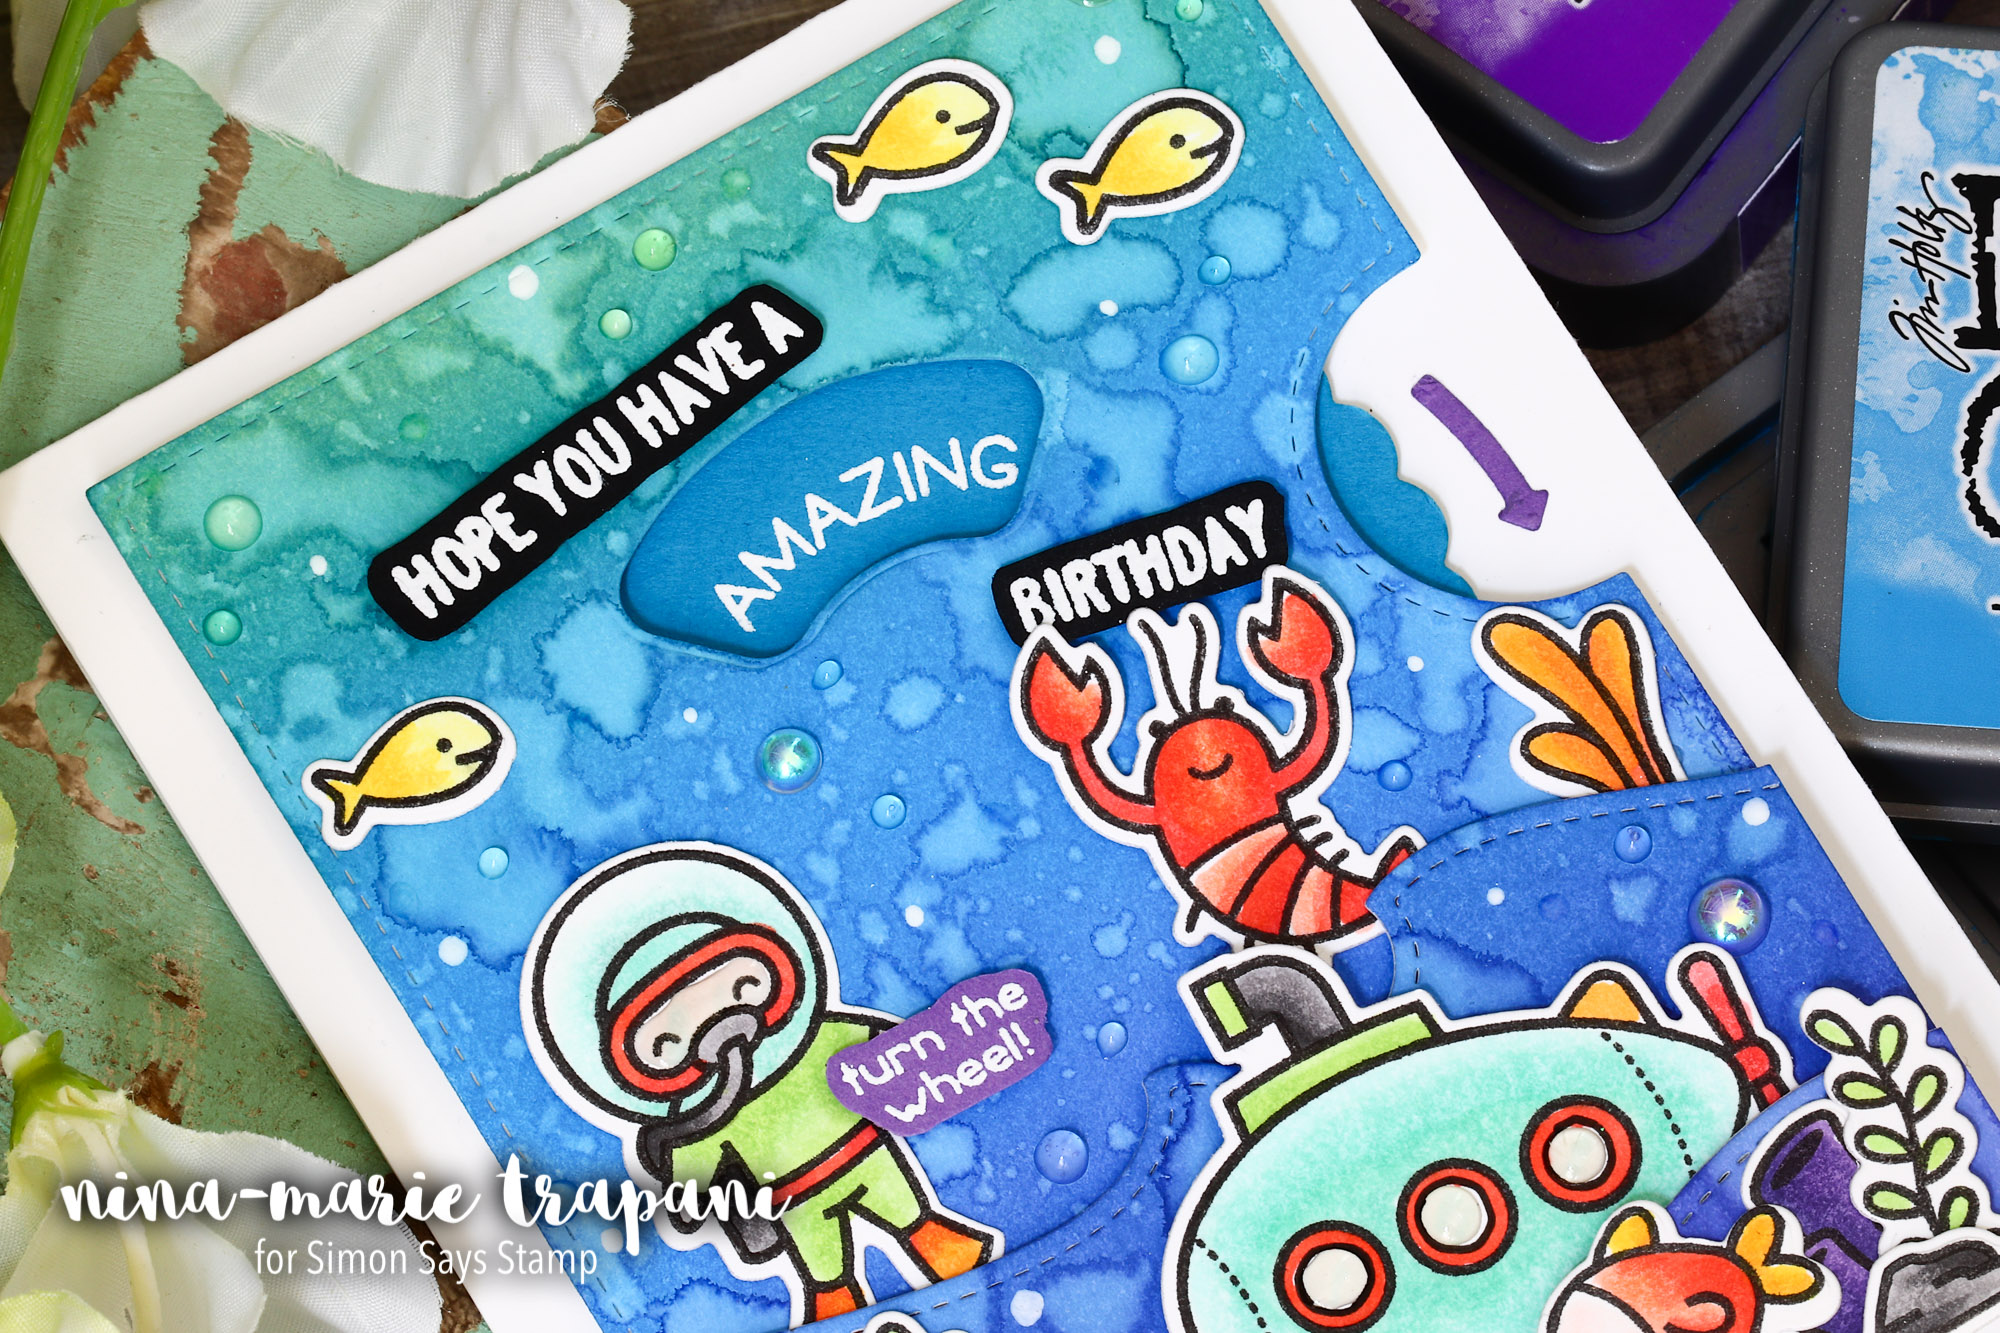
The also-brand-new Stitched Wave Borders added fun depth to the scene! I inked all of the waves and ocean elements with Distress Oxide inks; Salty Ocean, Blueprint Sketch, Wilted Violet and a tiny bit of Squeezed Lemonade at the top to create the illusion of light filtering through the water.
I used some of the pretty Iridescent Bubbles from Studio Katia and Tonic Studios’ Morning Dew Nuvo Drops to create bubbles.
I had leftover images and waves from creating my scene on the front of the card, so I used those pieces to make a little scene on the inside too!
I hope you will watch the video to see how I created this interactive card; thanks for stopping by and visiting with me today!
WATCH THE VIDEO
SUPPLIES
|


