Studio Monday with Nina-Marie: Doodlebug Sliders and Wobblers 5 Ways!

Hello crafty friends! It’s Nina-Marie here, welcoming you back to a brand new Studio Monday video! Are you ready for some fun, interactive card ideas using Doodlebug’s Sweet Summer collection?
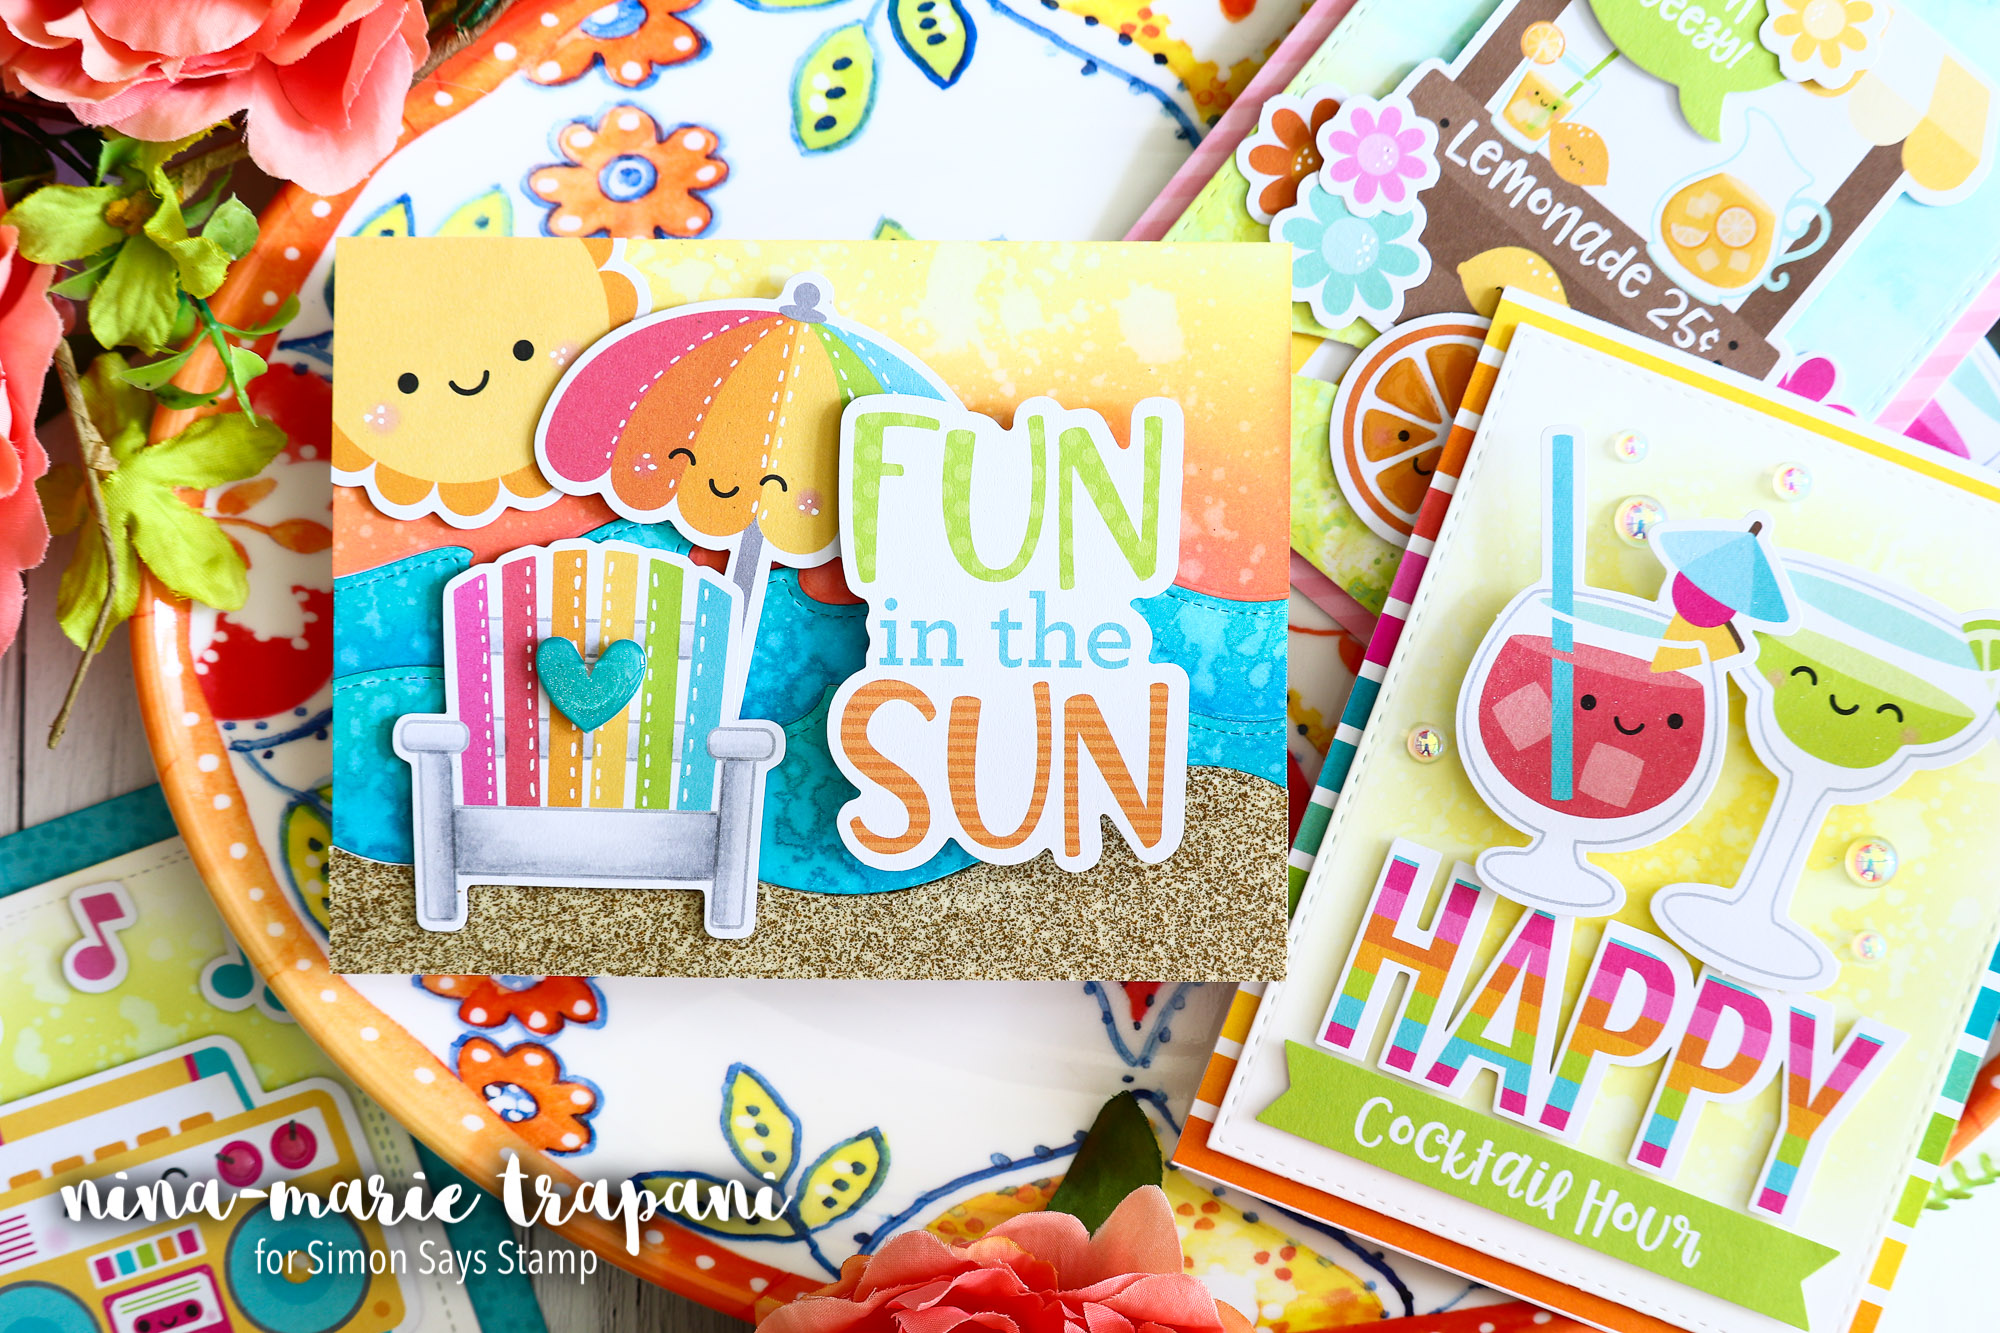
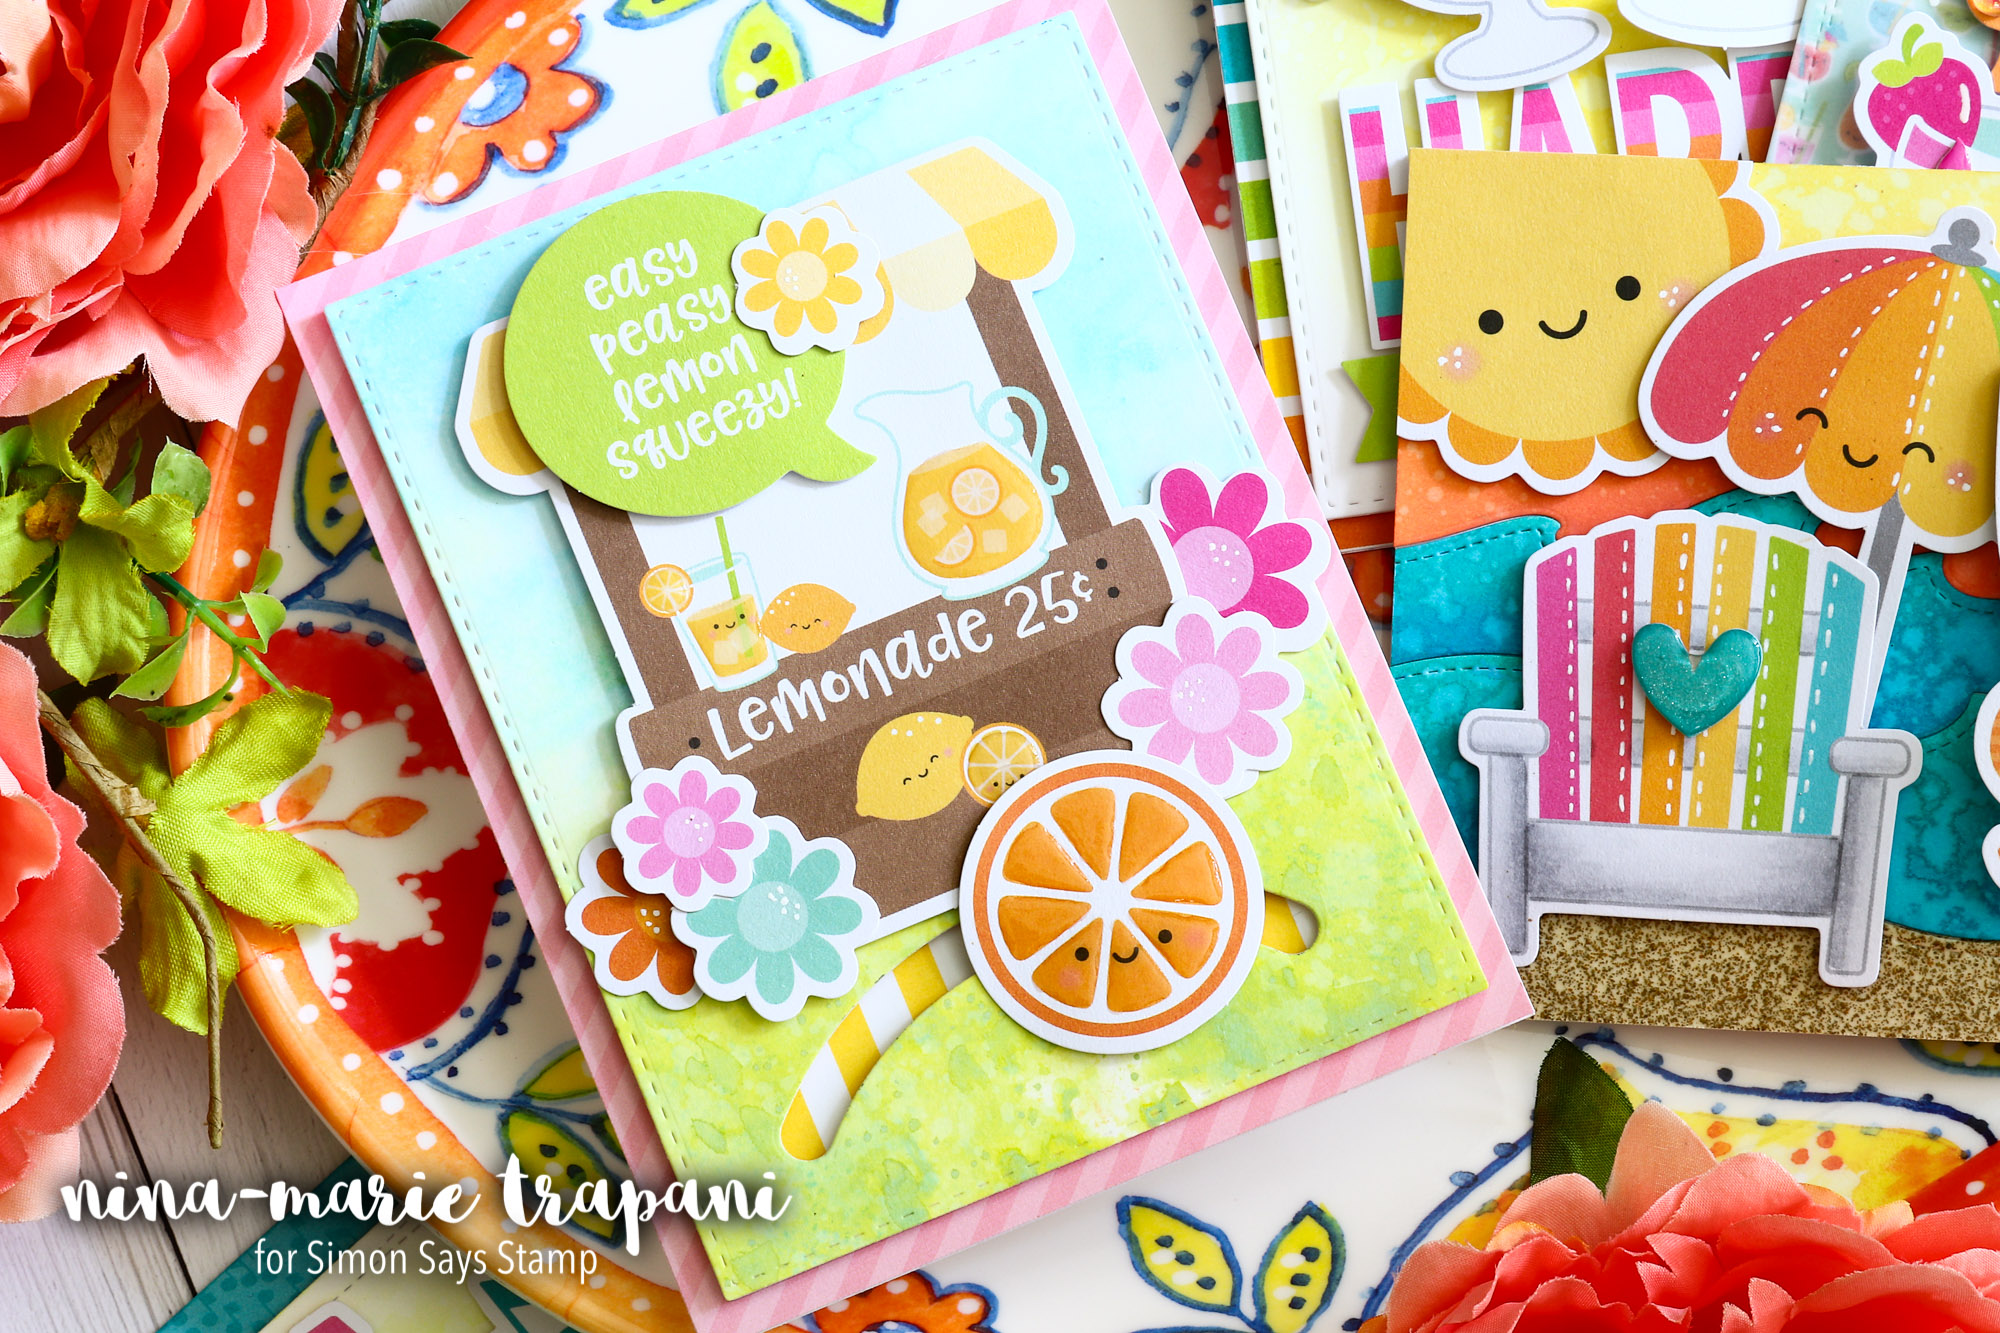
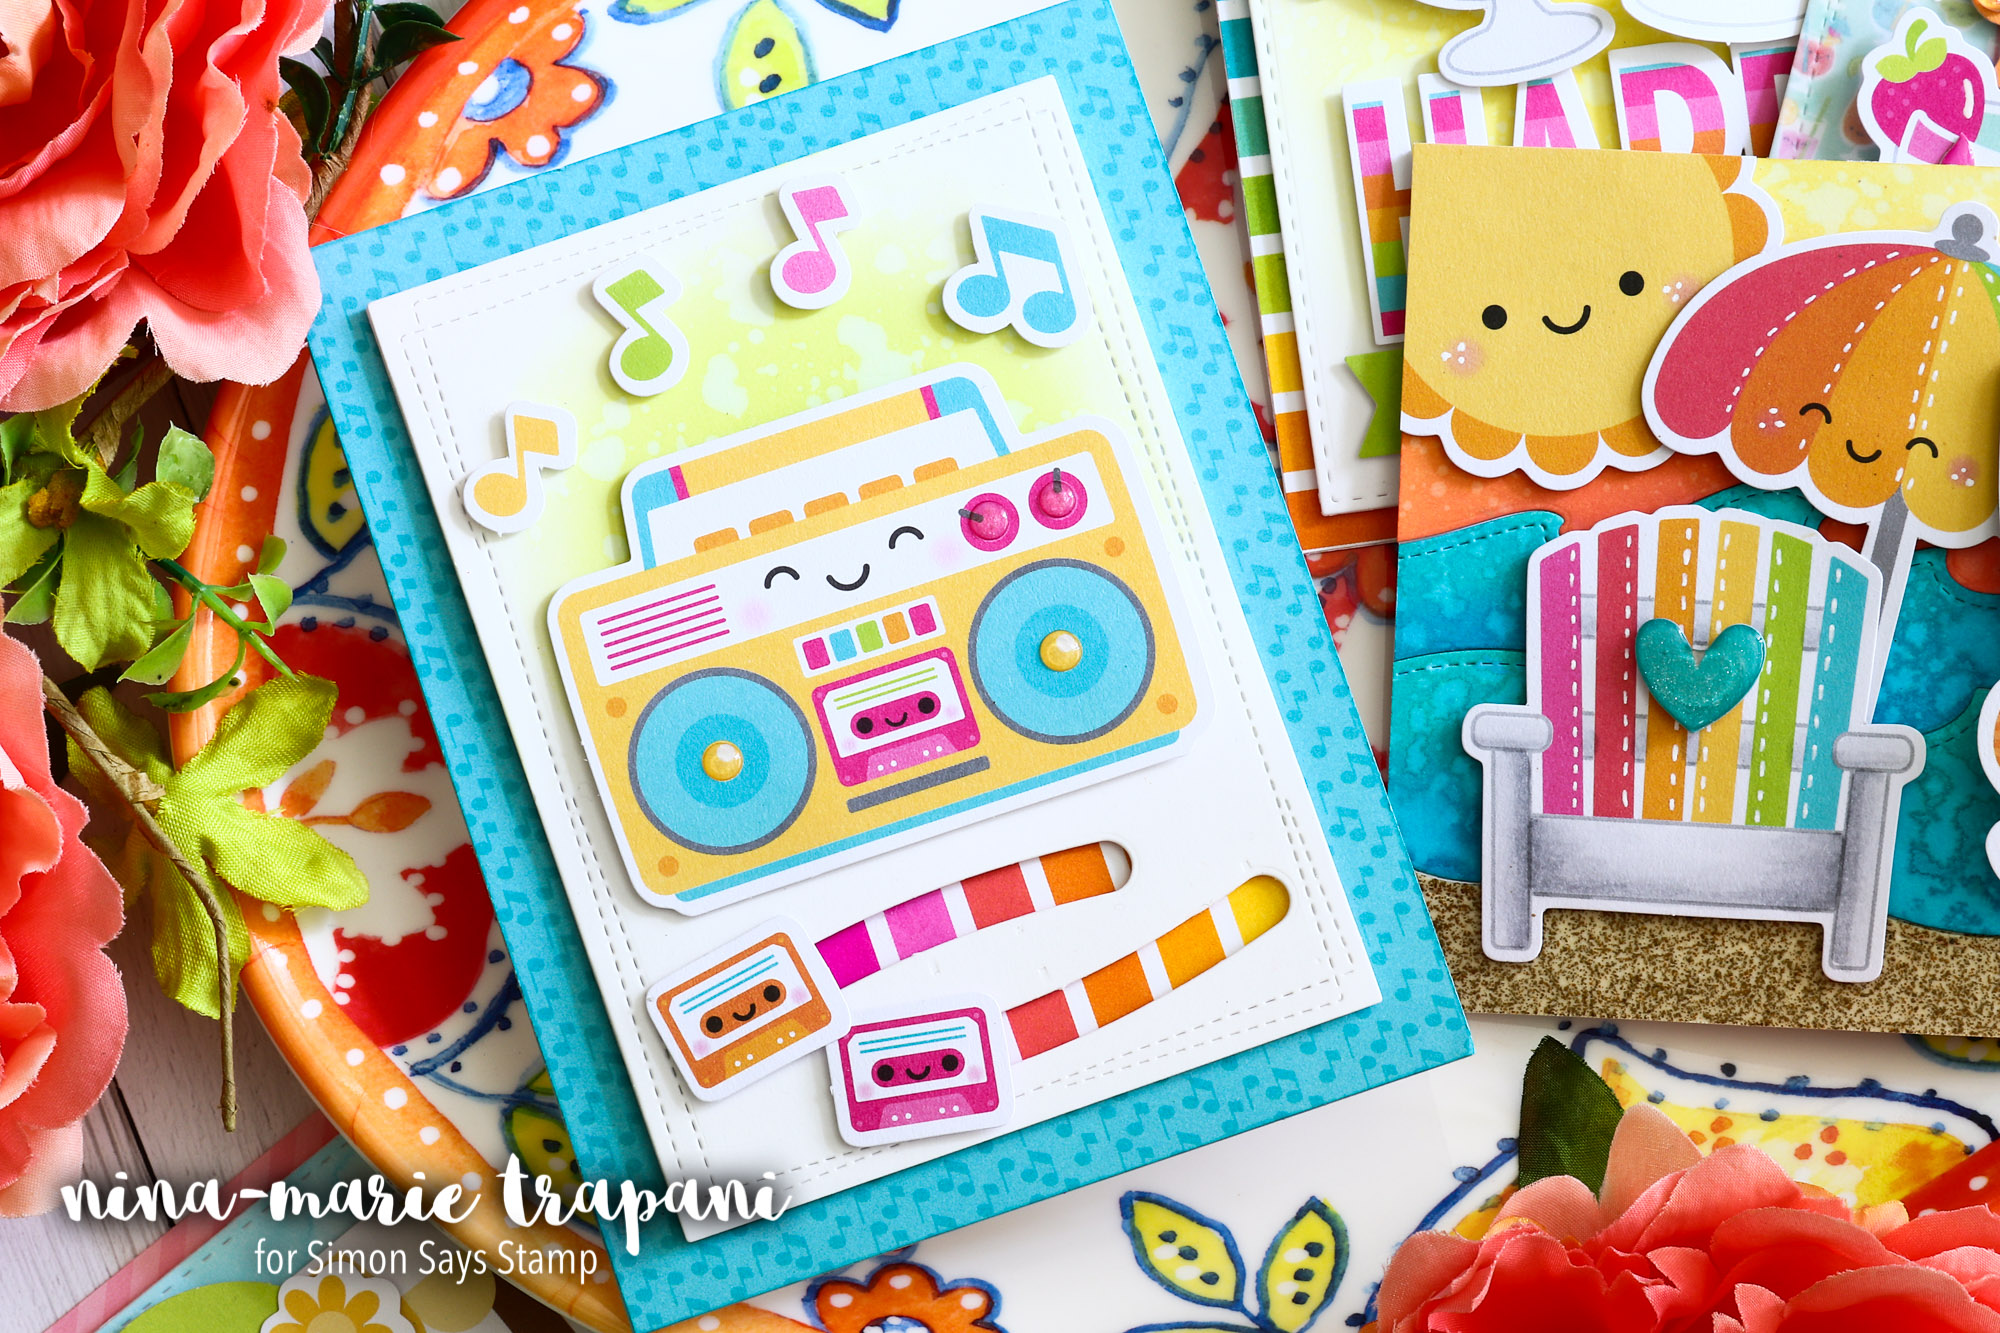
In today’s tutorial I’ll walk you through 5 ways you can use this colorful, happy collection with Lawn Fawn’s Slide On Over and Slide On Over Semicircles dies, and Mini Action Wobbles from Art Impressions! Pairing these products together makes for some playful cards with a bit of interactive fun!
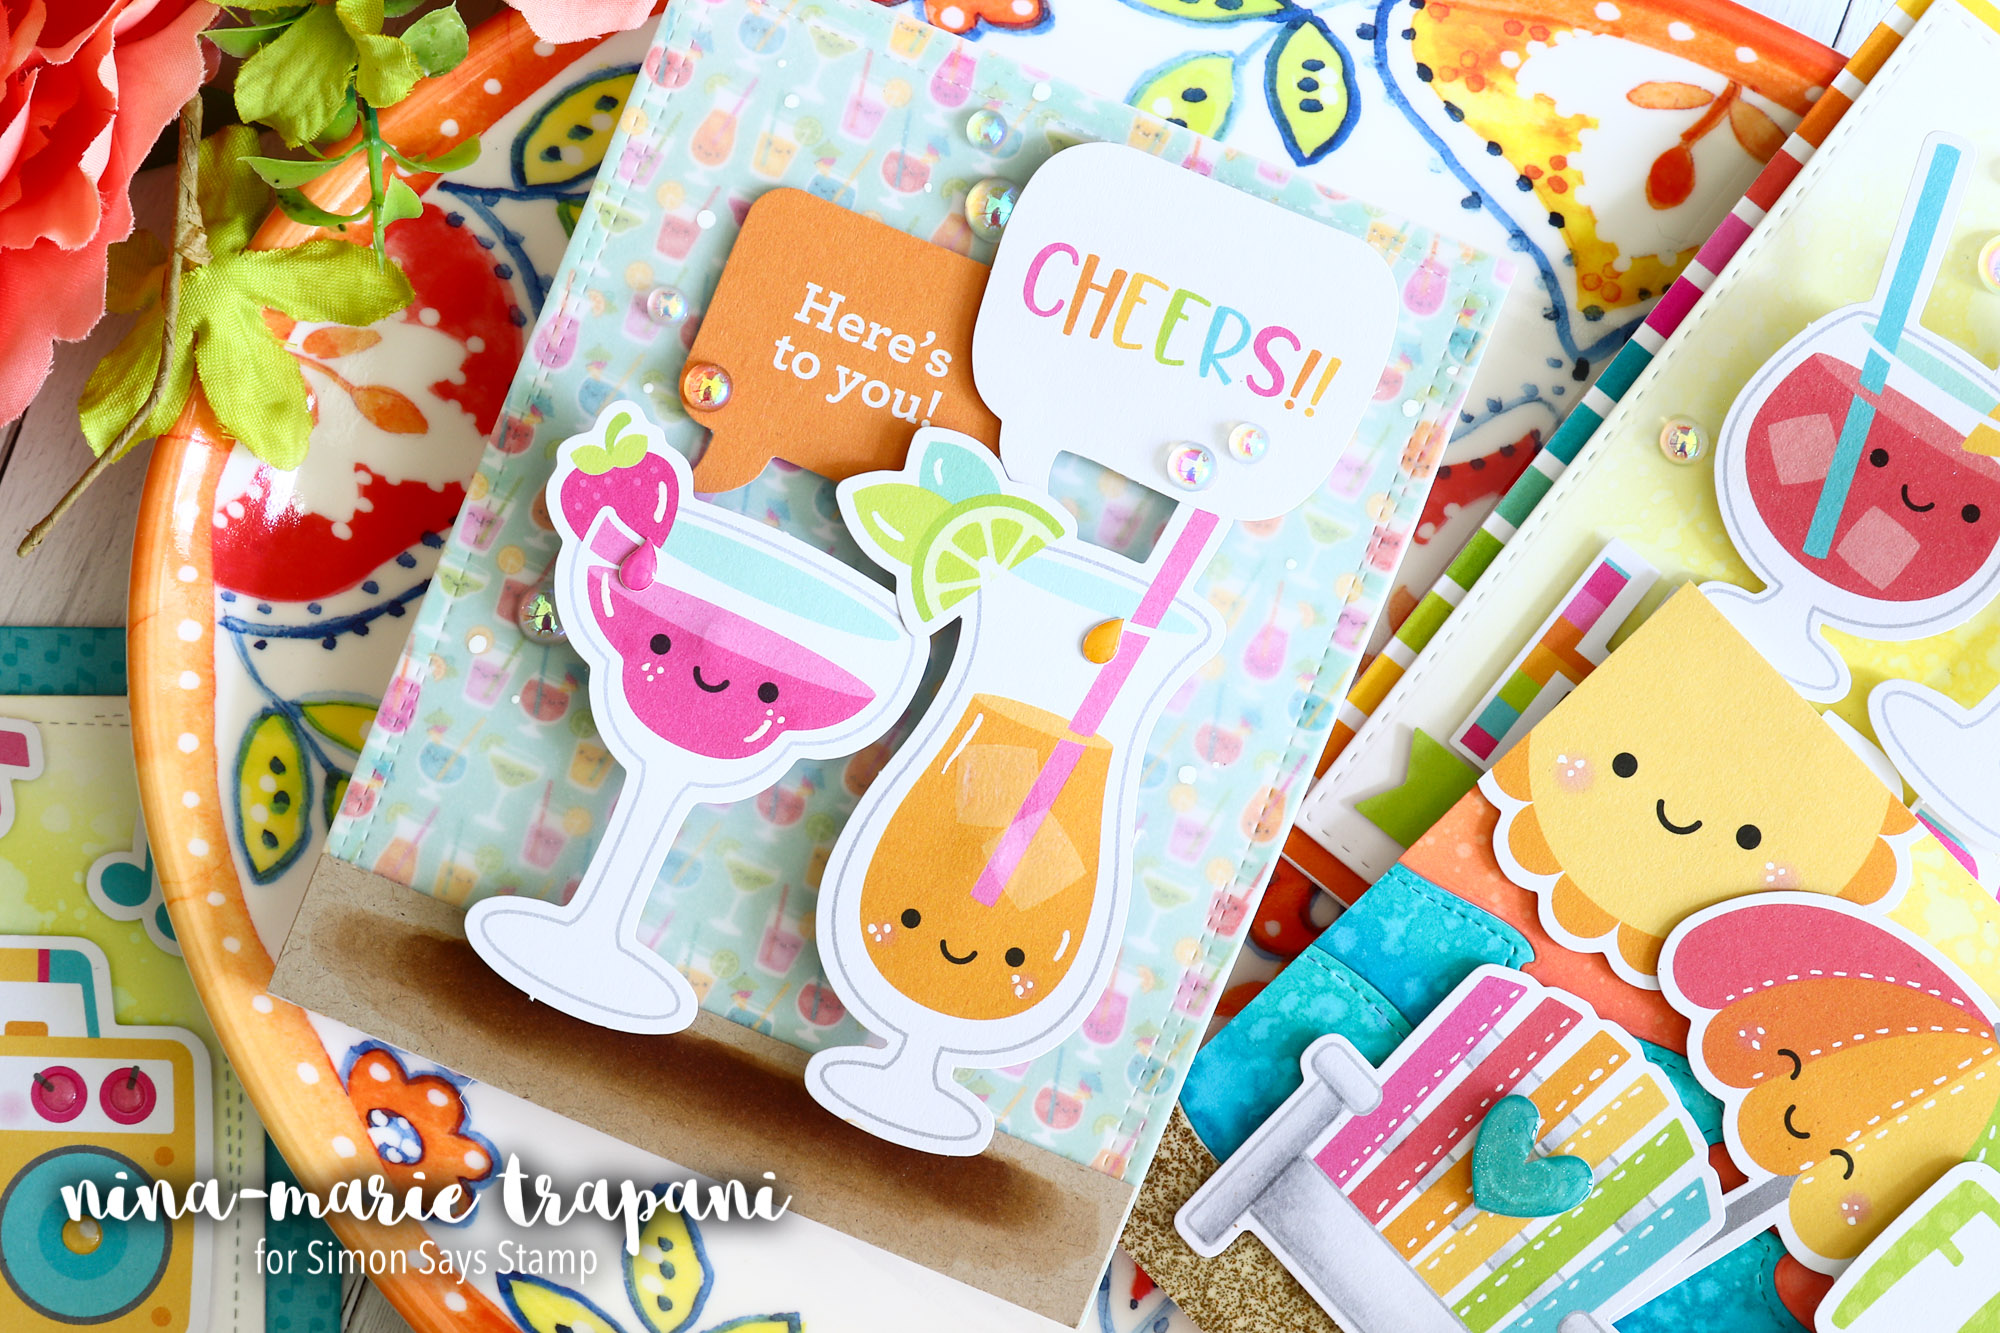

Throughout these cards, you’ll see the Doodlebug Sweet Summer Odds and Ends, and Sweet Summer Chit Chat die cut shape collections, plus the Sweet Summer 6×6 paper.
In the video, I will walk you through how to make these fun sliders and wobblers; I hope you will press play and see it all come together! Thanks SO much for stopping by and spending time with me today; I will be back again next week with more inspiration for you!
WATCH THE VIDEO
SUPPLIES
|


Blog Candy Alert!! Follow our blog via email and comment on this post for a chance to win special blog candy!
Congrats! Blog Candy Winners!
Yippee for Yana: One Layer Floral Copic Colored Cards: Mary Holshouser
What Would Kelly Make: Pattern Stamping: Billie A
One Stamp, Five Ways: Hello There: Danielle Dietz
Art Journal Style Cards with Shari Carroll: Anastasia M.
Sassy Cards for Your Best Girlfriends: Greta H
Easy No-Line Watercolor + 30 Day Coloring Challenge Blog Hop: Angela
Make A Wish Diorama Keepsake Box: Debbie Siddle
Please email [email protected] with the name of the blog you won from, the prize you won, and your address (if applicable) to redeem your prize(s)!
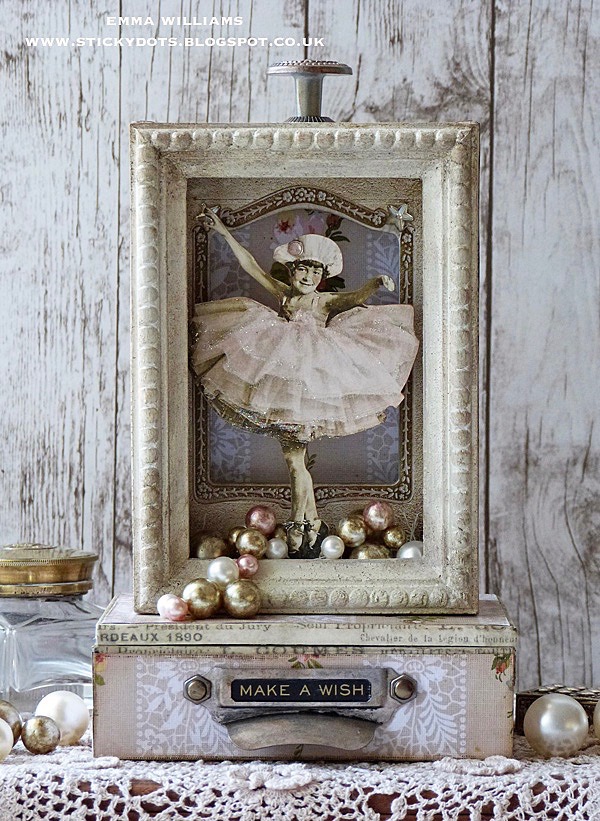
Make A Wish Diorama Keepsake Box
Hi friends! Happy Sunday! Welcome to another special mixed media post with the incredibly awesome and talented Emma Williams! She’s kindly shared this fun project along with a step by step process of how to recreate this gem for yourself! To see more of her work, please be sure to visit her blog HERE. Read on and enjoy!
Happy Sunday everyone ~ it’s Emma here and I’m thrilled to be back on the Simon Says Stamp blog to share my latest project with you all.
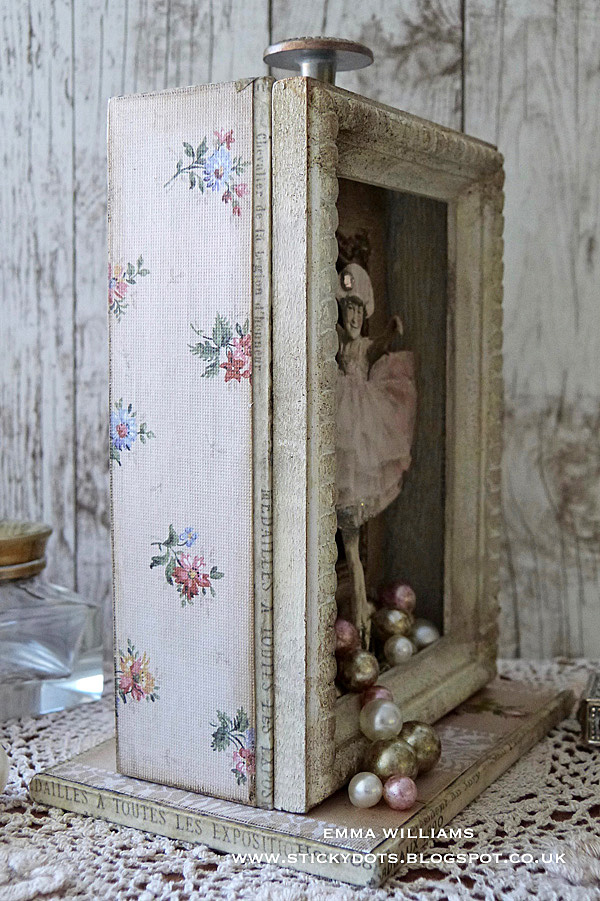
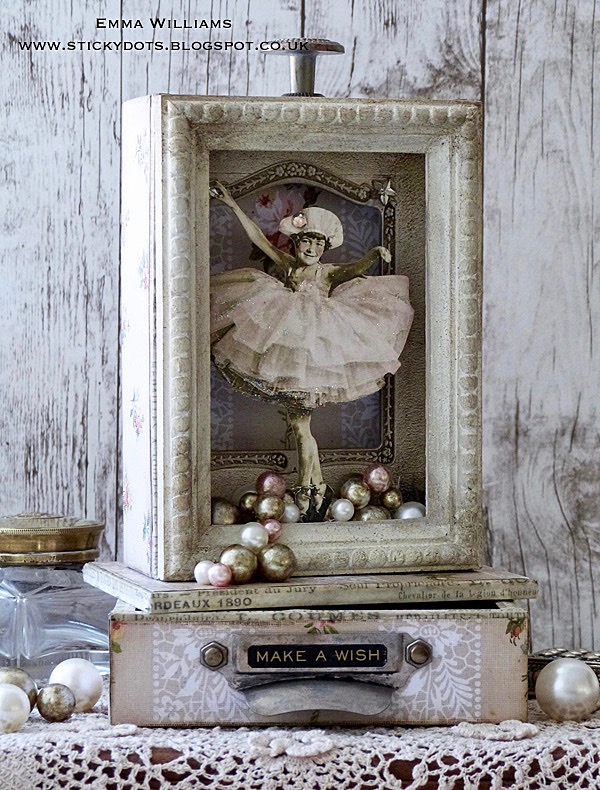
I’ve always loved making little boxes and creating functional pieces that are beautiful to display around the home. So with this in mind, I used some of my favorite Tim Holtz products to create this diorama keepsake box and with this tutorial, I’ll take you through each step of how I made the box and bought this beautiful little paper doll to life.
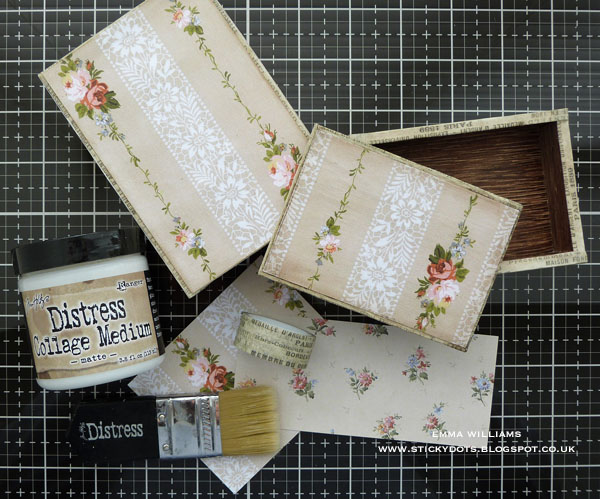
For this project, I used the two middle-sized Vignette Boxes and one Vignette Panel that fits the top of the smaller sized box.
Starting with the larger box, I applied a coat of gesso on the inside and once dry, I applied a coat of Antique Linen Distress Paint. Dry the painted surface and then dry brush small amounts of Pumice Stone Distress Paint over the top to create a more aged, worn look to the woodwork. Allow drying thoroughly.
Cut a panel of Worn Wallpaper to fit on the inside of the larger box and adhere with Matte Collage Medium applied with a Collage Brush.
Apply French Design Tape to all of the raw edges on both boxes and also the edges of the Vignette Panel.
Cut panels of Worn Wallpaper to fit the sides of each of the boxes and also a further piece to fit one side of the Vignette Panel ~ I used two different coordinating designs of the paper and on the larger box. You will also need a panel of paper to cover the back as this will be shown.
Ink the edges of each panel of paper with Frayed Burlap Distress Ink and adhere the paper pieces to the boxes and the top of the Vignette Panel using Matte Collage Medium. Apply a coat of the medium over the top of the papers to seal them.
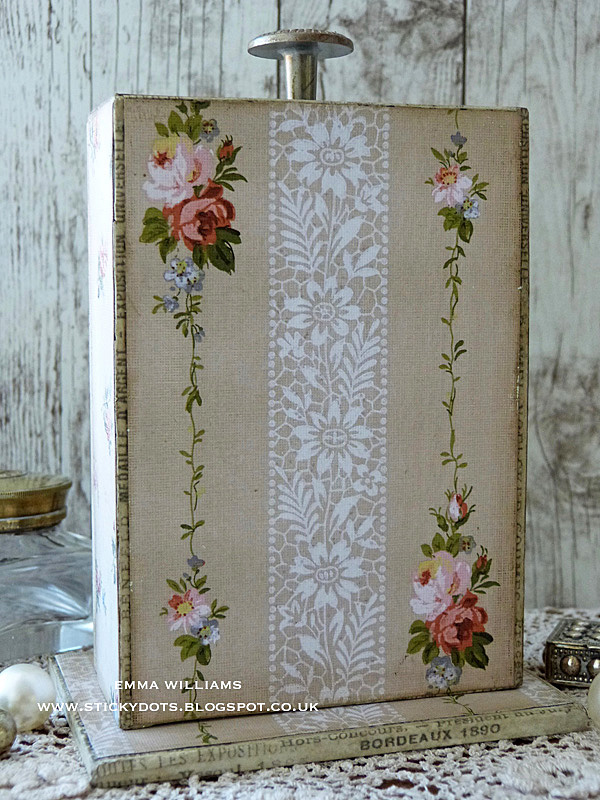
Once the medium is dry, run the Ground Espresso Distress Crayon along the edges of each piece of paper. Take a semi-dry baby wipe and blend the crayon into the edges to create a vintage look to the paper.
Cut and attach small sections of foam tape to the back of a Baseboard Frame, adding three layers placed on top of one another to create the dimension needed for the diorama. Attach the frame to the inside of the larger box.
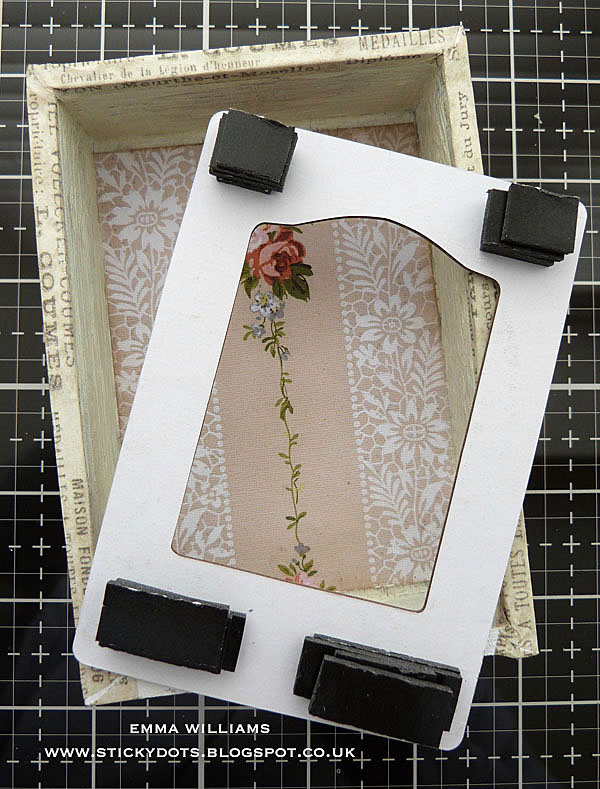
Apply Mushroom Alcohol Ink to two small mirrored stars and place the stars in the top left and right-hand corners of the baseboard frame.
Adhere the large box centrally onto the Vignette Panel using a layer of Matte Collage Medium and set to one side to dry.
Prime the Collage Frame, (same size as the larger vignette box) with a coat of gesso and allow to dry before adding a layer of Antique Linen Distress Paint over the top. Dry the painted frame and then dry brush with Pumice Stone Distress Paint.
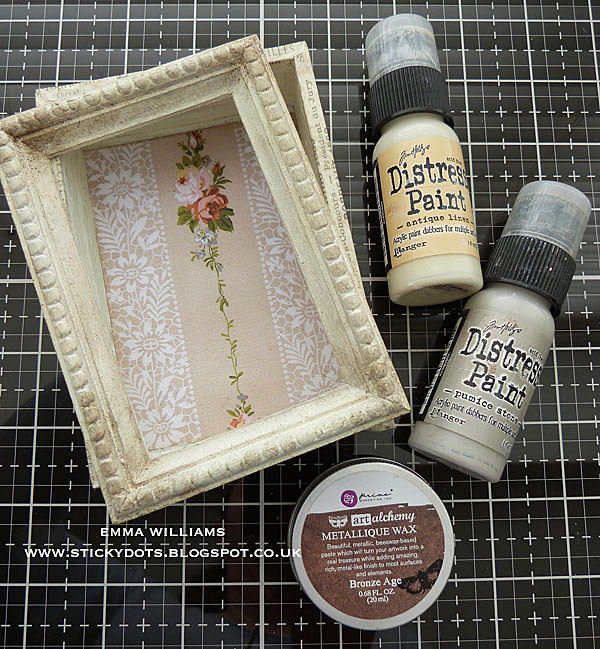
Allow the paint to dry thoroughly before applying Bronze Age Alchemy Wax with a Dabbing Brush, pouncing small amounts of the wax over the painted wood, concentrating on the mitered corners especially, to create a more worn look to the frame. Set the frame aside.
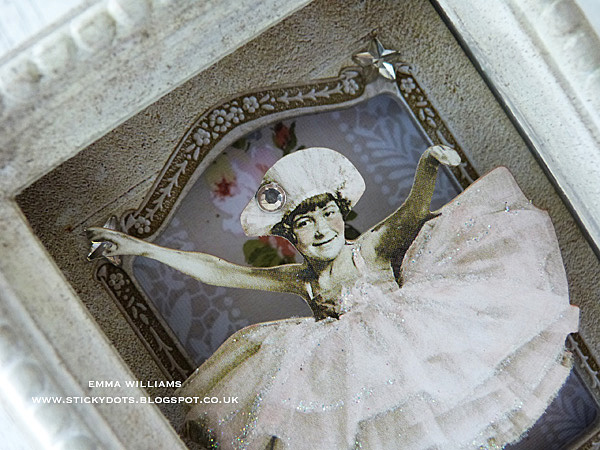
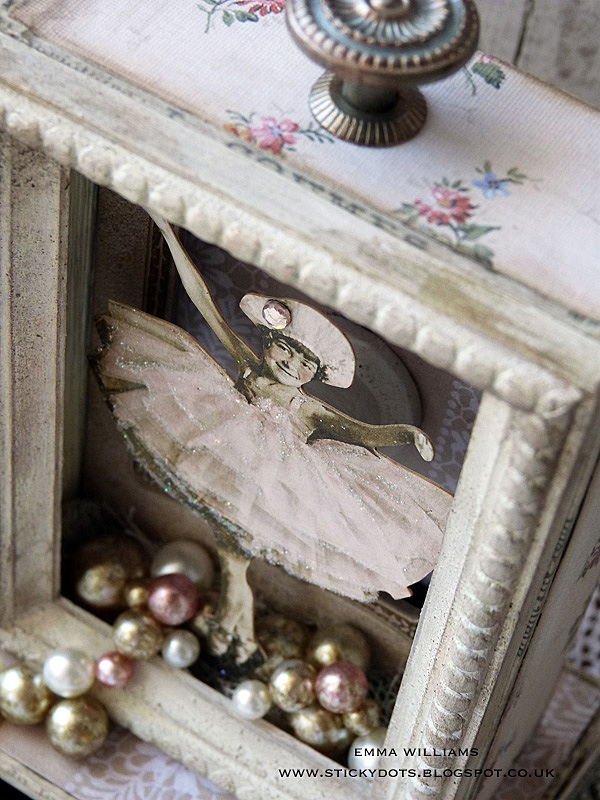
Moving onto the Paper Doll, color tint the dress and her cheeks using Spun Sugar Distress Marker Pen, applying the ink directly to the dress and wiping away any excess color with a soft cloth.
Taking a Glue Pen, apply the glue directly to the folds of the dress and sprinkle Rock Candy Glitter over the top. Add a crystal jewel to her hat and set aside to dry.
To create the diorama effect within the box, I attached a small cotton spool from my stash and adhered this to the back of the doll with Collage Medium.
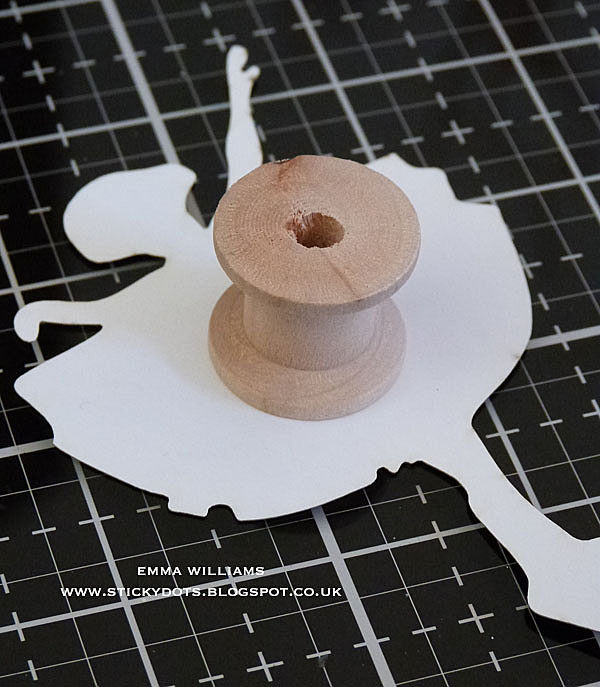
I then attached the doll to the inside of the box. The cotton spool is discreetly hidden behind the paper doll but you can see it in place in the photo below.
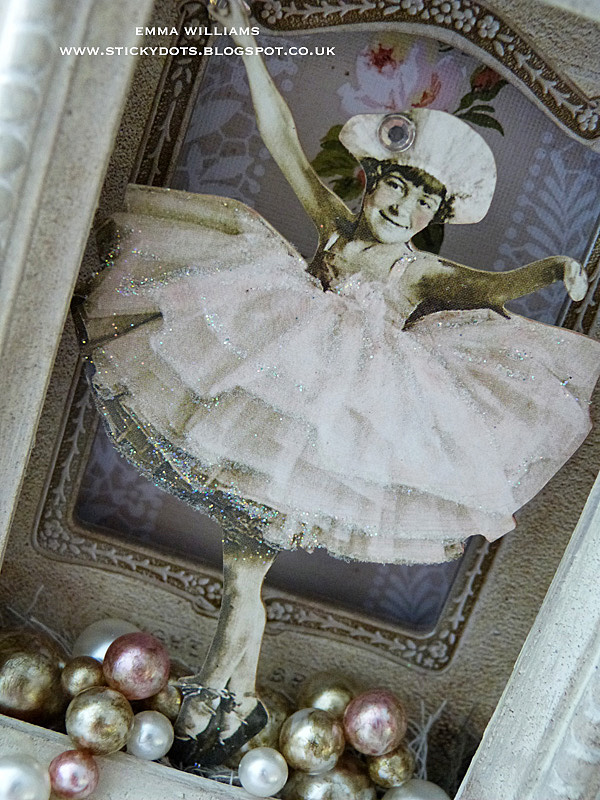
To color the Bauble Findings, place the pearls into two separate self-seal bags. Drop a small amount of alcohol ink, (I used Pink Sherbet and Mushroom to color mine) into the bag and then give the pearls a shake within the sealed bag covering the bauble completely in the ink.

Remove the Baubles from the bag and using the majority of the pearls, together with some of the plain natural coloured baubles, attach these with small dots of Matte Collage Medium applied directly onto the pearl itself and adhering them one by one to the inside of the box, arranging them along the base over a bed of cheesecloth.
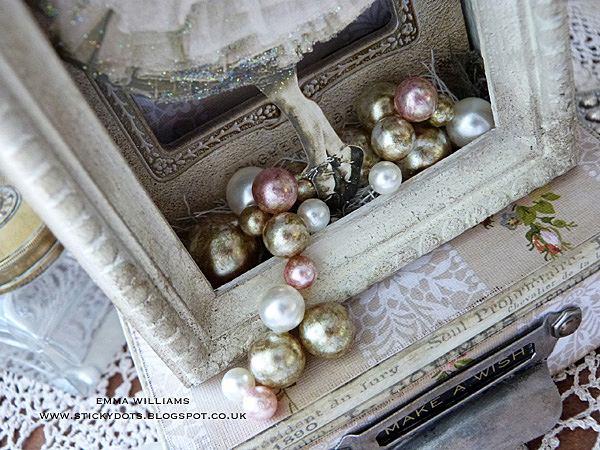
Attach the painted frame onto the front of the box and using the remaining pearls, attach these to cascade out of the box, again fixing them into place with the Collage Medium. Set the box aside for the pearls to dry thoroughly, preferably overnight if you have time and patience!
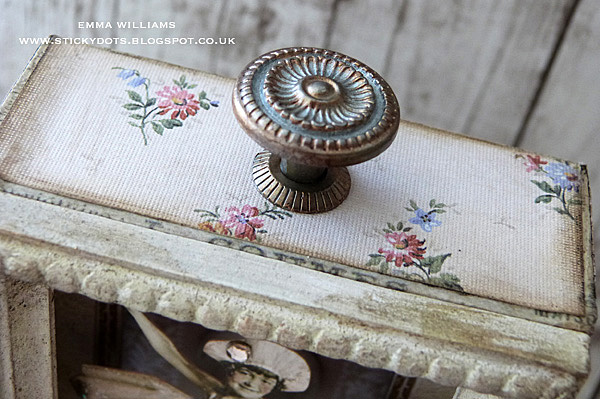
Apply Mushroom and Rose Gold Mixative Alcohol Ink to the applicator tool and color the Mini Hardware Knob and the Mini Hardware pull with the ink. Remove the screw from the knob and using the Collage Medium, apply the adhesive directly to the metal pieces and attach the knob to the top of the diorama box. Allow drying. Once the medium is set, it will hold the knob solid enough to be able to lift the top section of the box.
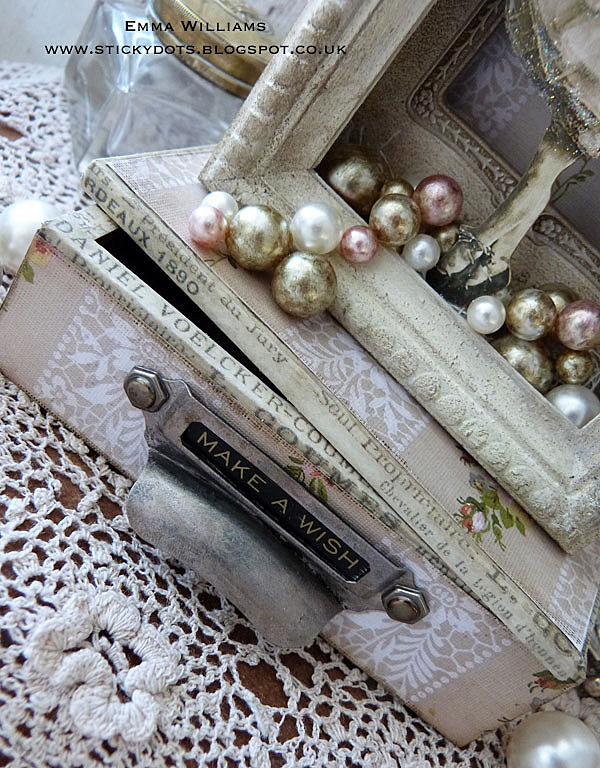
Attach the pull to the front of the smaller box. Take two Hex Fasteners and cut away the split pins on the back. Attach the fasteners to the holes of the mini hardware pull.
Place the “Make A Wish” metallic quote sticker onto a piece of black card, cut around the sticker and then place inside the hardware pull.
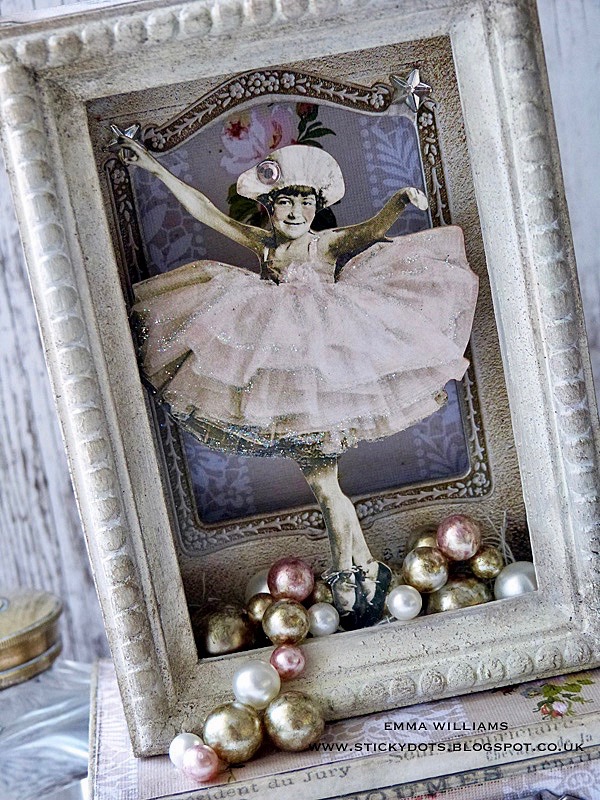
 Finally, all that’s left to do is place the framed section on top of the smaller box to create your diorama keepsake, ready to use and display in pride of place in your home.
Thank you so much for stopping by today ~ this has been such a lovely project to make and I’ve really enjoyed taking you through the creative process and I hope I’ve inspired you with this piece.
See you again soon everyone and enjoy the rest of the weekend…
Emma
SUPPLIES:
|


Thanks so much for stopping by and a big thanks to Emma for being our guest!
Blog Candy Alert!! Follow our blog via email and comment on this post for a chance to win special blog candy!
Easy No-Line Watercolor + 30 Day Coloring Challenge Blog Hop!

Hello to all our creative, coloring friends! It’s Nina-Marie here with you today, as I am going to be sharing some easy, no-line watercolor inspiration with you. I’ll be featuring some of our Simon exclusive sets, including the ever popular, Even More Spring Flowers stamp set!
Today’s inspiration is also part of Kathy Racoosin’s 30 Day Coloring Challenge blog hop. But this isn’t just any blog hop… this is celebrating her 10th CHALLENGE! TEN! Can you believe that? We are SO excited for Kathy, and love how she encourages all of us to color and relax, even if it is only for just a short amount of time. WAY TO GO KATHY!
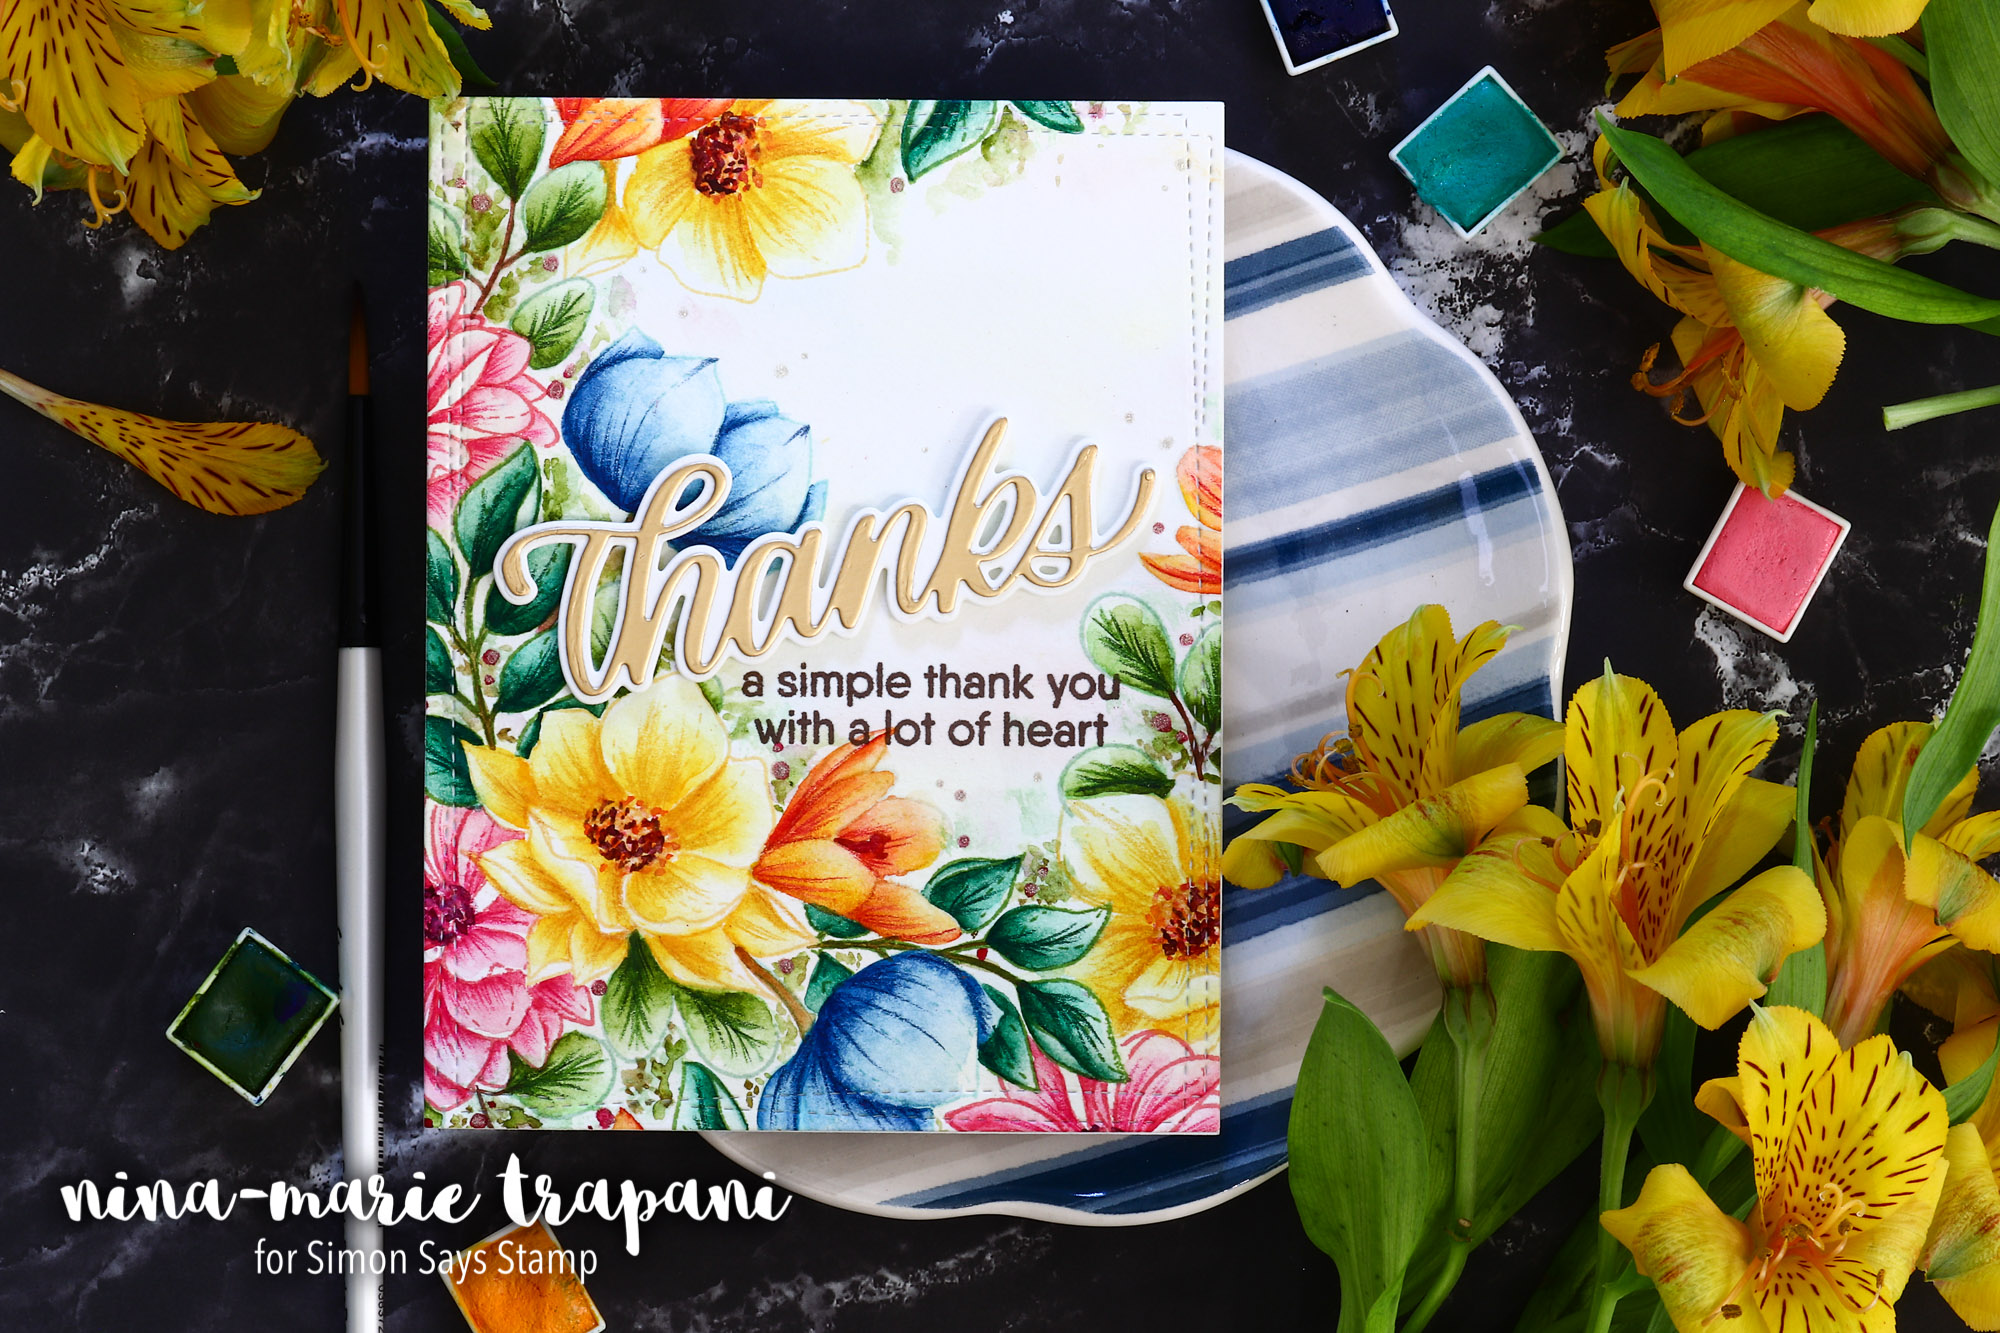
Here’s a look at the card I have colored and created for the blog hop! While this card appears extremely detailed, and even perhaps a bit challenging, I’m here to tell you that it is really quite easy! If you watch the video below, I’ll walk you through the steps and show you that YOU can do this too.
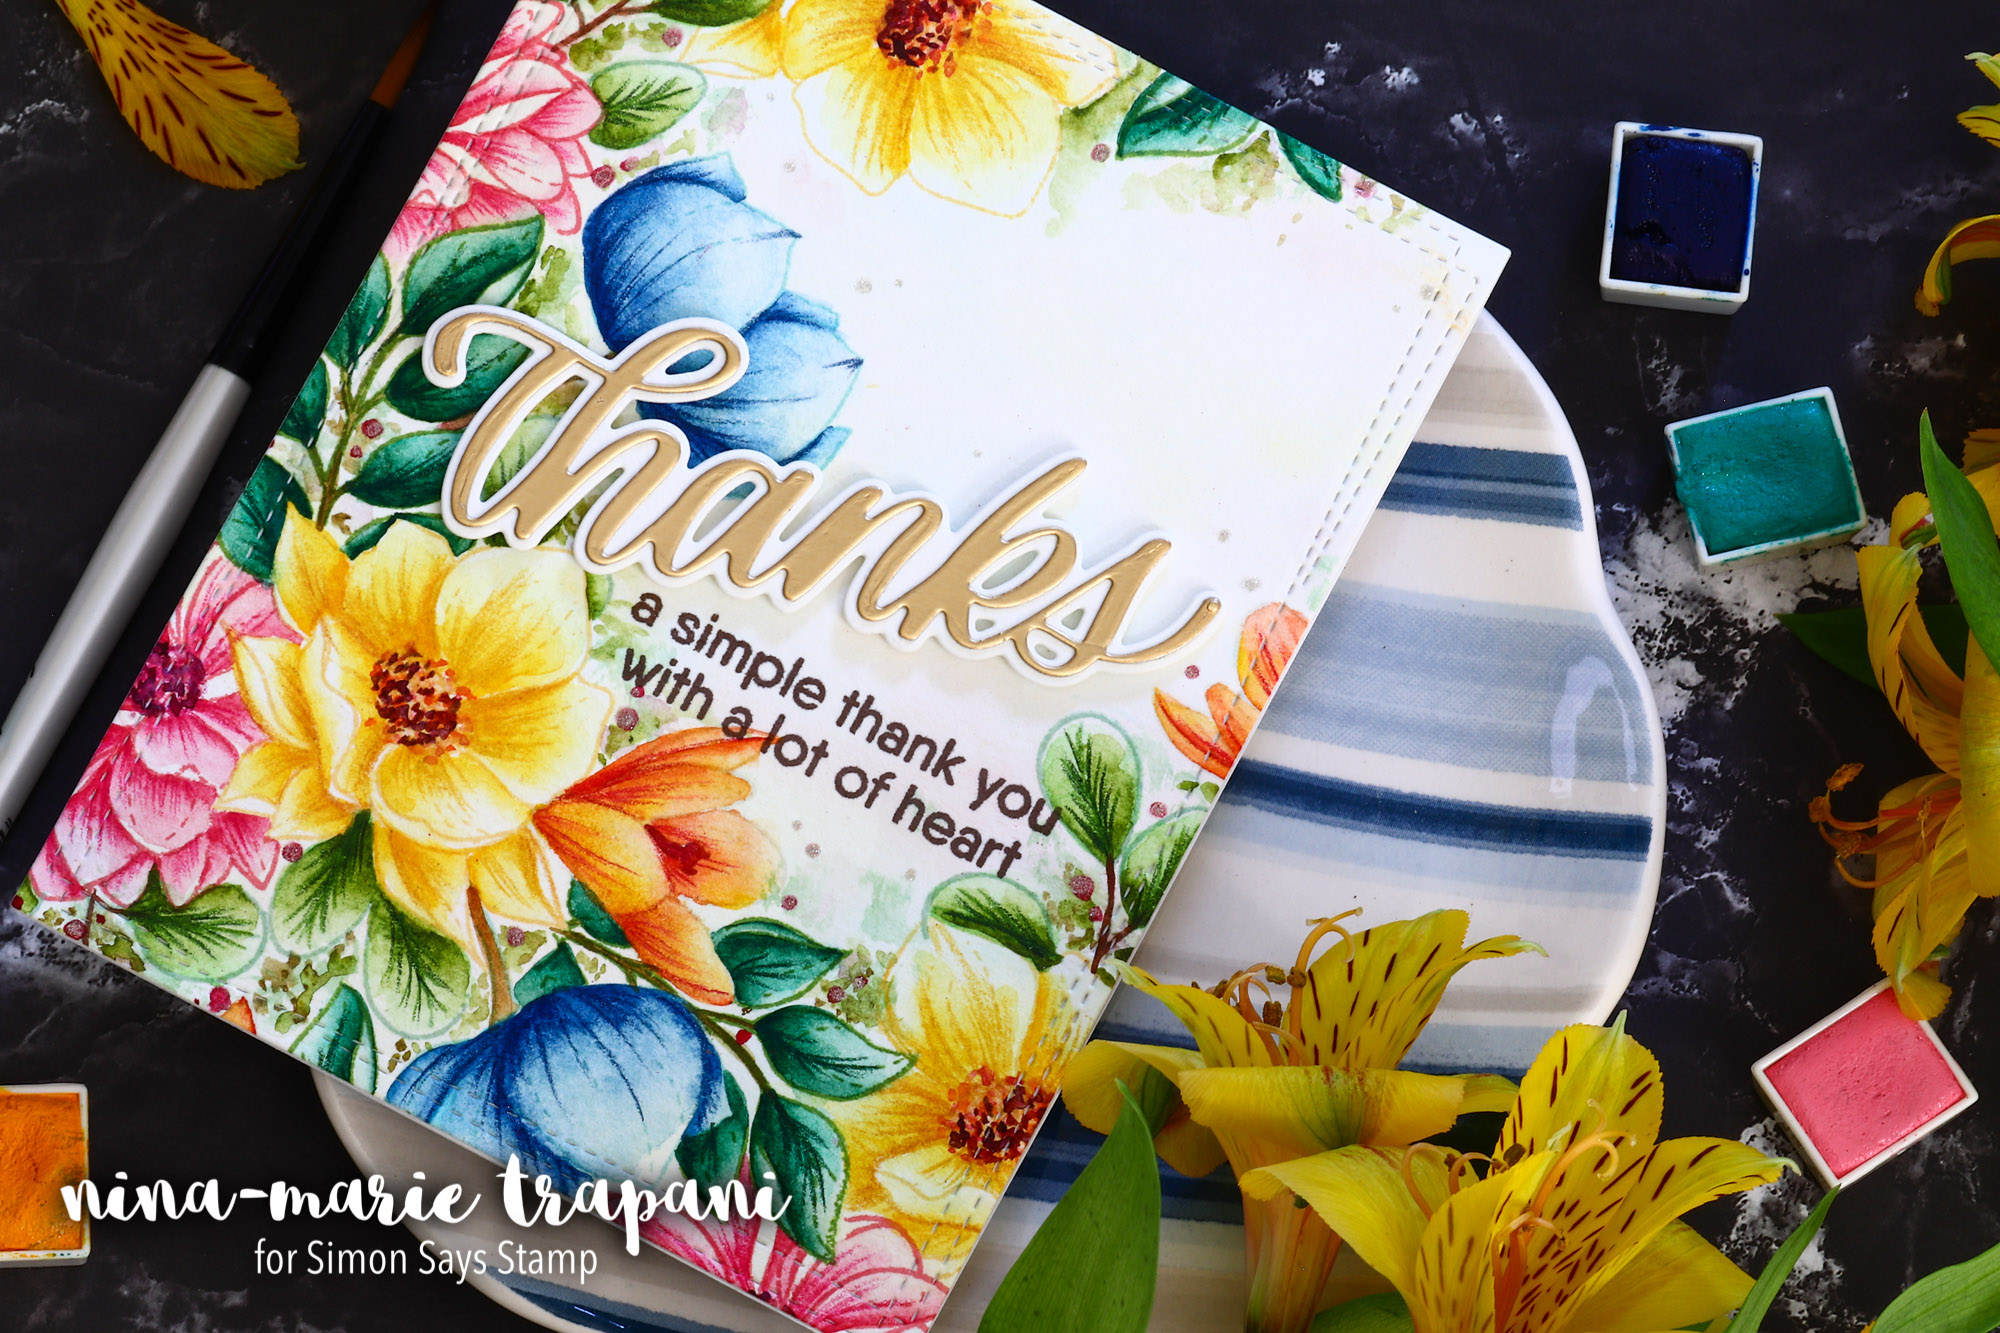
All of the flowers in my scene are from our Simon exclusives, More Spring Flowers and Even More Spring Flowers. I stamped each one with colored inks that coordinate with the watercolor shades I planned on using. Speaking of watercolors, I used Prima’s watercolor confections. However, you can use whatever watercolors you would like for this technique.
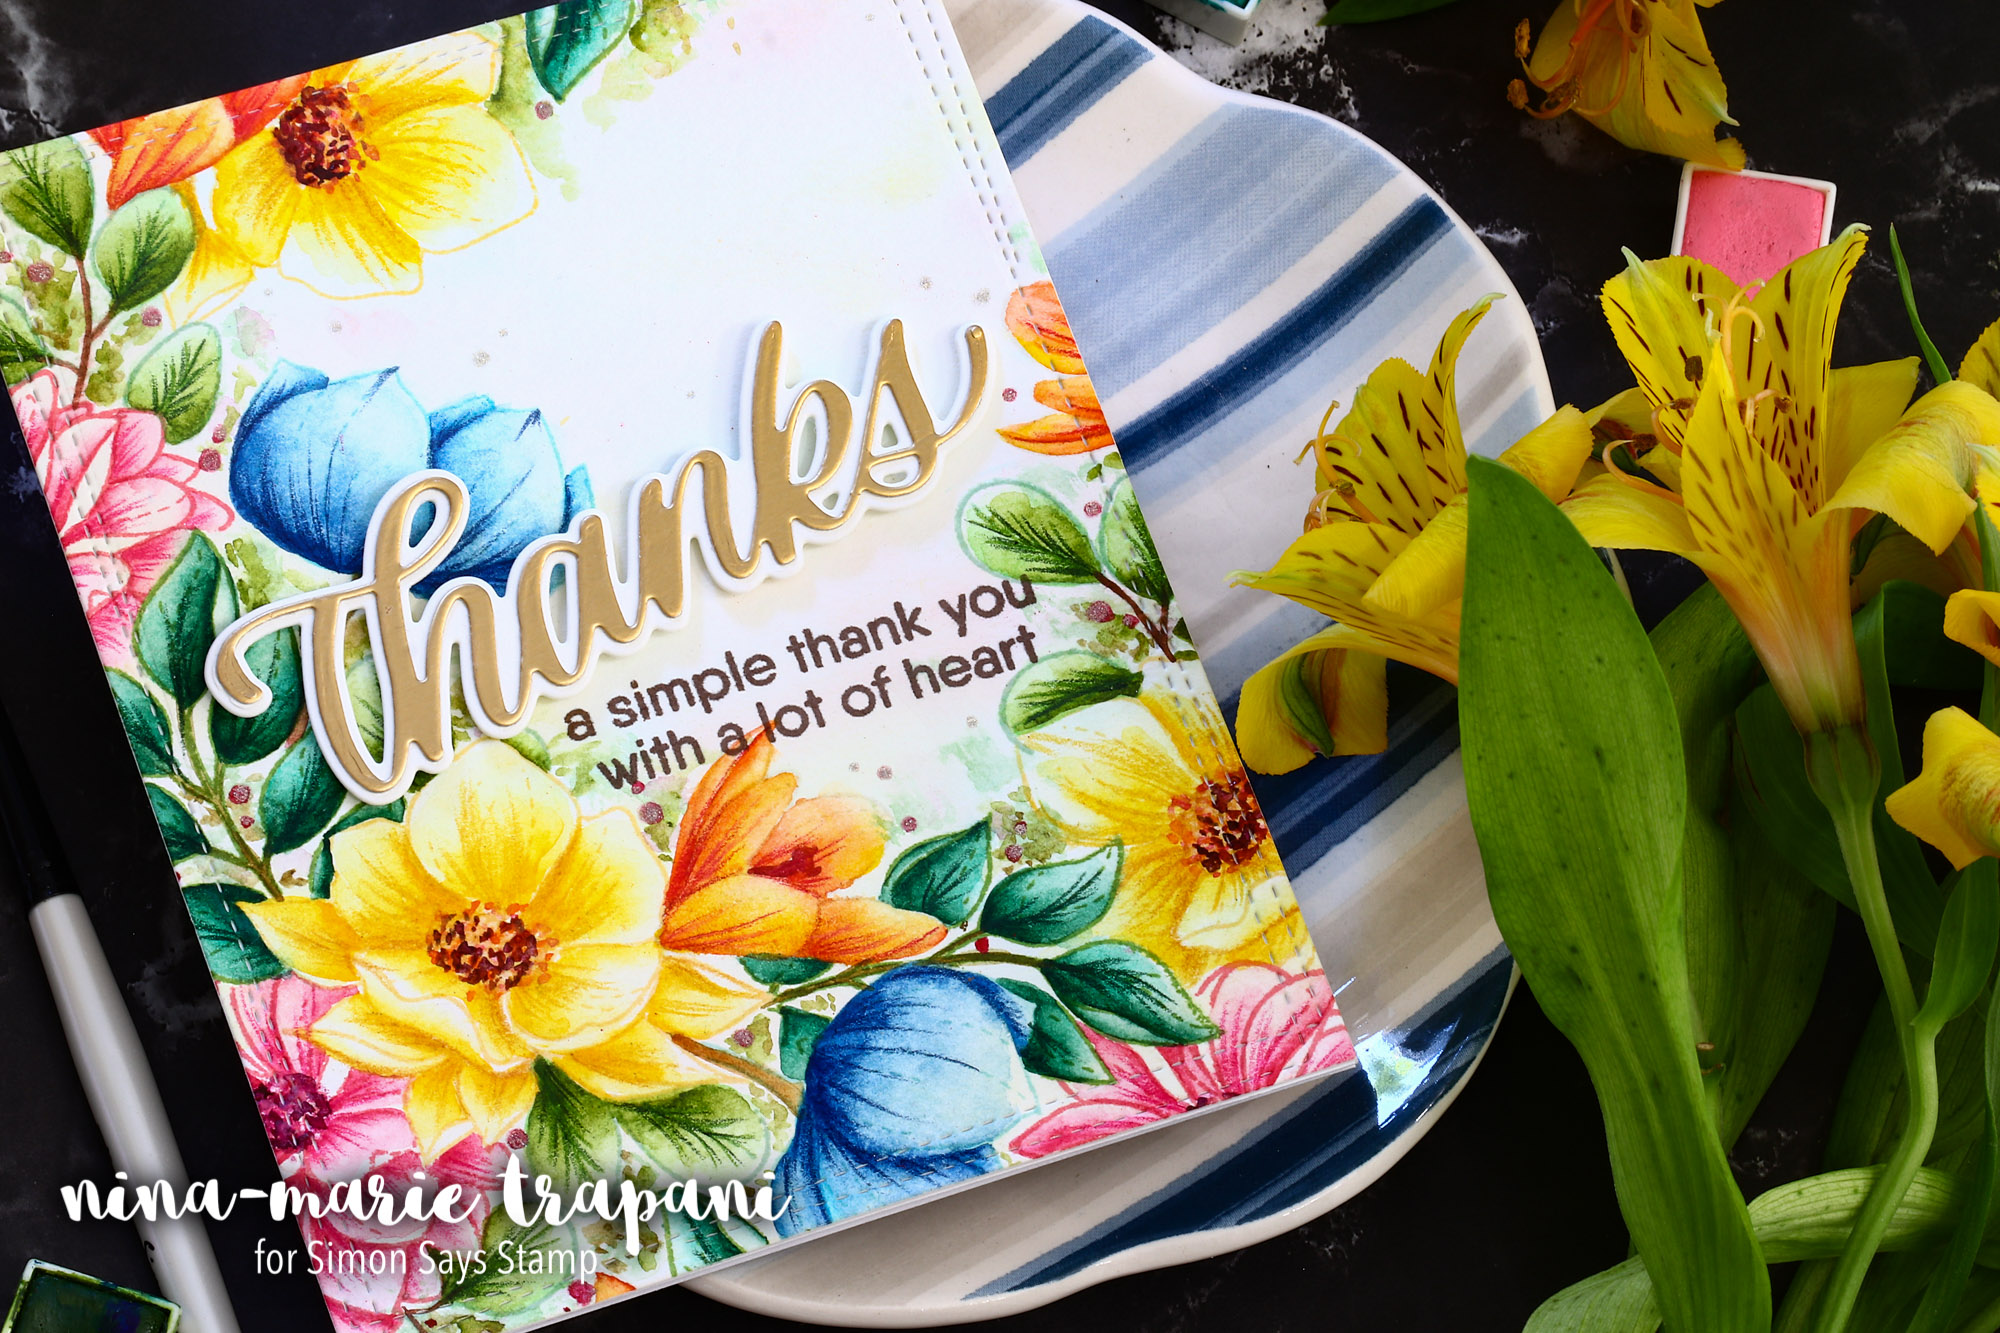
I’ve needed thank you cards lately, so I’m adding more to my stash by using our Simon exclusive, Big Thanks word die, which is paired with a supporting sentiment from My Favorite Things’ Grateful for You stamp set. I cut the thanks word from Tonic Studios mirror cardstock.
Please be sure to watch the video to see how creating a card like this can actually be rather simple! And keep on reading for more details on this fantastic, 30 Day Coloring Challenge blog hop!
WATCH THE VIDEO
SUPPLIES
|


BLOG HOP


