Doodling with Debby: Pencils On Kraft
Hi friends! Happy Saturday! Please welcome back the always amazing and inventive Debby Hughes in the latest installment of our monthly “Doodling with Debby” feature! Take a walk down this Winter Wonderland beauty and enjoy!

Hi, it’s Debby here for my monthly Doodling With Debby video feature on the Simon Says Stamp blog and for today I’m using pencils on kraft for a softly colored icy snowflake card using the Outline Snowflakes set along with the Merry dies and Tiny Words Christmas set.

I used a piece of 100lb Neenah Desert Storm card and stamped the Outline Snowflakes cling mount set in clear embossing ink. This gave a tone on tone guide on which to color with Faber Castell Pencils.
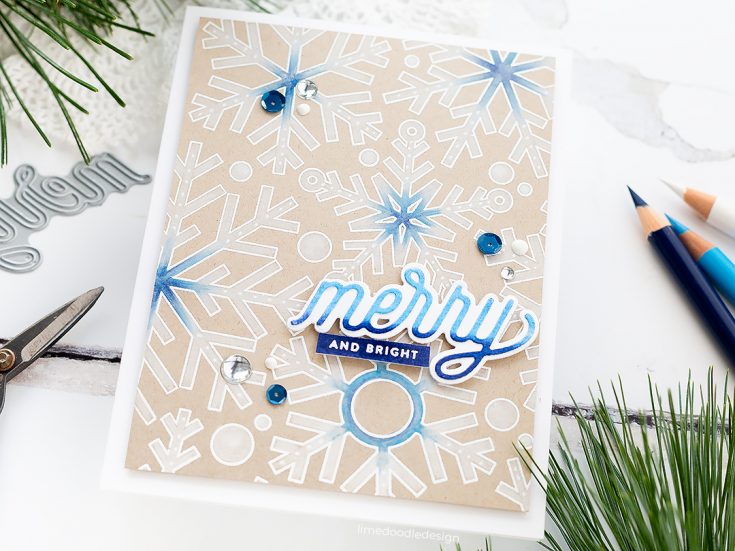
After coloring, I placed the kraft card back in the Misti, stamped again with clear embossing ink and this time white heat embossed the lines.
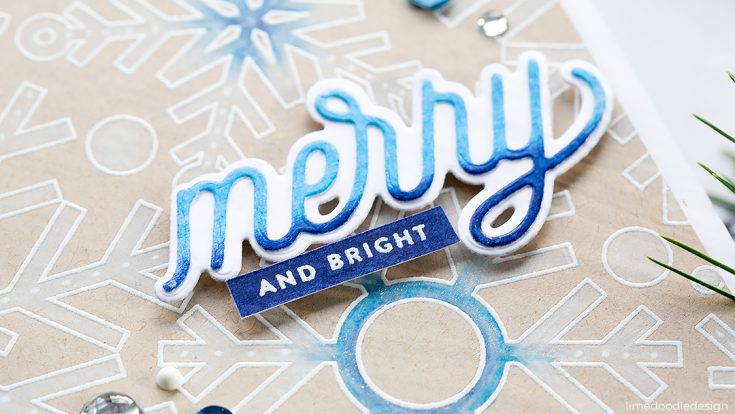
For the sentiment, I colored a piece of white card with the pencils I used for the background and then die cut the Merry die from the colored card. I mounted the word on the shadow die cut that comes with the Merry die set cut from white card. In addition, I stamped the words ‘and bright’ using the Tiny Words Christmas set in clear embossing ink on card colored again with a pencil and then white heat embossed. I added the two sentiment pieces to the background with foam adhesive.
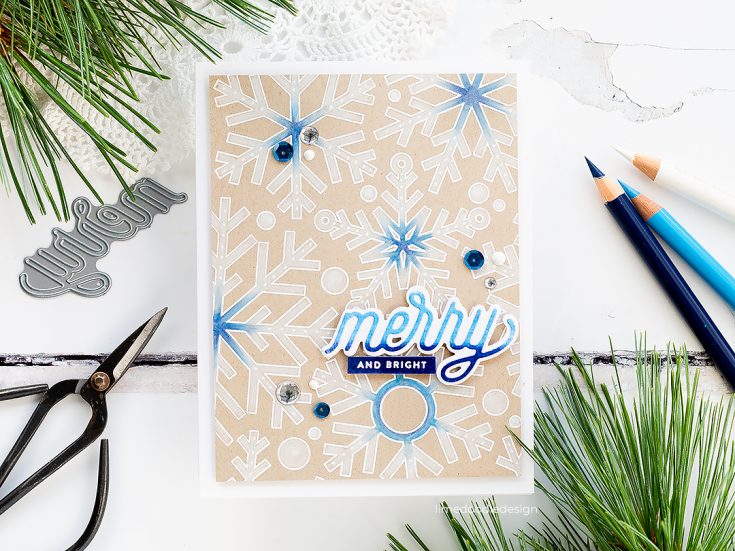
I added the kraft panel to a white card base and then accented with Starry Night Sequins, Silver Glossy Dots and Simply White Crystal Drops before adding a little more shimmer with a Sparkle pen.
Thanks for joining me today, and I’ll see you next time for Doodling With Debby.
WATCH THE VIDEO:
Watch below or in HD on YouTube.
SUPPLIES:
|


Thanks so much for stopping by and thanks to Debby for being our guest!

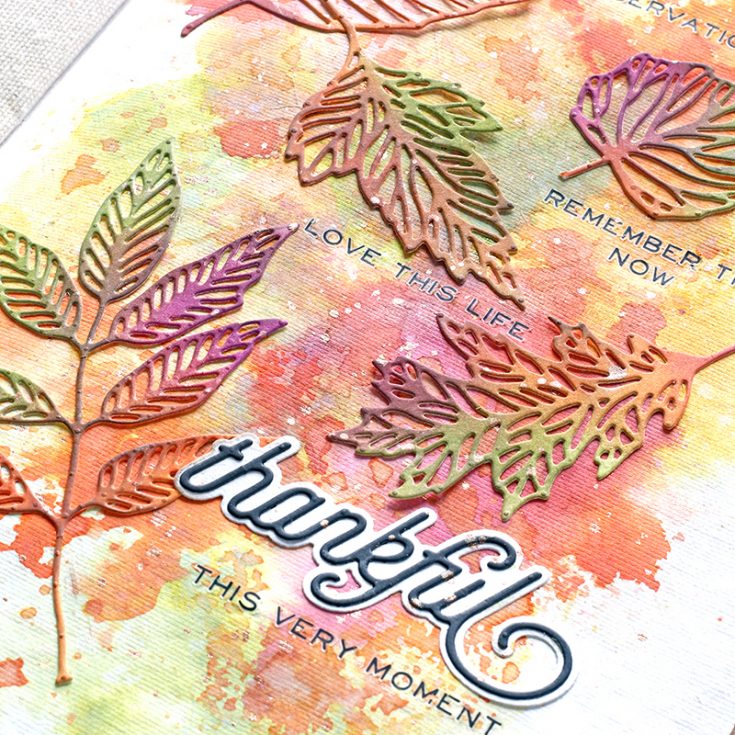
Art Journaling with Shari Carroll: Distress Oxides
Welcome back to the blog everyone!! Today I have an art journal page that I created using my Tim Holtz Distress Oxide inks. I’ve been wanting to use them in my journal pages but found it awkward to try to drag my journal into the inks.
I’ve found a simple way to get a watercolor effect background by using an acrylic block to transfer the ink onto the page. Now I’ll be using them more to create colorful backgrounds, check it out!!
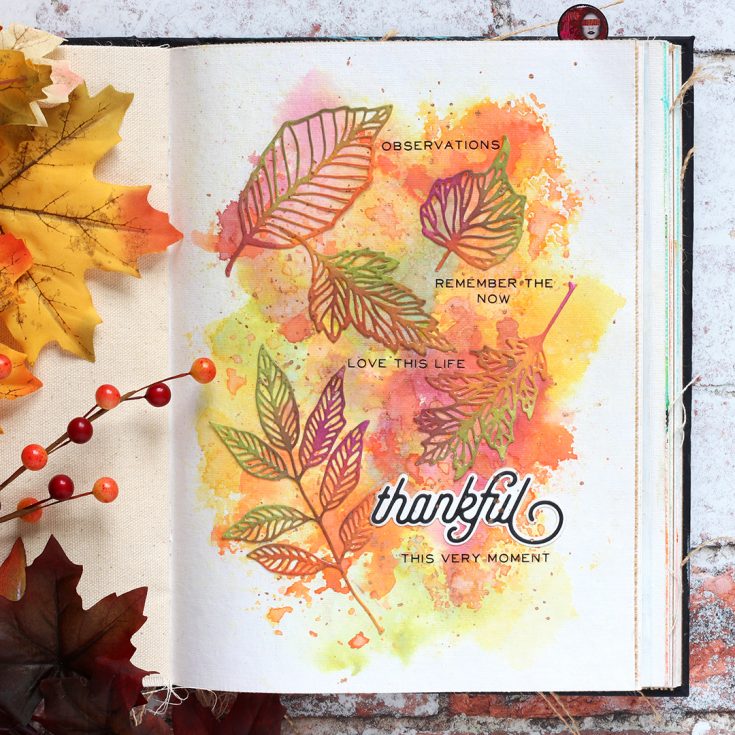
I’ve used only 4 Distress Oxide colors for the entire project, they are: Spiced Marmalade, Ripe Persimmon, Seedless Preserves, and Peeled Paint. I love how they stack, layer and create new colors in between. One of my favorite properties of this technique is to be able to control where you put the color and the drips and dollops of colors. I also colored the die cut Skeleton Leaves using an ink blending tool. Since no water was used, the color in more intense.
Blog Candy Alert!! Follow our blog via email and comment on this post for a chance to win special blog candy!

I hope I’ve given you another ways of using your Distress Oxide inks for your projects. Enjoy!!
|


November 2018 Card Kit – More Card Kit Inspiration with Kristina Werner!
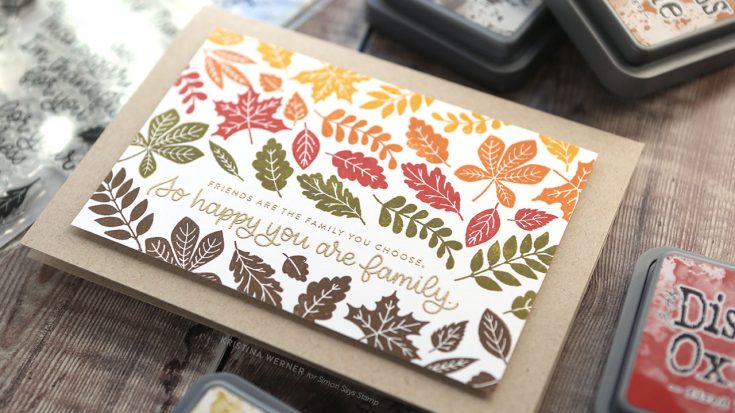
Hi all! Kristina Werner here. Have you all seen the November 2018 Card Kit? It’s packed with fun autumn themed products and stamps. Today I thought I’d show you an easy and simple, colorful stamped card using the stamp set in the kit, Thanks and Leaves.
I first stamped a couple of the greetings from the stamp set and heat embossed them using gold embossing powder. Then, I stamped the leaves from the stamp set around the greetings, starting from the bottom. I changed colors of ink multiple times in order to create bands of color moving up the card.
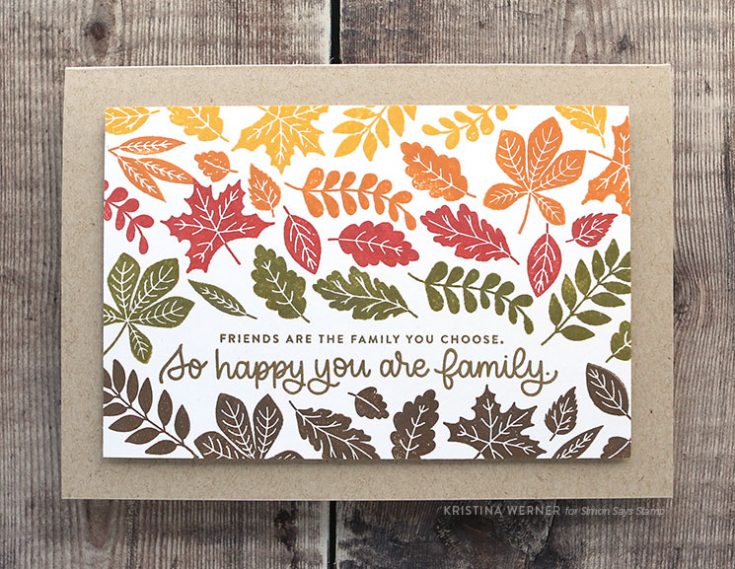
The five Distress Oxide inks I used are:
- Walnut Stain Distress Oxide Ink
- Forest Moss Distress Oxide Ink
- Fired Brick Distress Oxide Ink
- Rusty Hinge Distress Oxide Ink
- Fossilized Amber Distress Oxide Ink
I then adhered the stamped piece to a 7×5 card base made out of Desert Storm cardstock.
Thanks for stopping by today! You can grab the November 2018 Card Kit here, or subscribe to this kit and future kits here. :)
Supplies
|


