August 2018 Card Kit – More Card Kit Inspiration with Kristina Werner!
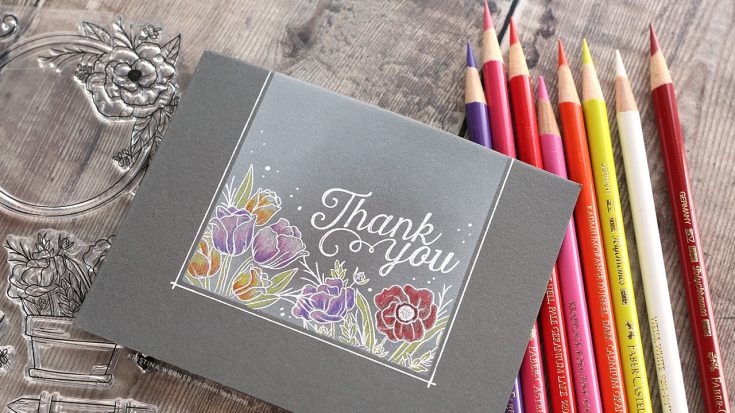
Hi all! Kristina here with some more card kit inspiration! The flower images in the August 2018 Card Kit are gorgeous! I couldn’t resist creating a one-layer card using the Mandy’s Flower Shed stamp set.
I love the look of colored pencil on a dark surface, so I used some Slate cardstock as my card base. I wanted just the flowers (the tops of the jar image and flower pot image), so I masked off the bottom and sides of the card and stamped the tops of those images in VersaMark Ink. I applied some white embossing powder and then heat set it. I also stamped and embossed the “Thank You” from the stamp set.
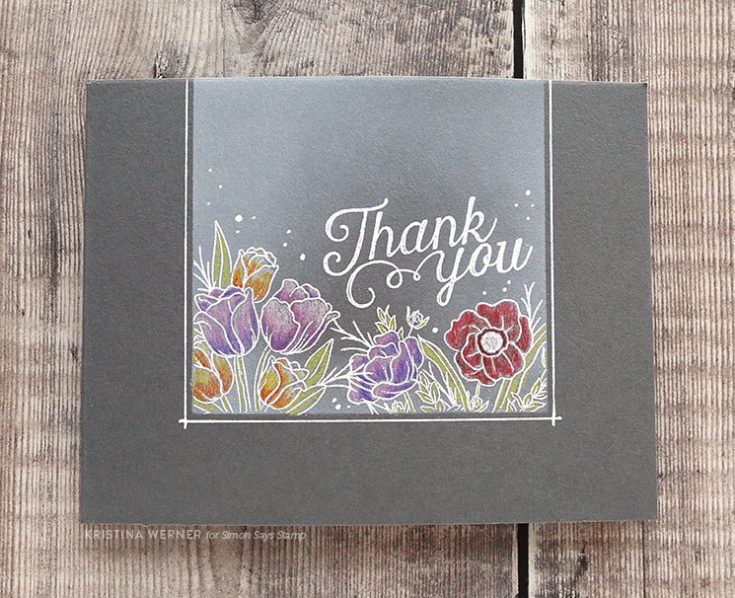
Before removing the masking, I ink blended some white pigment ink around the area.
Then I colored the flowers and leaves with Faber-Castell Polychromos colored pencils. For the flowers, I first colored a light layer of white and then added colors on top. This makes the colors more vibrant.
I hope you enjoy today’s card! You can pick up the August 2018 Card Kit here, or you can subscribe to receive this kit and future kits.
Supplies
|


Copic 25% off Sale!
Hi friends! Surprise! It’s another fun addition to our Christmas in July festivities– a Stocking Stuffer Copic 25% off Sale! Now is a great time to try these amazing markers if you have never done so or stock up on refills! Please enjoy!

Studio Monday with Nina-Marie: 5 Ways to Create with Seed Beads!

Hello crafters! It’s Nina-Marie here with you today, sharing 5 unique ways to incorporate seed beads into your card projects! Seed beads are so often used for shakers, which I have featured in today’s tutorial. But I’ll also be sharing unique ideas for using them in other ways to further enhance and embellish your cards! Are you ready to get creative??
The first idea I’ll be sharing in the video is a traditional shaker card! By adding seed beads amongst the sequins, you pump up the noise of your shaker for some groovy sound effects! Seed beads also make great filler for a shaker! As they are oftentimes translucent, it lets you enjoy the sequins and the background behind your shaker while still giving you a nicely rounded out design.
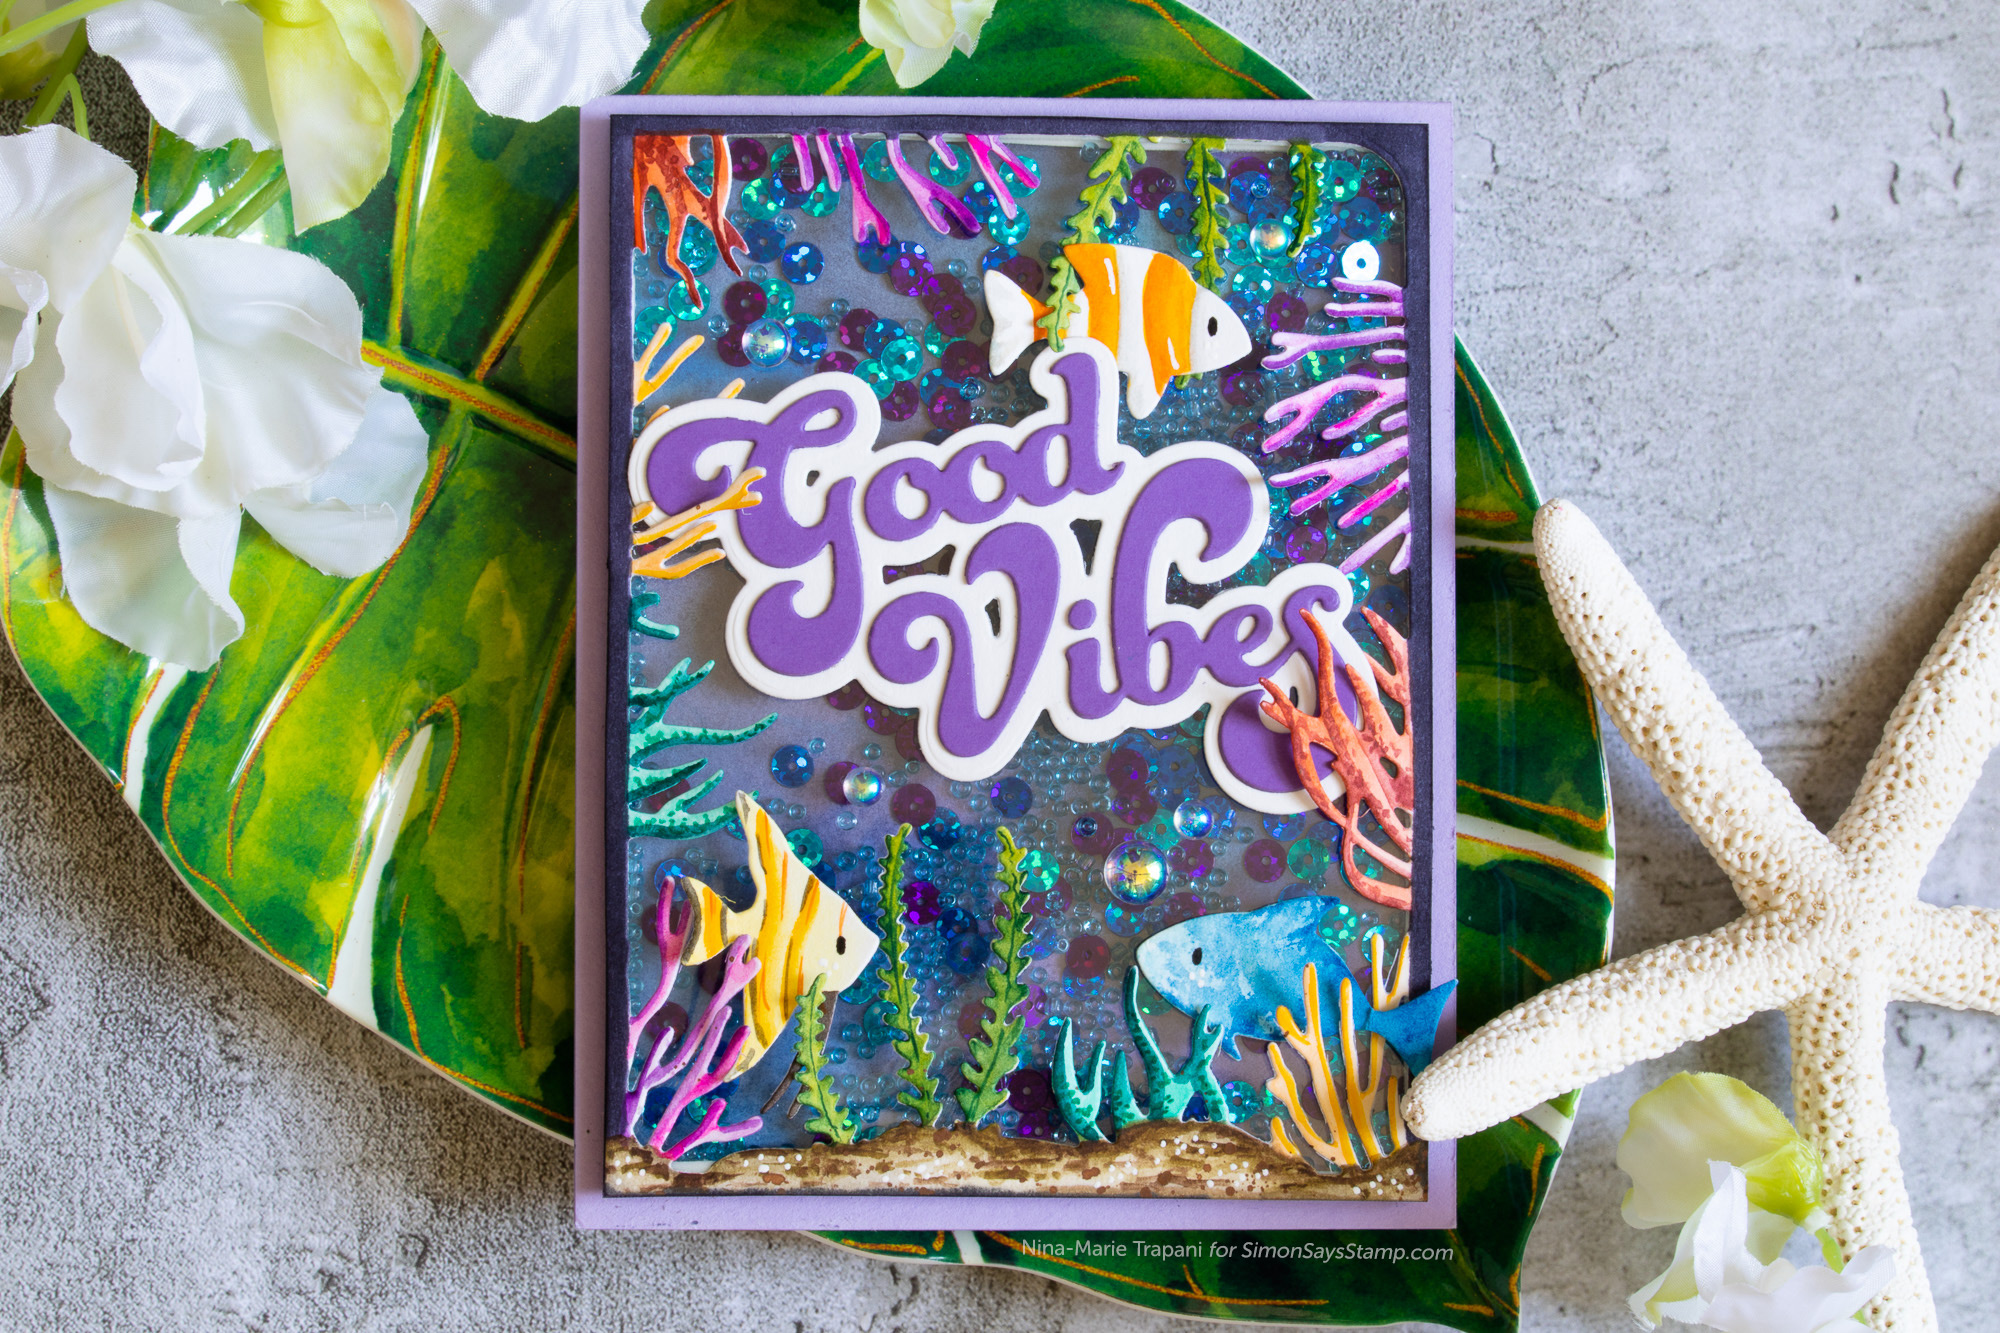
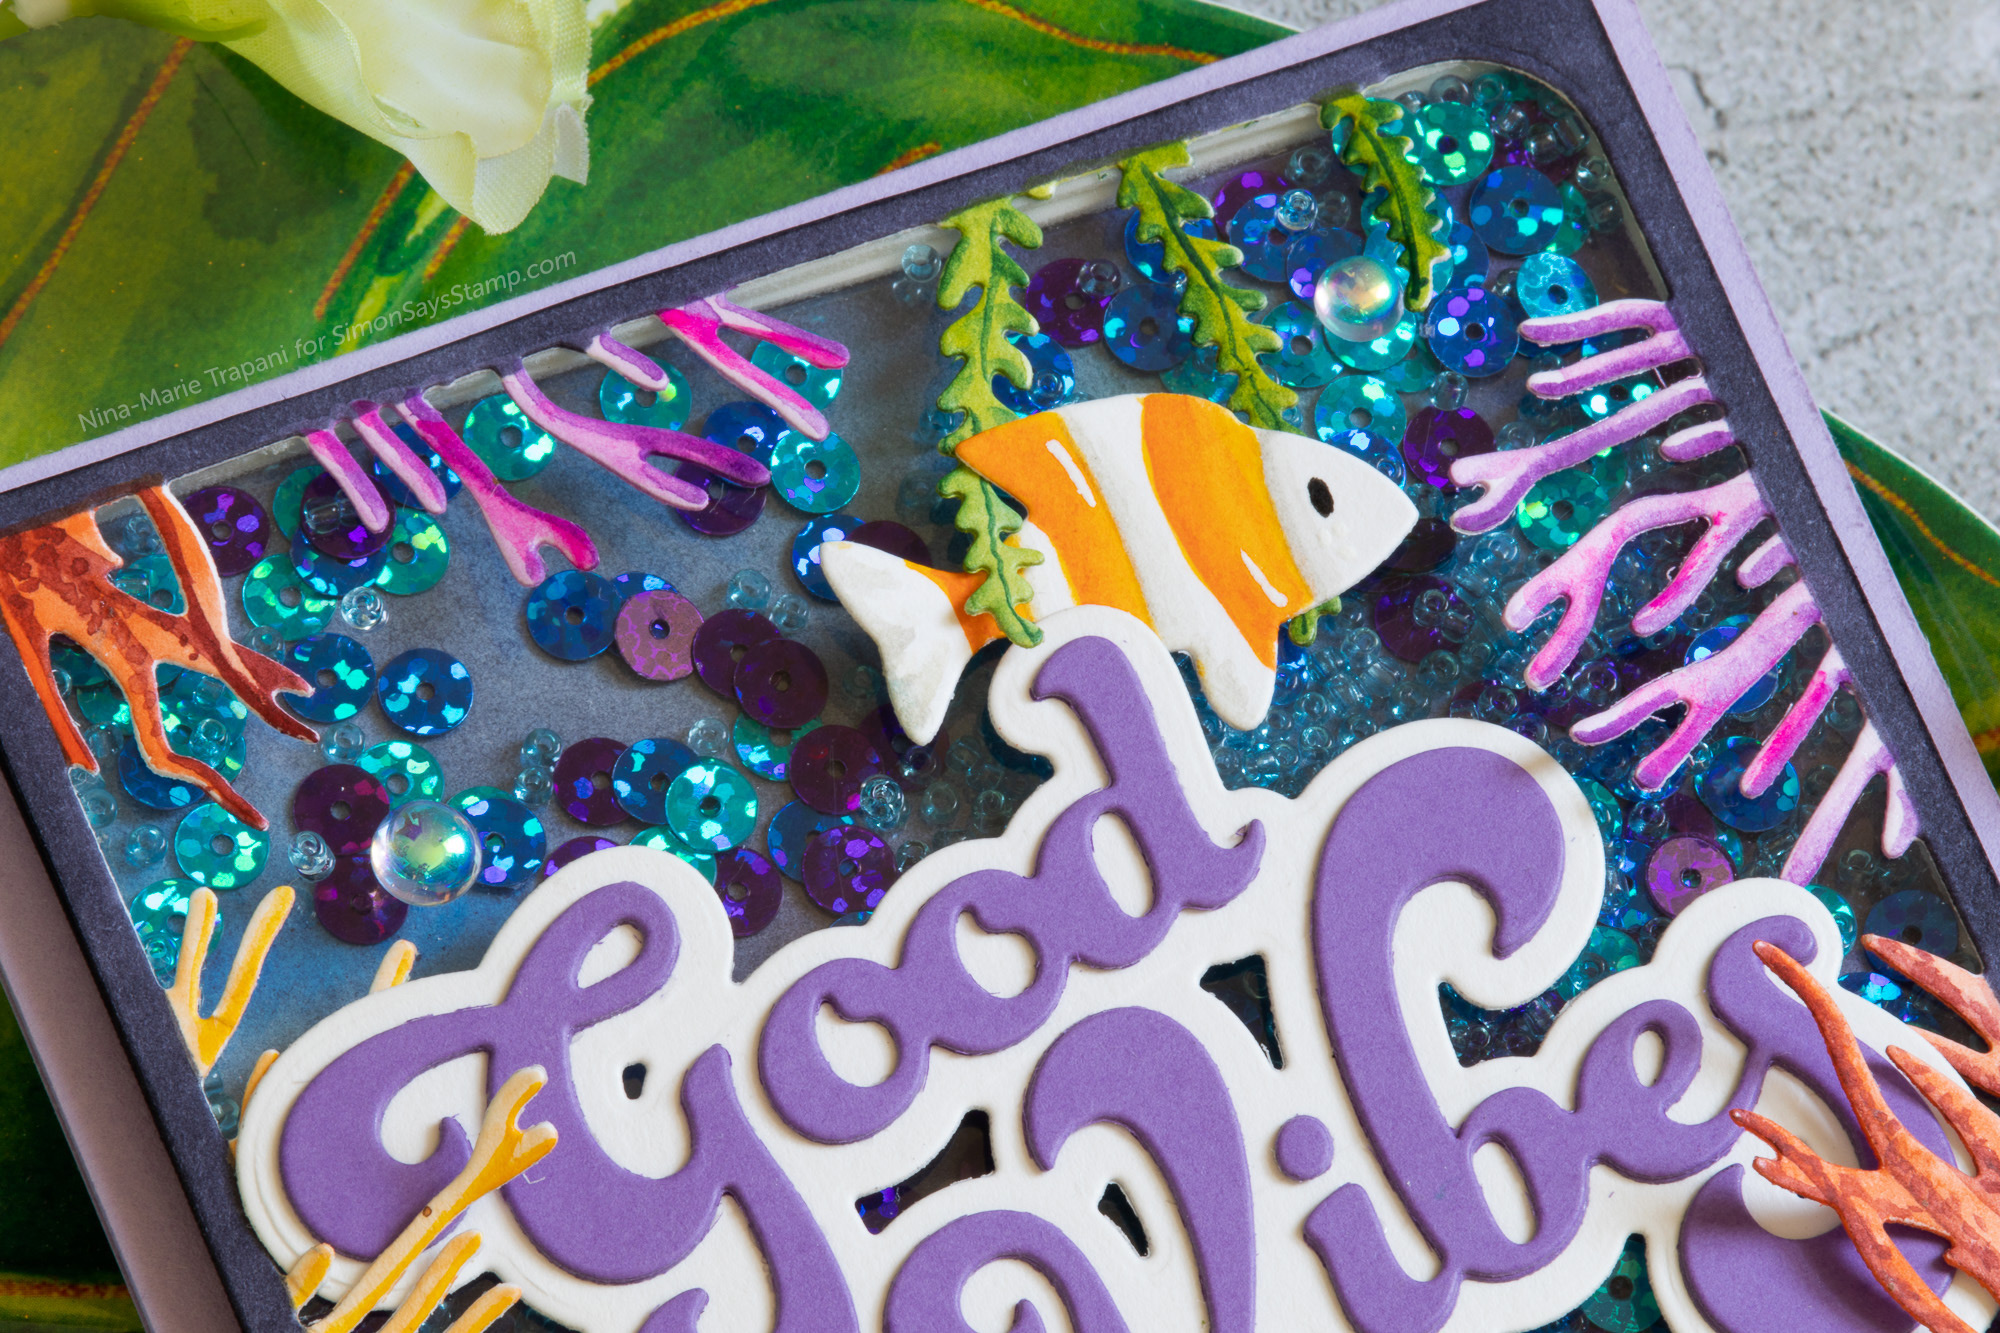
Inside this Impression Obsession Sea Life Frame shaker, I added Studio Katia Summer Sky seed beads and our Simon exclusive Mermaid sequins. There are a few Studio Katia Iridescent Bubbles amongst the fish, and the sentiment was cut from our Simon Good Vibes die set!
The next seed bead technique we will play with in the video is creating a shaker OVER a stamped image! Seed beads are ideal for this technique, as they are small and don’t hide the image, no matter how big or small your shaker is! I used our Simon exclusive Beautiful Day stamp and coordinating die set in this card. Keep in mind that when you try this technique, it works best if you use a coordinating die to cut out the window for your shaker.
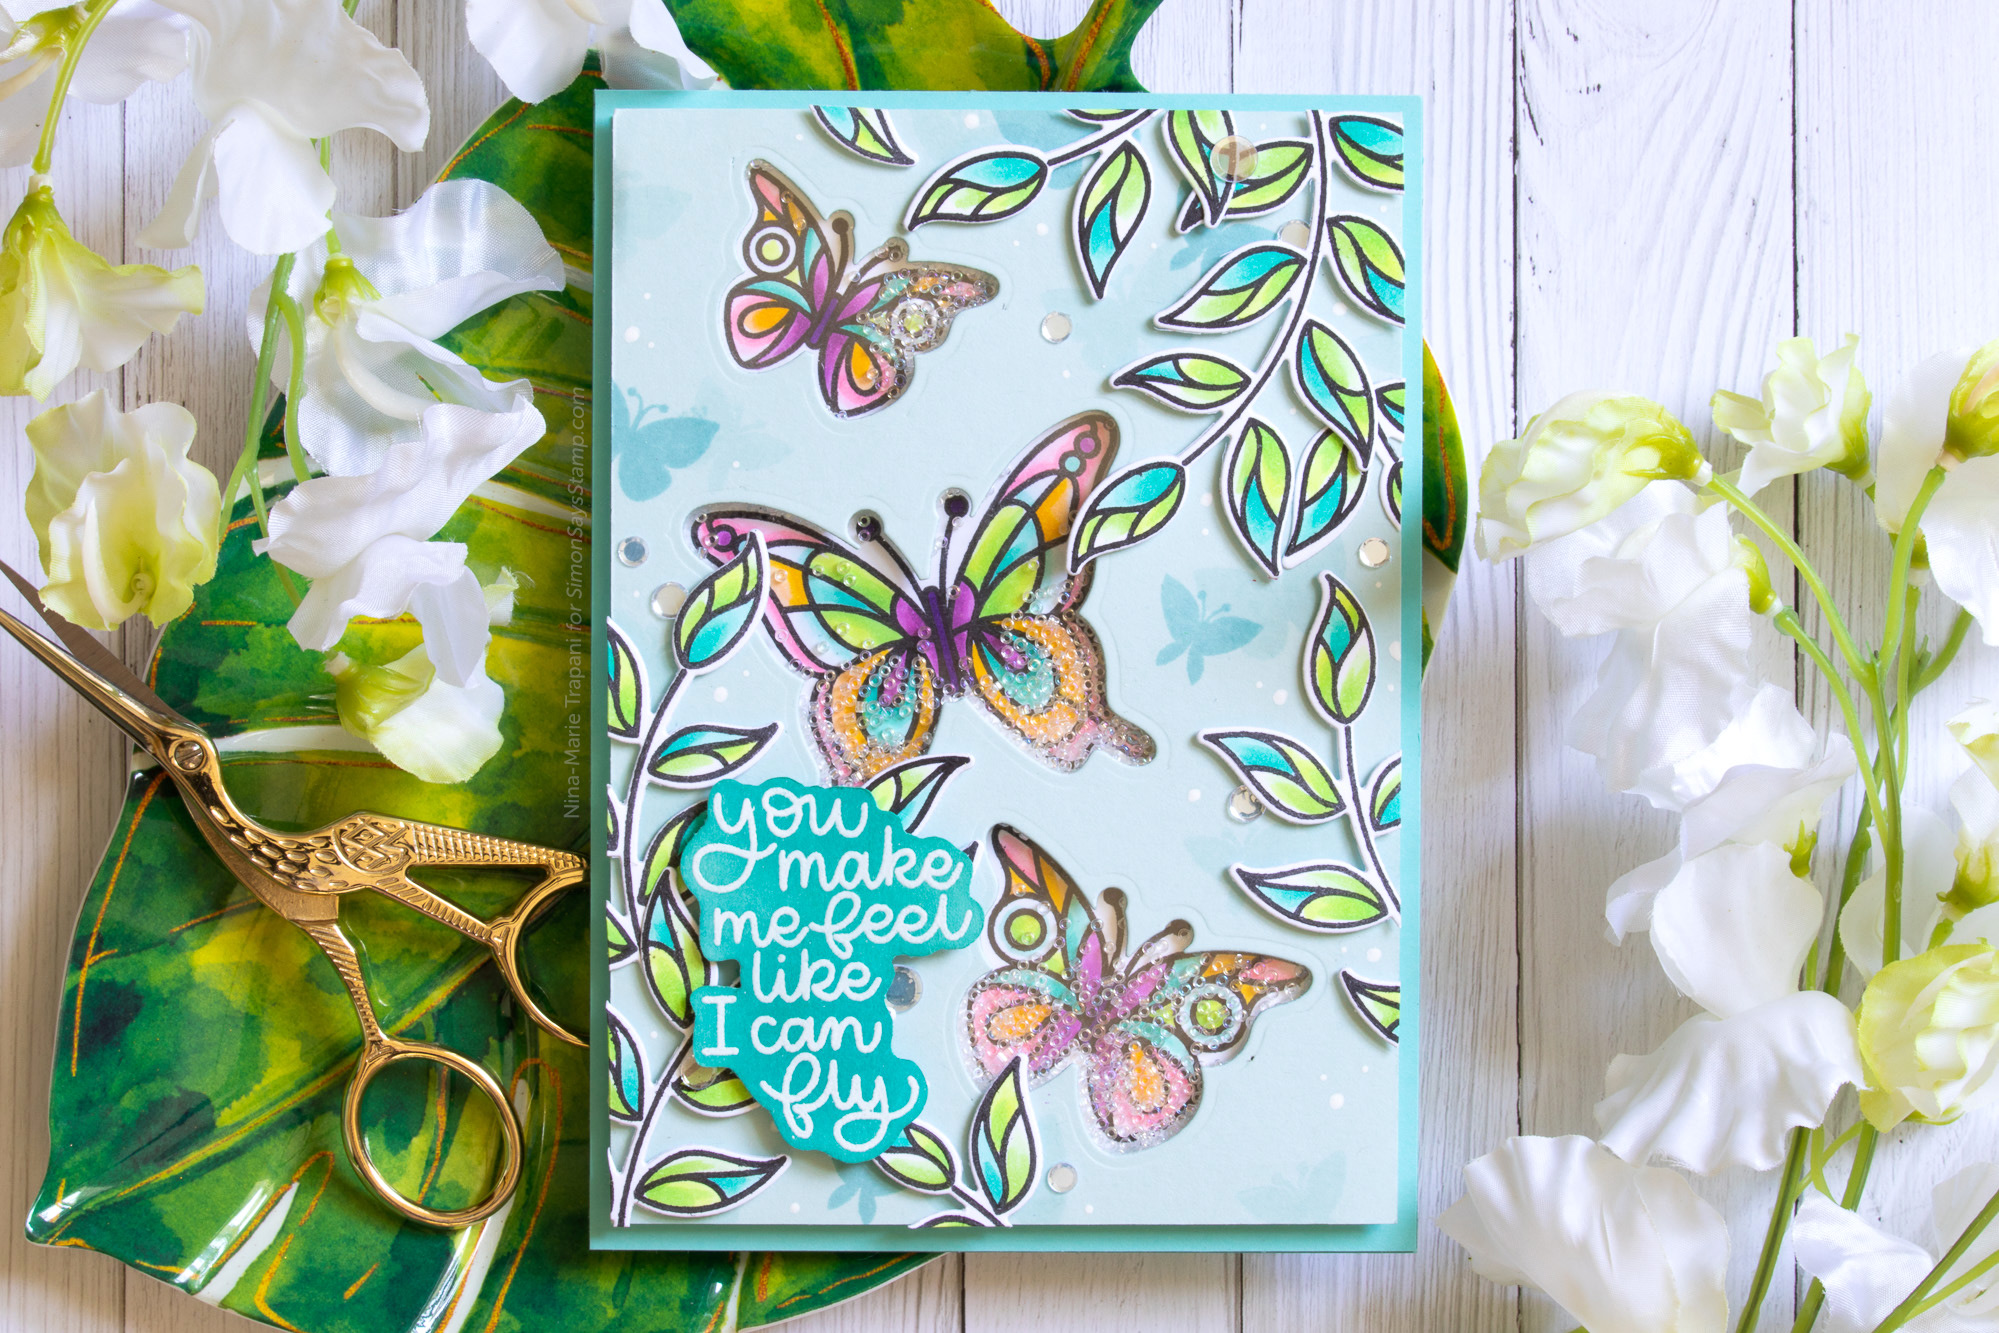
Inside the butterfly cut-outs, I added Iridescent seed beads from Studio Katia. The color of these sequins really enhances the pretty colors of the butterflies!

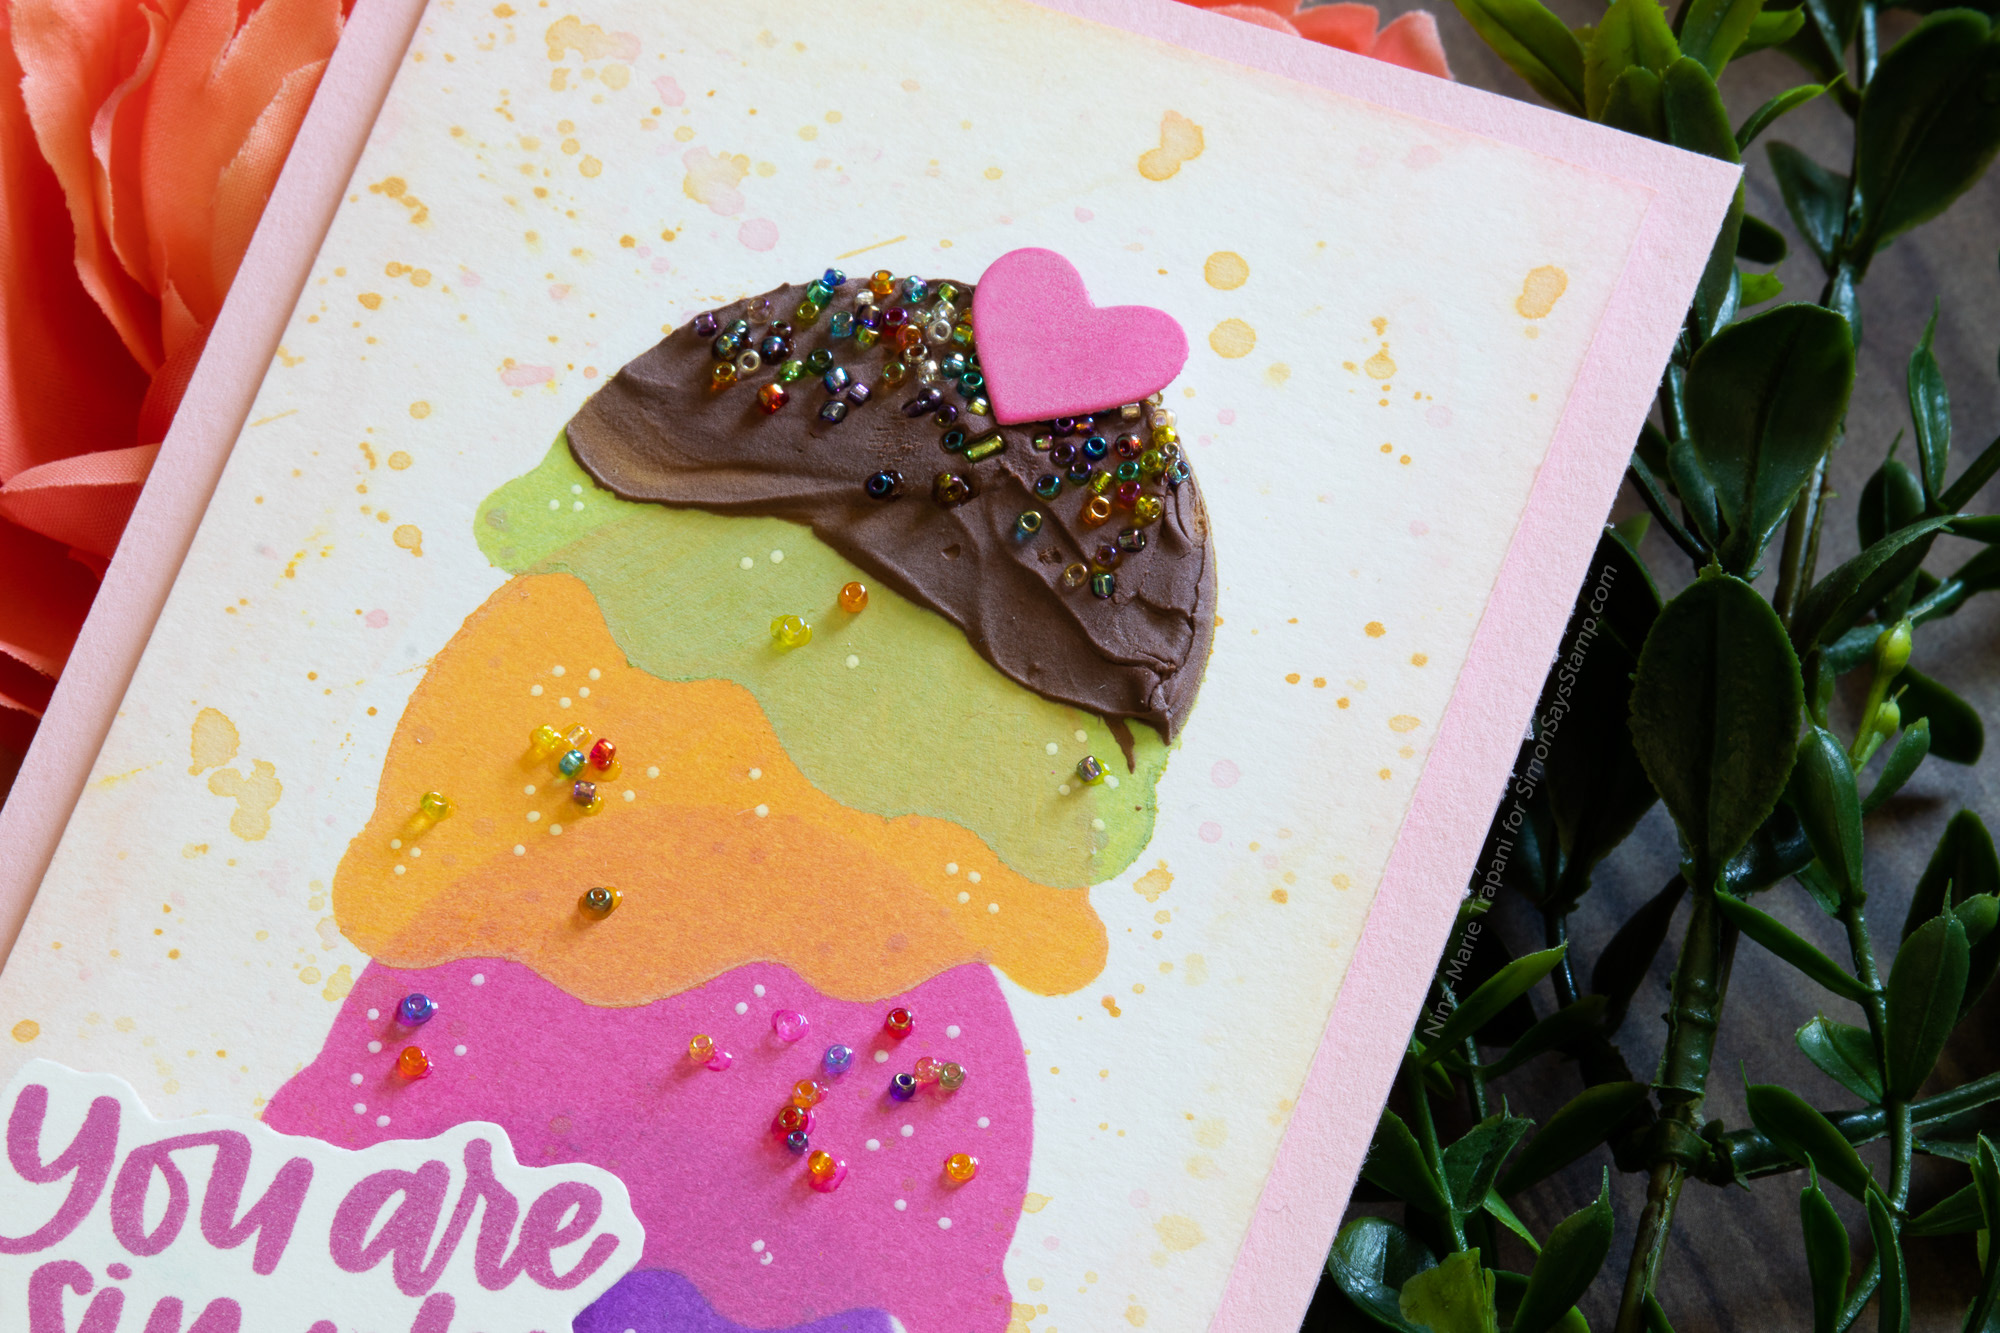
After we create the shakers, we’re really going to spice things up! I adore the Build a Cone stencil from Brutus Monroe. Check out how fun it is to stack layer after layer of ice cream scoops onto the cone! I used a few Oxide Ink colors to do the blending.

But the best part of ice cream is ALWAYS the sprinkles, right? With a bit of imagination, you can use a colorful assortment of beads, such as the Iridescent Rainbow mix from Studio Katia as those delicious sprinkles!

I’ve stepped up the sprinkle effect even further by making a “fudge sauce” with Light and Fluffy modeling paste and Vintage Photo reinker! While the paste was still wet, I gently pressed some more rainbow beads in the paste and let it all dry. Doesn’t this cone look good enough to eat?? The sentiments I used on this card are from our Everything Together and Love You Like stamp sets.
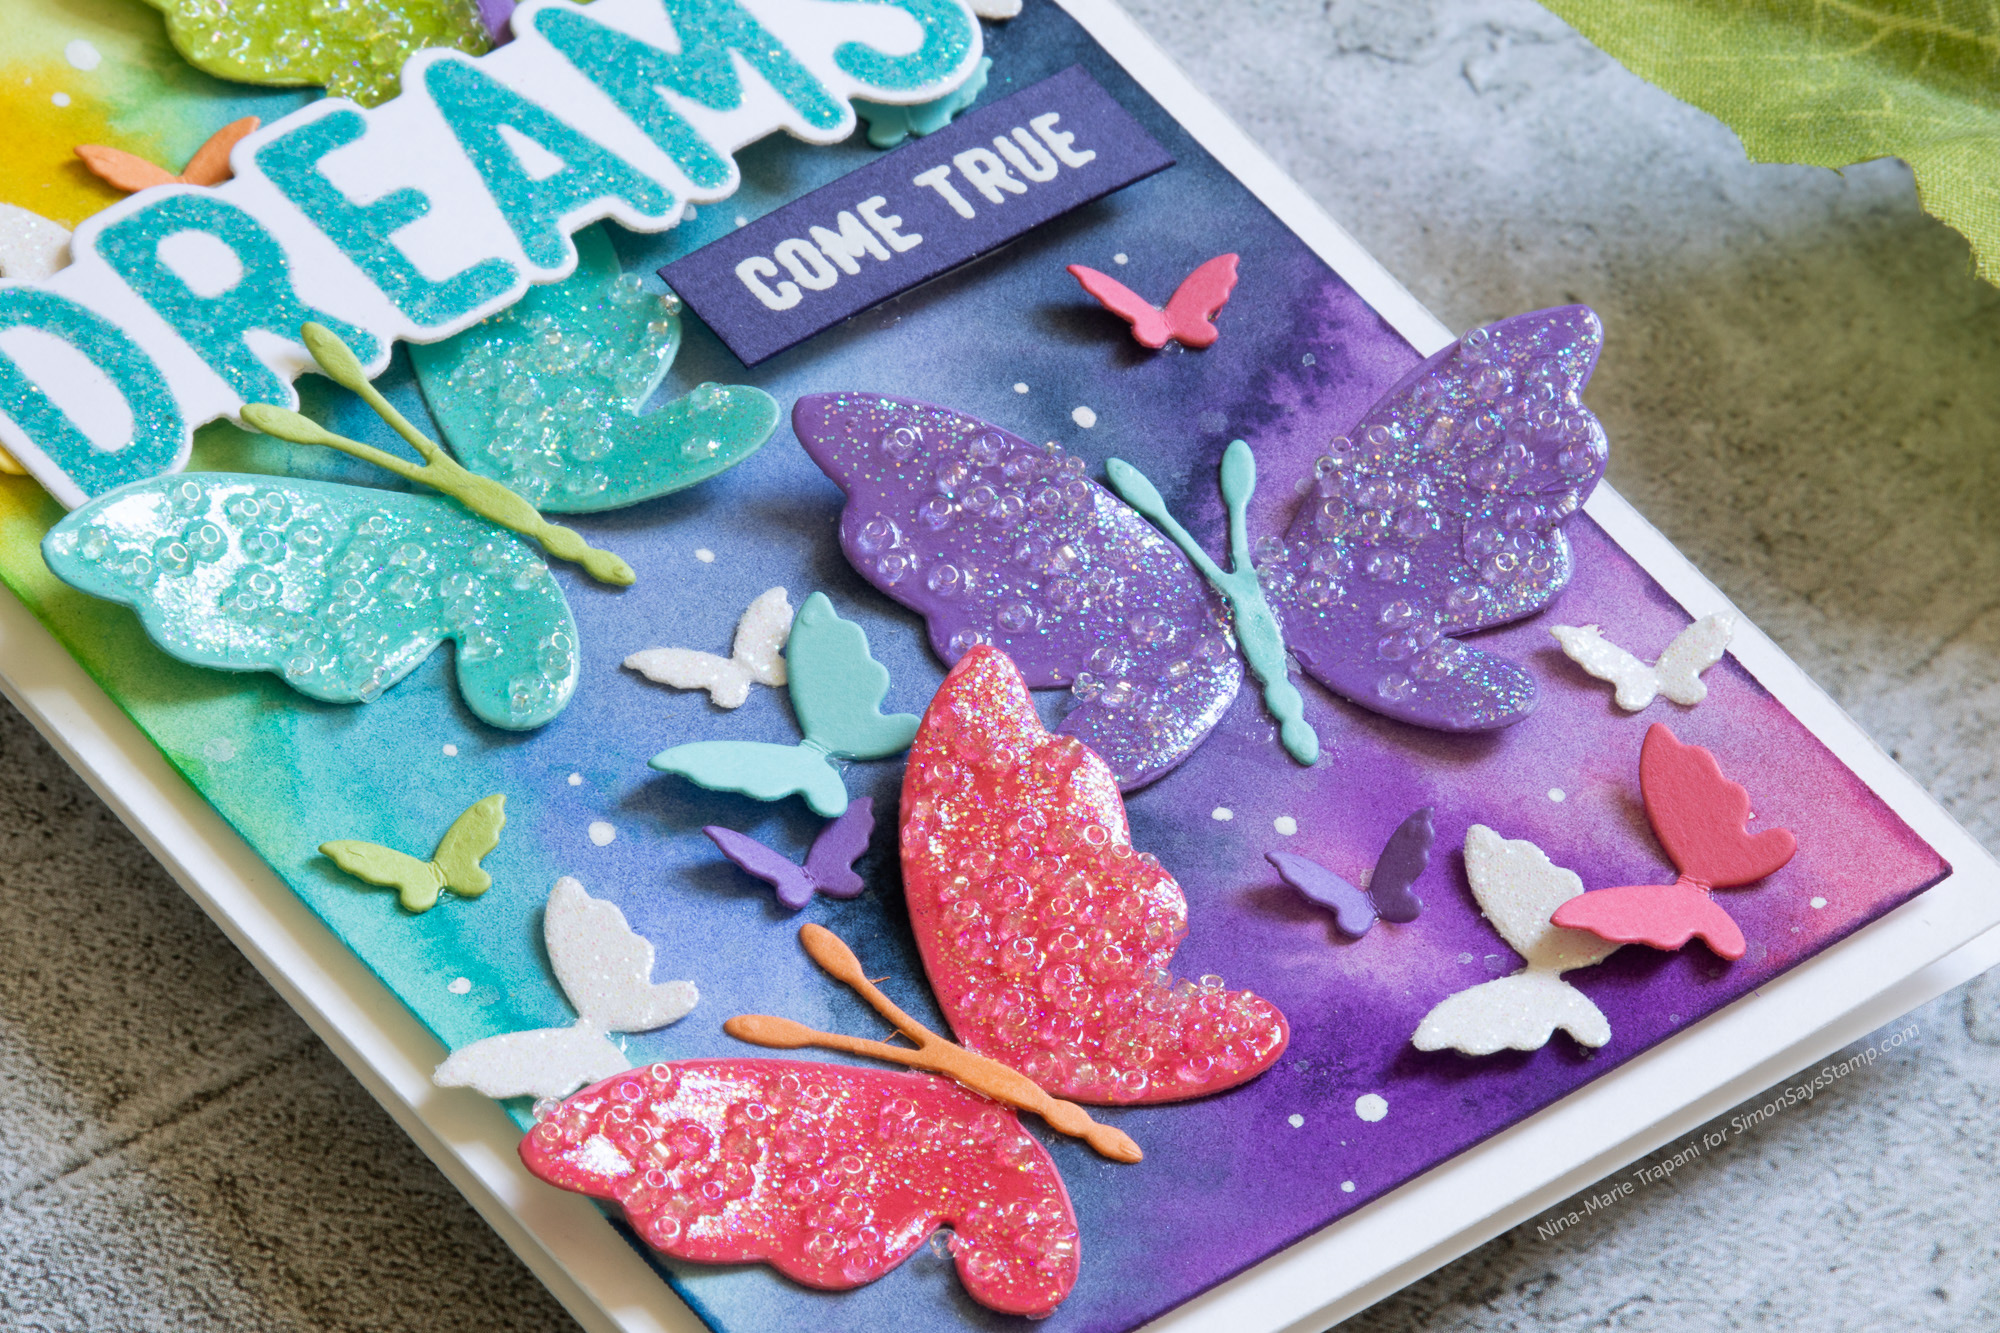
Have you ever tried covering a die cut shape with seed beads? The effect is GORGEOUS! I especially love the look of those Iridescent seed beads on top of colored cardstock. With our Simon exclusive, Adeline Butterfly die, I cut many colorful butterflies and coated each with a layer of Glossy Accents; while the adhesive was still wet, I dropped beads into the glue, along with a touch of Lawn Fawn Prisma glitter.

The Glossy Accents holds the glitter and beads beautifully, and nothing falls off! I layered these butterflies onto a colorful card, along with Flickering Butterflies and sentiments from our Yes You Can stamp set. Check out the dimension and shine!
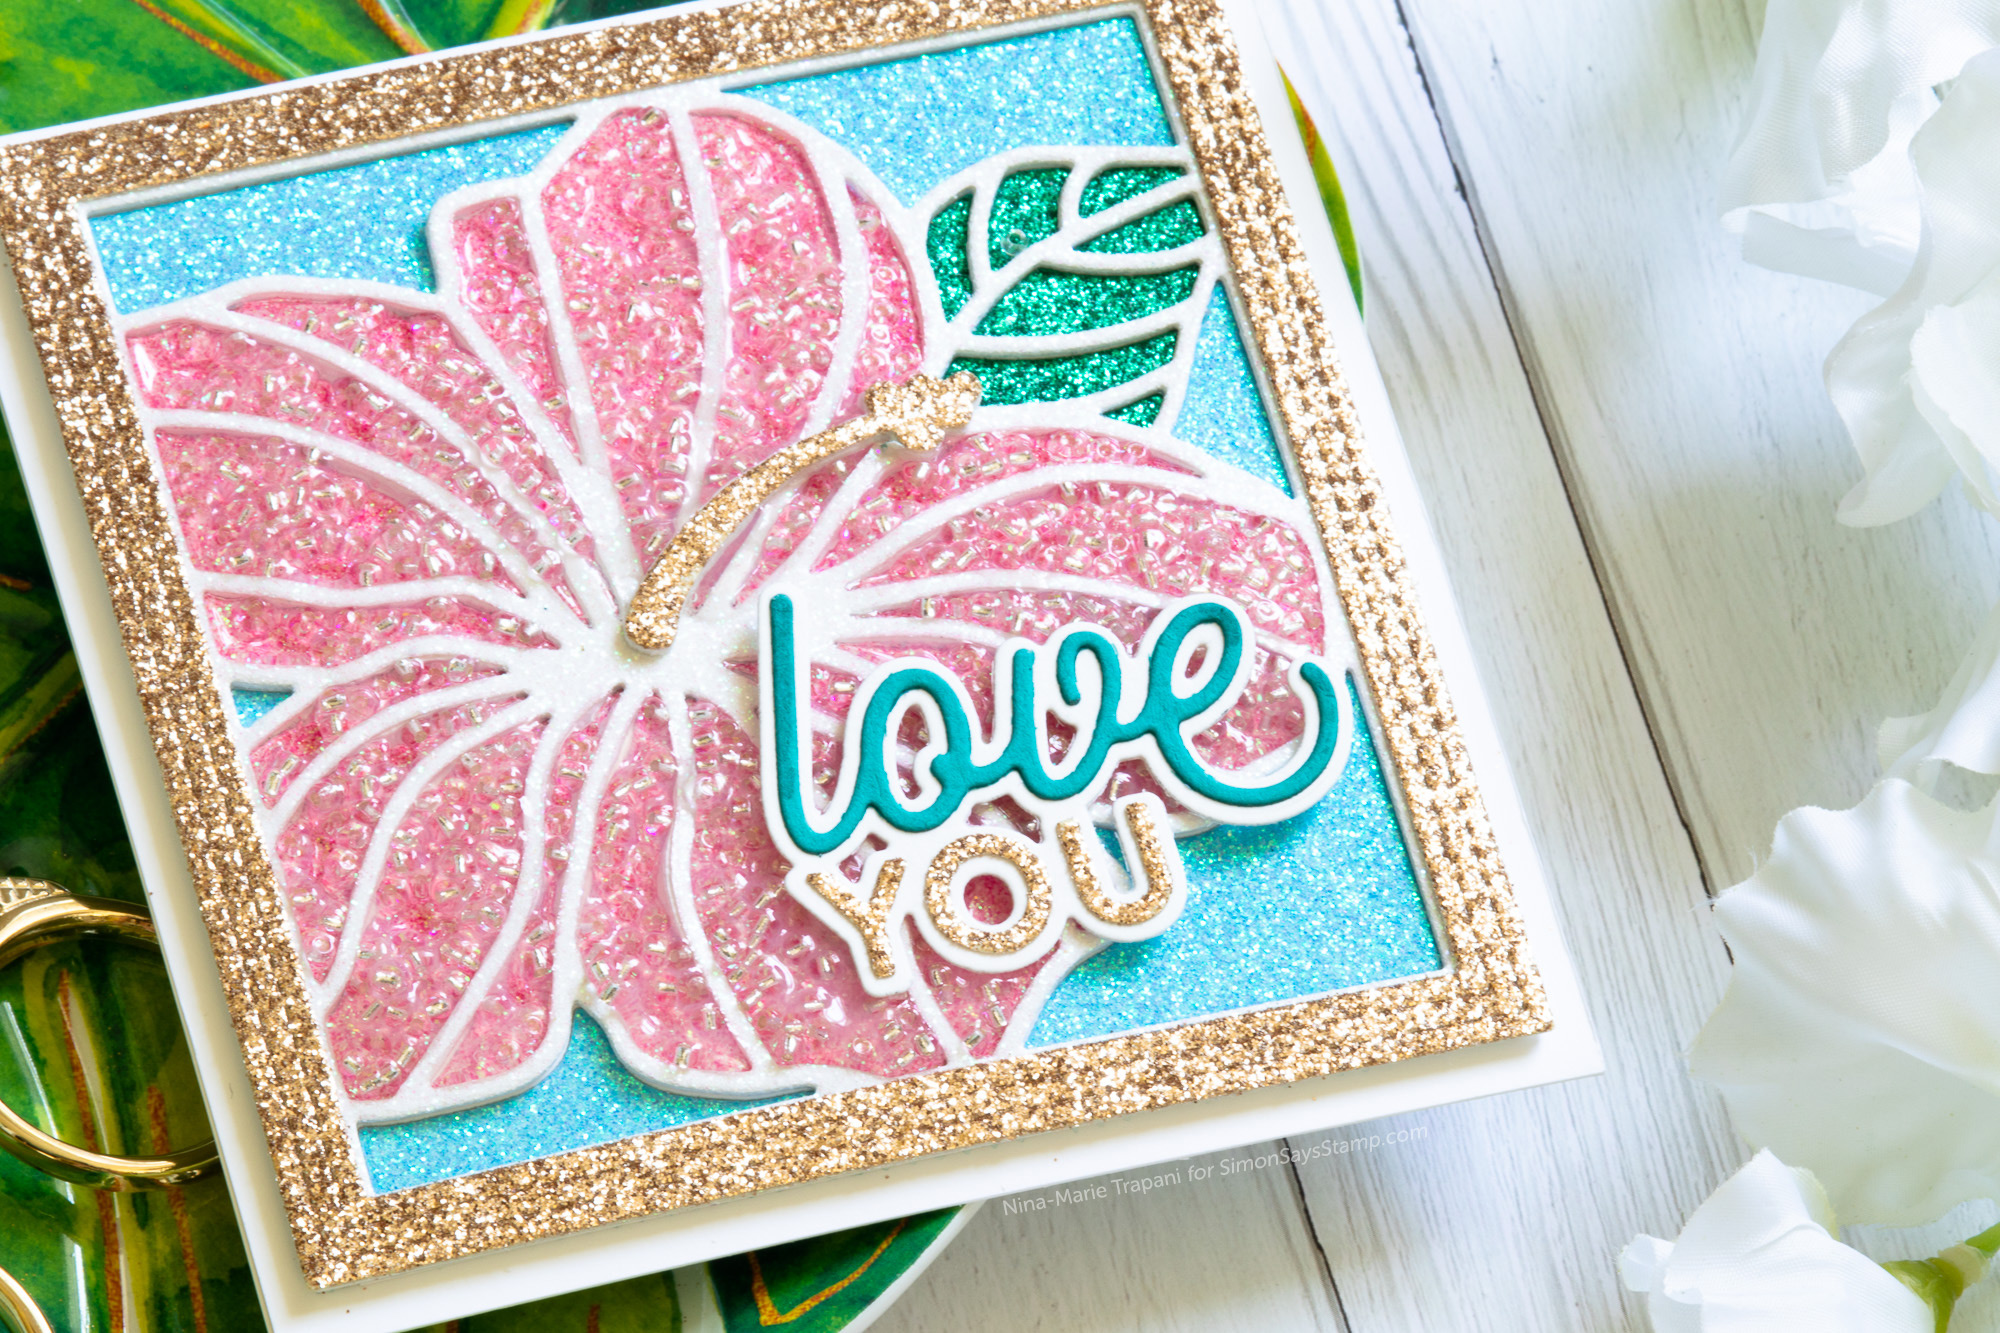
Finally, the last technique we’ll cover in the video is adding seed beads into an in-lay die cut design. This is such a unique way to fill in a shape, such as the petals of our Simon exclusive Hibiscus Frame die! I cut the flower from different shades of Tonic Studios glitter card, and in each of petal shapes, I added a layer of Silver Shimmer Pretty Pink Posh seed beads
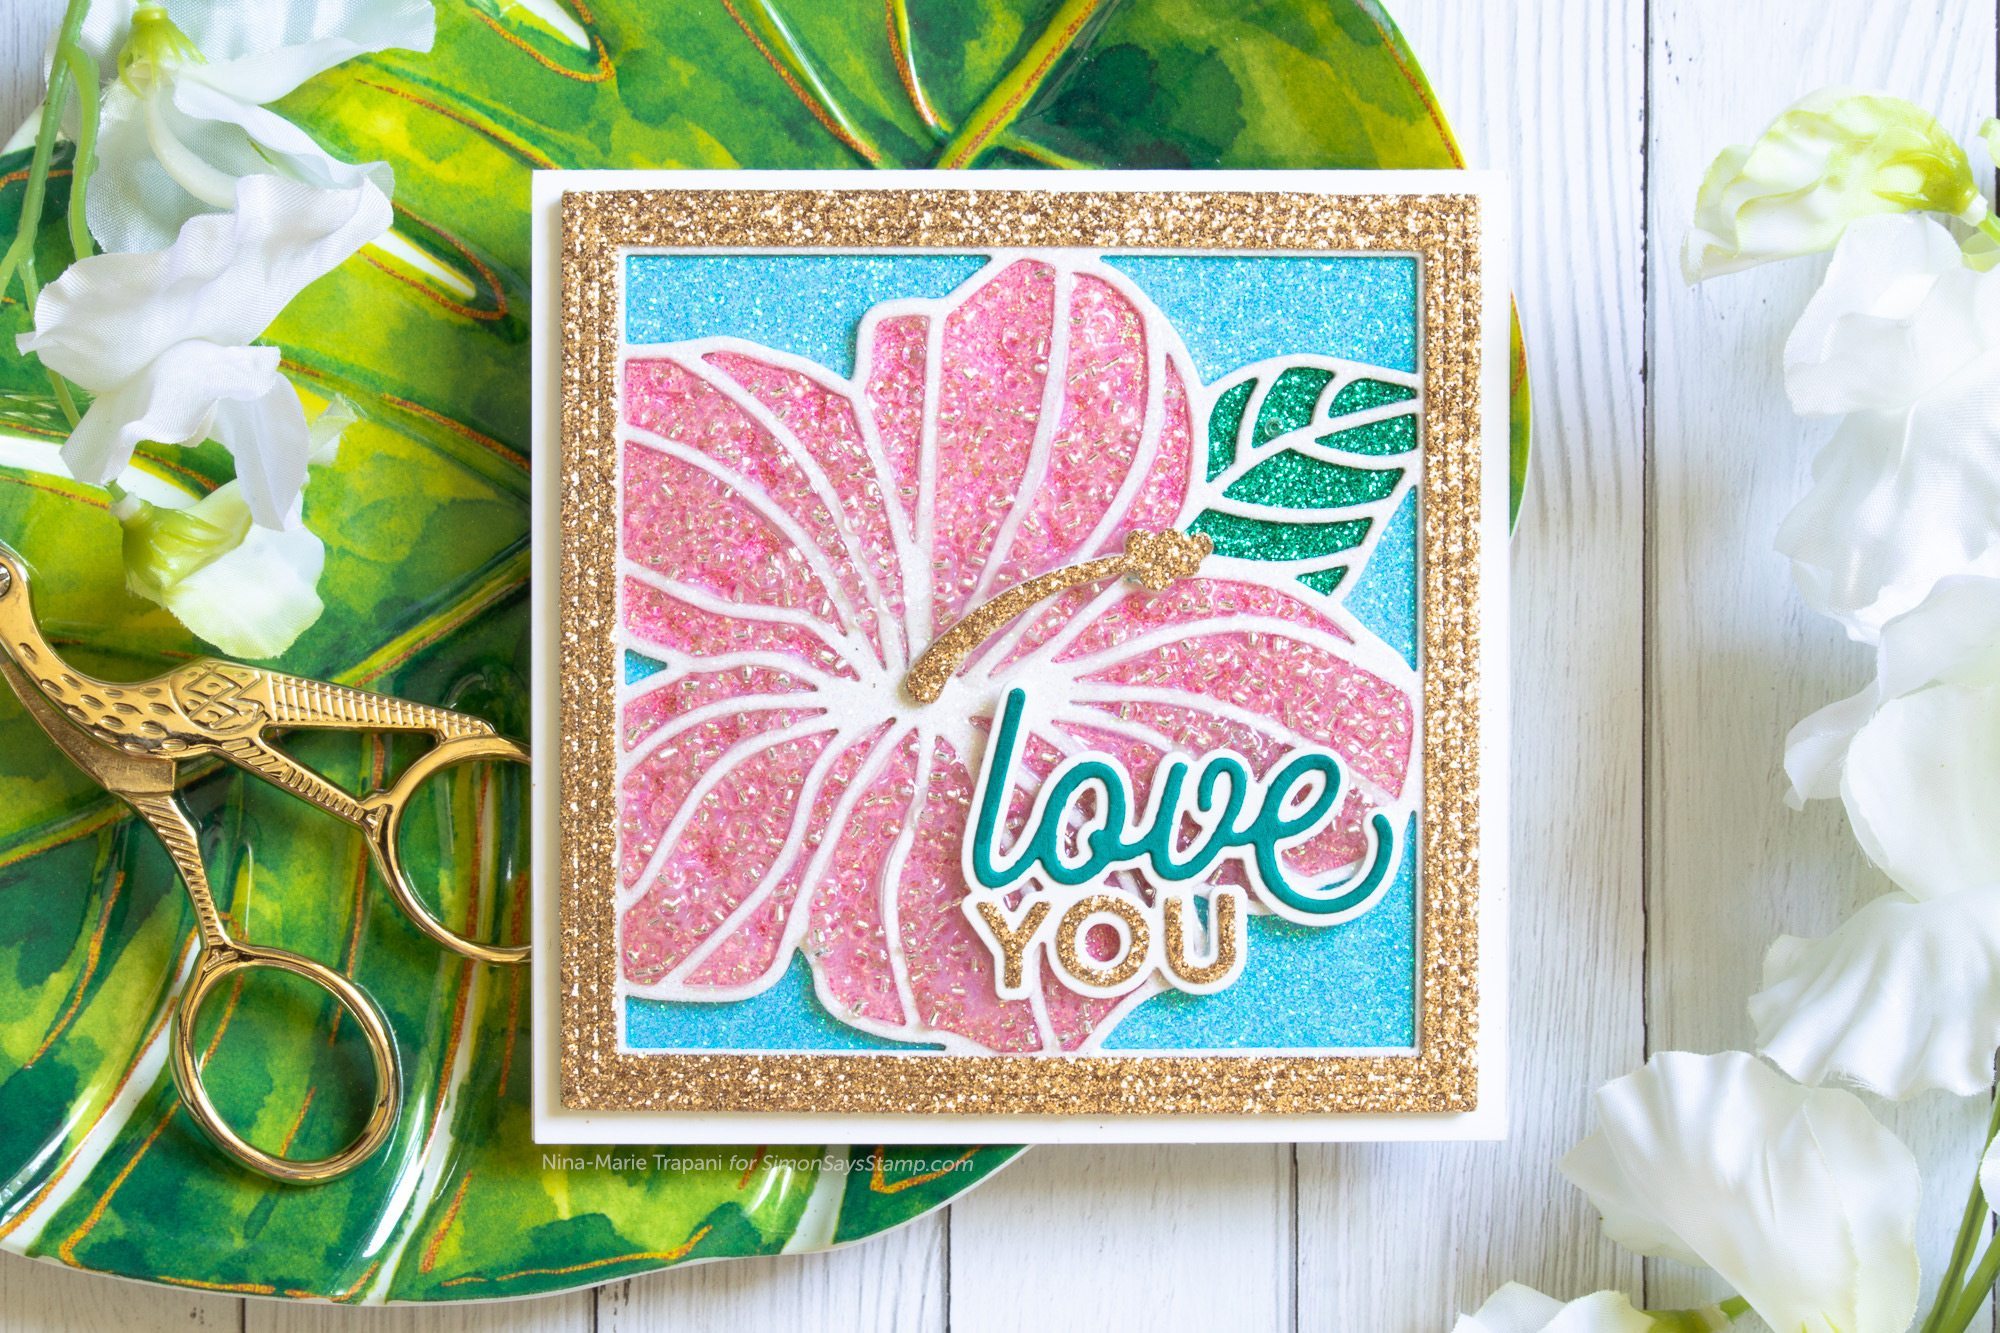
I used Glossy Accents again to hold the beads inside the petals. But oo-la-la! I adore the texture and shine it has once everything dried! I also used a Memory Box Double Stitch Square and our Simon Love You dies to finish off this colorful beauty!
Be sure to watch the video to see all these techniques in action! I hope they inspire you to create some cards with seed beads too!
WATCH THE VIDEO
SUPPLIES USED
|


Blog Candy Alert!! Follow our blog via email and comment on this post for a chance to win special blog candy!


