Distress Oxide Sprays Background + Die Cuts

Distress Oxide Spray Background + Die Cuts

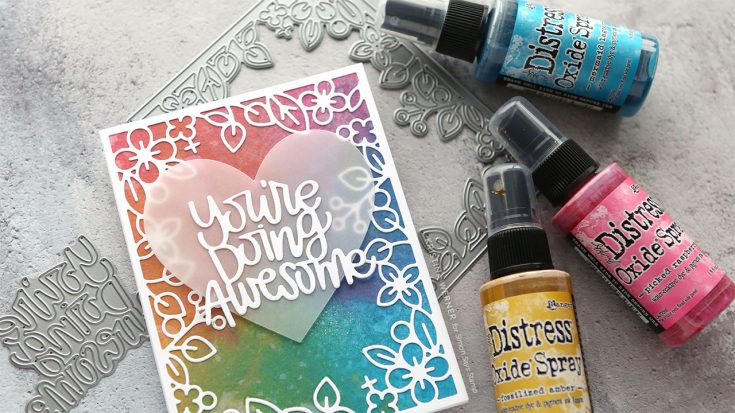
Hi all! Kristina Werner here. Today I have a fun card made using the new Distress Oxides Sprays from Tim Holtz and Ranger, plus some die cutting using dies from Simon Says Stamp.

I started out by placing a piece of Strathmore cold press watercolor paper inside an open box. I use sprays inside a box to help keep my work area clean. To create a colorful background, I used three Distress Oxide Sprays in Fossilized Amber, Picked Raspberry, and Mermaid Lagoon. I worked in layers and then dried the piece with a heat tool (you could also let it air dry).

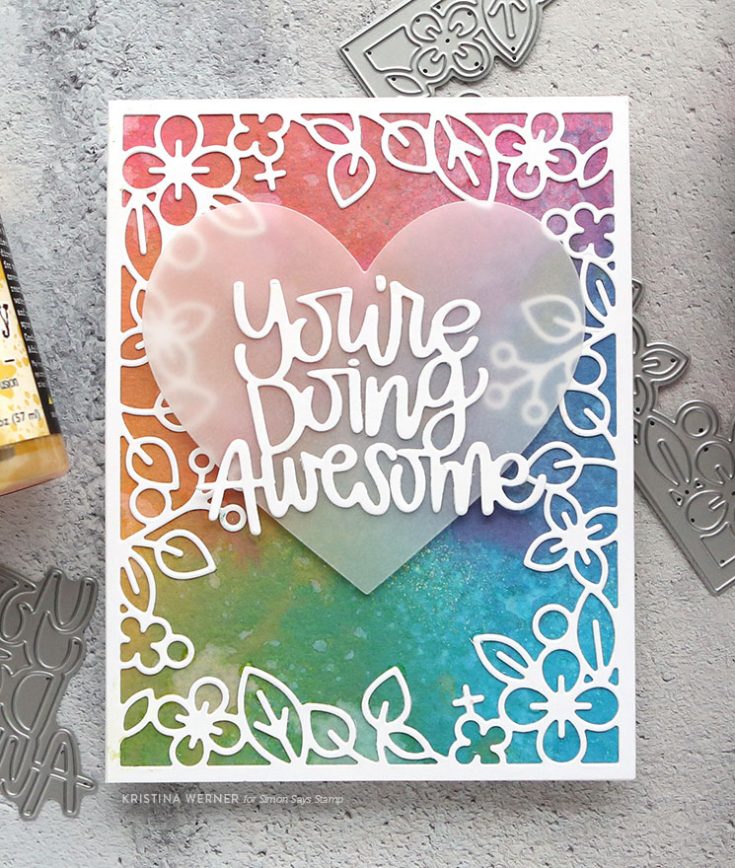
To add even more interesting areas to the background, I lightly sprinkled water and sprayed water onto the background. Then I sopped up the water using a paper towel. This left behind “water spots.”

For the main design of the card, I used the Outline Floral Frame die and the You’re Doing Awesome die. I cut both out of white cardstock. The large die cut frame was adhered to the watercolor piece using Gina K Connect Glue.

I also cut out a large vellum heart using the Nested Hearts dies. I adhered the greeting die cut to the vellum heart, and then onto the card using thin foam adhesive that I cut into tiny pieces to fit behind the greeting die cut.

Thanks for stopping by today! I hope you enjoy the card video. :)

Supplies

Simon Says Stamp OUTLINE FLORAL FRAME…
[ SSS ]
Simon Says Stamp YOU’RE DOING AWESOME…
[ SSS ]
Simon Says Stamp NESTED HEARTS Wafer…
[ SSS ]
Strathmore WATERCOLOR PAPER 5.5×7…
[ SSS ]
Tim Holtz Distress Oxide Spray PICKED…
[ SSS ]
Tim Holtz Distress Oxide Spray…
[ SSS ]
Tim Holtz Distress Oxide Spray…
[ SSS ]
Tim Holtz DISTRESS SPRAYER Ranger 4…
[ SSS ]
Precision Heat Embossing Tool Gun…
[ SSS ]
Neenah Classic Crest 80 LB SMOOTH…
[ SSS ]
Neenah Classic Crest 110 LB SMOOTH…
[ SSS ]
Spellbinders PLATINUM 6 Die Cutting…
[ SSS ]
Gina K Designs CONNECT GLUE Adhesive…
[ SSS ]
Bazzill 40 LB VELLUM 8.5 x 11 White…
[ SSS ]
EK Success CRAFT TWEEZERS Precision…
[ SSS ]
Darice ADHESIVE FOAM 33 Double Sided…
[ SSS ]
EK Success HONEY BEE Non-Stick…
[ SSS ]
EK Success RETRACTABLE KNIFE & BLADES…
[ SSS ]
C-Thru T SQUARE RULER Westcott JR12
[ SSS ]
Scor-Pal MINI SCOR-BUDDY Scoring…
[ SSS ]
Simon Says Stamp SMALL TEFLON BONE…
[ SSS ]
Tombow XTREME Permanent Adhesive Tape…
[ SSS ]
Tombow REFILL Xtreme Permanent…
[ SSS ]
Dahle Self-Healing Cutting 18×12 Mat…
[ SSS ]

In case you missed it, we were LIVE on Facebook! Check out the latest news!

Honey Bee One Layer Wonder with Kelly Latevola

Hi friends! Happy Wednesday, and thanks for stopping by our blog today! Please join us in welcoming Kelly Latevola as a special guest sharing some fresh inspiration from Honey Bee stamps! Don’t forget to watch the video for more information and enjoy!

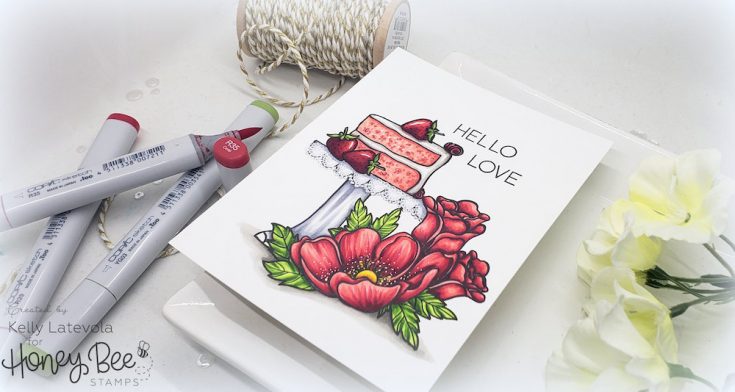
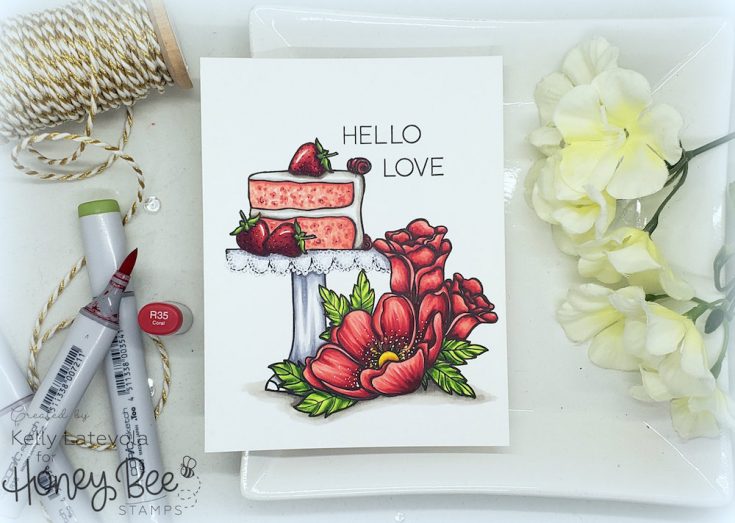
I’m Kelly Latevola and I’m so excited to be here on Simon Says Stamp to share some adorable Honey Bee Stamps sets with you! If you’ve followed my blog or seen a Youtube video of mine it will not surprise you that today’s project is a one layer card! 

I started by stamping and masking. It’s easy to get confused about what goes first in a one layer scene. I try to remember whatever I want to see the most of gets stamped first. So for this card I wanted to see the flowers the most. They go first. For the cake I want to see the entire strawberry. They go first. I hope that helps you sort it out when you’re stamping. 


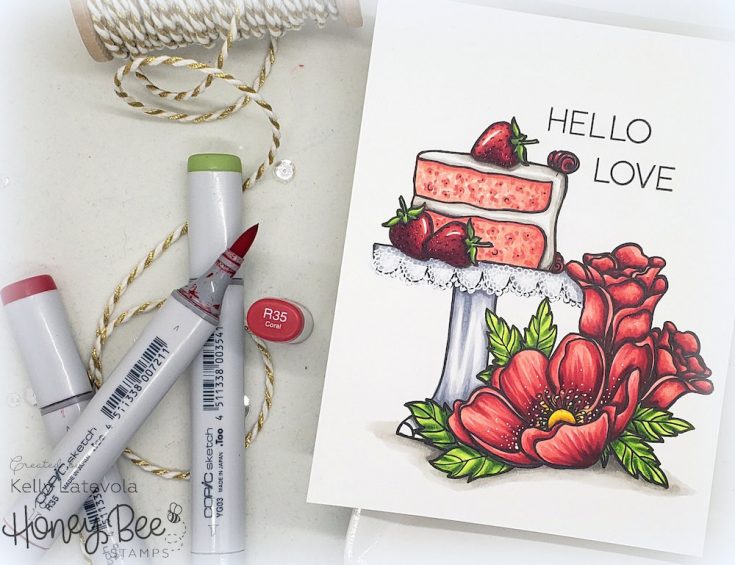
You might notice that the cake stand is a little bit taller on my card than it is in the stamp set. It’s not your eyes. It really is taller. I used a little trick to make the stand taller so it fit my card better. It’s really easy and can help you get more out of sets you already own. 


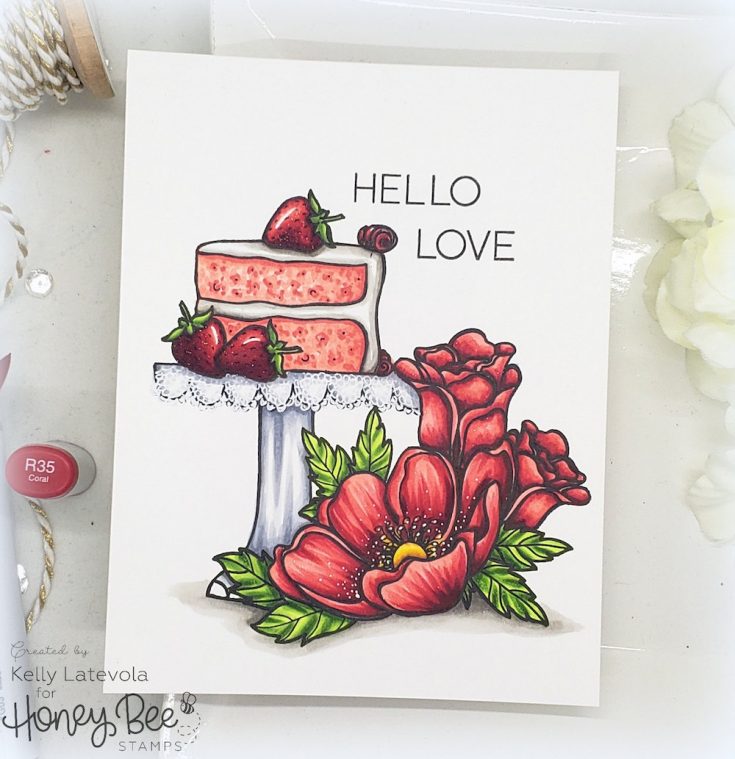
Once the stamping is complete I got started with the Copic coloring. For me this is my very favorite part. I did speed up the coloring a bit to make the video a more reasonable length but you can see everything from the masking to the cake stand to the sentiment in the video below:

WATCH THE VIDEO:


I think a scene would have been adorable but honestly, I love how clean this turned out. The white background really lets the bright red in the card shine! What do you think? Should I have gone with a full scene?

Thank you so much for joining me today! I hope you found a little something to inspire you for your next project :) 

SUPPLIES:

Honey Bee WINTER ANEMONE Clear Stamp…
[ SSS ]
Honey Bee PIECE OF CAKE Clear Stamp…
[ SSS ]
Honey Bee SWEET Clear Stamp Set hbst-115
[ SSS ]
Sakura 6 WHITE Gelly Roll Classic…
[ SSS ]
EK Success WRITING PEN FINE TIP 55-30080
[ SSS ]
Neenah Classic Crest 80 LB SMOOTH…
[ SSS ]
03441 Fiskars PREMIUM CUT LINE Paper…
[ SSS ]
Tombow MONO MULTI Liquid Glue Two…
[ SSS ]
ZIG Wink of Stella GLITTER CLEAR…
[ SSS ]
Copic Sketch MARKER E99 BAKED CLAY
[ SSS ]
Copic Sketch Marker C1 COOL GRAY Grey
[ SSS ]
Copic Sketch MARKER C3 COOL GRAY Grey
[ SSS ]
Copic Sketch MARKER C5 COOL GRAY Grey
[ SSS ]
Copic Sketch Marker YG01 GREEN BICE…
[ SSS ]
Copic Sketch Marker YG03 YELLOW GREEN
[ SSS ]
Copic Sketch Marker YG17 GRASS GREEN…
[ SSS ]
Copic Sketch Marker YG67 MOSS Dark Green
[ SSS ]
Copic Sketch Marker Y08 ACID YELLOW…
[ SSS ]
Copic Sketch Marker W1 WARM GRAY No. 1
[ SSS ]
Copic Sketch MARKER W3 WARM GRAY Grey
[ SSS ]
Copic Sketch Marker W5 WARM GRAY NO.5…
[ SSS ]
Copic Sketch Marker R32 PEACH
[ SSS ]
Copic Sketch Marker R35 CORAL
[ SSS ]
Copic Sketch Marker R29 LIPSTICK RED…
[ SSS ]
Copic Sketch Marker R59 CARDINAL…
[ SSS ]
Copic Sketch Marker R20 BLUSH Pink…
[ SSS ]
Copic Sketch MARKER YR24 PALE SEPIA
[ SSS ]
We R Memory Keepers TRIM AND SCORE…
[ SSS ]
MINI MISTI PRECISION STAMPER Stamping…
[ SSS ]
Gina K Designs JET BLACK AMALGAM Ink…
[ SSS ]
Judikins Eclipse ART MASKING TAPE…
[ SSS ]
Simon Says Stamp LARGE GRID PAPER…
[ SSS ]

Thanks so much for stopping by and thanks to Kelly for being our guest!

Blog Candy Alert!! Follow our blog via email and comment on this post for a chance to win special blog candy!

We use cookies to give you the best online experience. By agreeing, you accept the use of cookies in accordance with our cookie policy.