Yippee for Yana: Let’s Celebrate

Hi friends! Happy Wednesday! Thanks for stopping by today! Please join me in welcoming back the fabulous Yana Smakula in her latest edition of our Yippee for Yana blog series! Read on and don’t forget to watch the video for the full tutorial and enjoy!

Hi everyone, this is Yana Smakula and welcome back for another Yippee For Yana video!
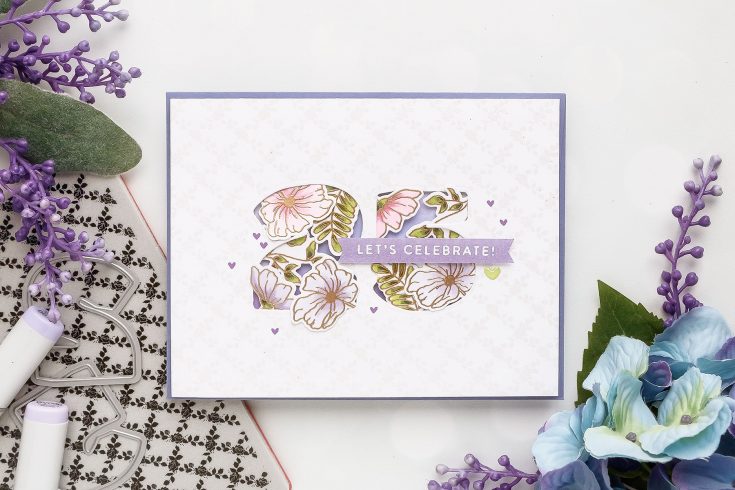
Today I have a simplenumbered Birthday Card idea to share using a few current favorite supplies from Simon Says Stamp. My card is for 25th Birthday, but you can change the numberto be anything you need, from 1st birthday to 99th!
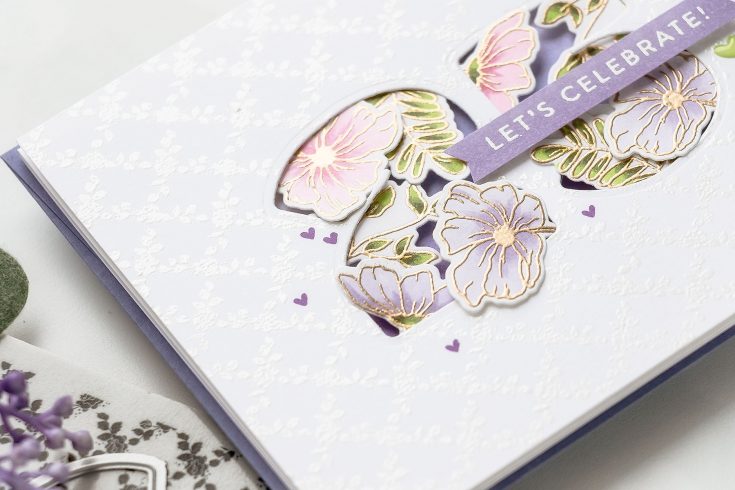
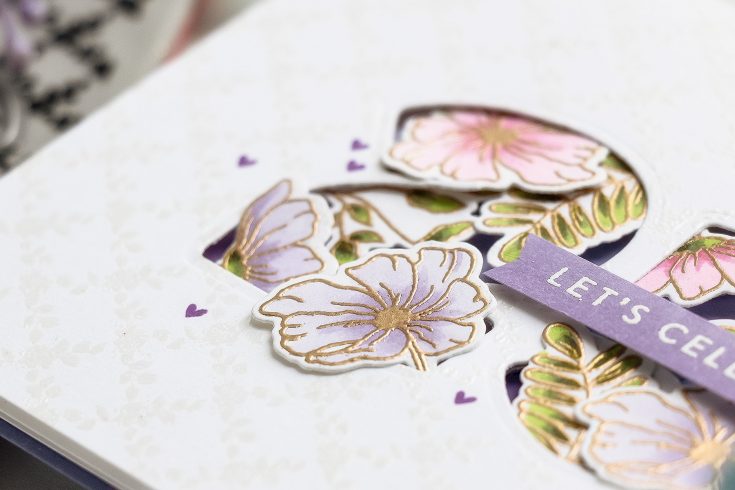
One of the key ingredients for these projects is the coordinating die set for the Birthday Numbers stamp set. I’m using just the dies today and actually skipping stamping the numbers. Having dies you can create all sorts of looks; the look I’m going for today is negative die cutting.
I wanted to add some interest to my background panel so I heat embossed Rose Lattice background background stamp in White Satin Pearl embossing powder from Hero Arts to have a tone on tone look. It doesn’t show much on the card, but it gives it a
I wanted to decorate the
I didn’t want to stamp flowers in black ink, so I opted for heat embossing once again and embossed them in Antique Gold embossing powder. I used a bit different color combo – pale violets, pinks
To add some color in the negative die cut opening I ink blended Velvet Orchid and Deep Purple ink colors directly onto the
Finally, I added that Let’s Celebrate sentiment,a green enamel heart and a few purple stamped hearts on this card.
Have fun stamping!
SUPPLIES:
|


Thanks so much for stopping by and thanks to Yana for being our guest!

Blog Candy Alert!! Follow our blog via email and comment on this post for a chance to win special blog candy!
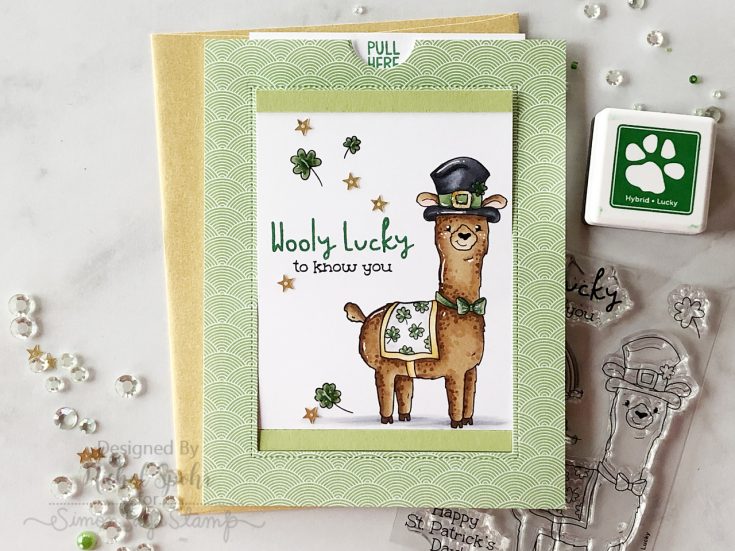
Wooly Lucky Sliding Window Interactive Card
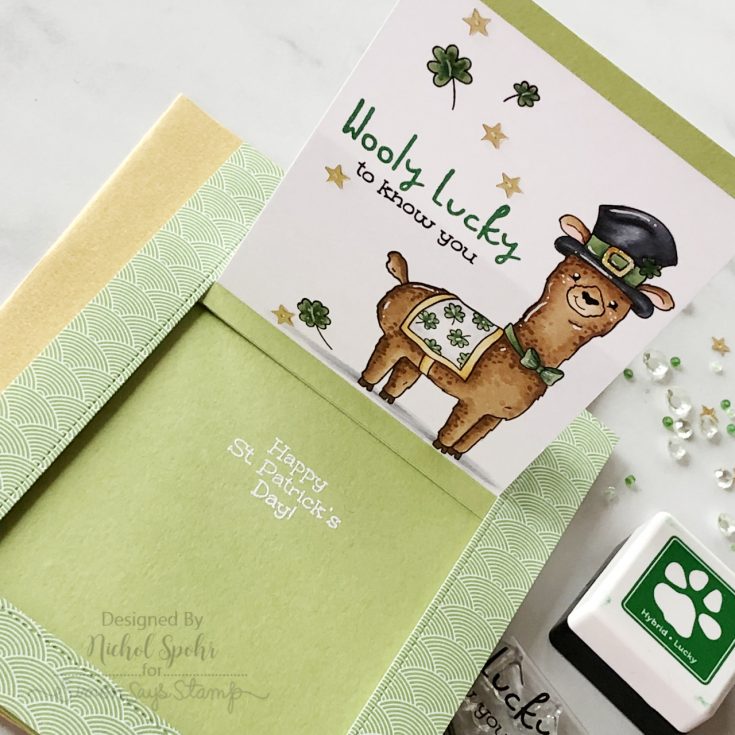
Hi friends! Happy Tuesday! Thanks so much for stopping by today! Please join me in welcoming back the fabulous Nichol Spohr as a special guest on our blog using our brand new March 2019 Card kit, Lucky Rainbow and spotlighting the Wooly Lucky stamp set that is included in the kit.
Don’t forget to watch the video and enjoy!
SUPPLIES:
|


Thanks so much for stopping by and thanks to Nichol for being our guest!

Blog Candy Alert!! Follow our blog via email and comment on this post for a chance to win special blog candy!
Studio Monday with Nina-Marie: Art Impressions Wheelies Inspiration!

Hello crafty friends, it’s Nina-Marie here with you today, featuring the Art Impressions Birthday Dog Wheelies set! These interactive Wheelies are amazing; each set comes with everything you need to put the card together!
Building the Wheelie is best illustrated by seeing it come together, so make sure you tune in to the video at the bottom of this post!
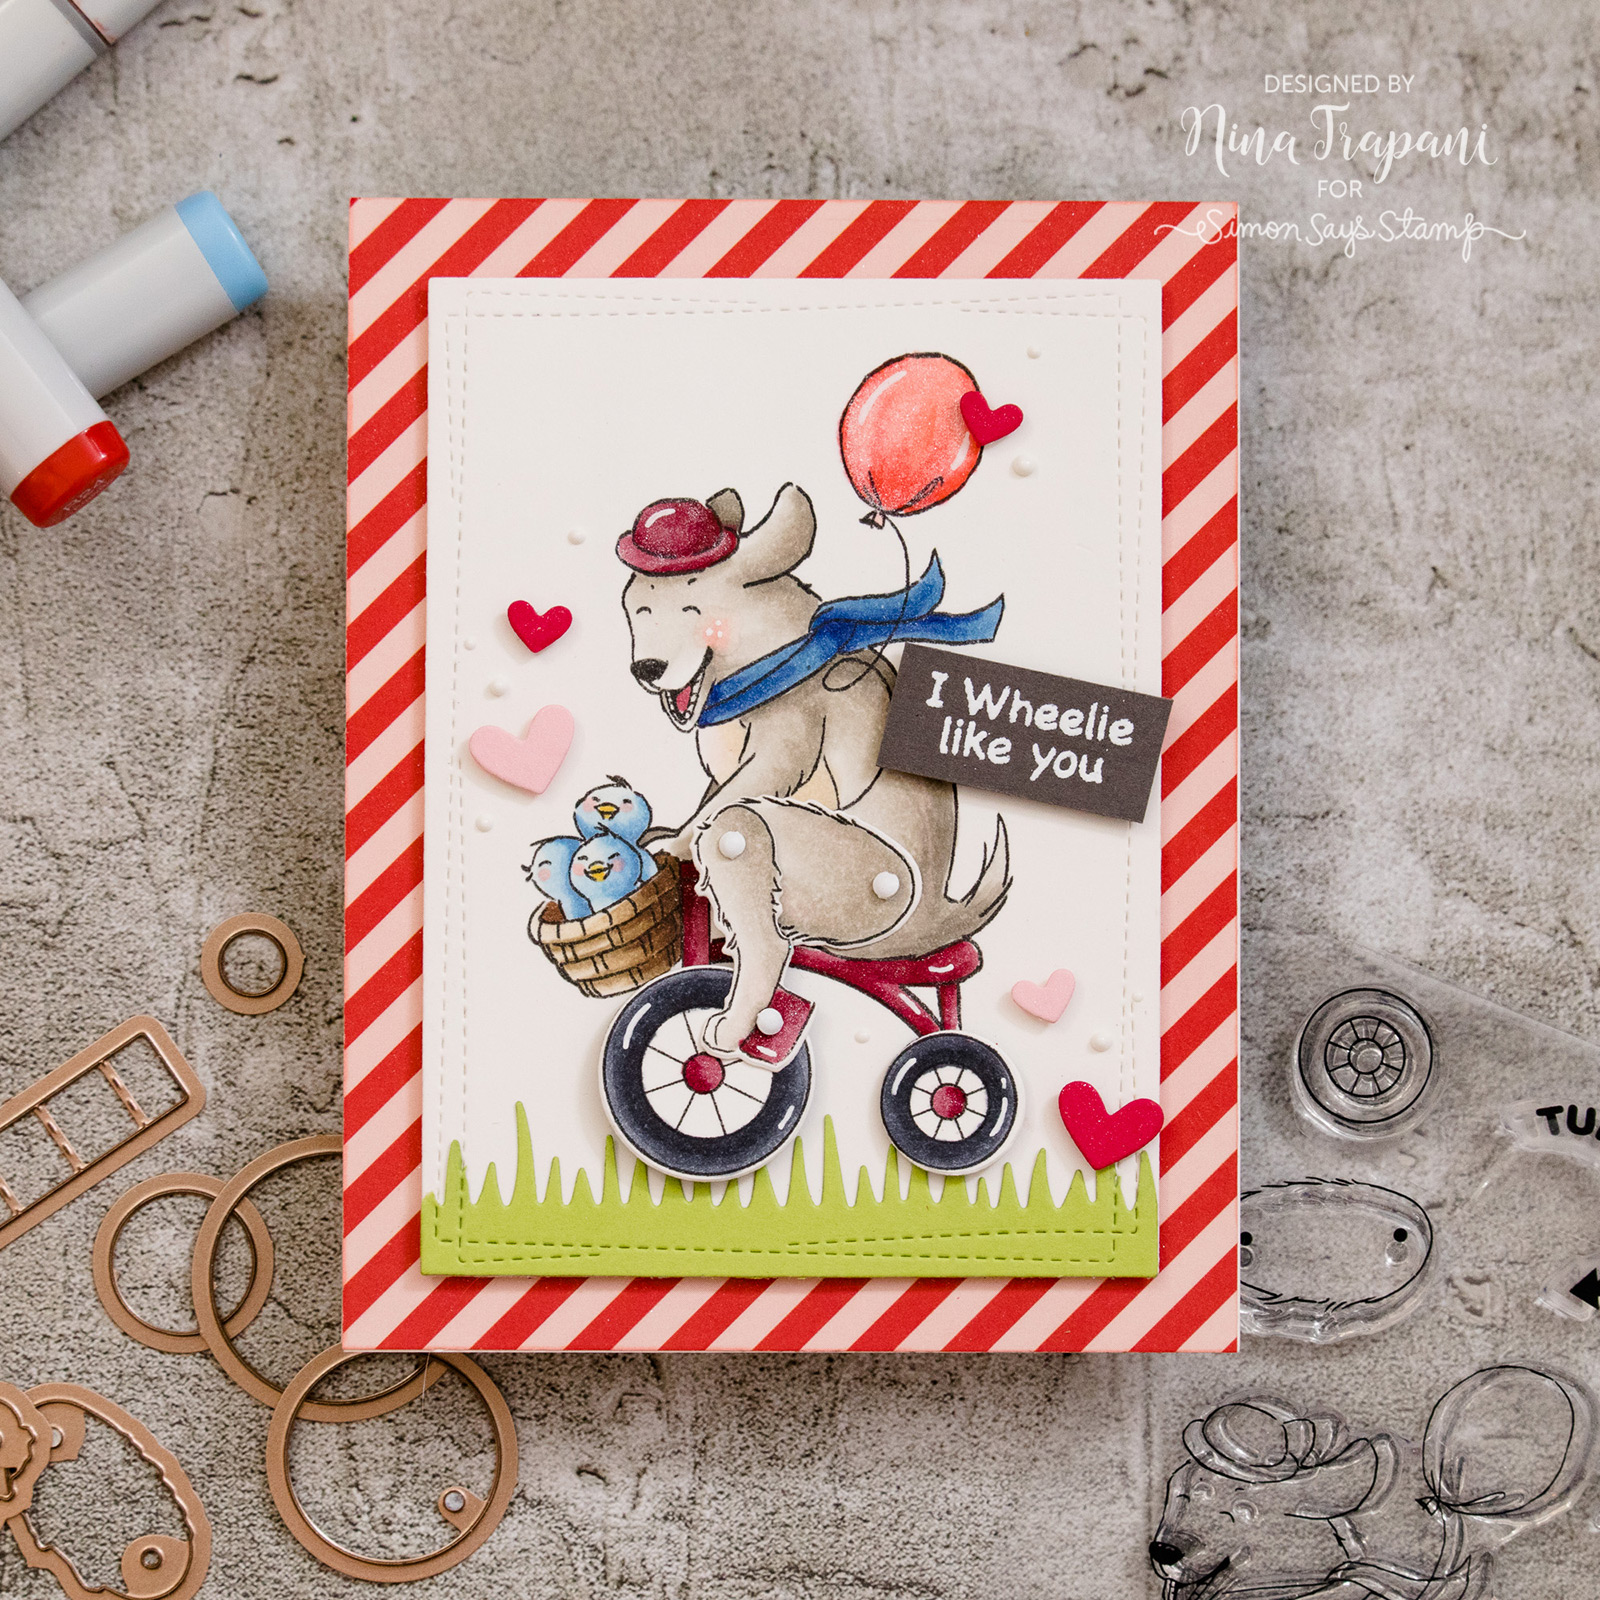
To color the dog (and his basket of birds!), I used a few Copic markers:
- R21, R24, R56, R59 (red)
- B00, B34, B39 (blue)
- C6, C8 (cool gray)
- W1, W2, W4, W5 (warm gray)
- E41, E44, E47 (brown)
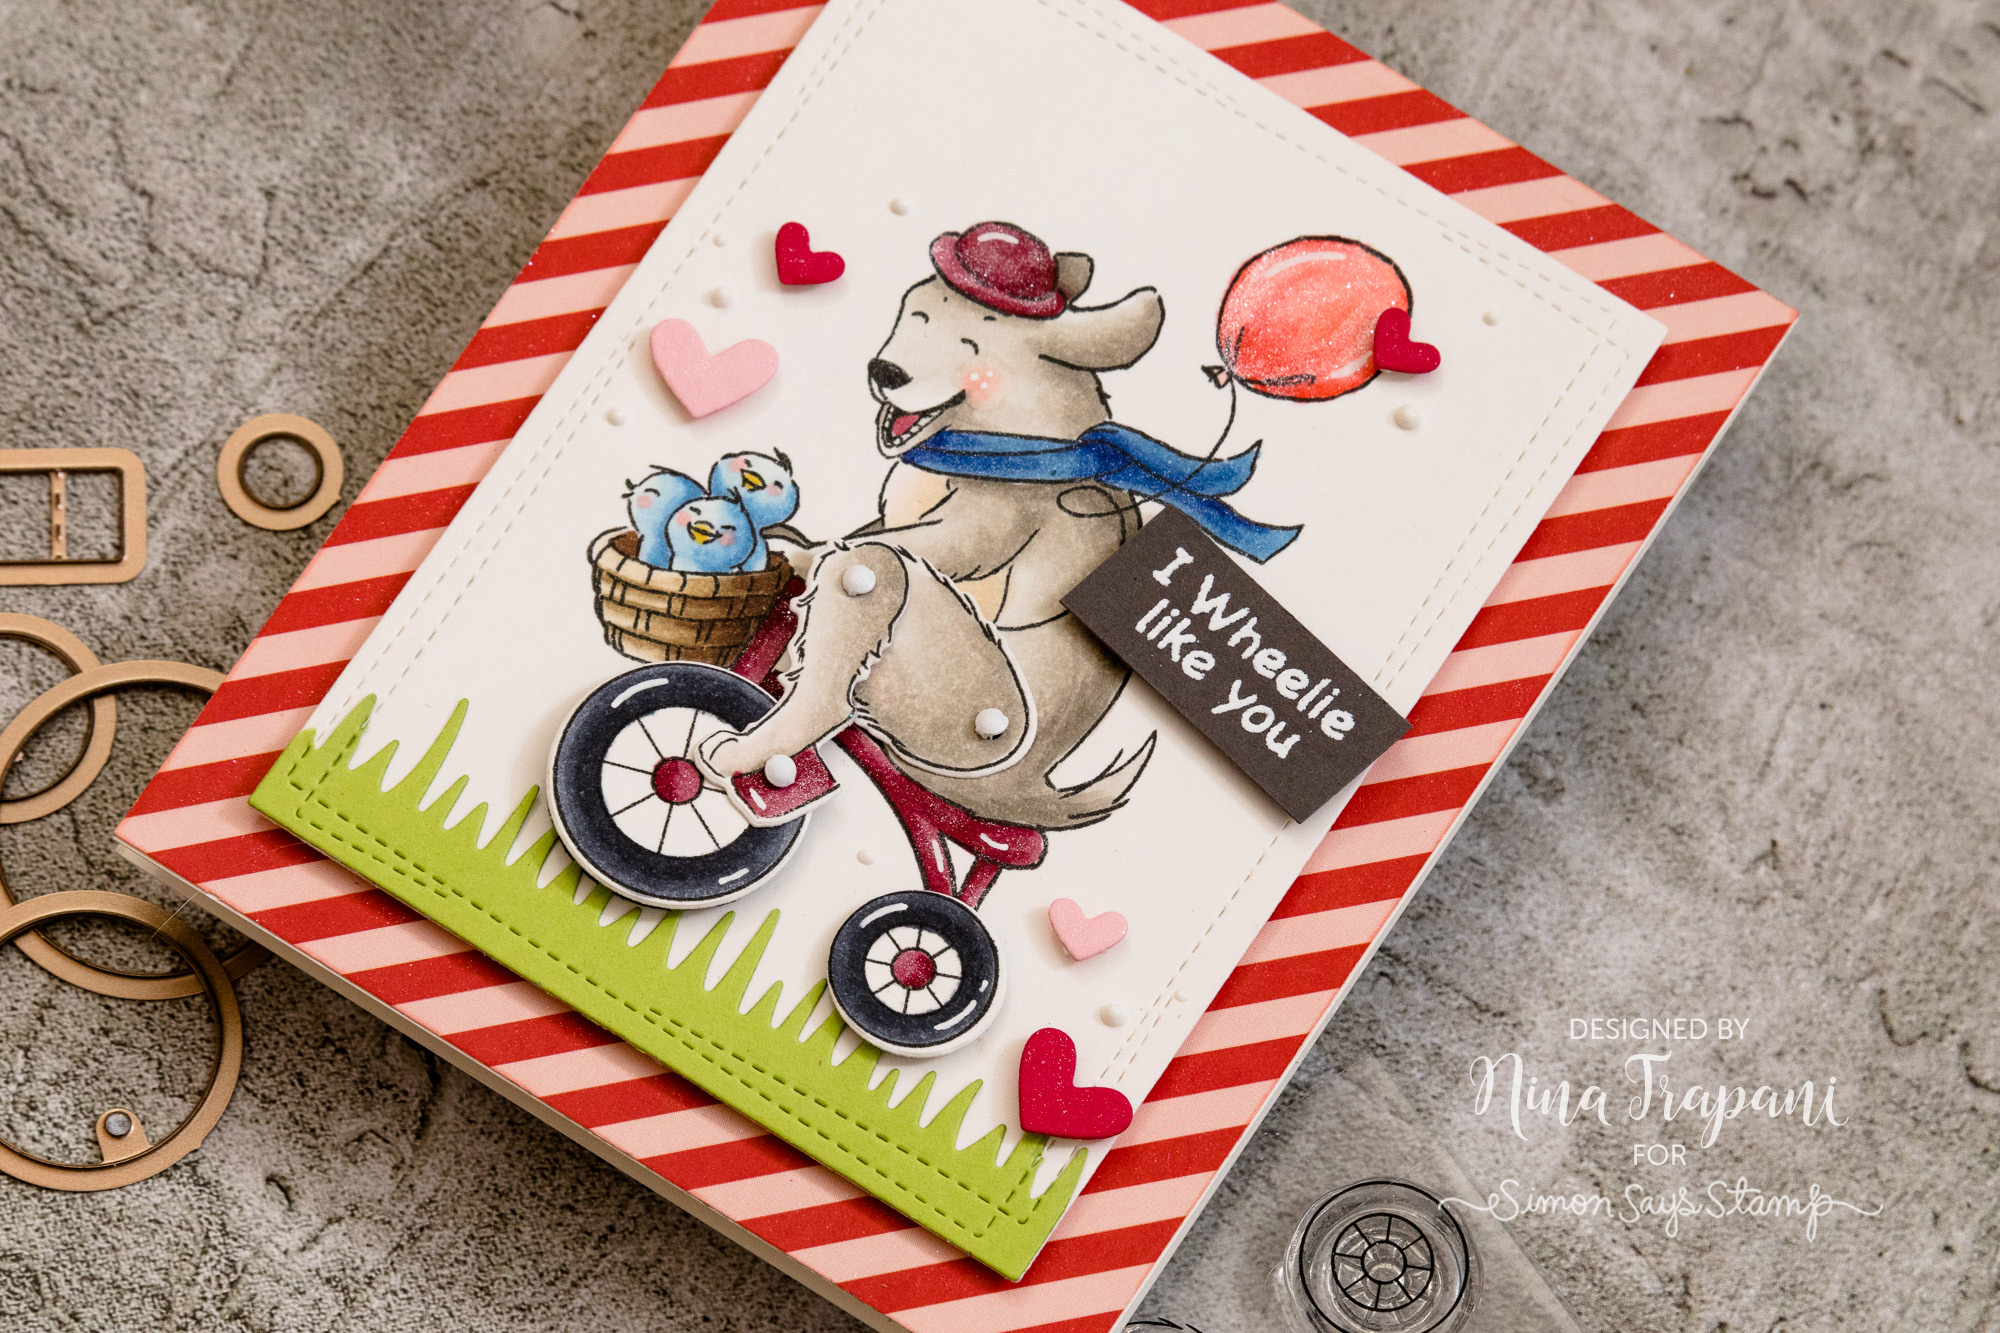
To decorate the card, I cut some grass with our Simon exclusive Grassy Edges die, and hearts from our Envelope Liner die. With a Tonic Studios Aqua Flow water brush and Nuvo Drops, I embellished the bike and background.
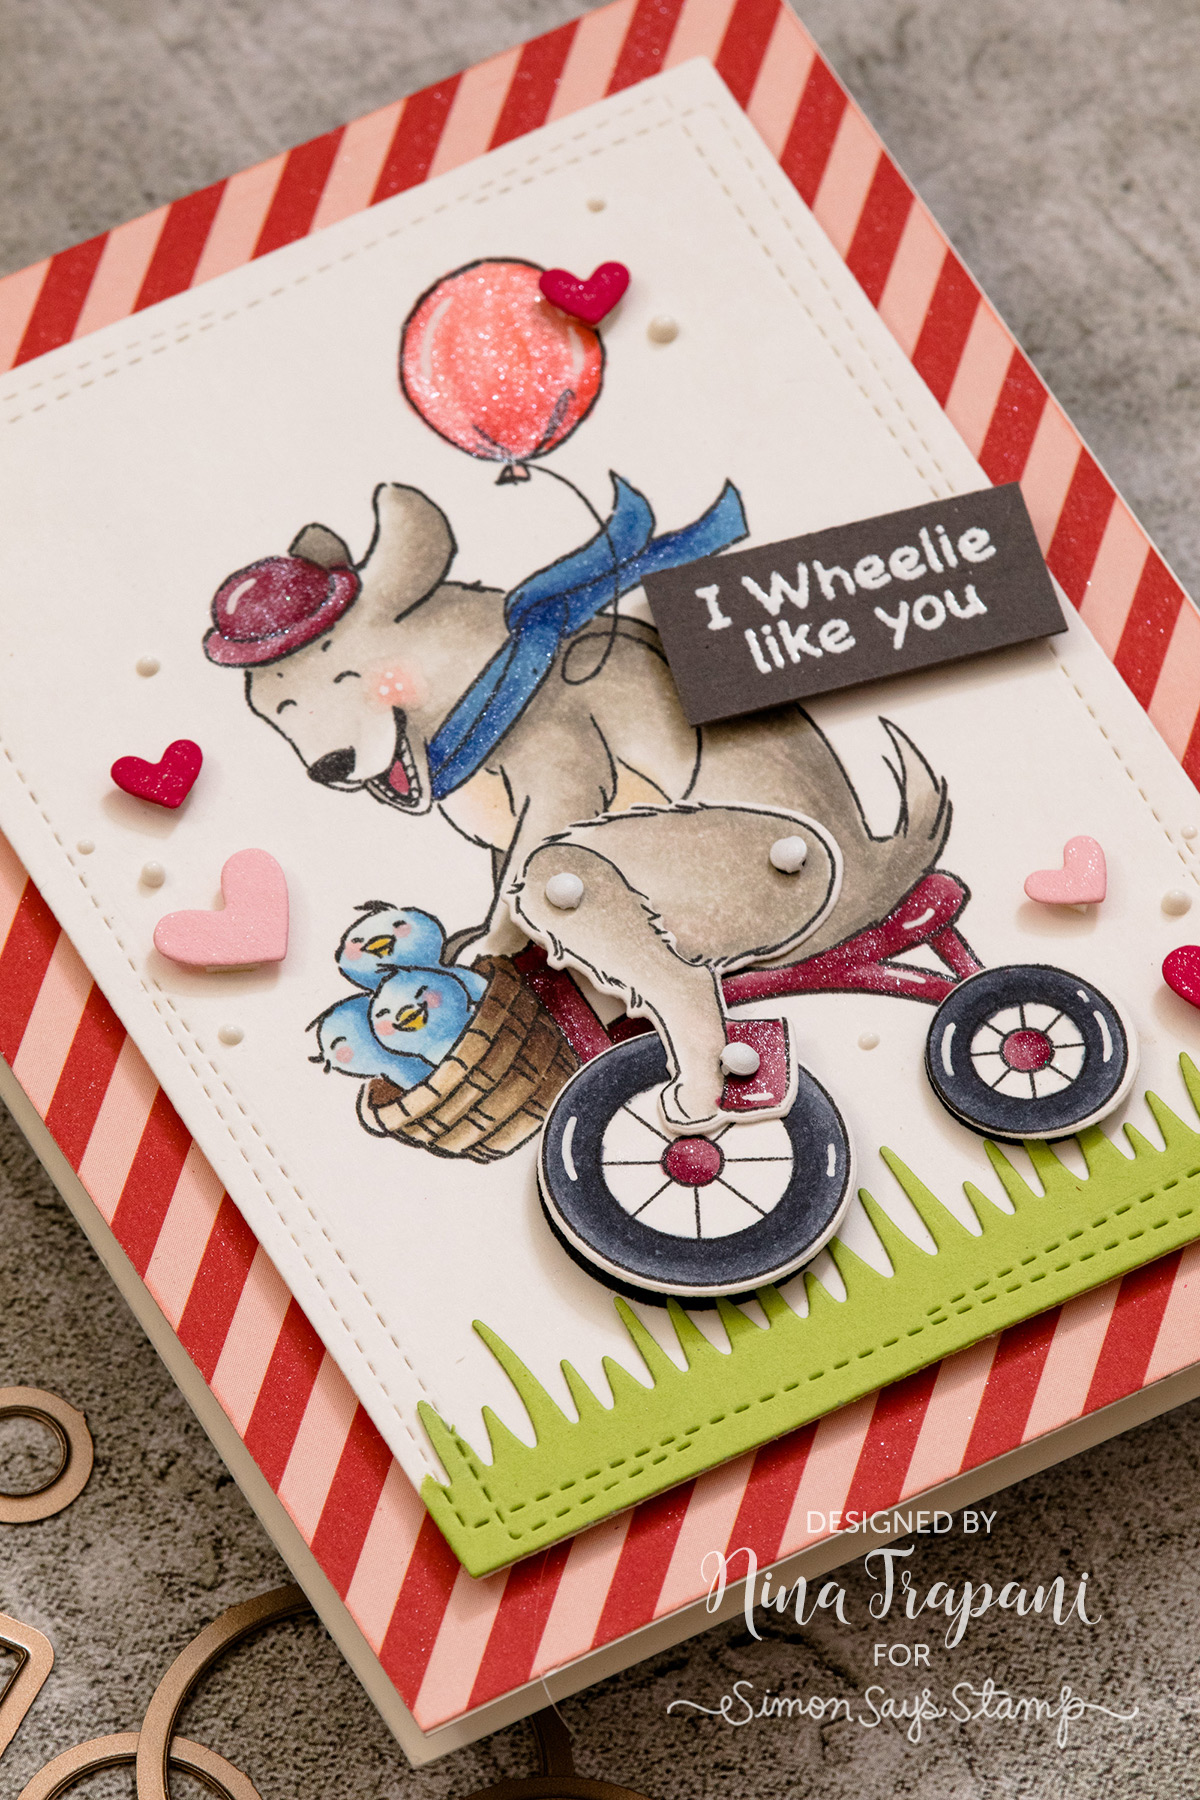
I hope you will watch the video below to see how the Wheelies are created; it is a lot of fun to make them!
WATCH THE VIDEO
SUPPLIES
|


Blog Candy Alert!! Follow our blog via email and comment on this post for a chance to win special blog candy!
Blog Candy Winners!!
March 2019 Card Kit Inspiration with Kristina Werner: Dana M!
Memory Box + Wreath Builder: Emma Sleppy!
Fresh Altenew Ideas by Jen Rzasa: MandaLJ!
Studio Monday with Nina-Marie: Mini Love Notes for Any Occasion: Marisela Delgado!
Please email [email protected] with the name of the blog you won from, your prize(s), and your address if applicable!


