Palette Blue Tag Book by Paula Cheney
Hello friend! Thanks so much for stopping by our blog today, and please join me in welcoming back special guest Paula Cheney with this super gorgeous tag book! Read on and enjoy!

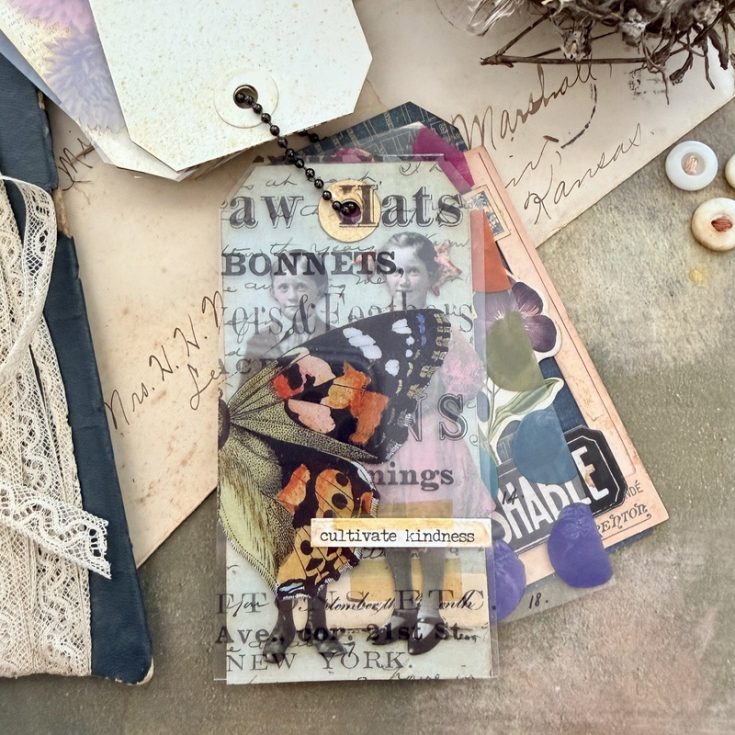
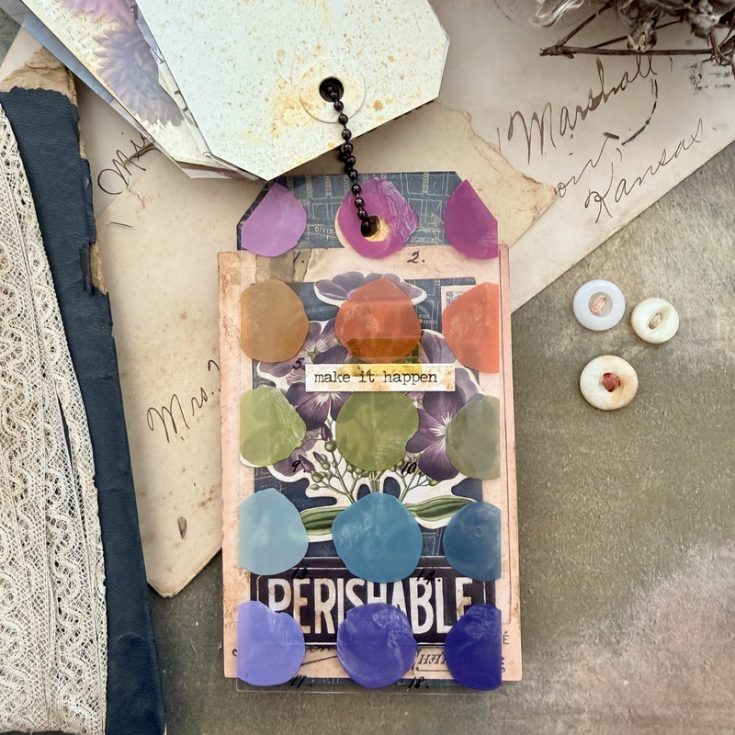
Hi friends! It is an exciting time in the studio with the release of the next three Palette paper colors: Teal, Blue, and Indigo! Today, I’m diving into the 8 x 8” Palette Blue to create a layered tag book packed with Tim Holtz idea-ology. Each tag features a coordinating transparency, creating a beautiful “peek-a-boo” effect as you flip through the pages. I’ve broken it down into a few simple steps so you can create your own—I hope you’ll follow along and see how easily this little book comes together!
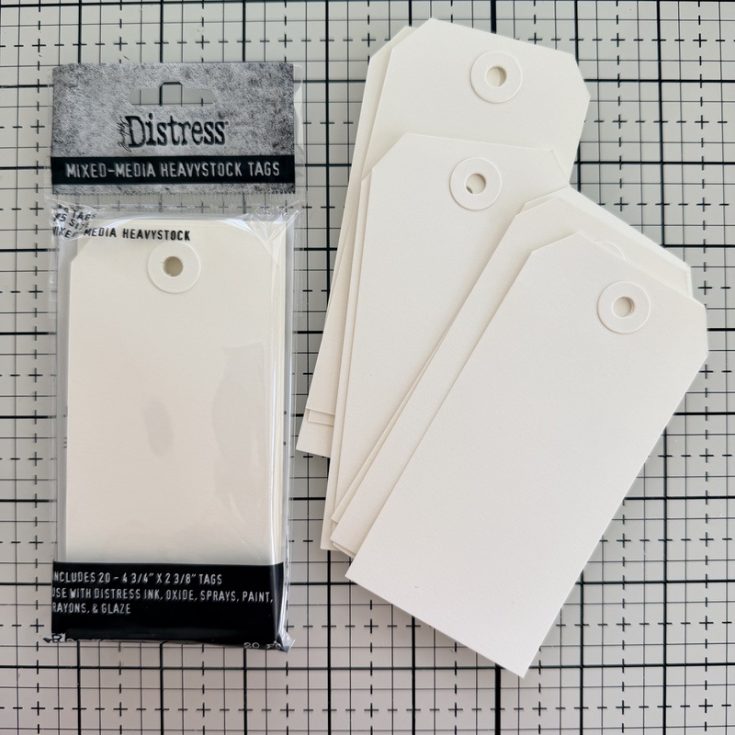

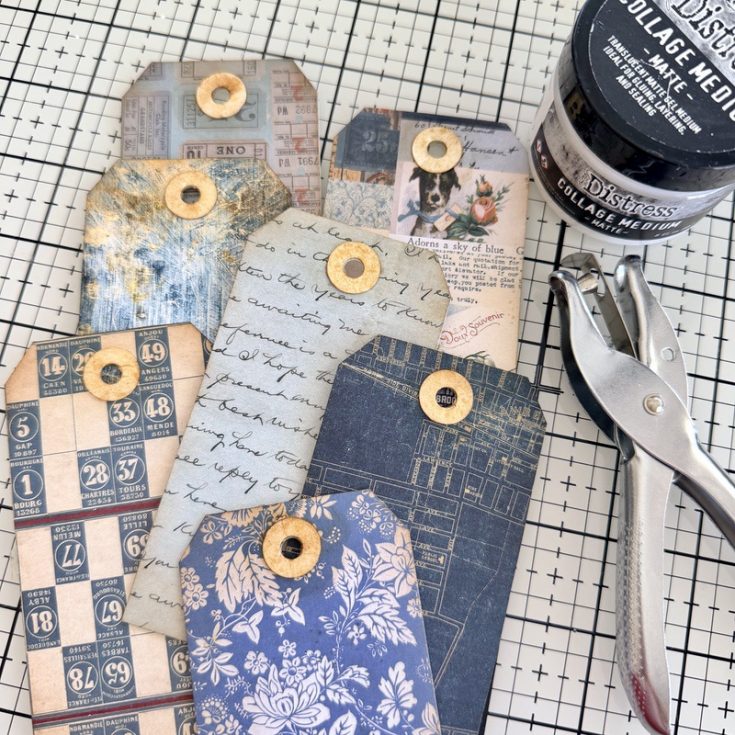
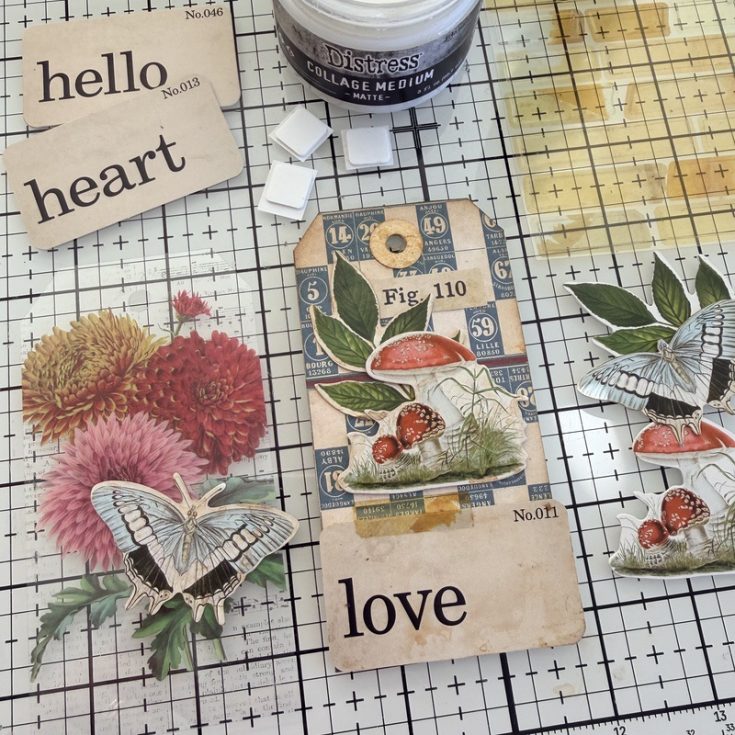
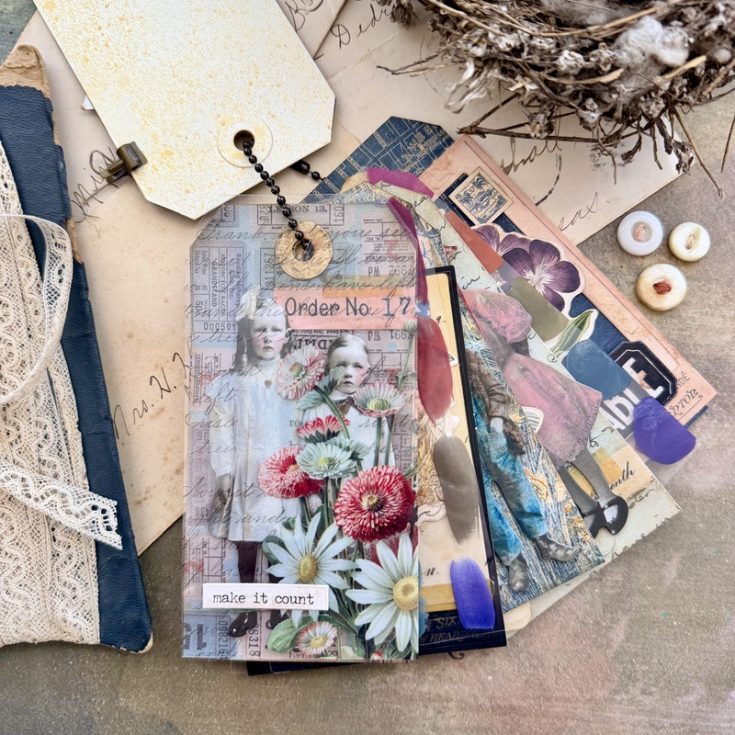
- Lets get started by pulling at least seven #5 Distress Mixed-Media Heavystock Tags (4 3/4 x 2 3/8”).
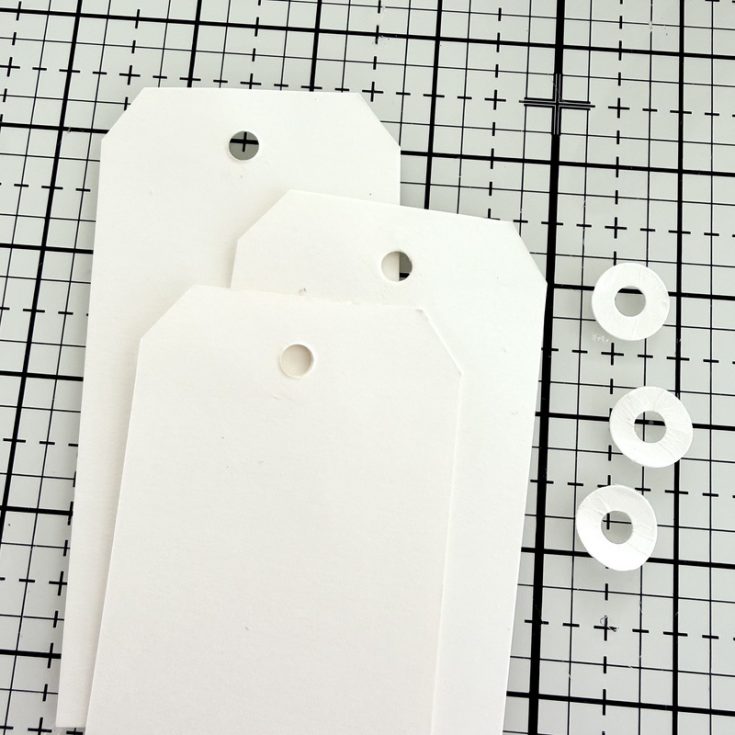
- Peel off the reinforcer on ONE side of the tag and set aside. They are super sticky but still easy to peel off!
- Use Collage Medium to add a mix of Palette Blue papers to the side of the tag that has no reinforcer. There so many fun prints in this collection to choose from. If you have a favorite, it could be repeated or more tags could be added.
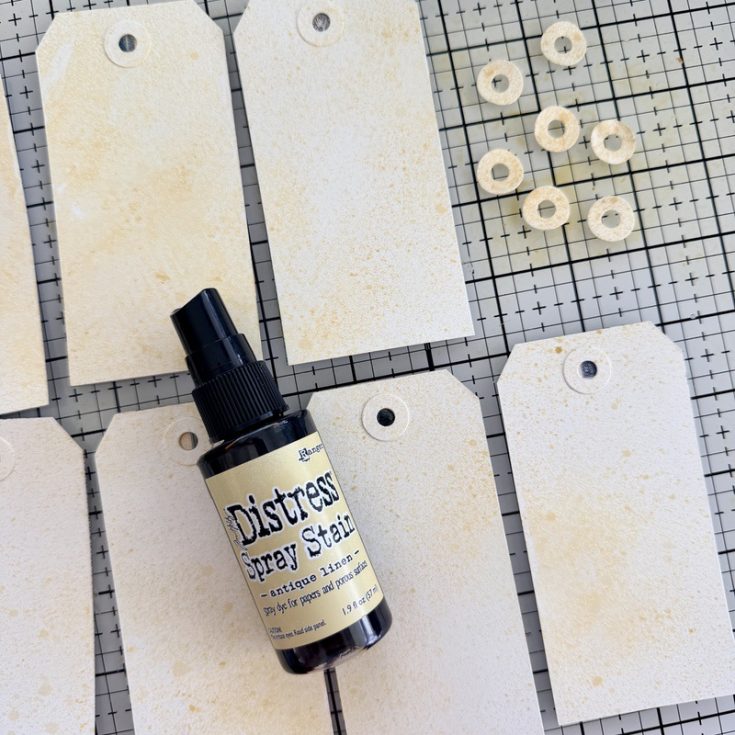
- Turn the tags over and spray the backs (and the reinforcers) with Antique Linen Distress Spray Stain. Let dry or use a Ranger Heat It Craft Tool to speed up the drying time.
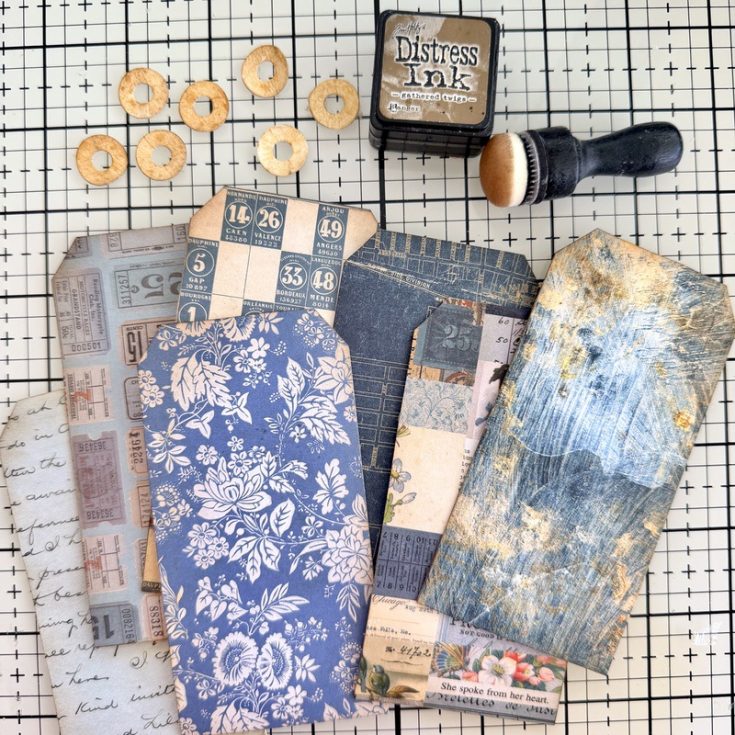
- Using a Tiny Blending Tool, ink the edges of the tags and the reinforcers with Gathered Twigs Distress Ink.
- Tun the tag over and punch a hole through the tag with a standard hole punch. Turn each tag to the paper side and add the reinforcer over the hole you just punched. Collage Medium can be used if the reinforcer needs a touch of glue. Set the tags aside.
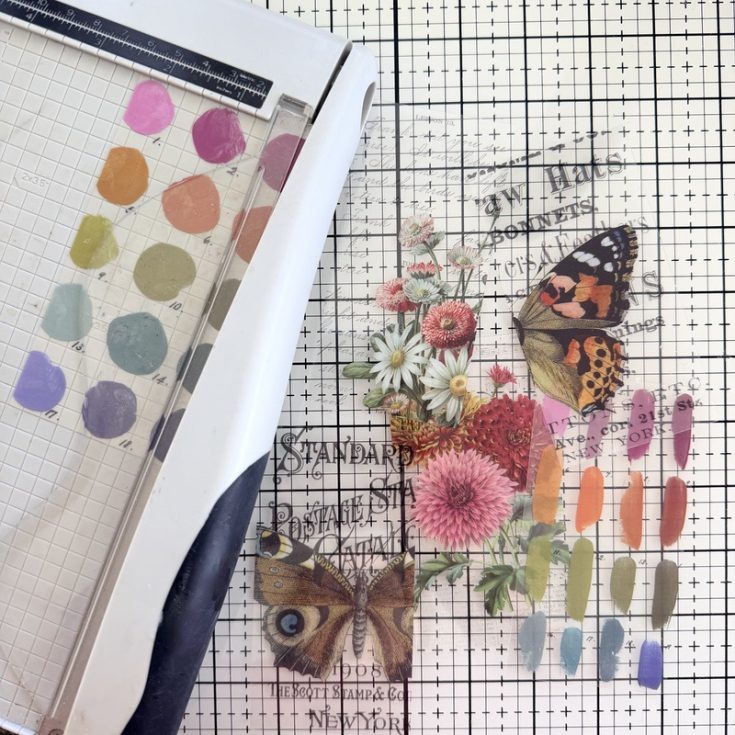
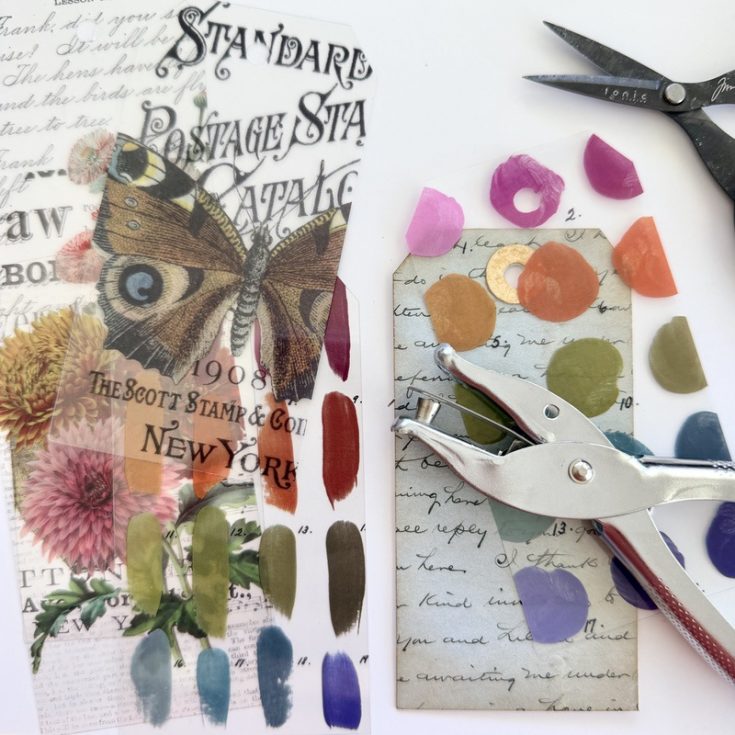
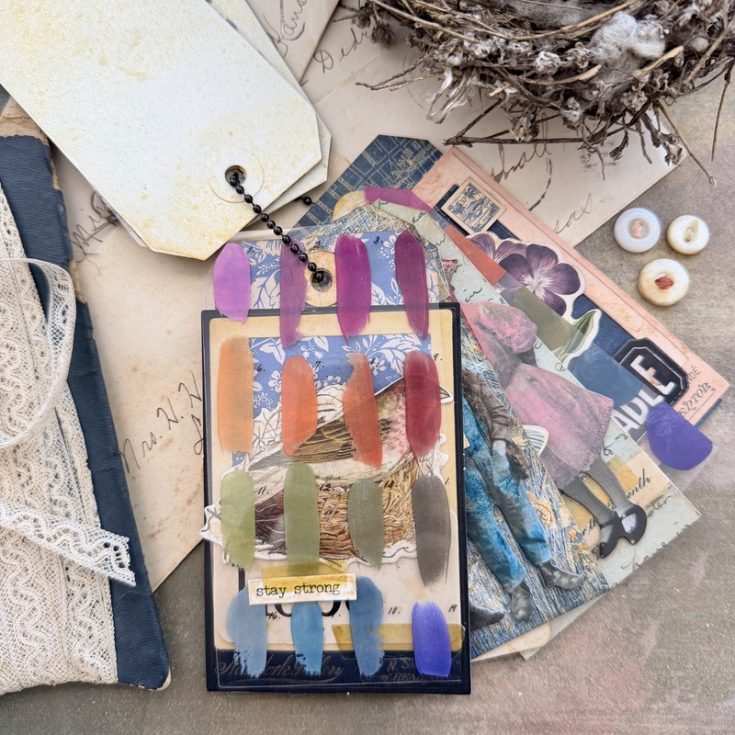
- Choose six transparencies from the Transparent Layers pack. Use a Tim Holtz/Tonic Guillotine Paper Trimmer to cut all six transparencies to 2 1/2” wide.
- Using a tag as a template, punch a hole in the transparency with a standard hole punch and cut the top corners to match the shape of the tag. Set transparencies aside.
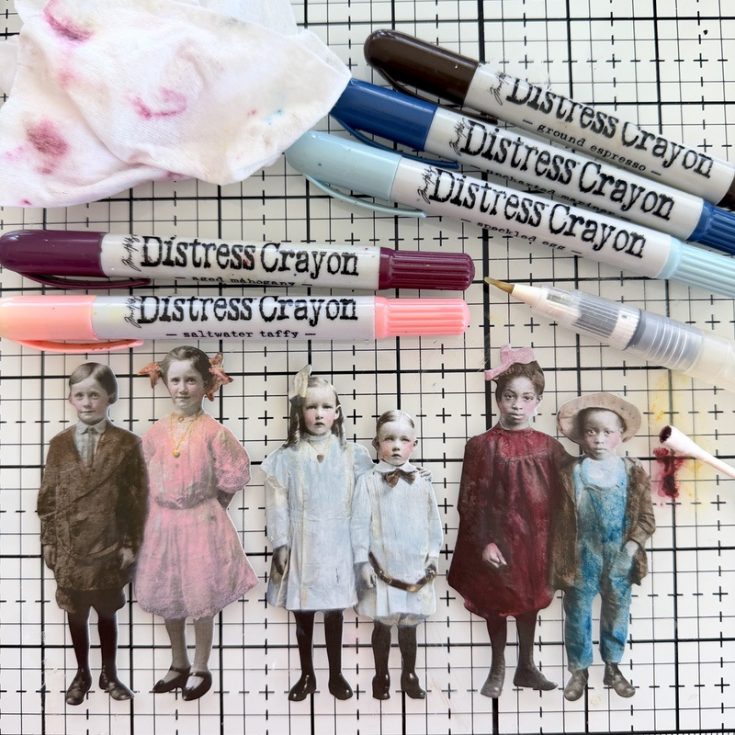
- Choose a few Paper Dolls from the Groups pack. I chose to work with children since they size fit the #5 tag. I also chose a few Distress Crayons to color the Paper Dolls. I am using Ground Espresso, Uncharted Mariner, Speckled Egg, Aged Mahogany and Saltwater Taffy.
HOW TO: Scribbled the crayon over the clothing. Rub the crayon over the surface with your index finger until the color is smoothed out. OPTIONAL: I wanted the clothing to look old so I pounced over the surface a couple times with a wet wipe to remove just a bit of the crayon and leaving a rustic finish. DETAILS: Use a damp Detailer Water Brush (no actual water in the brush itself) to add small details like Mustard Seed on the necklaces and Ground Espresso to the belt and bow tie on the little boy in the center.
CHEEKS: To color the cheeks, just scribble a little Aged Mahogany on the mat. Pick up the crayon with the end of a cotton swab and tap, tap, tap over the cheeks. If you get too much, tap over the top with your fingertip. Something about your fingertip smooths out the color and makes it look more natural.

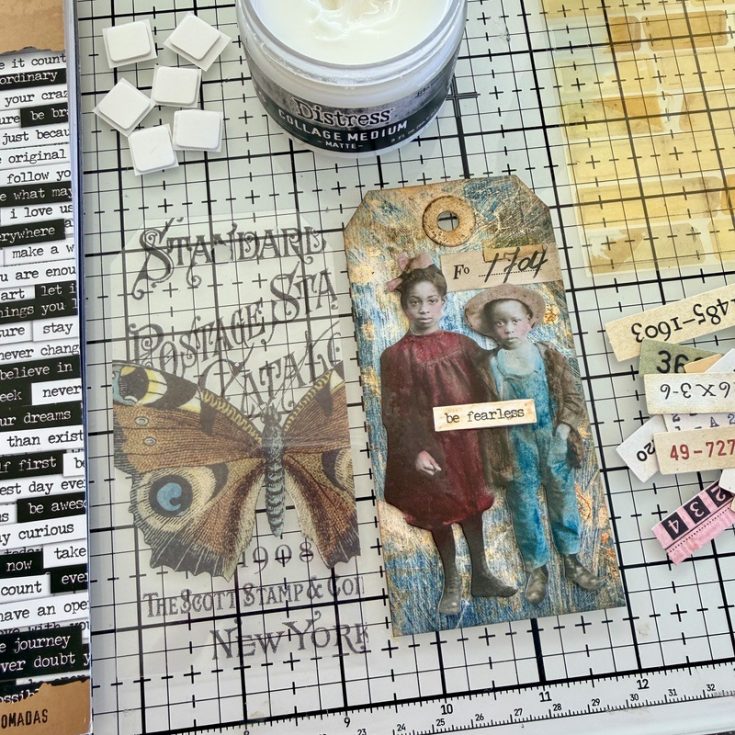
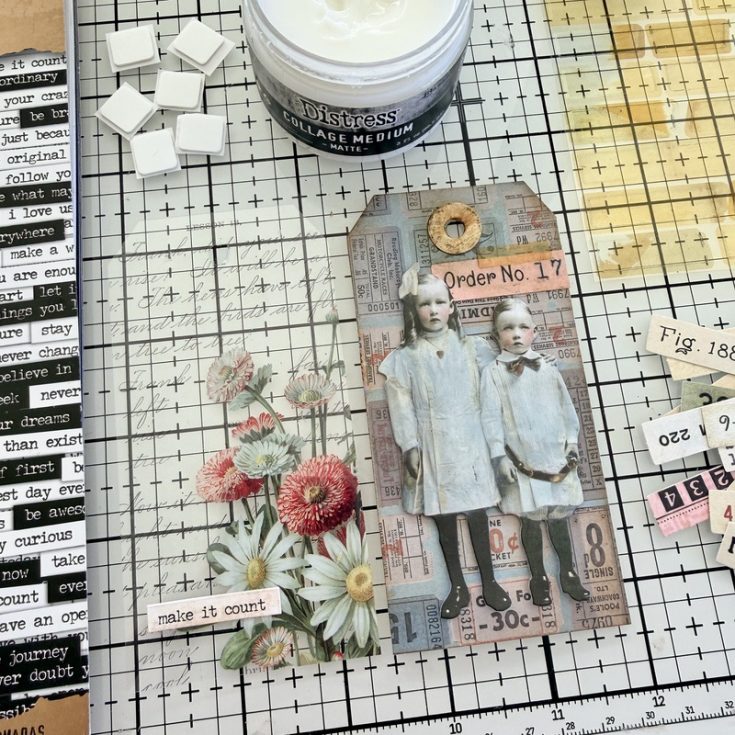
Match a transparency with a tag and work on them at the same time to coordinate. All three Paper Doll tags + Transparencies use the same basic idea-ology products: Snippets Number Strips, Small Talk Stickers, and Cello Sticker Tape. The Small Talk Sticker can go on the tag or the Transparency. All Paper Dolls were added with Thin 3D Foam Squares.
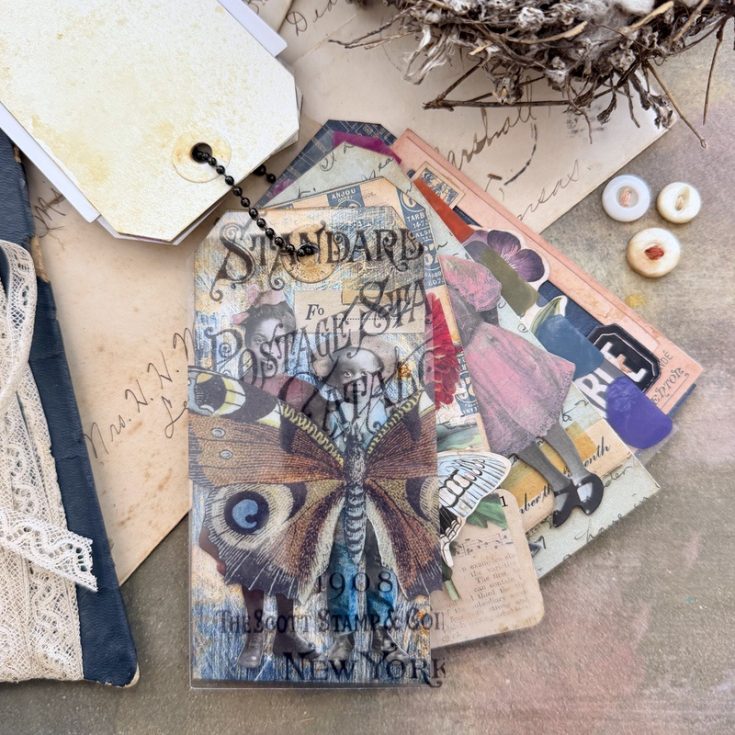
Nature Tags
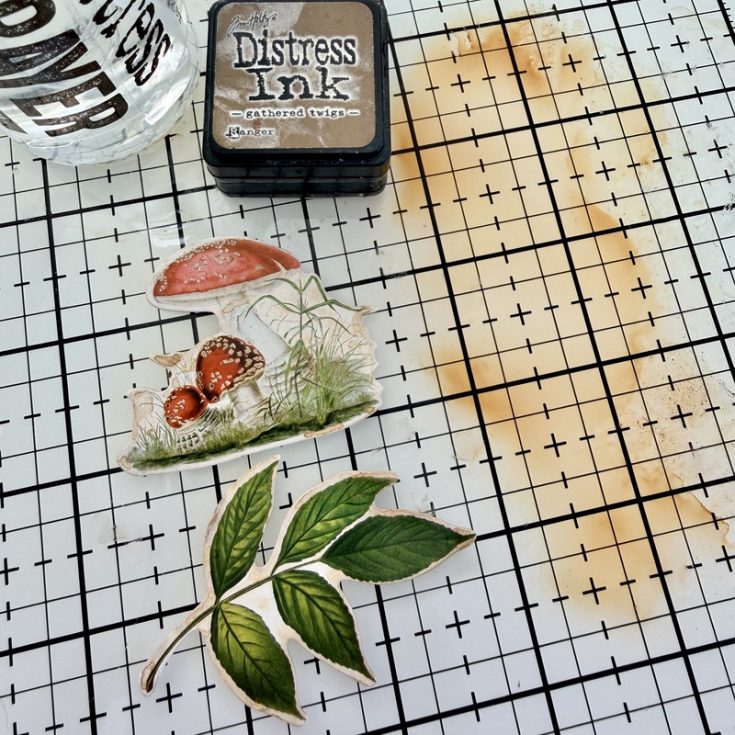
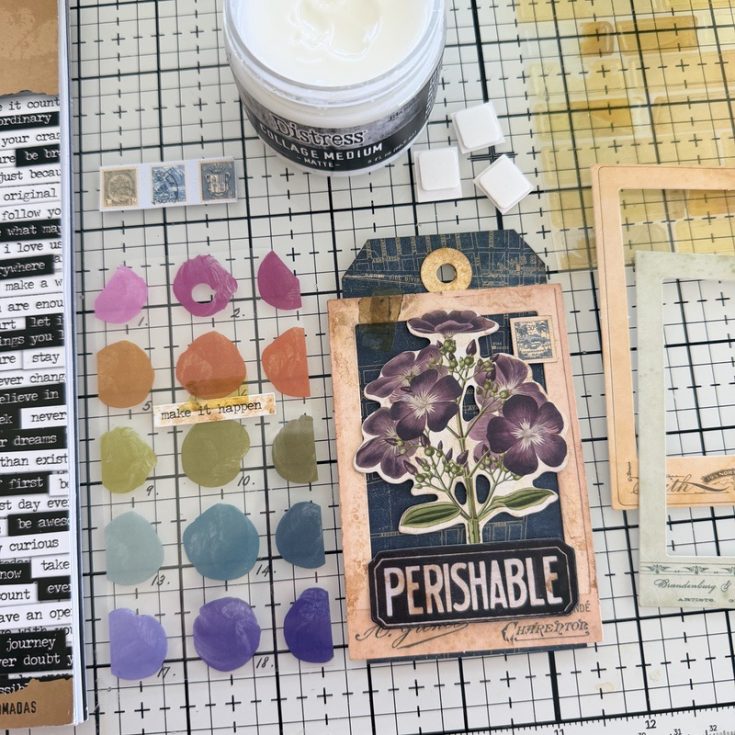
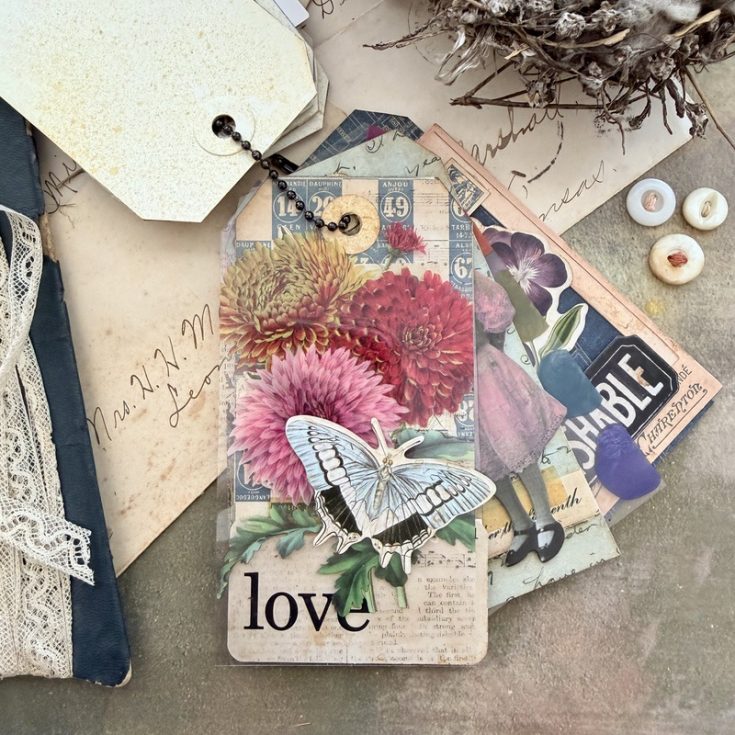
- The next three tags, as well as the cover tag, use ephemera from the Layer Organic pack. The images are printed on a white background so I wanted to make them a bit more vintage looking. You can do this two ways: simply ink the edges with Distress Ink or create a puddle of ink and water and dip the images into the puddle. Set on a paper towel and dry with a heat tool. Because the paper is coated it takes longer to dry, but the result is an overall vintage look that I love.
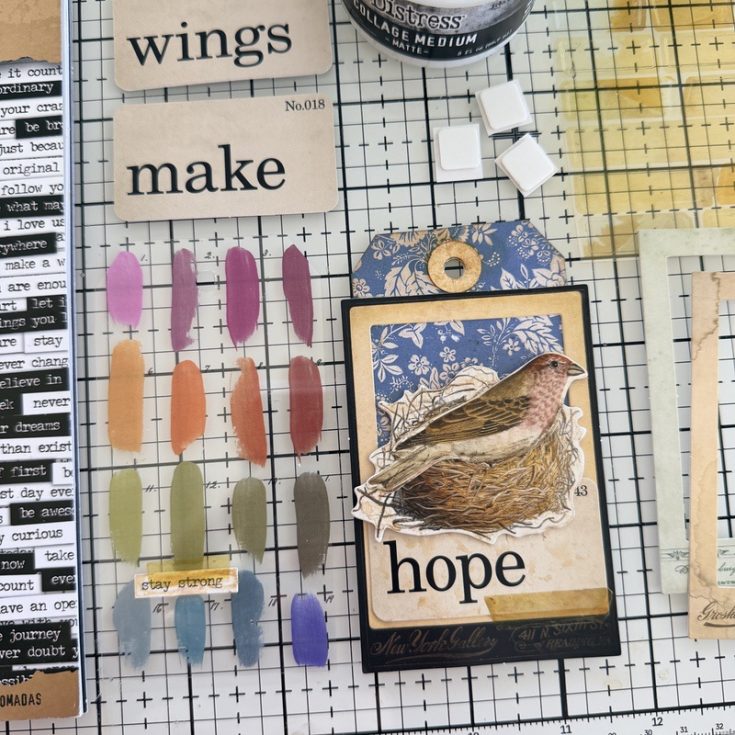
- Along with Layers Organic, Small Talk Stickers and Cello Tape, I’m adding idea-ology Photo Studio (frames), and Flash Cards.
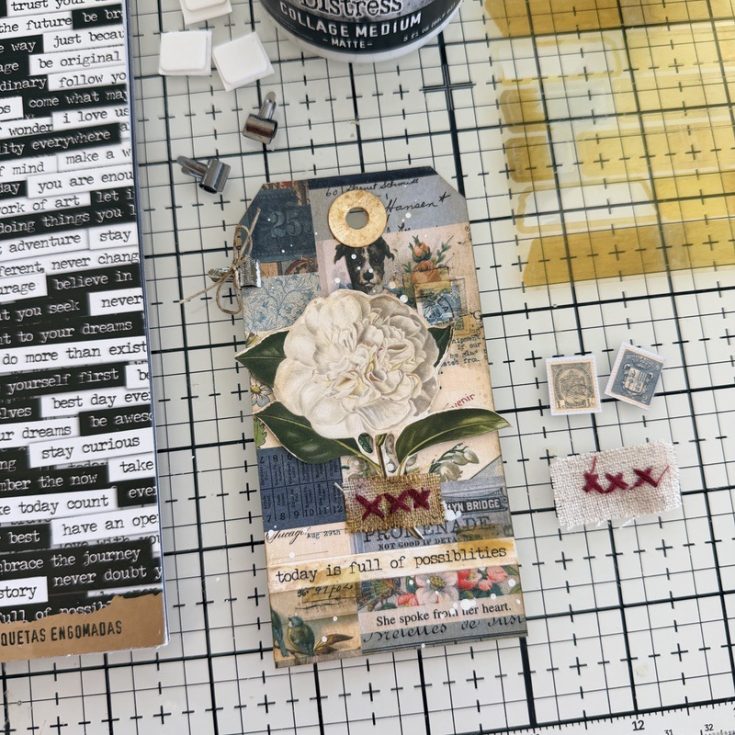
- The second tag does not have a Photo Frame, but it does have a few extra botanicals from the Layers Organic pack. I love the butterfly on the Transparency.
- The last of the nature tags has a stamp that I cut from the Palette Blue paper pack. The word ‘perishable’ also comes from the Layers Organic pack.

Cover
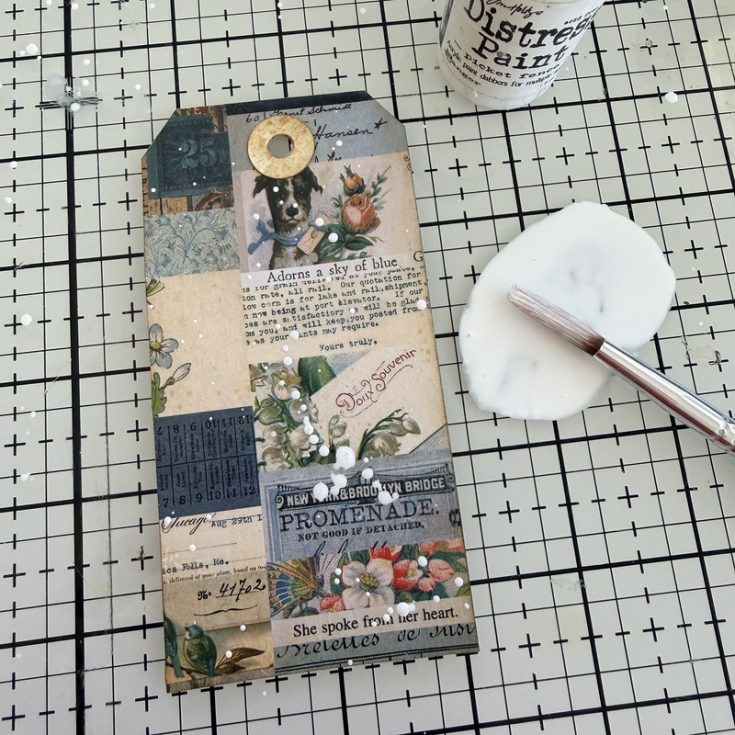
- Splatter the cover tag with Picket Fence Distress Paint.
- Add a botanical, Small Talk Sticker and Cello Sticker Tape. In addition, adhere a Stitched Scrap to the tag with Collage Medium, a stamp cut from Palette Paper, and a Tiny Clip with a string bow on the left side. I think the Stitched Scrap is so perfect once cut to size and inked with a little Distress Ink and water!
- Thread each tag with its matching Transparency onto idea-ology Ball Chain. Cut to length and add the connector to the end. If you plan to add more tags, make sure the Ball Chain is long enough.
SUPPLIES:
|


Thanks so much to Paula for this gorgeous inspiration and to YOU our reader, for stopping by today!
Thank you for coming to CREATE 2026! Here’s a Recap of all the fun!

Hi friend! In case you missed it, we wanted to share this fun recap of our super fun and whirlwind of Simon Says CREATE 2026! Big thanks to ALL of you who attended classes, stopped by for some Create it Take it(s), or came to do a bit of shopping! Also, we couldn’t have hosted this event without the help from the amazing designers and vendors that participated!
Thank you so much!! A big hug of appreciation to Shari Carroll for compiling this video! Enjoy!

Love Is in the Details: A Cute Lawn Fawn Scene Card
Hi friend! Happy Monday! Please join me in welcoming back special guest Megan Burnette showcasing this way cute card showcasing some brand new Lawn Fawn goodies! Be sure to read on to learn all the details and enjoy!

Hello again! I am so excited to be back on the Simon Says Stamp Blog today to share with you a fun, crafty design featuring new products from Lawn Fawn’s latest release.
One of my favorite Lawn Fawn critter series includes the adorable little mouse. I pulled images from several different sets to make this sweet scene. I stamped them using comic friendly ink and after coloring them with Copic Markers, I cut them out using the coordinating dies.
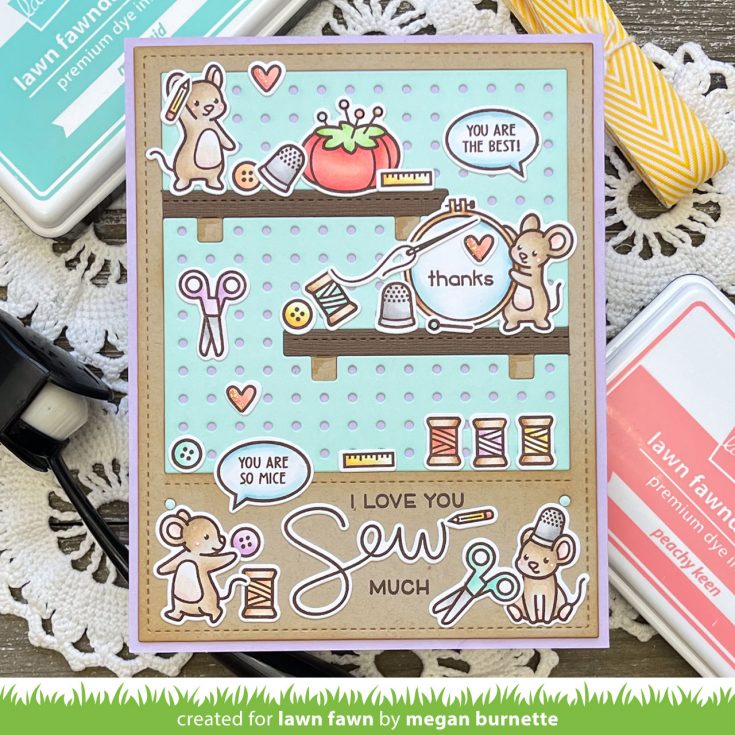
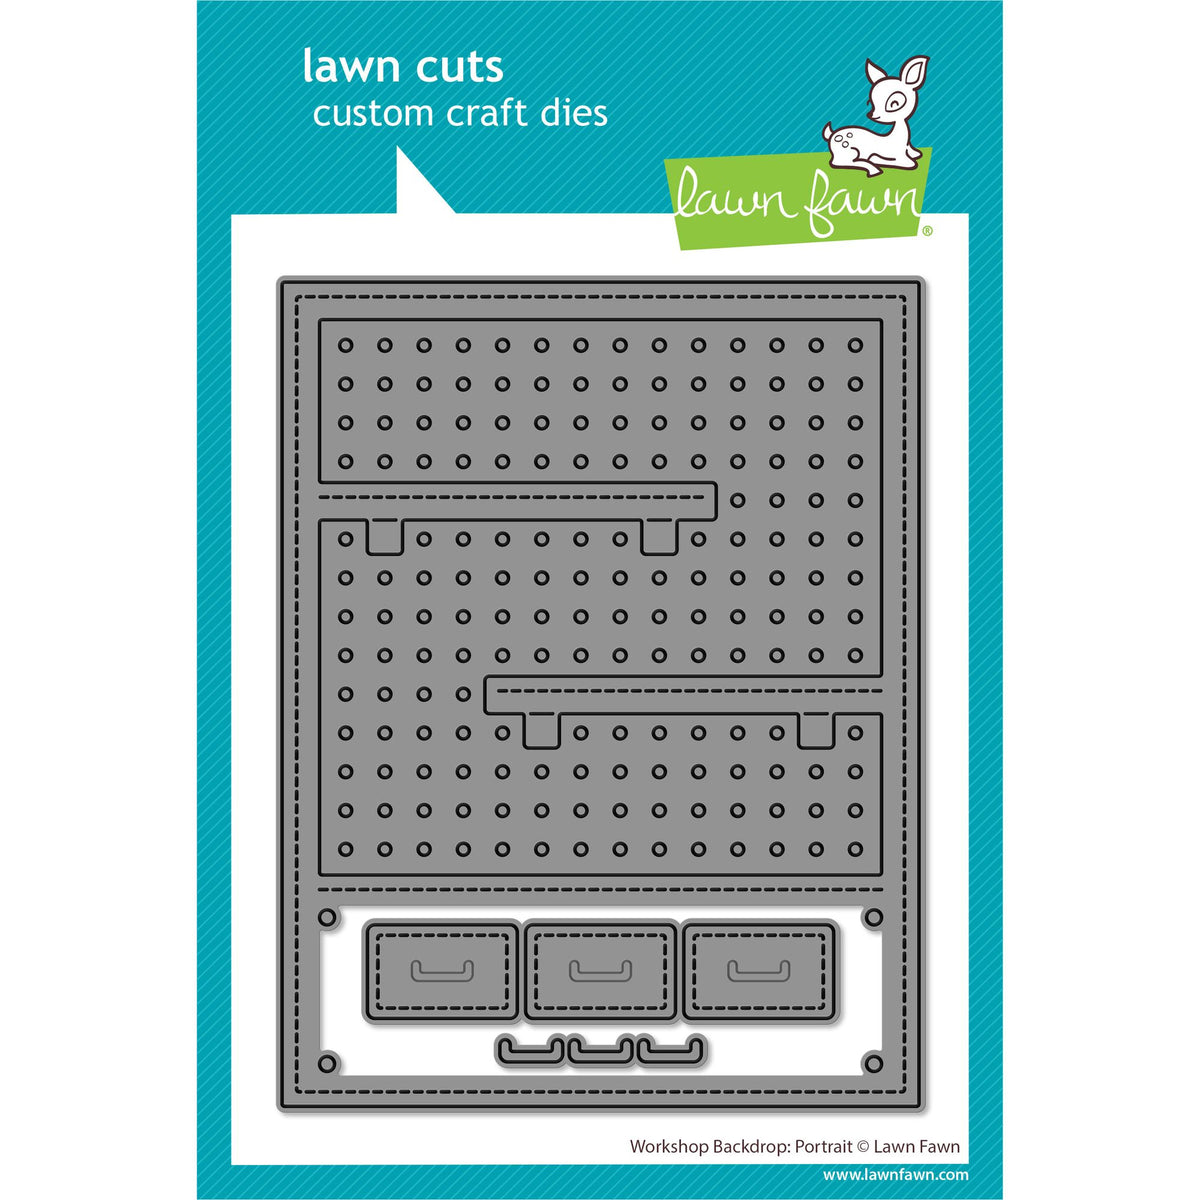
To set the scene for my card, I die cut a piece of Lawn Fawn Kraft cardstock using the Workshop Backdrop: Portrait Die. I then inked the edges with a little Vintage Photo Distress Oxide Ink to add some depth. I wanted the shelves to stand out, so I used the same backdrop die and cut a piece of Lawn Fawn Chocolate Bar Cardstock. I then cut the two shelves off and adhered them down using double sided tape. For the pegboard, I used the backdrop die a third time with the light aqua cardstock from the Lawn Fawn Macaron Paper Pack and backed the front panel onto a piece of Lawn Fawn Lilac Cardstock.
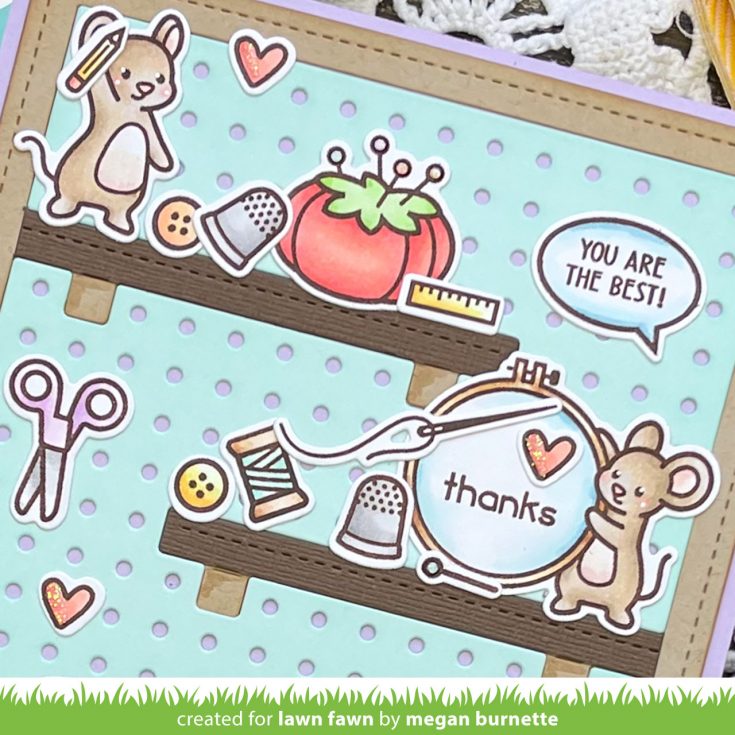
Next, I laid out my scene and adhered all of the elements down using the Lawn Fawn Glue Tube. I then added white details to the stamped images using a Sakura White Gelly Roll pen. For a little sparkle and shine, I used Nuvo Crystal Drops in White Blizzard on the hearts.
I hope that my project brightened your day! Thank you for stopping by and spending time with me and I hope you have a wonderful day!
SUPPLIES:
|


A big thanks to Megan for being our guest — and to YOU our reader, for stopping by today!


